
How to Make Your Photos More Colorful in Lightroom
Beautiful Colors Are Only a Few Edits Away


If you were to take one look through my Instagram, you'd see pretty quickly that I'm a big fan of color photography. The way that different colors can harmonize, set a mood, or tell a story inspires me.
Colors themselves often play a large role in what I choose to photograph and how I compose each shot. (A strategy that pays tribute to the father of color photography himself, William Eggleston.) With some experience, I've come to recognize scenes where I'll be able to subtly change colors in post to match my vision for the photo--even if the colors of reality are less than ideal.
Today, I'll walk you through the general process I use to make my photos more colorful using Adobe Lightroom Classic.
1. Shoot in RAW
Editing .jpeg & .png files (the default image type for many phones and cameras) is possible, but limited. If a photo is too dark, there's only so much you can do to recover the detail that's in the shadows. Drastic changes will tend to "damage" the photo, leaving digital noise and making the picture look extra pixelated.
"RAW files," on the other hand, are another format that most professional cameras can create. RAW files store more information in each photo, meaning that even if a photo is too dark, you can most likely recover a lot of information and detail by increasing the exposure when you edit. RAW files are also more "flexible," and can handle bigger edits more smoothly, while maintaining good image quality.
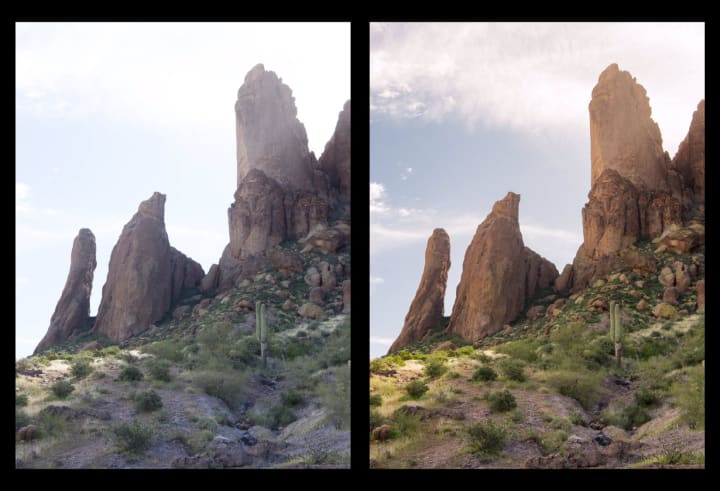
In this photo, I was able to recover the color blue and even the texture of the clouds in the sky. If it had been shot as a .jpeg, I wouldn't have been able to salvage those details because the sky in the original photo is too bright.
2. Find Colorful Places
If you want to create colorful scenes, the easiest thing to do is to find colorful scenes to photograph. Trying to change colors entirely or to add colors that weren't in a scene to begin with can be difficult and time consuming. As with all aspects of photography, try to get things right in-camera first the best that you can.
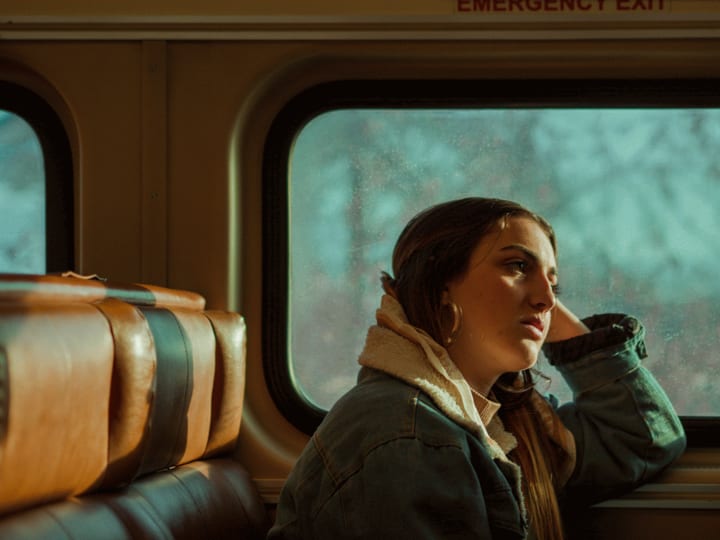
One day, I took the train from Provo to Salt Lake City and fell in love with the colors and environment in the train car. I knew I had to come back and take more photos. I'll go through my editing process on one of the photos I made when I revisited the train as a location for a portrait shoot.
3. Edit the Lighting & White Balance
Good colors require good light. The same color can look totally different under direct sunlight or in a dark shadow. Colors also appear to change when you edit the "temperature" (from more cool/blue to more warm/red) or the "tint" (essentially from more green to more purple) of a photo.
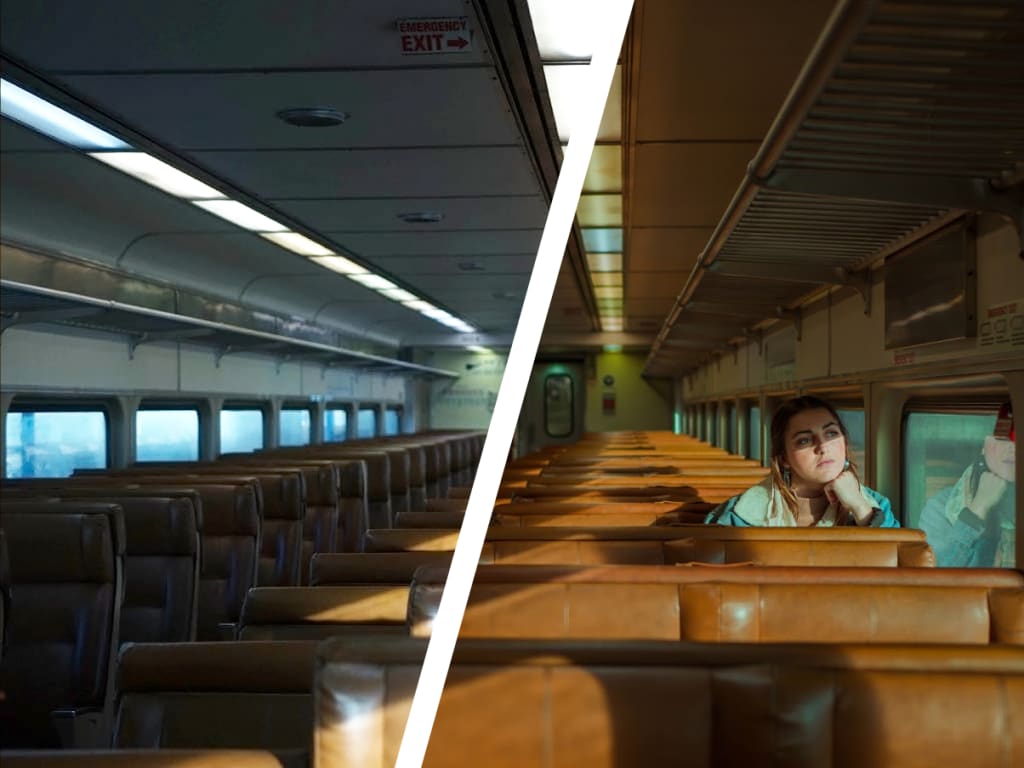
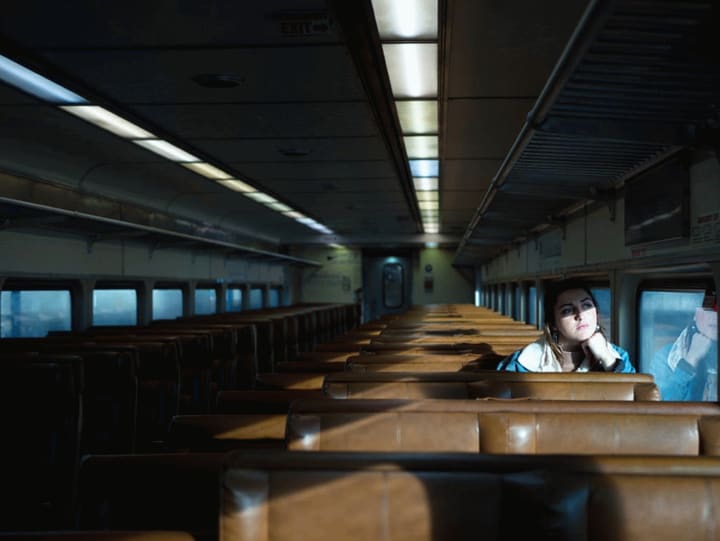
After importing my images into Lightroom, I "flag" my favorites and get to work, looking at one image at a time. If needed, I'll crop or straighten the image so it doesn't look crooked. (It amazes me how many crooked photos I take!) Then the first real step is figuring out the lighting. Let's look at this original, unedited photo.
Let's see. The sunlight coming in through the windows on the right looks good, if a little bit cold. Other than the windows and overhead lights on the left, the other side of the train looks really dark.
With these things in mind, I increased the exposure (brightness) and also lifted the shadows so that the other half of the train wasn't so dark. This made the windows and overhead lights look far too bright, and so I brought down the highlights and the whites to counteract that. It still looked a bit "cool," and I generally like my photos to be warmer, so I increased the temperature about +1200 (which is quite a bit. I'll explain more later!) and left the tint as is at 15.
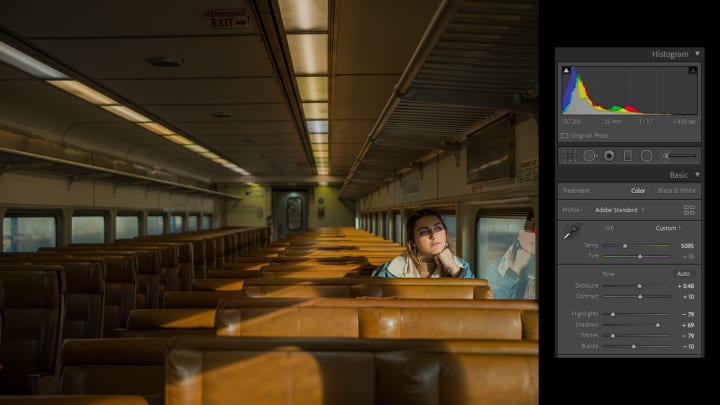
As you can see, even without touching the advanced color editing capabilities further down the editing panel, the colors have improved quite a bit. The shadow on the model's face isn't quite so harsh. We can see more of the detail in the left side of the train, and the fluorescent lights are starting to pop.
4. Edit the Colors
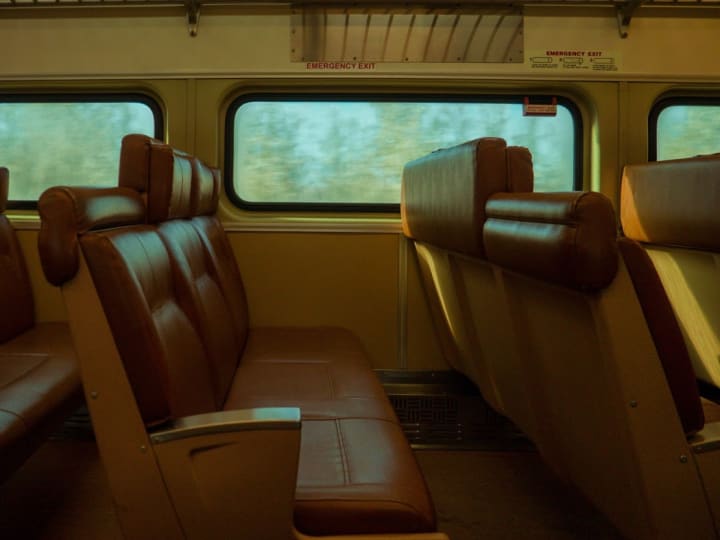
Here's where we get to have some fun. Before you go crazy though, take a second to look at the colors that are already in the photo. In my example photo, the seats towards the back have an almost orange glow that I really like. I know that I want to make the more "boring" brown-colored leather seats closer to me match the more colorful orange.
The other thing I noticed was that the different kinds of fluorescent lighting being used in the train made different sections appear to be different colors. Some sections of the overhead lights are more yellow, others more green, and even a few look blue. Those might be colors I try to bring out more in the edits.
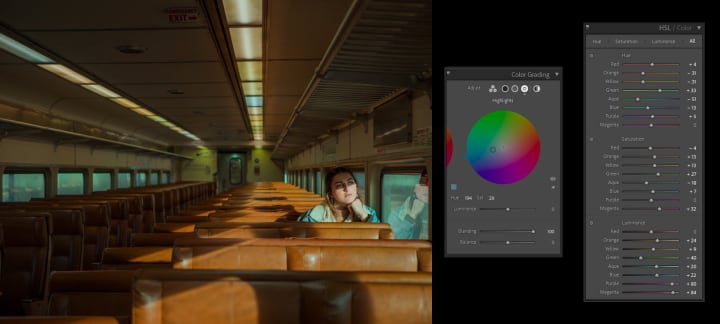
Here's a look at the color settings I used for this photo. (There are a lot of adjustments!)
There are two main windows in Lightroom used to edit colors. There's the color grading menu and the HSL (Hue, Saturation, Luminance) menu.
I chose to add a soft blue to the highlights of this photo in the color grading menu. After I increased the warmth in the last step, the windows lost some of their color. Because they are a brighter area in the image, by modifying the highlight color, I was able to make adjustments that affect only those bright areas of the image. This brought some color back into the windows, and I think that particular shade pairs well with the orange of the seats for a sort of "retro" palette.
This adjustment of bluer highlights also helped "balance out" the extra warmth I added in the last step. In my mind, I think of it like a mix of sweet and spicy.
As for each of the modifications I made on the HSL sliders, a lot of that was trial and error combined with several years of experience. Let yourself have some fun in playing around with the colors. You might discover beautiful combinations or adjustments that catch you by surprise.
For example, I made the oranges more "red" and increased the orange "luminance" to bring out the sun shining on the leather seats. I noticed that the lights at the very end of the train made the back wall an unattractive green. By pushing the greens closer to a blue-green than a yellow-green, and by decreasing the luminance, it fit the palette I was developing and stood out a little more. Making that adjustment also brought out the greens in some of the fluorescent lighting, adding an ominous, faded glow.
5. Fine-tune the Details
While less related to color, I did make a few small adjustments--increasing sharpness and vibrance (using other sliders in Lightroom) and reducing noise (any small pixilation, often caused by brightening the shadows). Reducing the noise also helped "soften" the photo a little bit. These kinds of details are often too small to notice, but they made a difference for me at least.
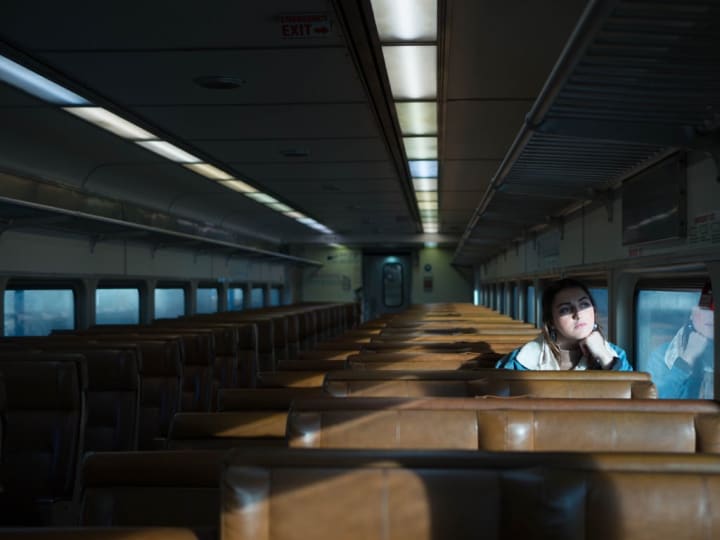
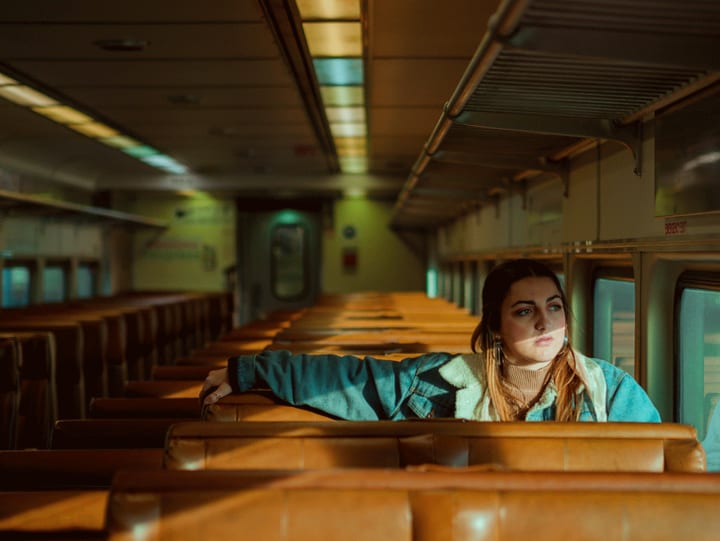
Without further ado, here we have the final photo!

A Pro Tip
There's one button on my keyboard that I use more than any other when I'm editing photos. (And no, it's not Ctrl+Z to "undo," although that might be a close contender.)
It's the backslash ("\") key. Lightroom has adopted the backslash key as a shortcut to toggle between before and after views.
After virtually every edit I make to a photo, I will hit the backslash key to compare my edited version to the original photo. If it helps improve the photo, I keep the change. If I like parts of the original better, I undo my edit and try something else.
You can get an idea of what it's like by looking at this gif that toggles between the original and edited photo we just looked at.
Being able to keep track of the changes you're making and quickly compare them to the original photo is essential in my editing process. It's also incredibly rewarding to see the improvements you've made come to life.
6. Copy & Paste
One of the best features of Lightroom is the ability to copy and paste edits from one image to another. You can even save specific edits as "presets" or filters that you can apply to any future photo. I've made dozens of presets over the last several years. Often, these filters don't translate perfectly to every image, but they can provide a powerful jumpstart to your editing process. They may only require minor adjustments in order to fit the new photo.
For example, I copied the edits I made to the photo we just edited, and pasted them onto the next image I had "flagged" as a favorite to edit. The same edits from the last photo pasted onto this one worked just as well, saved me a lot of time, and helped me maintain a consistent look and feel across all of the images from the entire shoot.
7. Learn, Evolve, Repeat
As you photograph and edit different scenes and settings under varying lighting conditions, you can collect these presets to use when you shoot similar settings in the future. You'll be able to edit faster and develop your own consistent artistic style that carries over all of your photos. At the same time, don't be afraid to break free of your own presets and try editing in new ways! There are infinite ways to take a picture, and just about as many ways to edit a picture, too. The possibilities are exciting!
Thanks for reading! I hope this process helps you add some color, personality, and magic to your photos! Please consider sharing this post with your friends and leaving a tip if you found it helpful!
- Oliver Dahl
About the Creator
Oliver Dahl
Oliver Dahl is a published author and photographer from Boise, Idaho.
He currently studies marketing at Brigham Young University.
Website: www.oliverdahl.com
Instagram: @OliverWDahl
Keep reading
More stories from Oliver Dahl and writers in Photography and other communities.
The Ultimate Photography Tips For The Travel Photographer.
You may think that all you need to take quality travel photos is your camera, your smartphone, or even your digital SLR; and while that’s true, there are still many more things to consider before you press the shutter button, no matter what type of camera you’re using. The following photography tips will ensure that you get quality photos every time – regardless of whether you’re traveling across the globe, or just to the next town over.
By Vijay Mistry5 days ago in Photography
Good Picture
This comprehensive guide to photography focuses on capturing moments, emotions, and stories, not just clicking a button. It covers key principles and techniques such as composition, lighting, and camera settings, aiming to elevate photography to the next level.
By Praveen Pkabout 18 hours ago in Photography

Comments
There are no comments for this story
Be the first to respond and start the conversation.