

Being a photographer brought many benefits into my life. Besides doing something I love, creating beautiful moments in life, working with other creatives, creating beautiful photos for so many people in my life, one of the most beautiful benefits of being a photographer is exploring and the drive to see more.
I always strive for something new, to find a new place, to see something new in my life, to capture or document everything I see, and share that with the world, and hopefully my photos will inspire someone to do the same.
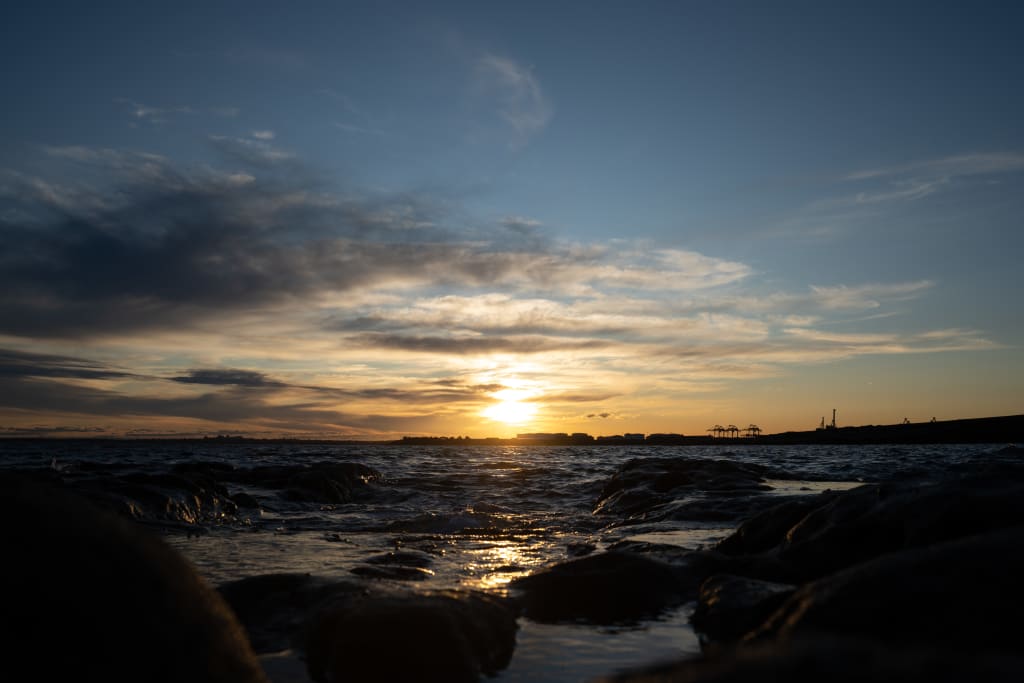
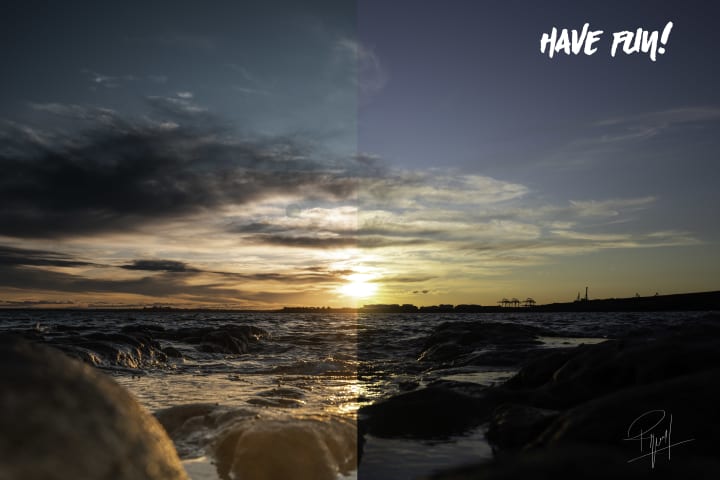
One of my favorite things to photograph when I go out just to take photos and realx, It's the beach, the sunset, the rocks, the people around, everything that has to do with the beach! I just love the beach.
I live in Sydney, I moved here 5 years a go, and my wife took me to this beach called " La Perouse ", I think it's also known because the movie "Mission Impossible" was recorded there, anyway, it's a beautiful beach that looks far on the ocean, the airport is near by so the photos look amazing with planes landing, with the sunset in the background, It's just amazing.
I miss my hometown, Sarajevo, and I researched once and found out the direction of my city, and I often go there, look In that direction and just think about my life In Sarajevo, everything that happened In life, It's my little niche to relfect on life, that excact spot at the beach. I love my life In Sydney, absolutely, but my whole family and old friends are there, so, I know you know what I mean.
COMPOSITION
My goal as a photographer Is to always take the best photo I can, I am human, there will be always few mistakes, but the main thing is to give it your best and take the best possible shot. And always go by that, If you have a good base, then the editing after doesn't take long, you will have a good photo and all you need to work on Is your tone, feel, your flavor!Â
I wanted to capture a little bit of the foregorund, the rocks in the sea, so I had to sit down on the wet rocks and get in position for the shot, which was pretty funny for the bystanders. haha!
The clouds were amazing, the sunset, background, the sea was calm, everything was waiting for me!
Anyhow, when I took the shot I was really happy because I've achieved what I wanted, I had the rocks in the foreground, the sunset is centered, the rule of third is on point, even dough If someone says I didn't follow the rules, that won't matter, I was happy with that shot and I couldn't wait to get home add a little bit of my flavor!

Another thing why I love this shot, my hometown Sarajevo is in that direction, and I don't know, It might sound silly, but knowing that made this photo much more valuable to me.
POST-PROCESSING
It's always fun when you take the memory card out and export your photos, I can't wait to see them!
So amongst many beautiful shots I took that day, was really fortunate with everything that day, I found my favorite and jumed into editing!
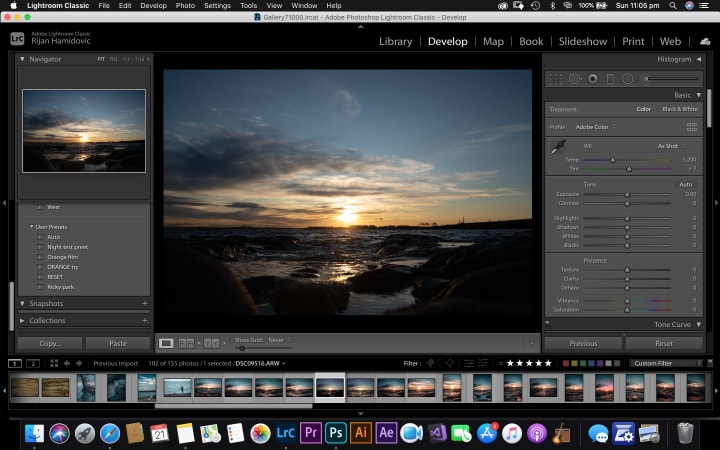
My favorite and by far the best software for editing my photos and creating custom presets, tones, is Lightroom, Lightroom Classic or whichever, doesn't matter, from Adobe creative Suite, they do the same job.
You can get it for a fair monthly price and it's worth every single penny!
I highly recommend it to any photographer, begginer or pro, doesn't matter this tool is essential.
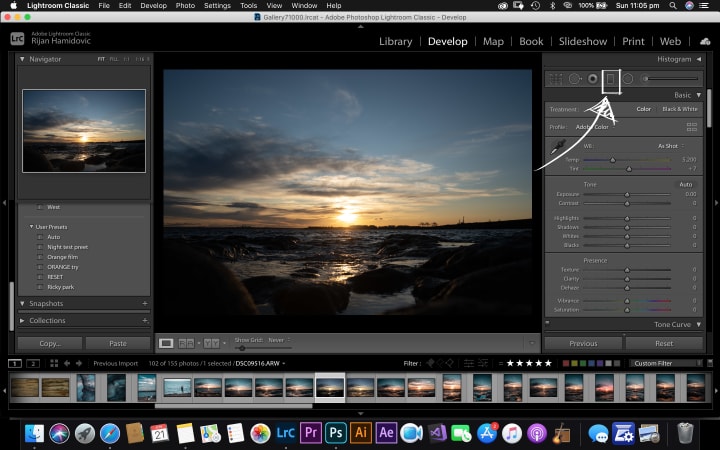
THE FIRST STEPS OF EDITING
One thing I always do before starting to edit is just take a good look at the photo, see what is missing, what to add, remove.
In this example, the shadows very a bit too dark, so I had to bring them up a bit.
To do that, I used the GRADUATED FILTER, keyboard shortcut "M", located under the Histogram on the right side of the panel.
Once you selected that option, a new panel of editing options opens up just for that, and you can select and work just on one specific are of the photo, how cool is that?! Looks like this..
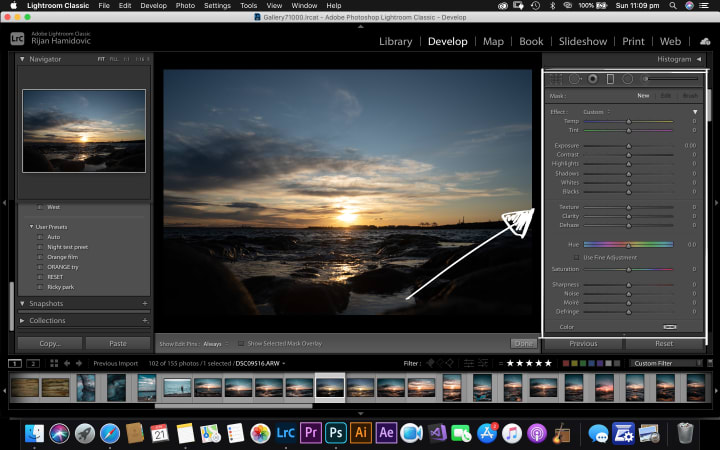
When the slider shows up, you can drag it verticaly or horizontaly, diagonally, to edit the part of the photo you think needs editing, In this case, It's the shadows. So the It will only affect the area where the slider Is, you will see a point and every time you close the slider, and open up a new slider, you can edit new areas In the photo, separately from the previous one you did.
What I did here :
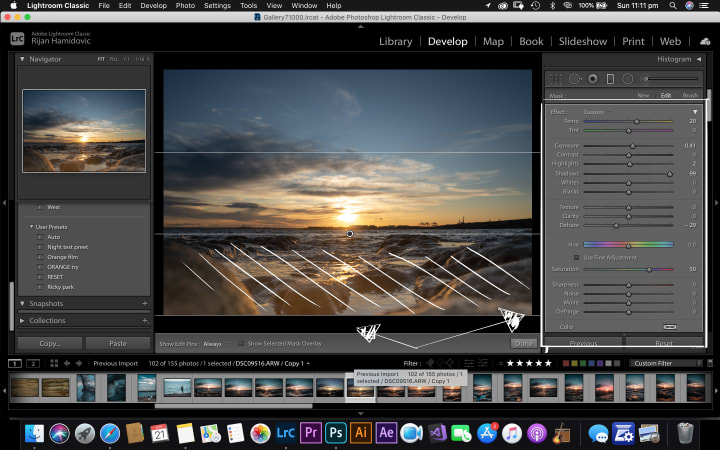
- I pulled up the slider over the rocks, on the right side you can see the SHADOW slider Is all the way up to +99, sometimes too much Is just fine.
- I took a little bit of DEHAZE about -30 , just to remove the Haze.
- Added some SATURATION +50
- Added some TEMPERATURE +20, to give a bit of a punch!
- Brought up the EXPOSURE to around 0.40, to brighten up the rocks.
Once you click on the GRADUATED FILTER It will turn off and the Lightroom panel comes back to normal, so you can continue to edit the photo as whole.
And that was pretty much It, took me 10 seconds to al ready improve the photo.
ADDING SOME COLOR AND TONES ( MY FLAVOR )
The next step is by far my favorite. Adding the tone, color, changing the mood of the photo, something that Is not very popular amongst the crowd, but why would you care what something thinks about something you love doing, right? So, do it, change it the way you like!
Let's jump into it.
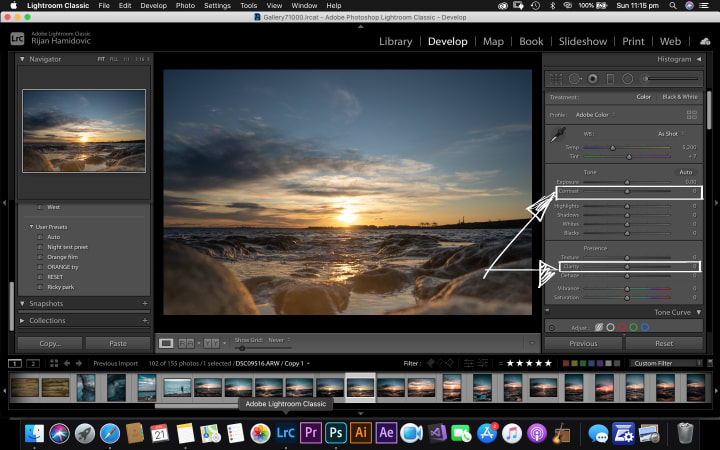
I always love to bring up the details in the photo with adding a bit of CONTRAST +20 and CLARITY +50, this will do just fine!
I already love how the photo is changing into something beautiful.
So, what do I do to change the colors, the mood of the photos?
There are many ways to do that, and everything depends on your idea, how do you want to set the mood, how would you like the photo to look after? This Is my feel and I hope you like it and It inspires you do try it out and create something much better!
CHANGING THE MOOD
Once you scroll down on the right side, you will find the HSL/COLOR pannel. Within this panel you will be able to change the colors of the photos, this is one of many options, one of the fastest maybe.Â
Once you see the panel, lets have some fun with the sliders!
Honestly, it's not a big deal. All you need is to play around with the sliders, to see what each color slider is doing, how the colors are changing when you move the slider and after a while you will get the idea, you will find your tone, and I would love to see what you came up with!
In the HSL/COLOR pannel you have three options to work with, In the header you will see, HUE, SATURATION, LUMINANCE. For today we will just work with the first two.
What I did here...
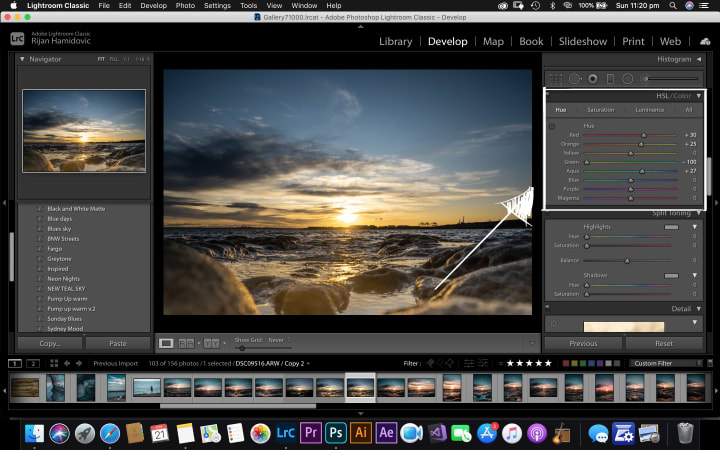
In the HUE section I changed the Red +40 / Orange +25 / Green -100, Aqua + 27 and that's it.
Even though you can't see a big diference right now, trust me I do, because all this will be usefull after, when you add the final touch. After so many hours spent editing, this makes a big diference to my photos, already the mood is changing, now we move on the the next section SATURATION.
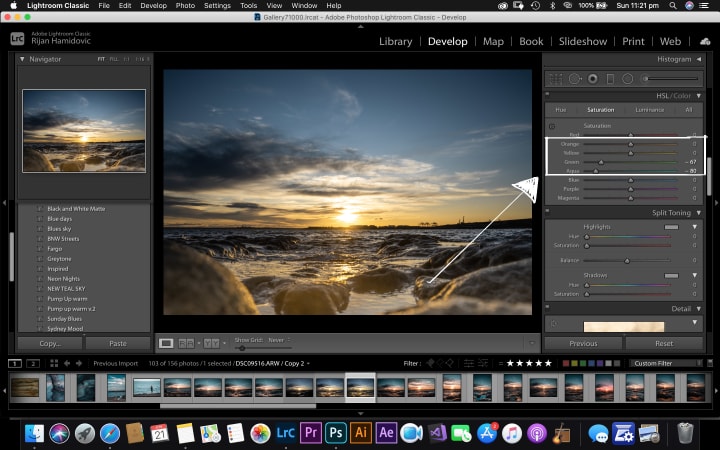
In the SATURATION section I pulled the GREEN down to -67 and the Aqua to -80.
All this numbers are my personal seettings, and they don't have to be exact, number up or down, It doesn't matter that much, but for the purpose of this edit, I am trying to be accurate for you. :)
And the final step!
CALIBRATION
This is where you adjust your camera raw color, pretty much it, so let's go!
You finished with editing the HSL/COLOR panel, now you scroll all the way down and you will see the CALIBRATION panel.
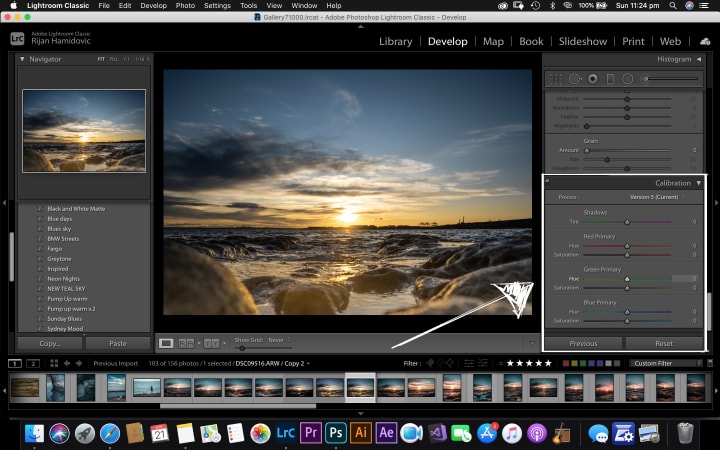
You get the Idea, have fun with the sliders!
- Shadows +25 / Red Primary Hue +2 / Green Primary Hue +65
and the last touch...
- BLUE Primary Hue -82 / Saturation +11
and after couple of minutes...
FINAL PHOTO

Editing for me Is one of the great things being a photographer. In this time and age we have so many tools to Improve our workflow, our style, the way we see the world, with just few clicks.
I love living in this time and age and have access to all of this, I think we are really fortunate.
Hold on, one more thing!
PRESETS!
After you did all this, edit, changed the colors, whatever you did, you can save it for the next photo, so you don't have to spend much more than one second on a edit! To do that...
Go to the top of the Lightroom screen and open the Develop Ta
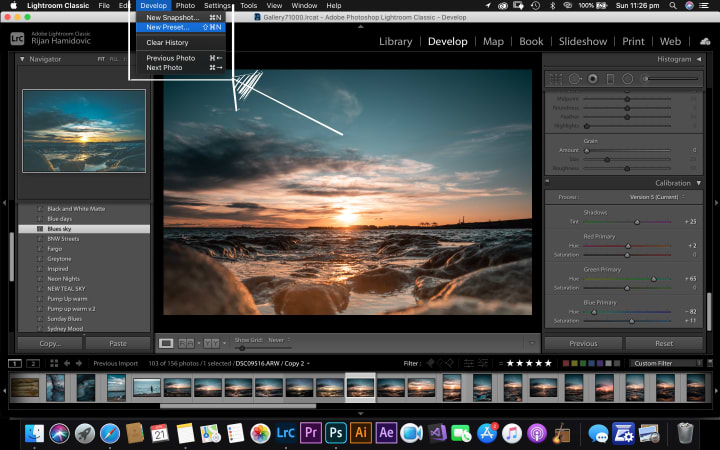
Select the NEW PRESET option and new window will open up.
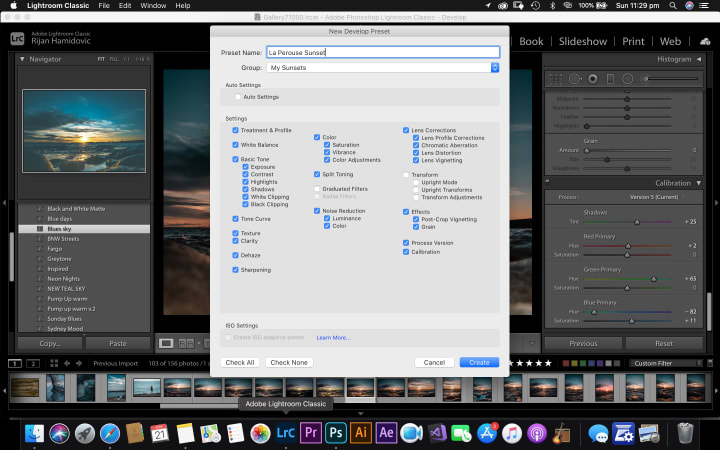
Preset name : You can name your preset the way you like
Group : Create and name your group where you will keep all of your presets.
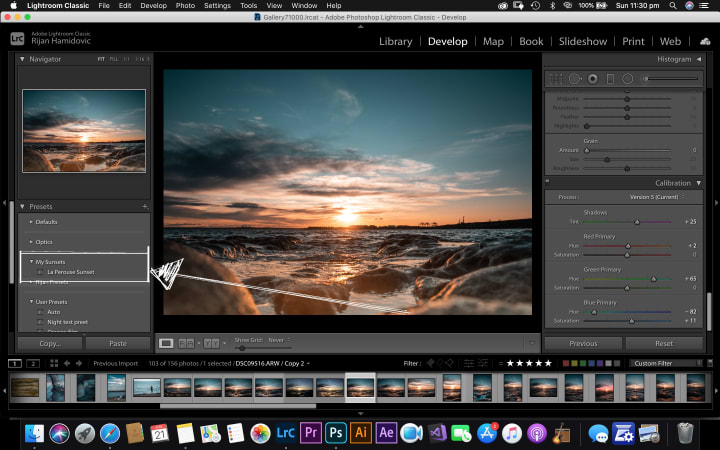
After you saved that, It will be on the left side of the screen when you go to the DEVELOP window in Lightrom ( where you do your edits ).
CONCLUSION
Go out, take a walk, relax, put your headphones on, or not, block the noise, block everything that is trying to get to you, be free, be one with the surroundings you are trying to take the photo of, become part of it, listen to It, be happy to be alive and to be there to capture the moment.
Everytime I take a photo like this one, I feel so grateful to be there, so fortunate to be able to capture this, print It, put It on my wall. Everytime I look at that photo It will remind me how good I felt that day, what I was thinking about, It will motivate me and Inspire me to create more.
Enjoy your life, and all these little things that makes us happy.
About the Creator
Rijan Hamidovic
Hello Everyone!
My name is Rijan, and I am a Sydney based photographer, vlogger, videographer.
I love spending time being creative, doing something that will inspire people, make em laugh, motivate them, or teach something.
:)
Welcome!
Keep reading
More stories from Rijan Hamidovic and writers in Photography and other communities.
Through My Eyes
I started with street photography the moment I picked up the camera, actually I borrowed the camera from my friend Maja. It was some kind of Sony DSLR I remember, did the job. I was so excited, and the first thing that I shot was the people on the street. That was it.
By Rijan Hamidovic4 years ago in Photography
The Ultimate Photography Tips For The Travel Photographer.
You may think that all you need to take quality travel photos is your camera, your smartphone, or even your digital SLR; and while that’s true, there are still many more things to consider before you press the shutter button, no matter what type of camera you’re using. The following photography tips will ensure that you get quality photos every time – regardless of whether you’re traveling across the globe, or just to the next town over.
By Vijay Mistry5 days ago in Photography
Good Picture
This comprehensive guide to photography focuses on capturing moments, emotions, and stories, not just clicking a button. It covers key principles and techniques such as composition, lighting, and camera settings, aiming to elevate photography to the next level.
By Praveen Pkabout 12 hours ago in Photography

Comments
There are no comments for this story
Be the first to respond and start the conversation.