
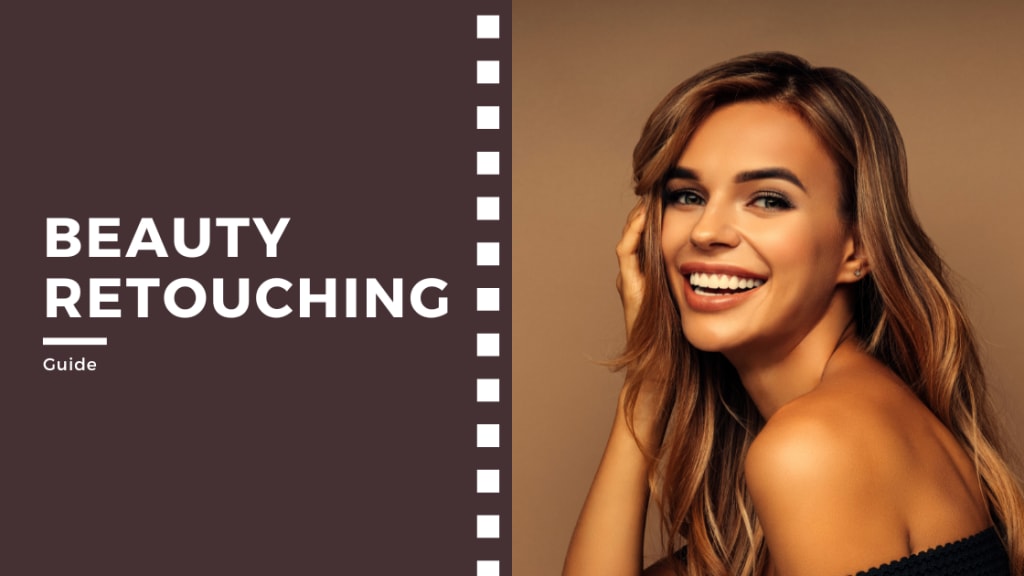
Beauty Retouching: Enhance Your Photos Like a Pro
Discover the art of beauty retouching for flawless portraits and stunning images. Learn expert techniques and tips in this guide.

Welcome to the fascinating world of beauty retouching in photography! Beauty retouching is an essential aspect of post-processing that aims to enhance the appearance of portraits and images by refining and perfecting various elements. It's like a magical touch that allows photographers and editors to bring out the best in their subjects.
At its core, beauty retouching involves making subtle adjustments to a person's features, skin, and overall appearance to highlight their natural beauty and create captivating visuals. Whether you're a professional photographer, an aspiring artist, or simply a photo enthusiast, mastering the art of beauty retouching can elevate your work to a whole new level.
Now, it's essential to understand that beauty retouching is not about altering reality or creating an unrealistic portrayal of a person. It's about refining and polishing the image while maintaining the subject's unique traits and authenticity. This sets it apart from photo manipulation, which involves more extensive changes that can distort reality or create a completely different scene.
As we embark on this journey, we'll delve into the techniques, tools, and principles that make beauty retouching an art form in itself. So, get ready to discover the magic behind enhancing portraits and embracing the nuances of beauty retouching! Let's dive in!
Essential Tools and Software
When it comes to beauty retouching, having the right tools and software is crucial to achieve professional-looking results. Let's explore some of the famous photo editing software used for retouching and the key retouching tools they offer.
Photo Editing Software
Several excellent options for photo editing are available, catering to different skill levels and preferences. Adobe Photoshop is undoubtedly one of the most popular choices and is widely used by professionals around the world. Its robust features and versatility make it a top-notch tool for beauty retouching.
Adobe Lightroom is another powerful software tailored for photographers, offering a streamlined workflow and batch editing capabilities. Other alternatives like GIMP (GNU Image Manipulation Program) and Affinity Photo also provide comprehensive tools for retouching, making them suitable options for both beginners and enthusiasts.
Key Retouching Tools
Within these photo editing software, you'll find a range of specialized tools designed specifically for beauty retouching. Some of the key tools include:
- Healing Brush: This magical tool helps you remove blemishes, scars, and imperfections by intelligently blending them with the surrounding pixels. It's perfect for achieving smooth and flawless skin.
- Clone Stamp: The Clone Stamp tool allows you to duplicate a selected area and "paint" it over other parts of the image. It's useful for fixing distractions or replicating textures seamlessly.
- Dodge and Burn: These tools help you selectively brighten (dodge) or darken (burn) areas of the image, which is essential for enhancing highlights and shadows and adding depth to the portrait.
- Frequency Separation: This advanced technique separates the texture and color information in an image, enabling precise adjustments to skin tones without affecting the overall detail.
- Liquify: The Liquify tool lets you reshape facial features, adjust body proportions, and fix minor distortions without sacrificing realism.
As you embark on your beauty retouching journey, familiarizing yourself with these tools and software will be the first step in unlocking your creative potential. Remember, practice and experimentation are key to mastering the art of beauty retouching. So, grab your favorite software and let your imagination flow as you create stunning and captivating portraits!
Skin Retouching Techniques
Achieving flawless and natural-looking skin is a top priority when it comes to beauty retouching. Let's explore some essential skin retouching techniques to help you remove blemishes, acne, and dark spots while maintaining the skin's natural texture.
- Removing Blemishes, Acne, and Dark Spots: The first step in skin retouching is addressing any unwanted blemishes, acne, or dark spots that might be present on the subject's skin. Using the Healing Brush or Spot Healing Brush tool in your photo editing software, you can carefully paint over these imperfections. The tool will automatically blend the area with the surrounding pixels, making the blemishes vanish seamlessly.
- Smoothing Skin and Achieving a Natural Look: To achieve smooth skin without making it appear overly processed, you can use the Clone Stamp or Healing Brush tool with a soft brush setting to softly blend the skin tones. The idea is to reduce the appearance of fine lines, wrinkles, and unevenness while preserving the skin's natural contours and highlights. Just to remind you, moderation is key here. Over-smoothing can result in an unnatural "plastic" appearance, which is best avoided. Always zoom out occasionally to check if the overall look remains natural and realistic.
- Retaining Skin Texture while Reducing Imperfections: Maintaining the skin's texture is crucial for creating a realistic and authentic look in beauty retouching. One effective technique for achieving this is by using the Frequency Separation method. This technique allows you to work on the color and texture of the skin separately.By separating the skin's texture from its color, you can target imperfections and blemishes on the texture layer while preserving the underlying skin tones. This approach enables you to reduce prominent blemishes while retaining the natural appearance of the skin.
As you practice these skin retouching techniques, remember to pay attention to the individuality of each portrait. Different subjects may require varying levels of retouching, and the goal is to enhance their natural beauty without compromising their unique features. With time and practice, you'll refine your skills and create stunning portraits with flawless yet authentic-looking skin.
Enhancing Eyes and Lips
The eyes and lips are essential elements that can significantly impact the overall appeal of a portrait. Let's explore some key techniques for enhancing these features and making them stand out beautifully.
- Making Eyes Pop with Brightness and Sharpness: You can start by adjusting their brightness and sharpness to make the eyes more captivating. In your photo editing software, use tools like Curves or Levels to brighten the eyes slightly, bringing attention to their natural colors and highlights. Be subtle with this adjustment to maintain a realistic look. Additionally, using the Sharpening tool or the High Pass filter can help enhance the details in the eyes, making them appear more pronounced and expressive. The goal is to draw the viewer's gaze into the subject's eyes, creating a captivating connection.
- Adding Sparkle and Enhancing Catchlights: Eyes often have a sparkle, known as catchlights, caused by reflections of light sources. To add a sparkle effect, use a small, soft white brush and create tiny white dots in the eyes' highlights. This simple touch adds depth and life to the eyes, making them appear more vibrant and engaging. While adding catchlights, ensure they look natural and align with the existing light sources in the image. Avoid overdoing it, as subtlety is key for a realistic result.
- Emphasizing Lip Color and Shape: Beautifully emphasized lips can enhance the overall allure of a portrait. Start by adjusting the lip color using tools like Hue/Saturation or Color Balance to make them appear more vibrant and appealing. You can deepen the lip color slightly without losing the natural tone.
For precise shaping, the Dodge and Burn tools can be useful. Use the Dodge tool to lighten areas around the lips that catch more light, and the Burn tool to darken shadows, enhancing the lips' shape and three-dimensional appearance.
Perfecting Hair and Hairstyles
Hair plays a vital role in defining a subject's look and can be challenging to retouch. Let's explore some essential techniques for perfecting hair and achieving stunning hairstyles in beauty retouching.
- Dealing with Flyaways and Frizz: Flyaways and frizz can be distracting and take away from the overall polished look of a portrait. To address these issues, you can use the Clone Stamp or Healing Brush tool with a soft brush to carefully blend and smooth out stray hairs. Alternatively, you can use the Smudge tool to gently push flyaways back into the hair, creating a neater appearance. Please be careful not to overdo this process; you want the hair to look natural and not overly retouched. Maintaining the hair's texture and flow is crucial in achieving realistic results.
- Adding Volume and Shine to Hair: To give the hair more volume and shine, you can use the Dodge tool to brighten certain strands or areas selectively. This technique simulates the play of light on the hair, making it appear fuller and more lustrous. Additionally, you can use the Burn tool to darken specific areas, adding depth and dimension to the hair. You can achieve a more dynamic and appealing hairstyle by combining both Dodge and Burn tools strategically.
- Changing Hair Color and Styles through Retouching: Beauty retouching allows you to experiment with different hair colors and styles without the commitment of actually dyeing or cutting the hair. Using tools like Hue/Saturation or Color Balance, you can alter the hair color to create striking transformations.When changing hair color, please pay attention to the lighting and shadows in the image to make sure the new color looks natural and blends seamlessly with the rest of the portrait.
- Furthermore, you can use the Liquify tool to reshape the hair or virtually try different hairstyles. This lets you explore various looks and find the most flattering style for the subject.
As you perfect the hair and hairstyles in your portraits, remember that subtlety and attention to detail are essential. Focus on enhancing the hair's natural beauty while maintaining a realistic and harmonious balance with the rest of the image. You can achieve stunning hair transformations that complement the subject's overall appeal with practice and creativity.
Teeth Whitening and Brightening
A captivating smile can light up a portrait; teeth whitening and brightening are crucial for achieving that natural and appealing look. Let's explore some techniques to enhance smiles without overediting and ensure a bright, confident grin.
- Achieving Natural and Appealing Smiles: When teeth whitening, the goal is to brighten the teeth while maintaining a natural appearance. Start by selecting the teeth area carefully, ensuring you don't include other elements like lips or gums. Use the Whitening or Dodge tool with a soft brush to gently lighten the teeth's color.The key here is moderation. Avoid excessive whitening, as overly bright teeth can appear unrealistic and distract from the overall portrait. Strive for a balance that retains the authenticity of the subject's smile while enhancing its radiance.
- Correcting Tooth Discoloration without Overediting: Tooth discoloration can occur due to various factors, such as age, diet, or dental conditions. To address discoloration, use the Hue/Saturation tool to adjust the teeth' color subtly. Tweak the saturation and lightness to reduce any yellow or gray tones and bring out the natural whiteness.It's crucial to maintain the individuality of the subject's teeth. Not all teeth are uniformly white, and minor imperfections can add to the charm and authenticity of a smile. Avoid making the teeth look overly uniform or "perfect," as this can lead to an artificial result.
Remember, the goal of teeth whitening and brightening is to enhance the subject's smile while preserving their unique traits. It's about highlighting their best features and ensuring they feel confident and comfortable in their own skin. Approach teeth retouching with subtlety and a keen eye for detail to achieve natural and captivating smiles that shine through the portrait.
Shaping and Contouring
Shaping and contouring are powerful techniques in beauty retouching that can enhance facial features and create flattering face shapes by cleverly using light and shadow. Let's explore how to master these techniques to achieve stunning and captivating portraits.
Enhancing Facial Features through Light and Shadow: Shaping and contouring relies on understanding how light interacts with the face. By strategically applying light and shadow, you can emphasize or de-emphasize certain features, sculpting the face to achieve a more flattering look. To enhance prominent features like cheekbones or a defined jawline, use the Dodge tool to brighten specific areas, making them catch more light. Conversely, for areas you want to soften or recede, the Burn tool can be used to darken and create subtle shadows. Please remember that subtlety is essential here. The goal is to bring out the natural beauty of the subject without making the contouring too obvious or artificial.
Creating Flattering Face Shapes with Contouring Techniques: Contouring is an effective way to alter the perceived shape of the face. For instance, you can slim down a round face by darkening the sides and jawline, giving the illusion of more defined contours. Similarly, you can soften a sharp jawline by gently lightening the edges.
Remember to consider the subject's facial structure and work with their existing features to create a harmonious and realistic result. Experiment with different techniques to find the most flattering contouring approach for each unique face.
Blending and Natural Look: A crucial aspect of shaping and contouring is achieving a seamless blend between light and shadow. Use soft brushes and subtle adjustments to ensure that transitions between highlighted and shadowed areas are smooth and natural.
Take a step back and view the portrait from a distance to assess the overall look. The contouring should complement the subject's natural features and enhance their attractiveness while still appearing realistic.
As you delve into shaping and contouring, remember that practice and observation are key. Study how light interacts with faces in various lighting conditions and experiment with different techniques to achieve flattering and captivating results. With time and skill, you'll master the art of shaping and contouring, elevating your beauty retouching to the next level.
Overall Image Enhancements
Beyond the specific elements of beauty retouching, there are essential overall image enhancements that can elevate the final result of your portrait. Let's explore two crucial aspects: adjusting brightness, contrast, and color balance, as well as improving composition and cropping for better visual impact.
Adjusting Brightness, Contrast, and Color Balance: Fine-tuning the brightness, contrast, and color balance is fundamental in beauty retouching. By doing so, you can create a cohesive and visually pleasing image that complements the subject's appearance.
Use tools like Levels or Curves to adjust the brightness and contrast. Aim to strike a balance between enhancing details and maintaining a natural look. Be mindful not to overexpose or underexpose certain areas, as this can lead to loss of important information and affect the overall harmony of the portrait.
Additionally, work with the color balance to ensure the skin tones appear accurate and lifelike. Pay attention to the temperature and tint to achieve a pleasing and realistic color palette.
Improving Composition and Cropping for Better Results: Composition is the foundation of a powerful portrait. Consider the rule of thirds and leading lines to create a balanced and visually appealing composition. Keep the subject's eyes and key facial features in mind when positioning them within the frame.
If needed, cropping can be a powerful tool for enhancing the composition. Trim distracting elements, adjust the framing, and fine-tune the overall visual flow to draw attention to the subject and their beauty.
Remember, cropping can have a significant impact on the final image, so take your time to explore different crop ratios and angles to find the most flattering and compelling composition.
By paying attention to overall image enhancements, you ensure that a well-crafted composition and harmonious color balance complements the beauty retouching efforts. As you refine your skills, you'll develop an eye for detail and aesthetics, creating portraits that showcase enhanced beauty and captivate the viewer with their artistic appeal.
Retouching Portraits Professionally
To achieve professional and polished portrait retouching, it's essential to employ advanced techniques that ensure both realism and artistic flair. Let's delve into two crucial aspects: working with layers and masks for non-destructive editing and mastering realistic and artistic beauty retouching techniques.
Working with Layers and Masks for Non-Destructive Editing: Professional portrait retouching involves using layers and masks to maintain the integrity of the original image. When you work non-destructively, you preserve the ability to make changes without permanently altering the underlying pixels.
Start by duplicating the background layer and performing retouching adjustments on the duplicate layer. Layer masks come in handy for selectively revealing or concealing specific retouched areas. This allows you to refine and fine-tune each modification, blending them seamlessly for a natural look.
Remember to keep your layers organized and name them descriptively for easy navigation. Non-destructive editing ensures that you can always go back and adjust or remove retouching elements if needed, leading to a more flexible and professional workflow.
Techniques for Realistic and Artistic Beauty Retouching: Achieving a balance between realistic enhancements and artistic touches is essential in professional beauty retouching. While it's crucial to retain the subject's natural features, artistic flair can add a touch of creativity and uniqueness to the portrait.
Use techniques like Frequency Separation for realistic skin retouching, where you can work separately on the skin texture and color. Focus on subtle adjustments to preserve the authenticity of the subject's appearance.
Experiment with creative brushes, blending modes, and filters for artistic enhancements. Techniques like digital painting and softening can be applied selectively to add a dreamy or ethereal quality to the portrait, enhancing its overall emotional impact.
Keep in mind that every portrait is unique, and there's no one-size-fits-all approach. Tailor your retouching to suit the subject's personality and the desired mood of the final image.
As you refine your portrait retouching skills professionally, remember that practice and experimentation are vital. Aim to strike a balance between realism and artistic expression, and utilize non-destructive editing to ensure flexibility and precision in your work. By embracing creativity and honing your techniques, you'll craft portraits that captivate and leave a lasting impression.
Tips for a Natural Look
Creating a natural and authentic look in beauty retouching is a skill that requires both technical expertise and an artistic eye. Let's explore some valuable tips to help you avoid common retouching mistakes and maintain the natural beauty of your subjects.
Avoiding Common Retouching Mistakes and Pitfalls: One of the most common pitfalls in beauty retouching is overdoing it. It's essential to resist the temptation to remove every imperfection or push the retouching to the extreme. Over-smoothing skin, excessive teeth whitening, or unrealistic reshaping can result in an unnatural and plastic-like appearance.
Instead, focus on subtle and strategic enhancements that retain the subject's unique features while softening distracting elements. Always take a step back and assess the overall portrait to ensure that your retouching enhances without overpowering the subject's natural beauty.
Balancing Beauty Retouching with Maintaining Authenticity: The key to a natural look lies in striking a balance between beauty retouching and preserving authenticity. Embrace the subject's individuality and enhance their best features rather than striving for an unrealistic ideal.
Communicate with your subject during the retouching process, and ensure that they feel comfortable and confident with the final result. Openly discuss any changes you plan to make and seek their input to ensure that the retouching reflects their true essence.
Remember, beauty retouching should complement the subject's personality, not alter it entirely. Aim to tell a genuine and captivating story through your portraits by capturing the essence of the individual.
Ultimately, achieving a natural look in beauty retouching requires a delicate touch, attention to detail, and a deep understanding of the subject's unique beauty. As you refine your skills and artistic vision, you'll develop a signature style that captures the beauty of your subjects authentically, leaving a lasting impact on viewers.
Wrapping Up
In conclusion, beauty retouching is an art form that can elevate portrait photography to new heights. Throughout this journey, we've explored key techniques and principles that contribute to achieving stunning and captivating results.
Recapping the key beauty retouching techniques, we learned how to enhance skin by removing imperfections while preserving its natural texture. We discovered the magic of making eyes and lips pop with brightness and sparkle, as well as the importance of shaping and contouring to create flattering face shapes. Additionally, we explored the techniques for teeth whitening and brightening, as well as overall image enhancements like adjusting brightness, contrast, and color balance.
A fundamental aspect of professional beauty retouching is working non-destructively with layers and masks, allowing for flexibility and precision in editing. Furthermore, we emphasized the significance of maintaining authenticity throughout the retouching process, avoiding common mistakes and excessive alterations.
As you continue your journey in beauty retouching, remember that practice is key. Embrace experimentation and develop your own personal style that reflects your artistic vision and celebrates the uniqueness of your subjects. Be patient with yourself and allow your skills to evolve over time.
Most importantly, always prioritize the human element in your portraits. Beauty retouching is not about conforming to unrealistic standards but about enhancing and celebrating the natural beauty that resides within each individual.
So, go forth with confidence, creativity, and a commitment to authenticity. Embrace the art of beauty retouching, and let your passion and talent shine through in every portrait you create. Happy retouching, and may your artistic journey be filled with joy and fulfillment.
About the Creator
MD Samiul Islam
I'm a photographer based in the Dallas/Fort Worth area. With over Five years of experience, I have the knowledge and expertise to capture memories that will last a lifetime.
Keep reading
More stories from MD Samiul Islam and writers in Photography and other communities.
Unlocking Ecommerce Triumph: Unleashing the Potential of Ecommerce Product Image Editing and Retouching
In the world of ecommerce, where customers cannot physically interact with products, visuals play a crucial role in capturing attention, conveying information, and influencing purchasing decisions. The saying "a picture is worth a thousand words" holds true in the online marketplace, where product images serve as the first point of contact between the customer and the item they are considering.
By MD Samiul Islam10 months ago in Photography
Capturing Magic
In the world of photography, timing is the key to everything. While skilled compositions and technical proficiency are undoubtedly crucial, the perfect lighting can create the perfect photo. Nowadays, we can determine any light ourselves and are no longer dependent on any natural light source, thanks to the developed technology. We can turn every day into a night by using the right filters. And we can illuminate every night to be seen as a day. A typical process, especially in the film industry.
By Krishan Mubashar14 days ago in Photography
Exploring the Art and Craft of Photography: Pursuing Excellence in the Visual Medium
Introduction: Photography is more than just capturing images; it's a powerful means of storytelling, expression, and communication. In today's digital age, where smartphones and social media platforms have made photography accessible to everyone, the pursuit of excellence in this visual medium remains an ongoing endeavor. Best photography transcends technical proficiency; it involves creativity, vision, and a deep understanding of composition, light, and subject matter. This essay delves into the art and craft of photography, exploring what defines the best photography, the elements that contribute to its excellence, and how aspiring photographers can strive for mastery in their craft.
By WILLIAM DIAGO RODRIGUESabout 15 hours ago in Photography
Turning Pages of Life
Life’s like a book — some parts are good, others not so much. Still, keep turning the pages; you might find the best chapter next. If someone hurts you, choose to forgive or just let it be, but never change who you are for them.
By Emily Chan - Life and love sharing4 days ago in Poets


Comments
There are no comments for this story
Be the first to respond and start the conversation.