
A Grandma's Gentle Guide to Make Photos Look Better
Step-by-Step, in Easy-to-Follow PLAIN Language!
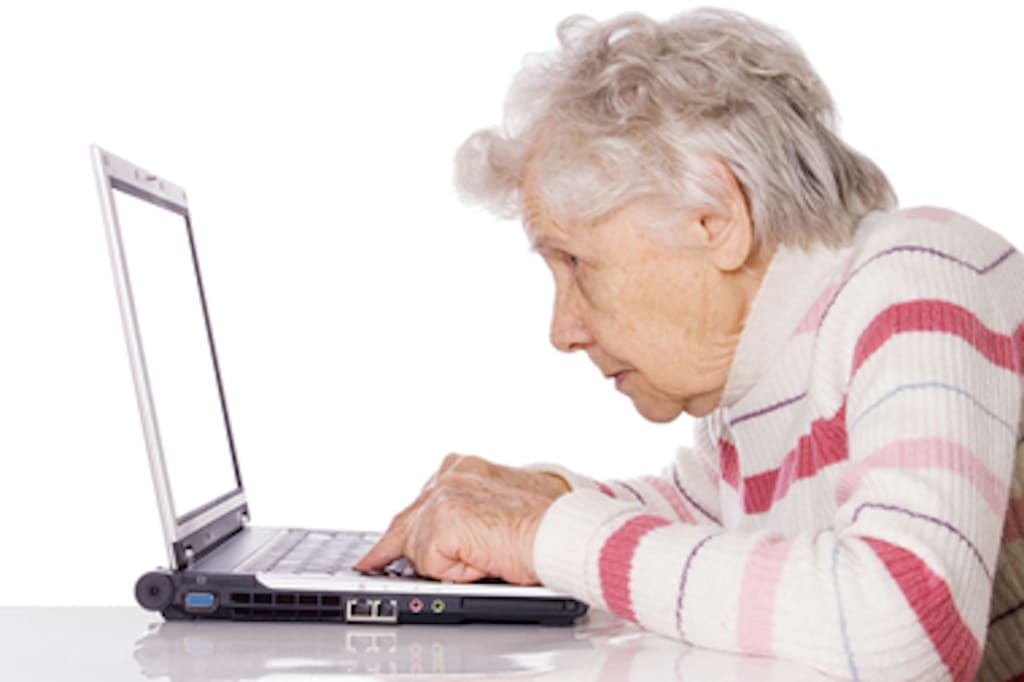
So, we've FINALLY learned how to save a picture or photo on our desktop (for later posting onto Facebook, or to send in a text or email) without asking our children or grandchildren for help… Bravo for us! If you’re fairly computer illiterate, like me; now, you wish you knew how to make those pictures look better. But every time we try to learn how; the instructions we're given sound like they’re in a foreign language. Well, don’t despair. After much trial and error, I’ve finally figured out the basics, and I will share what I’ve learned with you, in this step-by-step article (for users of Apple Macintosh Desktop computers). Don’t worry, I’m not going to use any highfalutin talk… Rest assured I’ll explain it in easy-to-follow, plain language, step-by-step. (Our children and grandchildren are sure to be surprised—and impressed, that we learned this on our own!) Shall we begin?
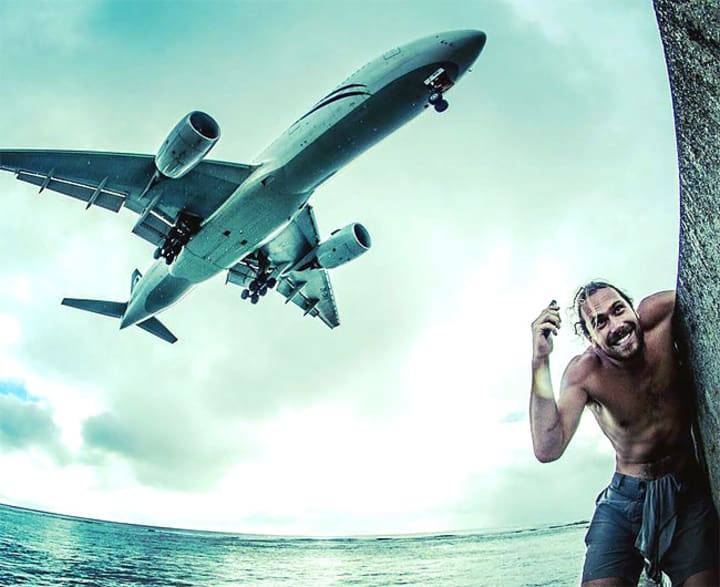
A) HOW to CUT OUT THE JUNK WE DON’T WANT in OUR PICTURE or PHOTO: There are times when we groan, “Oh, this family photo would be PERFECT if that weird guy in the corner hadn’t walked by!” Or, “I wanted to take a picture of my grandchild's plane flying away, but I don’t want that guy on the right side in it!” (Youngsters call such unwanted people in our shot: “Photobombers”.) Other times we moan, “I really like the saying on this picture, but I don’t like what they added to the bottom.” I promise we won't be moaning and groaning any longer, if we follow these steps to cut out the junk we don’t want. (The youngsters call this “cropping".) Here’s how to do it:
1-A. HOW to FIND OUR PICTURE or PHOTO: Every time we save a picture or photo, it automatically is stored in a place on our Apple Macintosh computer called: “Preview”. So, we need to open up Preview to find it. I know what you’re thinking… “Where in the world is this “Preview" and how do I open it?” Never fear.
a) HOW to OPEN “PREVIEW”, WHERE OUR PICTURE or PHOTO is STORED: At the bottom of our computer screen is a line of little colored images. (The youngsters call these “icons”.) The Preview one we’re looking for looks like a blue and white smiley face. (On my desktop computer, it’s on the far left side of the other images.) Have you found the blue and white smiley face at the bottom of your screen? Good! Now, let's click on it. This will open up a page where all our saved pictures and photos are.
b) HOW to FIND THE PARTICULAR PICTURE or PHOTO WE WANT: Don’t panic at all the little picture choices; just ignore them. Instead, look at the top far right of the Preview screen we just opened. We are looking for a little magnifying glass… Do you see it? Great! Now, click on the magnifying glass and it will open a helpful search box. Do you remember a word that was in the name that under which you saved the particular picture or photo? Excellent! Now, just type that word into that narrow search box by the magnifying glass, and then hit ‘return’ or ‘enter’ on your keyboard. “Ta-da!” All the pictures and photos that contain that word in their name have appeared below. (Hopefully, there won’t be too many to look at before you find the one you want.)
c) HOW TO SEE THE PICTURE or PHOTO BIGGER, SO WE CAN WORK ON IT: Before we can take the junk out of the photo, first we need to see it bigger and better. To do that, click on the little picture or photo a couple quick times. Has it enlarged now? Well done!
2-A. HOW to CUT OUT THE JUNK: Look at the gray info above the enlarged picture or photo. Ignore all the doo-dads for now in that gray box, and just look for the letter ‘A’ with a circle around it. (Don’t ask me what it stands for, that’s not important.) Have you found it? Then click on that letter A with a circle around it. Did it make another narrow gray box with more doo-dads appear below the first gray box? If so, you can proceed to the next step.
a) HOW to DRAW a BOX AROUND the GOOD STUFF WE WANT TO KEEP in OUR PICTURE or PHOTO: Get ready to click and keep holding down our click, instead of lifting it right up. This is so we can show the computer what part of the picture or photo we want to KEEP. “That sounds complicated!” you say? No worries. It’s not as difficult as it sounds. Let’s say you like the top 3/4 of your picture or photo, but you don’t like what’s on the bottom. Here’s what you do: Click on the upper left corner and hold it down and still. If you’re doing it correctly, a plus sign should show up. Now, without lifting up your finger off the touchpad (or your mouse), slide the your finger diagonally down and across to the other side, stopping above the junk stuff. If you did it correctly, a dotted see-through box with blue dots should enclose the area you want to keep—if it doesn’t show up, make sure you started clear up on the corner. If it showed up, but you accidentally lifted your finger before you enclosed the entire good area of your picture or photo that you want to keep; don’t fret. On your keyboard, simply click on the ‘esc’ (escape) key in the upper left corner, and you can try again. (It took me several practice tries before I was able to enclose the area I wanted, so don’t give up—you’ll get the hang of it!) But, what if the junk we want to cut out is at the top? Then we’d simply go below that junk on the far left side and pulling diagonally and down before we let our finger lift up, until the area that we want to keep is entirely enclosed. What if the junk is on one of the sides? Then we’d start our click on the top edge of the photo, either to the left or to the right of the junk (depending on where it is.)
b) HOW to MAKE EVERYTHING NOT in OUR BOX DISAPPEAR: Hey, you’ve got that dotted line with the blue dots enclosing all the good stuff you want to keep, on the picture or photo… Yay! So, now, we’re ready to make the junk we don’t want, disappear. How? Look back above the photo at the bottom gray box. Do you see the upper and lower-case letter ‘Aa’ on the far right side? You do? Then, look at the little doo-dad just to the right of the ‘Aa’—it looks like a square with the lines sticking out. Okay, when you’re ready to get rid of everything outside of the box you drew, then click on that doo-dad. “Ta-da!” Now, your picture or photo only has the stuff you WANT to see in it!
B) HOW to SAVE WHAT WE’VE DONE SO FAR: Before we go any further in making it look even better, it’s a good idea to save it. To do this, look at the very top left corner of your computer screen. Do you see the little apple? To the right of that, it should say: “Preview”. (If it doesn’t, then click on the picture or color, and it should make it show up.) Just to the right of Preview, it should say: “File”. Click on File and hold it down so you can read what the box that shows up, says… Do you see “Save” about 1/4 of the way down in the box? Good. To click on it, we'll have to keep holding our finger down on the touchpad or mouse until we move it down, releasing it on “Save". “Ta-da!” Now, our picture or photo will always have the changes we made. (I’ll remind us to save again, after each of the following main steps.)
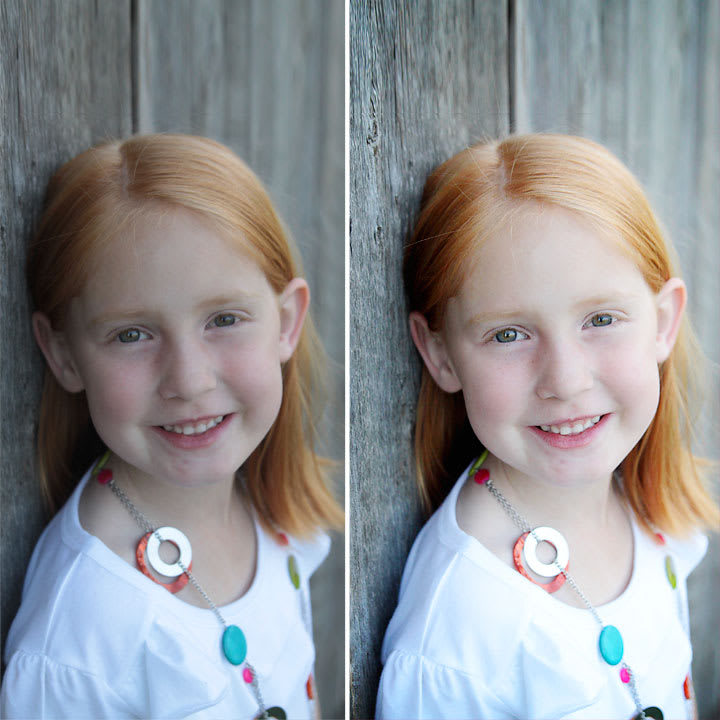
C) HOW to IMPROVE THE COLOR of OUR PICTURE or PHOTO: Now, we've got only the stuff we want to see in our picture or photo. But, look! Why is our picture or photo so dark and dingy-looking compared to others we see on Facebook? The next step is to improve the color.
1-C. HOW to FIND THE “ADJUST COLOR” TOOL WE WILL NEED: Look back up at the very top left corner of our computer screen. Third from the right, it should say: “Tools”. (If it doesn’t, then click on the picture or color, and it should make it show up.) Click on Tools and hold it down so you can read what the box that shows up, says… Do you see “Adjust Color” third from the top in that box? Good. Now, to click on it you’ll have to keep holding your finger down on the touchpad or mouse until you move it down, releasing it on “Adjust Color”.
a. HOW to BRIGHTEN THE COLOR of OUR PICTURE or PHOTO: To the right of your picture or photo, a dark gray box that says “Auto Levels” in it, should have appeared onto our computer screen. Don’t panic at how complicated it looks! For now, we’re only going to use ONE thing in that box. Do you see the top line that is titled: “Exposure”? Good. Do you notice the little white vertical bar in the middle of the Exposure line? Good. To make your picture brighter, simply click on that vertical bar and while holding your finger down on your touchpad or mouse, slide that bar to the right. You will see your picture or photo becomes lighter and brighter! Quit holding your finger down when your picture looks bright enough.
b. HOW to DARKEN THE COLOR of OUR PICTURE or PHOTO: “Oh, no!” you exclaim, “I made it TOO bright by accident!” No worries. All we need to do is to click on that vertical bar again in the Exposure line, and this time, slide it to the left. The picture or photo will then become darker! (Feel free to play around with it a little, until you’ve got the color looking the way you want.)
D) REMEMBER to SAVE AGAIN, WHAT WE’VE DONE SO FAR: Before we go any further in making it look even better, it’s a good idea to save it again. To do this, look at the very top left corner of your computer screen. Do you see the little apple? To the right of that, it should say: “Preview”. (If it doesn’t, then click on the picture or color, and it should make it show up.) Just to the right of Preview, it should say: “File”. Click on File and hold it down so you can read what the box that shows up, says… Do you see “Save” about 1/4 of the way down in the box? Good. To click on it, we'll have to keep holding our finger down on the touchpad or mouse until we move it down, releasing it on “Save". “Ta-da!” Now, our picture or photo will again always have the changes we made. (I’ll remind us to save again, after the following steps, too.)
E) HOW to WRITE SOMETHING ON OUR PICTURE or PHOTO: Now that we’ve got our picture or photo looking the way we want, it sure would be nice if we could write something on it! (The youngsters call this, adding a “caption”.) Once you learn how and keep trying, adding writing to your picture or photo will become easier and easier, I promise.
1-E. HOW to FIND THE “TEXT” TOOL WE WILL NEED: Look at the bottom row of gray info above our enlarged picture or photo. Ignore all the doo-dads for now in that gray box, and just look for the letter ’T’ with a rectangle around it. (Hey, I know what this doo-dad stands for… “Text”!) Have you found it? Then click on that letter T with a rectangle around it. Now, look down and all around your picture or photo. Do you see a horizontal line with a blue dot on both ends, and the word “Text” in the middle? If not, look harder. If so, we are ready to proceed to the next step.
2-E. HOW to MAKE THE WRITING on OUR PICTURE or PHOTO BIGGER or SMALLER: Sometimes we can see the line with a blue dot at each end, but the word “Text” is so small, we can’t even read it. Other times, “Text” is way too big. Later, we’re going to change that word to whatever we want to write on our picture. But first, let’s adjust the sizing of our letters.
a. HOW to FIND (WHAT I CALL) THE WRITING ADJUSTER: We need to click and hold the “Aa” in the second row of the gray box, up above our picture or photo. The Aa is on the far right side of that gray box. Do you see the box that shows up when you’re holding down that Aa? In the middle of that box is a number. To the right of that number are up and down arrows.
b. HOW to CHANGE THE SIZING of OUR WRITING: There are two ways to enlarge the letters that are on our picture or photo. 1) We can click on the number a couple times until the number is highlighted. Then simply type in a different number. If we want the letters bigger, type in a larger number, if we want the letters smaller, type in a lower number. 2.) Another way to change the sizing is to click on either the up or down arrows to the right of the number box. We will see the writing change in the picture or photo as you do this.
c. HOW to CHANGE OUR MIND AFTER WE WRITE SOMETHING: Don’t worry if later on, after we write what we want to say, the writing is still either too big or too small… Simply click on the writing and then repeat above Steps “a & b”—we can adjust the sizing as much as we want.
3-E. HOW to CHANGE THE COLOR of OUR WRITING: Why would we want to do this? Well, if the colors in our picture or photo are too dark, and the color of our writing is also dark; it will be hard for others to read our writing. Likewise, if the colors in our picture or photo are too light, and the color of our writing is also light, it will be hard for others to read our writing, defeating the purpose. So, let’s learn hoe to change the color of our writing until it looks just the way we want it to look.
a. HOW to FIND the COLOR SELECTIONS: Once again, we need to click and hold the “Aa” in the second row of the gray box, up above our picture or photo. Remember, the Aa is on the far right side of that gray area. Once agin, do you see the box that shows up when you're holding down that Aa? In the middle of that box is a number. In the upper right corner of that box is a colored rectangle. Click on that colored rectangle, and a box full of color choices will appear below it. (You don’t have to keep holding down your finger, you can release your touchpad or mouse this time.)
b. HOW to CHOOSE a DIFFERENT COLOR for OUR WRITING: We are going to be surprised at how easy this is to do… Simply decide which color we want to use, and click on it. What if we don’t like the way the color we picked looked? No worries. Just click on a different color! NOTE: The most popular colors are in the top row of that color box. But, if we don’t like the way any of THEM look, try a more subtle selection from the rows below. After we have chosen a color that we like, just click anywhere on our photo to get rid of the color choice box.
4-E. HOW to WRITE on OUR PICTUE or PHOTO: Now, we’re ready to write (or add a “caption”). Simply click on the “Text” wording that should still be showing on our picture or photo; then type whatever we want to say! “Oops! I don’t want to say that after all,” you say? No worries. Just click on the text until it’s highlighted if we change our mind, and type something else. If it’s just one word that we want to change, for instance if we misspelled something; then click before or after that word holding our finger down, then slide our finger across our touchpad (or use our mouse) until the word is highlighted, then type the correction.
5-E. HOW to MOVE OUR WRITING AROUND on OUR PICTURE or PHOTO: After we have our writing on the picture or photo, we usually find it’s not in the spot that we want it. Simply click on our writing and while holding our finger down on our touchpad or mouse, move our finger around until the writing is positioned where we want it.
a. HOW to MAKE OUR WRITING NARROWER or WIDER: Even after we’ve positioned our writing, it may run too long. To make it narrower (or shorter), simply “grab” hold of the left (or right) side of the invisible box that’s around our writing by clicking and holding on it. Then, pull the box to the left or right, we decide where we want it. To make our writing wider (or longer), do the same thing, but drag the box OUT on one or both sides.
b. HOW to GET OUR WRITING BACK WHERE WE WANT IT on OUR PICTURE or PHOTO: Usually, whenever we have been playing around with the writing, it messes up our positioning. No worries. Go back to Step 5-E above. We can adjust the positioning of our writing as much as we want!
6-E. HOW to MAKE OUR WRITING BE CENTERED, or FLUSH LEFT, or FLUSH RIGHT or EVEN LINES: This can make a huge difference on how our writing will look on our picture or photo! With some, the writing will look better centered; but with others, having it flush left or flush right looks better. Feel free to play around with it, to see the differences. NOTE: “Even Lines” (called “Justified” by the youngsters) is a choice we will RARELY select, because most times, it won't make our writing look good.
a. HOW to CHANGE the ALIGNMENT of OUR WRITING: Click on the Aa once again, in the gray box above our picture or photo. When the box appears, this time look at the alignment choices in the bottom of the box. Every time we click on a different choice, you will see the alignment of our writing changes. Do we want it centered? How does it compare to flush left? Would flush right look better? After we like the alignment, click anywhere on our picture or photo, and the selection box will disappear.
F) REMEMBER to SAVE AGAIN, WHAT WE’VE DONE SO FAR: Before we go any further in making it look even better, it’s a good idea to save it again. To do this, look at the very top left corner of your computer screen. Do you see the little apple? To the right of that, it should say: “Preview”. (If it doesn’t, then click on the picture or color, and it should make it show up.) Just to the right of Preview, it should say: “File”. Click on File and hold it down so you can read what the box that shows up, says… Do you see “Save” about 1/4 of the way down in the box? Good. To click on it, we'll have to keep holding our finger down on the touchpad or mouse until we move it down, releasing it on “Save". “Ta-da!” Now, our picture or photo will again always have the changes we made.
Congratulations, we have just learned the basics of how to edit our pictures or photos on an Apple Macintosh Desktop computer! Don't they look so much better? Well done!

G) WHAT ABOUT ALL THE OTHER EDITING TOOLS for OUR PICTURE or PHOTO? "Grandma’s Gentle Guide” is written just to give us the basics to make our pictures or photos look better. We couldn’t help but notice all the other doo-dads and choices... When I write “Grandma’s Gentle Guide: Part 2” at a later date, it will help us:
-Learn how to adjust the size of our picture or photo before we put it on the internet;
-Learn how to use shadows and highlights; and
-Learn how to pick different lettering styles (the youngsters call them “fonts”); and
-Learn how to use bold or italics in our writing on pictures or photos.
But for now, let's practice the basics we've learned above. Then, after we're feeling comfortable with these, we should feel free to play around with the OTHER enhancing and editing tools on your Macintosh desktop computer... (That’s how we will learn more—by playing around, clicking on this and that to see what it does.) After all, this guide is not for professionals—this is for us beginners! For now, the above basic steps are all we need to follow, in order to be more pleased with the way our pictures or photos look, when we post them on Facebook, text them, or email them.
FINAL TIP: If you have a printer, I recommend you print off these instructions so you can refer to them every time you want to make a picture or photo look better. (You can also come back to this published story/guide on Vocal.Media to refer to it again.) After we use the above steps several times to edit our pictures or photos, I promise we will start to memorize more and more, what to do. Don’t stress over it, though; “Rome wasn’t built in a day.” This is a GENTLE Guide… Have fun with it in your spare time. Enjoy! Life is too short! I hope this “Grandma’s Gentle Guide” helps someone… Learning it has sure made editing attempts for use on social media, much more enjoyable for me. I hope it will make it more enjoyable for you, too.
by Karla Bowen Herman (a Grandma—and loving it)
About the Creator
Karla Bowen Herman
I've always wanted to be an author, ever since I was a little girl. Time has a way of flying by when you're raising a family. But, I've discovered you're never too old to start! May something I write someday, lift someone's heart.
Keep reading
More stories from Karla Bowen Herman and writers in Photography and other communities.
"Beneath the Dust"
What that brown paper box contained, Walter Fox could never have imagined in his wildest dreams... The Cherokee Elders’ Council were in agreement that Walter Fox should till up the acreage he and his ᎤᏂᏥ (mother), called home. The land had lain fallow for forty long years, ever since the dust bowl that buried the earth, as a consequence of human’s failure to care for the land. Sufficient penance had been paid; it was time for this land to awaken from its long rest.
By Karla Bowen Herman3 years ago in Families
Capturing Magic
In the world of photography, timing is the key to everything. While skilled compositions and technical proficiency are undoubtedly crucial, the perfect lighting can create the perfect photo. Nowadays, we can determine any light ourselves and are no longer dependent on any natural light source, thanks to the developed technology. We can turn every day into a night by using the right filters. And we can illuminate every night to be seen as a day. A typical process, especially in the film industry.
By Krishan Mubashar10 days ago in Photography
The Secret of Lighting
“Light is not just an element, but the essence that breathes life into images.” Whether it is capturing the delicate contours of a portrait, the vibrant hues of a landscape or the intricate details of still life, lighting plays a tremendous role in shaping the mood and visual impact of a photo. Understanding the nuances of lighting is crucial for us to elevate our craft from snapshots to interesting works of art. It is not just about having the right equipment, it is about harnessing the light creatively to transport emotions, tell stories and evoke reactions from our viewers.
By Krishan Mubashar6 days ago in Photography


Comments
There are no comments for this story
Be the first to respond and start the conversation.