
How to Make a DIY Fish Tank Filter
A Step-by-Ste: A Comprehensive Step-by-Step Guidep Guide

Introduction: Why Build a DIY Fish Tank Filter?
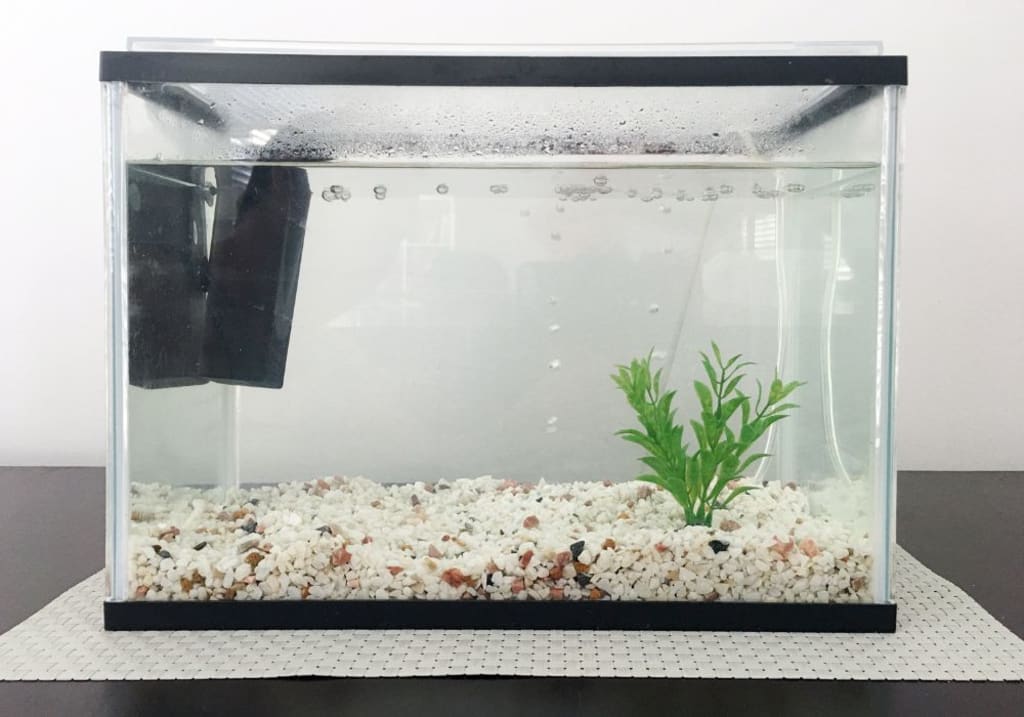
A fish tank filter is an essential component of any aquarium. It maintains water quality by removing debris, waste products, and harmful chemicals, ensuring a healthy environment for your fish. While commercial filters are available, building your own DIY fish tank filter can be a cost-effective and customizable alternative. This comprehensive guide will walk you through the process of making a DIY fish tank filter with simple materials and easy-to-follow steps.
Benefits of a DIY Fish Tank Filter
- Cost-Effective
Commercial filters can be expensive, especially for larger tanks or specialized setups. Creating your own filter can save you money while still providing efficient filtration.
- Customization
A DIY filter allows you to customize the filtration system to suit the specific needs of your aquarium, whether it’s a freshwater, saltwater, or planted tank. You can choose the materials and design that best fit your tank's requirements.
- Educational and Rewarding
Building a DIY filter can be an educational and rewarding experience. It provides insight into how filtration systems work and allows you to take a hands-on approach to maintaining your aquarium.
Materials Needed for a DIY Fish Tank Filter
Before you start building your filter, gather the following materials:
- Plastic container: A small plastic container with a lid, such as a food storage container or a plastic bottle.
- Air pump: An aquarium air pump to provide the necessary airflow for the filter.
- Airline tubing: Flexible tubing to connect the air pump to the filter.
- Filter media: Materials such as sponge, filter floss, activated carbon, or bio balls.
- Drill and drill bits: To create holes in the plastic container.
- Suction cups: To attach the filter to the side of the tank.
- Scissors: To cut the airline tubing and filter media.
- Hot glue gun: To secure components.
Step-by-Step Guide to Building Your DIY Fish Tank Filter
Step 1: Preparing the Plastic Container
Choose the Container: Select a plastic container that is suitable for your tank size. It should be large enough to hold the filter media but small enough to fit inside the tank.
Drill Holes: Use a drill to create several holes in the sides and bottom of the container for water flow. Ensure the holes are small enough to retain the filter media but large enough to allow water to pass through.
Create an Opening for Airline Tubing: Drill a hole in the lid of the container to fit the airline tubing. This hole will connect the air pump to the filter.
Step 2: Adding the Filter Media
Cut the Filter Media: Cut the sponge, filter floss, or other filter media to fit inside the container. Use multiple layers of different types of media for mechanical, chemical, and biological filtration.
Layer the Media: Place the filter media inside the container in layers, starting with the coarsest material (e.g., sponge) on the bottom and the finest material (e.g., filter floss) on top. If using activated carbon or bio balls, place them in the middle layer.
Step 3: Assembling the Filter
Insert the Airline Tubing: Thread the airline tubing through the hole in the lid of the container. Extend the tubing into the container, reaching close to the bottom but not touching the filter media.
Secure the Tubing: Use a hot glue gun to secure the airline tubing in place, ensuring it is airtight. This will prevent air leaks and ensure efficient operation.
Attach the Air Stone (Optional): If you have an air stone, attach it to the end of the airline tubing inside the container. The air stone will help evenly distribute air bubbles and improve water circulation.
Step 4: Installing the Filter in the Tank
Attach Suction Cups: Use suction cups to attach the filter to the side or back of the tank. Position the filter near the water surface, with the intake holes submerged.
Connect the Air Pump: Attach the other end of the airline tubing to the air pump. Place the air pump outside the tank, in a dry and well-ventilated area.
Power On the Air Pump: Plug in the air pump and turn it on. You should see air bubbles rising from the filter, indicating it is working properly.
Types of Filter Media and Their Functions
- Mechanical Filtration
Mechanical filtration removes physical debris and particles from the water. Common mechanical filter media include sponges, filter floss, and filter pads. These materials trap debris, preventing it from circulating in the tank and maintaining water clarity.
- Chemical Filtration
Chemical filtration involves the removal of dissolved substances and impurities from the water. Activated carbon is a popular chemical filter media that absorbs toxins, odors, and discoloration. Other chemical media include zeolite (which removes ammonia) and phosphate removers.
- Biological Filtration
Biological filtration uses beneficial bacteria to break down harmful substances like ammonia and nitrites, converting them into less toxic nitrates. Bio balls, ceramic rings, and sponge media provide surfaces for these bacteria to colonize and thrive.
Maintenance Tips for Your DIY Fish Tank Filter
- Regular Cleaning
Regular cleaning of your filter media is essential to maintain its efficiency. Rinse the filter media in tank water (not tap water) every 2-4 weeks to remove accumulated debris. Replace the media as needed, especially if it becomes clogged or deteriorated.
- Inspect Airline Tubing
Regularly inspect the airline tubing for kinks, blockages, or wear and tear. Replace the tubing if necessary to ensure proper airflow.
- Monitor Water Quality
Regularly test the water quality in your tank to ensure the filter is effectively maintaining a healthy environment. Use a water testing kit to check parameters such as ammonia, nitrites, nitrates, and pH levels.
- Adjust Air Pump Settings
If you notice reduced airflow or poor filter performance, check the air pump and adjust the settings as needed. Clean or replace the air stone if it becomes clogged.
Troubleshooting Common Issues
- Reduced Water Flow
Solution: Check the filter media for clogs and rinse or replace it as needed. Ensure the holes in the container are not blocked and that the airline tubing is not kinked or obstructed.
- Air Bubbles Not Reaching the Filter
Solution: Ensure the airline tubing is securely connected to the air pump and the filter. Check for air leaks and use a hot glue gun to seal any gaps. Ensure the air pump is functioning properly and adjust the settings if needed.
- Filter Making Noise
Solution: Ensure the filter is securely attached to the tank and that the airline tubing is not vibrating against any surfaces. Place the air pump on a soft surface to reduce noise and vibrations.
Advanced DIY Fish Tank Filter Designs
Internal Sponge Filter
An internal sponge filter is a simple and effective design that uses a sponge as the primary filter media. The sponge provides mechanical and biological filtration, making it ideal for small tanks or breeding setups.
Materials Needed:
- Sponge filter
- Air pump
- Airline tubing
- Air stone (optional)
Instructions:
Attach the airline tubing to the air pump and thread it through the sponge filter.
If using an air stone, attach it to the end of the tubing inside the sponge filter.
Place the sponge filter in the tank and secure it with suction cups.
Connect the airline tubing to the air pump and turn it on.
Canister Filter
A DIY canister filter is a more advanced design that provides efficient mechanical, chemical, and biological filtration for larger tanks. It uses a sealed container and a water pump to circulate water through multiple filter media layers.
Materials Needed:
- Sealed plastic container (e.g., a large food storage container)
- Water pump
- PVC pipes and fittings
- Filter media (sponge, activated carbon, bio balls)
- Drill and drill bits
- Silicone sealant
Instructions:
- Drill holes in the container for water intake and output pipes.
- Attach PVC pipes and fittings to the holes, sealing them with silicone sealant.
- Place the filter media inside the container in layers.
- Connect the water pump to the output pipe and secure the intake pipe inside the tank.
- Fill the container with water, seal the lid, and turn on the water pump.
Conclusion
Building a DIY fish tank filter is a practical and enjoyable project that can enhance your aquarium experience. By following this comprehensive guide, you can create an efficient and effective filter tailored to your tank's needs. Remember to regularly maintain the filter and monitor water quality to ensure a healthy environment for your fish. With a little effort and creativity, you can provide your aquatic pets with the clean and safe habitat they deserve, all while enjoying the satisfaction of a job well done.
About the Creator
Hasan
Welcome...
In this site of mine you can learn amazing things and many information that you don't know so please subscribe to my site.
Enjoyed the story? Support the Creator.
Subscribe for free to receive all their stories in your feed. You could also pledge your support or give them a one-off tip, letting them know you appreciate their work.
Morning Bliss
Something pulls at me. The darkness no longer so dark, but a softer gray, a flutter of light. The feeling of skin against sheets is fleeting, quickly drowned out by the push of bone against muscle, of nerves once silent now screaming. Awareness is painful, every breath rattling my ribs and pushing my spine against its cord.
By Steph Ruff25 days ago in Petlife
Sparrow
Remember the little chirps outside your window? The sight of a sparrow hopping around, pecking for crumbs? Sparrows, once a common sight in our cities and towns, are sadly becoming less frequent visitors. While they aren't exactly "domestic" birds (they don't rely on humans for survival), they have adapted to live alongside us for a long time. But that might be changing.
By umar khalida day ago in Petlife


Comments
There are no comments for this story
Be the first to respond and start the conversation.