

Tote bags are super easy to make and are useful to have around the house. They have replaced the use of my handbag for me and I couldn't imagine life without one now. I find they are able to carry anything I need, whether that be my phone and purse or my shopping.
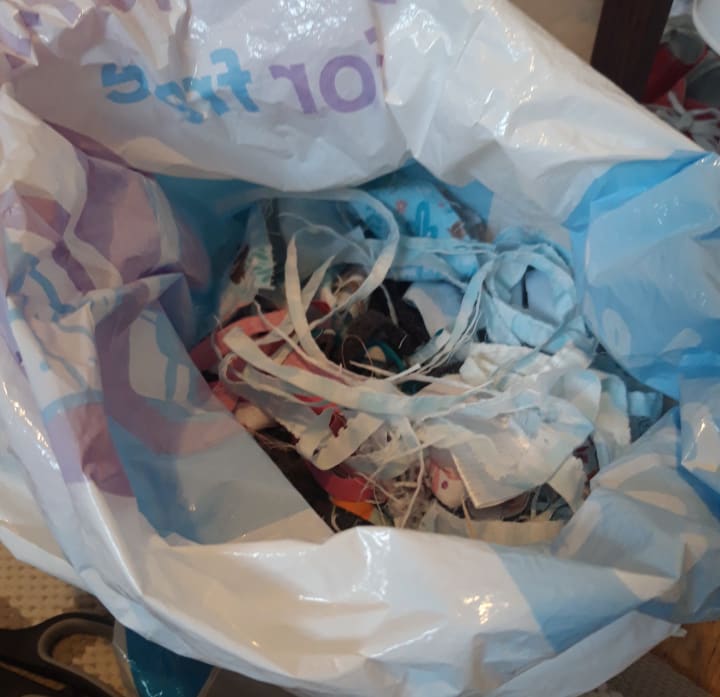
To make this tote bag, I am using the fabric from a pillow cover from a bed set I picked up in a charity shop and that I have washed and cleaned. Whenever I am sewing, I refuse to create any waste as I believe that everything can be reused and put to a new purpose. Therefore all of my offcuts and bits of thread that are cut off, are collected in my 'rubbish' bag and I use it for stuffing things that I make for myself. I'll post a picture of it underneath.
The pillow case fabric is 100% polyester and the pattern is a light, baby blue gingham along with a plain white lining inside.
The amount of time I get each day to sew varies on what day it is and today is one of my shorter days, therefore I have not managed to complete the bag for today, it will be done however, for tomorrow.
The progress I have made today though will allow me to get straight on with sewing tomorrow to finish and I will write my method underneath.
Method
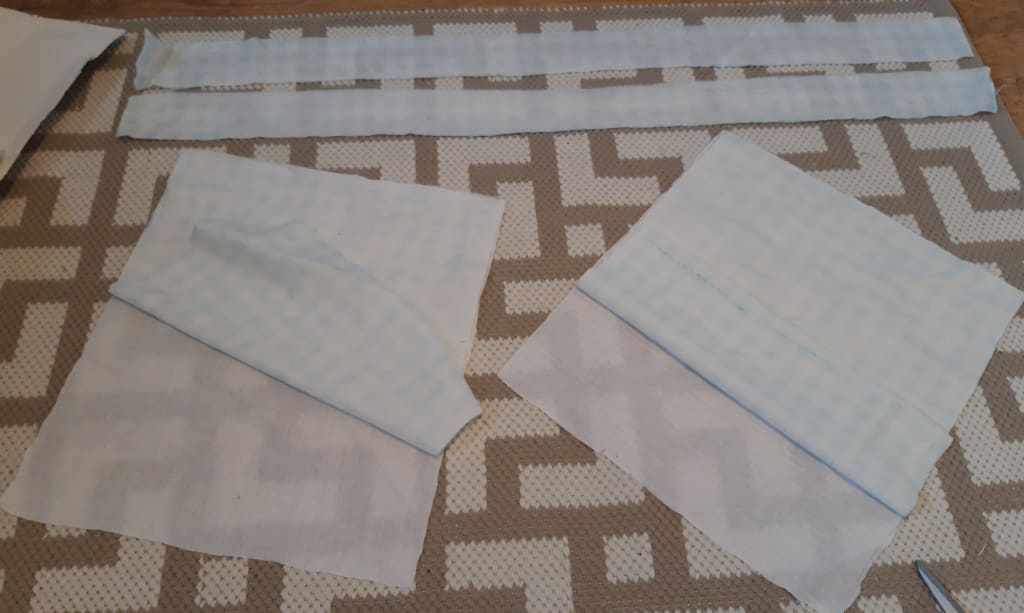
Step 1: Measure out two large rectangles of your chosen fabric to your choice of size along with two plain rectangles to be the backing. Wadding can also be used in between to make the sides of the bag stiffer.
Step 2: For the handles I choose to cut two long lengths of fabrics measuring 6in width by 30in length. These are going to be doubled over lengthways but before cutting, make sure they are the right length.
(This is as far as I have got today and for some of the more confusing steps below, I will add pictures tomorrow.)
Step 3: Fold one of the handles lengthways so that the right sides are together and sew along the seam. Turn the right way around using a tool such as a bodkin or how I do it, with a pair of tweezers and a lot of patience. Repeat with the other handle.
Step 4: Place one handle between the right sides of a pattern piece of fabric and a plain one. Leaving about 1 1/2in sticking out of the top. Sew around the two large pieces of fabric, leaving a gap at the bottom to turn the right way around. Repeat with the other side.
Step 5: Turn the right way around by gently pulling the handle out from the inside and pushing out the corners. Secure the bottom with an invisible stitch.
Step 6: Reinforce the handles on either side of the bag by sewing an 'X' shape (you can find this type of reinforcement on a lot of commercially made bags) and this helps to allow the bag to carry heavier items.
Step 7: Finally, with the patterned sides together, sew a seam around the two sides and bottom and turn the right way around once more.
You don't have to stick to this method as there are lots of different way to make these bags but this is a basic method. Other ways might include inside pockets or a zip across the top. A lovely thing with these bags is that they are able to be designed and created to however you want.
I should finish the tote bag tomorrow and I will post the second part which will include more pictures and details.
About the Creator
Jessica
My name is Jess but I am also known as the owner of Hedgehog Sewing on Etsy. Here I am writing a daily blog as to what I am up to during my sewing days and maybe some bonus content too.
Linebacker Distylium: The Backbone of Your Garden
Title: Linebacker Distylium: The Backbone of Your Garden In the ever-evolving world of gardening, one plant has quietly asserted itself as a reliable backbone for landscapes: the Linebacker Distylium. With its resilience, versatility, and aesthetic appeal, this shrub has become a staple in gardens across various climates. From its origins to its modern-day applications, let's explore why Linebacker Distylium deserves a prime spot in your outdoor sanctuary.
By Kavya Organic Garden3 days ago in Lifehack
Keeping it Cool: AC Repair Services in Boca Raton
Like any other machine, it can face electrical issues or mechanical failure, hamper its operations, and render it useless. That's why getting it serviced occasionally and fixing the repair issues timely for a convenient summer experience is important. In this article, we'll delve into the issues your air conditioner may face, the importance of maintaining your air conditioners, and the things to know before searching for AC repair services.
By AC COOL AIR LLC4 days ago in Lifehack


Comments
There are no comments for this story
Be the first to respond and start the conversation.