
Smart Home Automation Tips; Just Like Tony Stark (Iron Man).
DIY Smart Home Automation and Voice Control tips & tricks

Imagine coming home late from work, and it’s already dark. You are just parking your car in the garage, as the lights automatically turn on for you. You feel grateful to have the lights turn on without you rubbing your hand against the wall looking for the light switch.
You grab your lunchbox from the car, swing your work bag over your shoulder and open the door to enter the house. You are greeted with the kitchen lights gradually filling up the room: You feel warm and comfortable by your home welcoming you in such a manner.
You put your things on the table and flop on the couch with a long sigh and have a few seconds’ of a break. You can see the TV remote on the coffee table next to the tissue box in front of you, but your body feels too heavy to sit up and reach for it. You fall back into the couch and say the magic words:
“Hey Google, Watch 365 Days on Netflix,“
The TV Turns on and plays your favorite show from where you left off without scrolling and searching through the menu.

Just like Tony Stark in the Iron Man and the Avengers Movies with his A.I voice activated assistant J.A.R.V.I.S. You too can experience something similar. I will show you step-by-step how you can achieve each of these features in your own home.
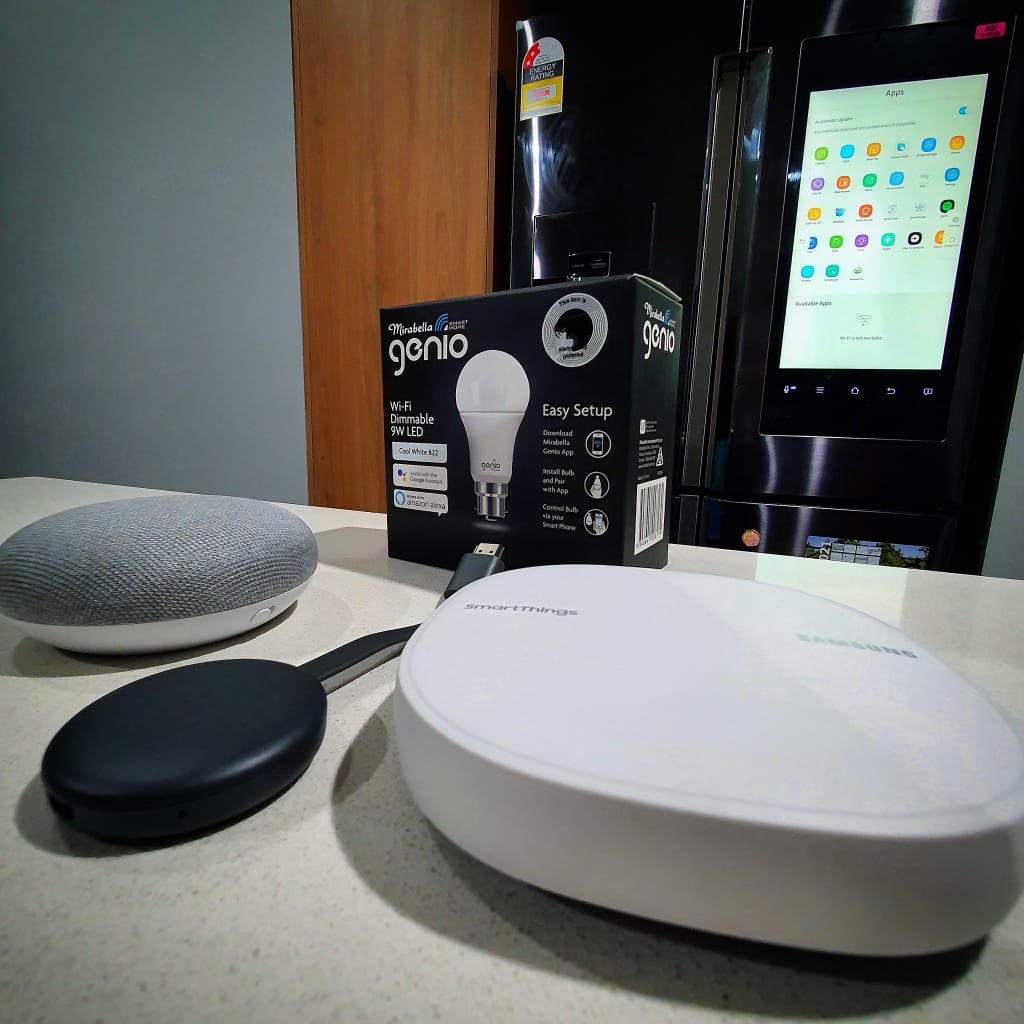
These methods will use combinations of Samsung SmartThings, Google Assistant devices, Android OS devices, and Tuya-based compatible Wi-Fi devices. Wi-Fi is the most common internet protocol used worldwide, allowing anyone to attempt the project in this article.
Some countries like Australia don’t use Zigby and Z-wave protocol networks because they interfere with other radio frequencies used in the country.
A quick tip: Using an Android OS phone or tablet will allow more features and apps to get the best use of your smart home system.
How do I Automate my lights to turn on when there is movement?
There are a few ways to achieve this. I will show you a method using the following items:
- Samsung SmartThings Wi-Fi Mesh Router Hub (can also boost your current Wi-Fi range).
- Tuya platform Wi-Fi Light bulb that is compatible with SmartThings
- Tuya or Smart Life app
- SmartThings app
- Samsung SmartThings motion sensor
- Your Wi-Fi Internet Router
Step 1 — Internet and Router/Modem
The first thing you need is an internet connection to your house and router/modem. Your modem/router should also have an Ethernet LAN (Local Area Network) output to connect the SmartThings Wi-Fi hub to the internet.
Step 2 — Connect and Set up the Samsung SmartThings Wi-Fi Hub
Connect the Samsung SmartThings hub to the router with an ethernet cable and download the SmartThings app on your phone.
On the SmartThings app, follow the guided prompts to add your SmartThings Wi-Fi Hub device.
Step 3 — Install and set up the SmartThings Motion Sensor.

Pull out the battery protection plastic tab on the back of SmartThings Motion Sensor and connect it to the SmartThings app by adding and searching the device.
The batteries will last you for a while. For the 5 months since I’ve installed it; the battery life is now on 80%.
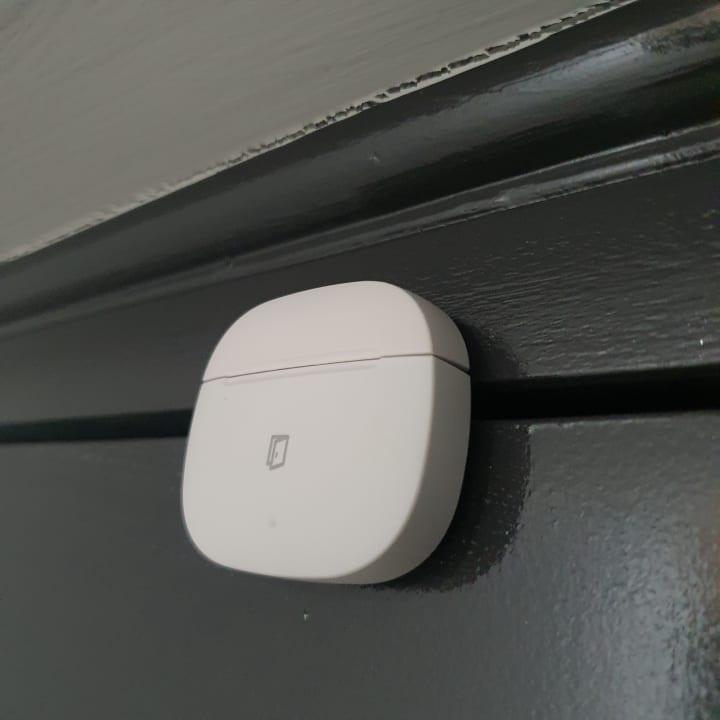
Remove the double-sided adhesive tape cover off the mounting bracket and stick it in the desired position on a flat, clean surface. Face the sphere magnet in the direction you want to track movement.
The sensor unit easily connects to the mounting bracket by the strong sphere-shaped magnet and the steel plate in the motion sensor’s back. It is effortless to adjust the focus point of the sensor after you have mounted it.
The motion sensors have about a 120 degrees angle field of vision, vertically and horizontally, so face it in the center of your desired coverage range.
Step 4 — Install and connect the Smart Tuya platform-based Wi-Fi light bulb
Twist on the Wi-Fi light bulb into the light socket and turn the light switch on at the wall. The Wi-Fi light bulb should flash quickly at regular intervals to notify you it’s ready to connect to the app.
If it doesn’t blink, you will need to turn the light switch on-and-off 3–5 times (depending on what brand your Wi-Fi light bulb, I suggest reading the instructions manual).
Side note: sometimes the Wi-Fi light bulb will take a few tries of the above procedure to reset, don’t throw a tantrum and throw it out; I’d be glad to have it.
You can now download and open the Tuya or Smart Life app and add the light bulb from the “+” sign in the top right-hand corner.
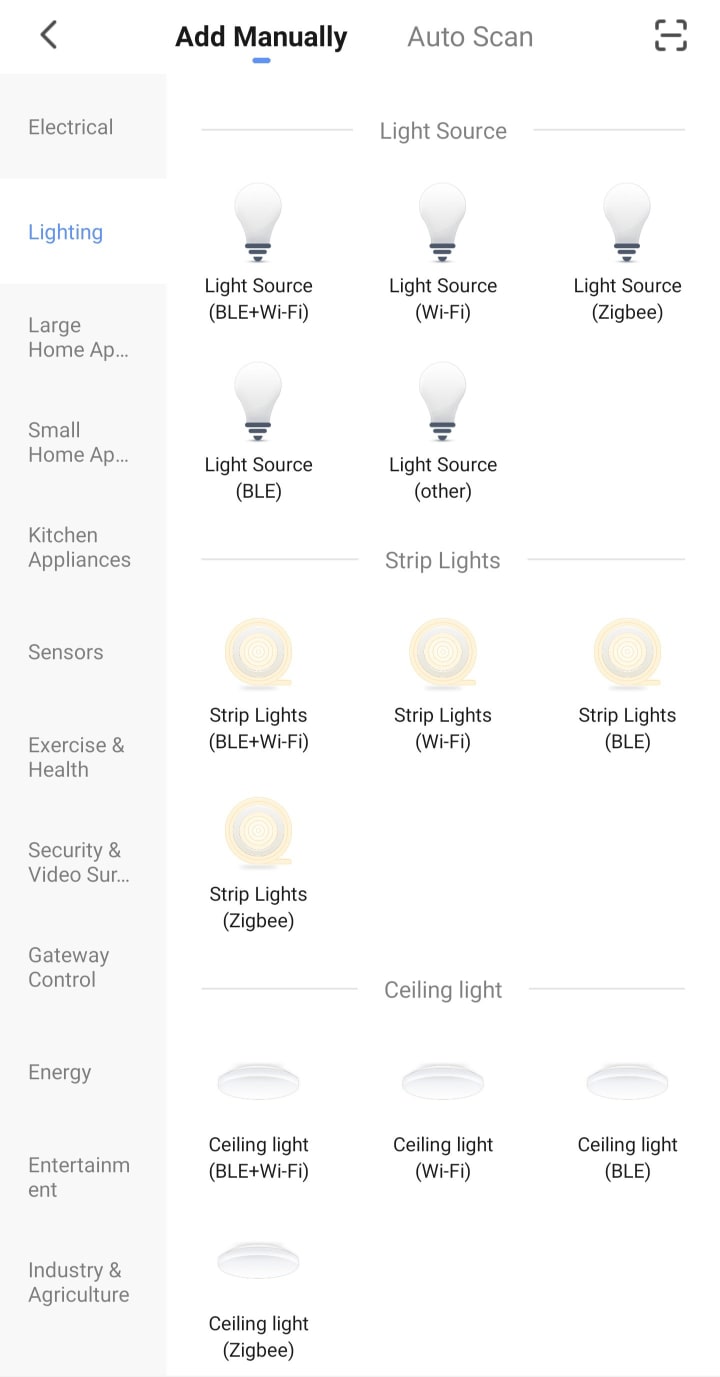
For Australians, the Genio Mirabella light bulbs are Tuya- platform-based and work for this method. You need to add the devices to the Smart Life app and not the app they recommend installing.
The Arlec Gridconnect devices from Bunnings are also Tuya platform-based, but they are not compatible with SmartThings. I would not recommend using them for this, and yes, I have tried to connect them with IFTTT.
Step 5 — Syncing the Samsung SmartThings and Tuya Apps
You will connect the two apps together from the Samsung SmartThings app to achieve the cross-platform integration.
From the SmartThings app, add a device by brand, search for Tuya or Smart Life (depending on which app you used to set up your light bulbs. Fill in your credentials from the app login. Allow any permissions that the app requests.
Now can see all your devices from both platforms in one place.
Step 6 — Setting Automations
Hit the menu button on the top left-hand corner (three lines) of the SmartThings app, and press on automation. You will set the rules for your devices from here.

It works by inputting logical rules to set how the devices behave when another device is activated. The UI (user interface) is straightforward to use for any level user.
“If a motion sensor detects motion, then turn Garage Wi-Fi lightbulb and turn off after 1 minute.”
As you will see, you can set the duration the light will stay on.
Step 7 — Testing
While testing, you will want to check a few things.
- Does the Tuya Wi-Fi light bulb turn on when you walk in the range of the SmartThings motion detector?
- What is the maximum visible range of the motion sensor concerning your target location? To test, stand out of the motion sensor range and start creeping towards its visual range and see when the sensor detects your motion.
- Does the light stay on for the duration of time you set it as?
How do I automate my lights to turn on when the door opens?
For this type of automation, the only thing you need to do is follow the steps above but replace the motion sensor with a SmartThings Multi-Purpose Sensor.
The SmartThings Multi-Purpose Sensor can sense open-and-closing motions, vibrations, and room temperature. Install one-half of the sensor on the door frame, and the other half on the door itself. Use the magnetic contact to help with the alignment.
I use these sensors to automatically turn on my front porch lights when people knock on my front door.
A quick tip: You can add the times you want your automation to function and send a notification to the app when actions trigger.
You can do this by adding additional rules to your “If” and “Then” commands.
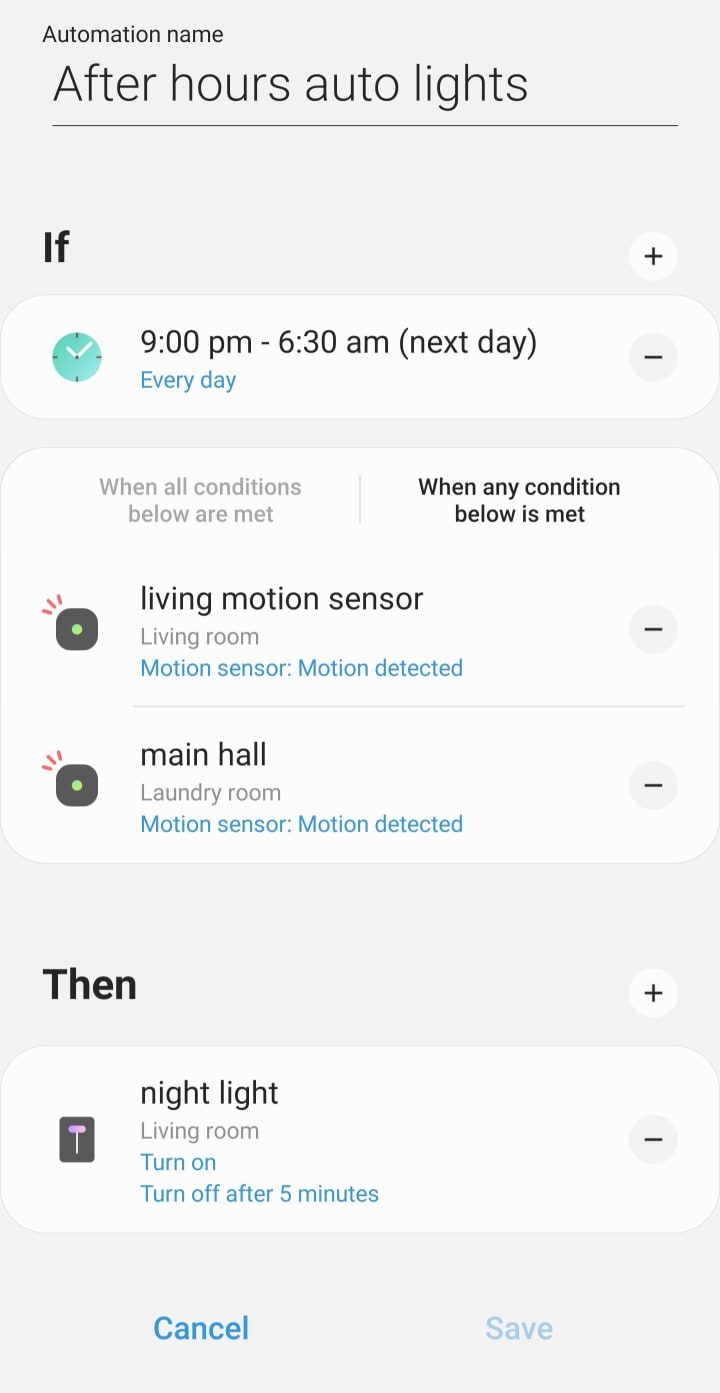
If Multi-Purpose Sensor triggers at 9.30 pm-6.30 am, then turn on the night light for 5minutes, and send a notification.
How do I turn my TV on with voice commands?
You can achieve this function by using the Google Home Mini or any Google Assistance Speaker Device, a Google Chromecast, and an Android phone/tablet device.
Types of Google Assistance Speaker Devices include:
- Android phone with Google Assistance
- Nest and Google Home/Assistance hub
- Specific JBL speakers and hubs with Google Assistance
- Smartwatches with Google Assistance
Step 1 — Download the Google Home App on your Android phone.
Using the Google Home app on an Android device allows you to turn on any of Googles’ Voice Partners directly from voice command and also enables you to directly screen-share your phone to the Google Chromecast through the app.
With an Apple device, you won’t have the function to directly screen-share to your tv and only cast specific media sources.
Google created Android, of course, they will favor their platforms.
From the Google Home App, connect your Netflix and other partnered media accounts during the app’s set-up.
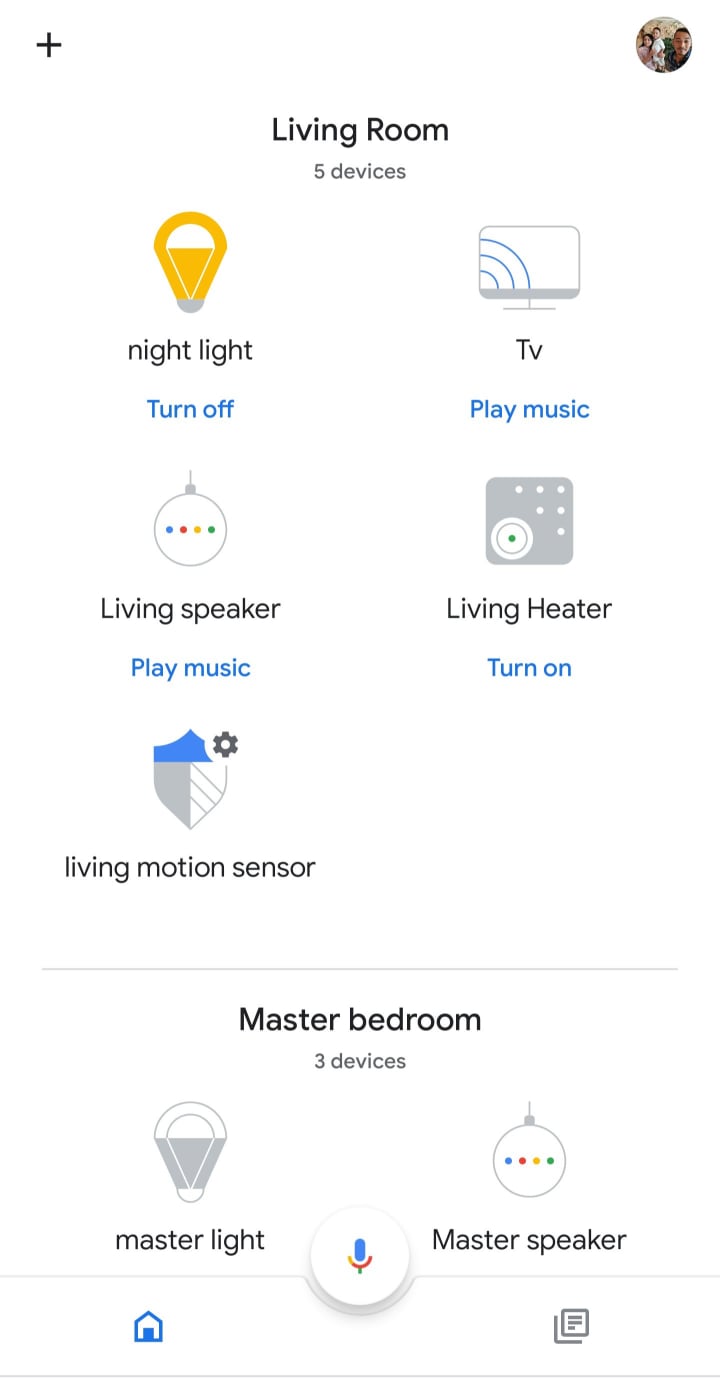
Step 2 — Connect your Google Home/Nest Mini
On the Google Home app, add your Google Home/Nest mini Device by following the prompts.
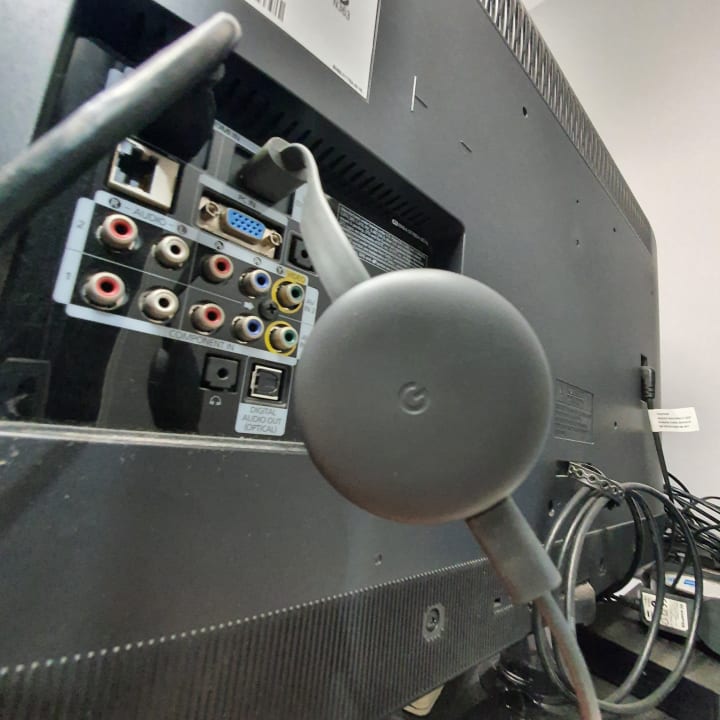
Step 3 — Connect your Google Chromecast device.
Connect your google chrome via HDMI to your TV and add the device to the Google Home app. On an Android device, you will see the option to “Cast my screen.” This isn’t available on Apple devices.
The TV must have HDMI-CEC capabilities to turn it on with a voice command. Most modern TVs will have this. If your TV is outdated, then you can still use the casting option from your device.
Step 4 — Test it out.
See if your TV turns on by saying:
“OK, Google, turn on my TV” or “Hey, Google, power on TV.”
If you have an account with any of googles voice supported partners, you can launch them with voice commands too:
Google Voice Partners:
- Netflix
- Hulu
- CBS
- Youtube
- Sling TV
- STARZ
- CW
- HBO Max
- Viki
- Crackle
- Red Bull
- Google Play Movies & TV
Use the voice command:
“Watch <Stranger Things> <on Chromecast>” or “Watch <Stranger Things> <on [partner]> <on Chromecast>”
Conclusion
DIY Smart Home Automation has never been simpler to do. Why wouldn’t you want the convenience of having your lights turn on automatically or use voice commands to turn things on and off? Especially when the current technology has made it easily accessible, at low cost, and made it easy for installation.
Smart Home Automation and voice commands will eventually be in every home in the future, phasing out the traditional light switch and remote controls.
Impress your family and friends by giving this project a go. Impress yourself for being able to install it in your own home. You will be feeling like Tony Stark (Iron Man) once you've made your house fully automated and controlled by your voice.
About the Creator
The Technologenius
Engineer | Tech Tinker | Gamer | Guides | Tutorials. I may also slip in some Pokemon card and gaming content for some fun time! ;) More content: https://flipboard.com/@TTechnologenius?from=share&utm_source=flipboard&utm_medium=curator_share
Keep reading
More stories from The Technologenius and writers in Lifehack and other communities.
How to Install a Reolink Security Camera System to Protect Your Home From Intruders
Intruders could attack you and your family in your home when you least expect it. An effective security camera system alerts you on your phone whenever there might be unexpected activity around your house while you're away or in bed.
By The Technologenius3 years ago in Lifehack
Yaupon Holly Tree: An Evergreen Delight for Your Garden
Title: Yaupon Holly Tree: An Evergreen Delight for Your Garden In the realm of evergreen wonders, the Yaupon Holly tree (Ilex vomitoria) stands out as a true delight for any garden enthusiast. With its glossy, dark green foliage, vibrant red berries, and versatile nature, this native American plant brings both beauty and practicality to your outdoor space. Let's delve into the many reasons why incorporating Yaupon Holly into your garden can be a rewarding endeavor.
By Kavya Organic Garden6 days ago in Lifehack
Vocal Bonus Leaderboard: 05/01/2024
Welcome to the weekly update of the Leaderboard! We're thrilled to showcase Vocal's most discussed stories, popular picks, and rising stars. Let's dive into this past week's standout contributors and their remarkable achievements.
By Vocal Team4 days ago in Resources


Comments
There are no comments for this story
Be the first to respond and start the conversation.