
How to Install a Reolink Security Camera System to Protect Your Home From Intruders
7 steps comprehensive guide to a DIY home security camera system

Intruders could attack you and your family in your home when you least expect it. An effective security camera system alerts you on your phone whenever there might be unexpected activity around your house while you're away or in bed.
You could catch a thief amid stealing that special gift your late parent gave you, or save a family member's life from a hostile intruder.
Buying and installing a security camera system can be expensive. Decent quality security camera systems could cost you around a thousand, and the installation cost could set you back about another half of that.
But you can't put a price on the safety of your family.
Do not stress out just yet! I tested the Reolink security camera system and found it a cost-effective and reliable solution. I will show you step-by-step how you can install it yourself and cut costs, so you don't have to cut your limbs off to sell for cash. I will also show you how you can buy the complete kit for under $500.
Step 1 - Buying your Reolink security camera system & equipment
The links listed below will bring you to the "Reolink Camera Kit" I bought and installed for this project. The Reolink Package includes everything you need for the installation, besides the tools you need to get separately. I have also listed the tools you would need below.
FYI., for shipping to Australia from the supplier in China, I had to pay an extra 10% tax on purchases $1000 and below. They also delayed my delivery because of COVID-19 restrictions, and it arrived within three weeks of purchase. They will inform you about this during the purchase process for the country you set.

Disclosure: As an affiliate for Aliexpress, I earn for qualifying purchases at no extra charge from you. I only recommend products I believe in or have tested.
I have linked examples of the tools for your reference that you can purchase and use for this project, but I suggest getting them at your local tools shop.
Tools you will need are:
- Electrician cable feeder strap or wire guider.
- Electrical tape
- Hammer drill
- Masonry and general drill bits
- Phillips head screwdriver
- Plasterboard or masonry wall plugs.
- Headlamp
Optional:
Step 2 - Plan camera positions & cabling path
Walk around your house and see where you can mount your cameras on the wall or ceiling to face your target area. The cameras have an 80degrees field of view and work best when installing them in the corners of your house.
I had a camera facing the driveway, one camera watching the front door, one in the garage, and another overlooking the dogs along the side of the house.
Before you drill holes, be sure to check that you can get the network cables to the intended camera position. Check that no other wires or pipes are running behind the area you are drilling. You can check this by climbing into your roof space and shining a light with a headlamp down the wall cavity you want to make a hole in or the targeted ceiling space.
If you see a power switch or any power points in the area, it's best not to drill near them. The power lines to your light switches and power points would likely come from the roof and run vertically down in a straight line; do not drill anywhere between the ceiling and power points or light switches in a straight vertical line.
Also, note that the mounting plugs in the cameras' kit are suitable for brick walls or cement. If you intend to mount on drywall, you will need to buy alternative mounting plugs. I have examples of the right mounting plugs to use in the equipment list in step 1.
Step 3 - Set up the NVR and monitor
Position the NVR in the same room as the internet modem. The cable they supply you is less than a meter, and you will get the most of the internet at that range with no signal losses. Connect the monitor into the NVR (Network Video Recorder) with the supplied HDMI cable and plug their respective power plugs into the PowerPoint.
Connect the NVR into the router with the supplied "short" ethernet cable, or get a more extended line if your router is further away. Test the cameras by connecting them to the back of the NVR with the provided network cables. Plug the mouse into the USB slot and power on the devices, then follow the screen's wizard prompts.

The setup steps are as follows;
1. Password: Set up a password for the admin login. The password needs to be at least six characters long.
2. General Configuration:
- Language
- Video Standard: NTSC (USA, Canada, Mexico, Japan, Korea, and some other regions) or PAL (UK, Europe, Australia, and some other areas).
- Resolution: This is the resolution of your monitor that you are using (most commonly 1920 x 1080).
- Time Zone
- Menu Date Format
- UID: This is the Unique Identifier Number of the NVR, which you would use to connect to the phone app. Alternatively, you could scan the QR Code on the top, front, right-hand corner of the NVR.
3. Hard Disk Management: The kit includes 2TB storage space, which will give you about two weeks' worth of recording.
4. Network Configuration: The IP configurations will automatically pick up when you plug the NVR into the router.
5. Device List: This is the list of cameras connected. Suppose there isn't the same amount of IP addresses listed to cameras connected. In that case, you might have a connection issue somewhere from the NVR to the Cameras.
6. Email Configuration: Set up a Gmail you want the NVR to send outgoing email alerts and another email you wish to receive the alert notifications.
7. UID: Unique Identifier Number mentioned before to connect to your phone app.
8. DDNS: You only need to set this up if you intend to use older IP Technology. You don't need to set this up otherwise.
9. NTP: Network Time Protocol. You can press on sync to make sure the server has synced and press next.
10. DST: Daylight Saving Time
11. Finish Setup
Step 4 - Layout the POE cabling
Once you've tested that everything is in working order, it's time to run the cables in your roof space. Unroll the supplied 18m ethernet cables and lay them out on the floor fully extended; this is difficult to do in the roof space.
You may already have a hole in the wall for your internet lines. Use this hole to run your ethernet cable through if there is space. I was lucky to have a pre-installed PVC pipe that ran cabling down from the roof to the room, with extra space in the pre-existing hole in the wall. The wall I had was single leaf bricked and had no cavity, so I wouldn't have been able to hide my cables behind the wall and would have to run conjugate externally.
If you need to drill a new hole, check that there is a wall cavity that your cable can run down. Worst-case scenario, you might need to run conjugate on the face of the wall from the ceiling for your ethernet cables. After drilling a hole, make it presentable by installing a brushed wall plate mentioned in Step 1, that doesn't require you to splice the network cables.
If you prefer to use the RJ45 wall plate, expect to be splicing and punching ethernet cables into a key jack. You can find tutorials on how to punch Cat5e/Cat6 cables on YouTube (tutorial by FireFold on Youtube below). Reolink uses ethernet wiring standards shown in the image below if you want to take this method of approach.
In this article, I will only focus on using the purchased kit which already has RJ45 end caps. If you cut and need to re-attach the RJ45 connector, then you can follow the wiring standards shown below and use the R45 Punch Tool with the supplied spare connectors.

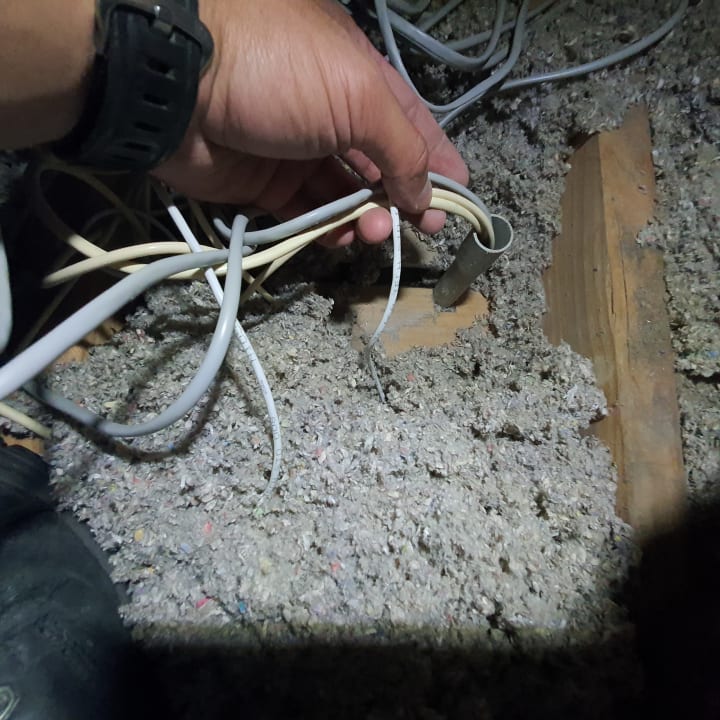
How do you get the cable down from the roof, behind the wall, and through the hole?
Use the wire guider or a cable feeder strap and push it through the cavity in the wall until you see it on the other side. You can either push it down from the roof or go up through the hole in the wall.
Once you have most of the cable feeder through the hole, tape the camera ethernet cable to the cable feeder's end with electric tape securely. Be sure to tape it at the tip of the head so it won't get caught on something on the way through the wall cavity, and wrap it a few times around the cable, so it doesn't come off.
Now pull up that cable feeder strap along with the taped ethernet cable to feed the line through the wall cavity and guide it up to the roof space. Plug one end of the cable into the NVR so it doesn't accidentally get pulled up through the wall, as you position the other end to the camera location. Follow this process for the other 3 three cables and place the other ends of the ethernet cable close to the camera locations to prepare them.
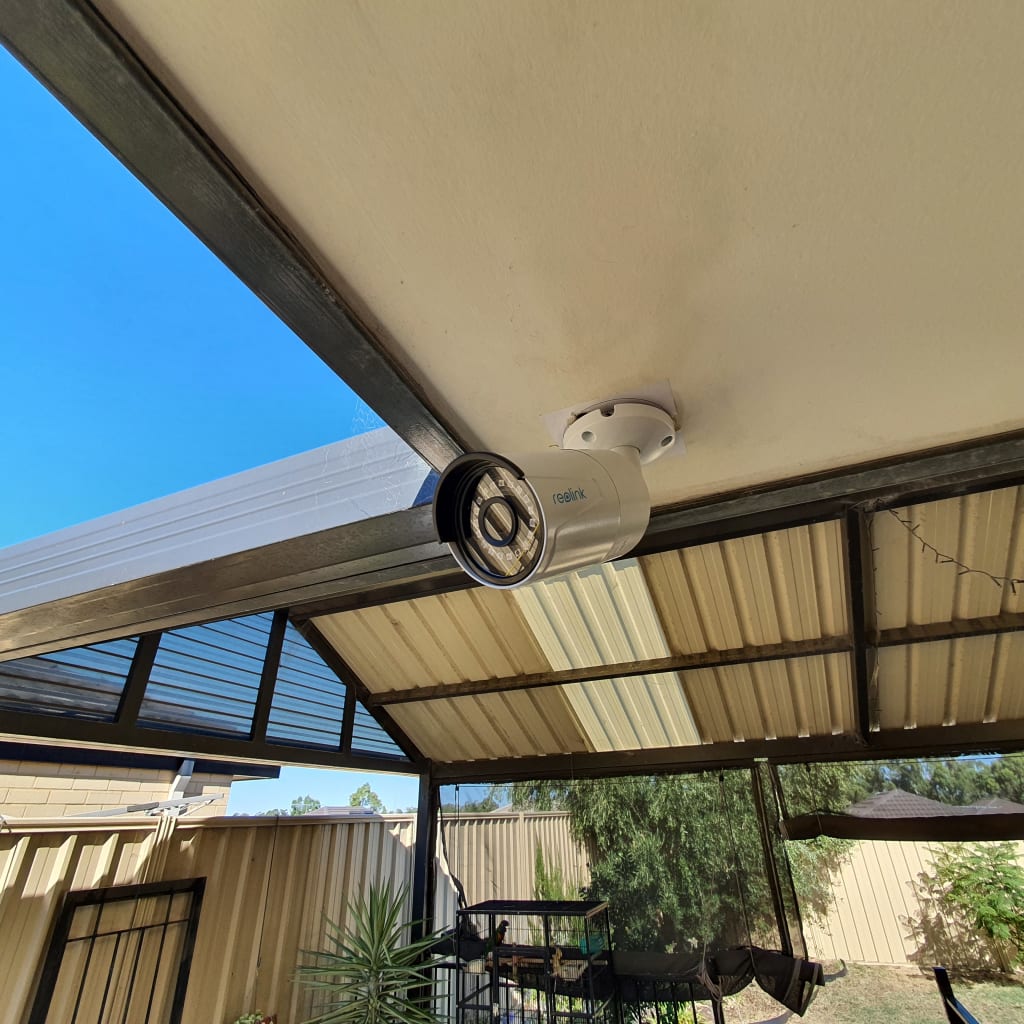
Step 5 - Mount the security camera
Now you can get some fresh air outside and take a quick break to refresh your mindset.
The kit comes with mounting templates you can stick to the surface you want to mount the camera. Remove the adhesive backing cover and attach the template in position, flat with no creases. Start by drilling one hole at the small circle position with a crosshair marked on the template to the size recommended by the mounting plug manufacturer you used. Drill perpendicularly straight into the surface and avoid any wobbling or side-to-side movements.
Hold the physical camera up to the first hole to see if you drilled correctly. The small circles with crosshairs should still align to the mounting holes on the camera base along with the hole you drilled. If the hole you drilled and the crosshairs align, you can continue with the other two holes.
If your drilling technique is not up to scratch and your hole has somehow moved from the position you intended it to go. Use the camera's mounting base to re-mark the hole positions with a marker. Not to scare you or anything, but the second and third holes need to be "spot-on." Or you will be cursing when the screws won't go in, and you have a dangling camera.
Here are some tips to improve drilling accuracy for brick and drywall surfaces that I used to get perfectly aligned holes:
- Use a sharpened tip drill bit (or a new drillbit)
- place the center of the drill bit on the center and mark a dent by tapping the drill trigger lightly a couple of times before continuously drilling.
- Apply a small consistent pressure into the surface while drilling, just enough to guide it forward slowly and not allow any slipping or excessive recoil.
When you have all three holes prepared, you can install the mounting plugs one by one. You should apply the right amount of force to slowly guide the plug in without breaking the surface area lining of the hole or breaking the mount plugs.
When you have the mounting plugs in, you need to make a hole in the center of all three holes big enough to fit the POE female connector on the camera through. I used a large masonry drill bit and drilled two holes side-by-side to make one sizeable oval-shaped hole.
It's time to pull the ethernet cables you laid out earlier through the hole. Push your cable feeder through the big hole in the center of your plugs and guide it up through the wall cavity or ceiling. Climb up to roof space now and electrical tape the ethernet cable to the end of your cable feeder, then pull it out towards your camera location.
You can now connect your camera to the NVR and see it on the monitor. Once you have checked that it's working, push the excess cable back into the hole and mount the camera with the screws provided onto your mounting plugs.
Follow this method for each of your cameras and adjust their viewing angles using the phone app in the next step.

Step 6 - Install phone app
Congratulations! The hard part is done-and-dusted.
Download the app on your phone's app store (google play, apple store, etc.) and follow the prompts. You can connect the NVR to your phone by using the UID or simply scanning the QR Code on the top of the NVR unit. The user is "admin," and the password is what you set earlier on the NVR.
Step 7 - Adjust the camera angle
All that's left is to adjust your camera's viewing angle by physically rotating it. You can loosen the Allen key screw to allow for more movement, then tighten it when you have the optimum position. Use the phone app to guide you, and allow for one or two seconds to allow for any lagging of your playback.

Conclusion
Well done for getting through this complete guide to get you on your way to having a protected home with your newly installed Security Camera System.
You now have the experience to attempt installations for other family and friends and get them protected too.
References
Aliexpress Affiliate Link: Qty4 5MP Bullet Camera Reolink Security Camera Kit
About the Creator
The Technologenius
Engineer | Tech Tinker | Gamer | Guides | Tutorials. I may also slip in some Pokemon card and gaming content for some fun time! ;) More content: https://flipboard.com/@TTechnologenius?from=share&utm_source=flipboard&utm_medium=curator_share
Keep reading
More stories from The Technologenius and writers in Lifehack and other communities.
How to Extend Video on a TV in Another Room
I've worked on a lot of audio-visual projects where a video source (Free-to-air TV, Foxtel, TV box, cable tv, etc.) was situated inside a control room/office/data room, and got watched on one or many electronic displays (TV, Video Wall, Projector, monitor etc.) located in different rooms of the building.
By The Technologenius3 years ago in Lifehack
Metal Marvels: How to Revamp Your Home with Metal Wall Art?
Metallic wall arts are more than just decorations; they can also be conversation pieces, space changers, and even reflections of who you are. So let’s dig into some of the many ways that metal wall art can be used to transform living spaces.
By Daniel Medalla Jr.2 days ago in Lifehack
How to prepare an amazing party jollof rice
Planning astonishing very smoky party jollof rice is a skill that requires accuracy, persistence, and a thoughtful understanding of flavors. In this complete help to prepare a smoky jollof rice, we will separate the cycle bit by bit to guarantee that you accomplish the ideal equilibrium of smokiness, flavor, and lavishness in your jollof rice.
By VOPNU, Adomale Monday5 days ago in Lifehack


Comments
There are no comments for this story
Be the first to respond and start the conversation.