
Making Fabric from Metal
A Historical Craft Made Modern


In medieval and ancient times, almost everything was either made by hand or with a limited amount of hand tools and pure elbow grease(this is fairly obvious, upon retrospect, since they used to call it the dark ages). From furniture to fabrics, carpentry to metalworking, laborers and skilled artisans alike had no electricity nor any advanced machinery to help them create their vision.
Despite this, we still managed to make some pretty neat stuff. Catapults and trebuchets, ancient siege engines used to topple castles and monuments - and then the castles and monuments themselves! Cyclopean relics of antiquity, lasting thousands of years if not longer, made (probably) entirely by hand and through the use of basic tools and simple machines. The Pyramids are still debatable, but most signs point to human efforts, not super advanced technologies or unknown extraterrestrial (subterrestrial? extrasensory?) assistance.
So, as a computer engineering major, I know a little about physics and a whole lot about following directions. While I can’t show you how to make a stone-flinger to finally settle your dispute with your neighbor way down the road, I can explain another fascinating craft skill that emerged from ancient times and, interestingly enough, can still be found today: Chainmaille!
(Nowadays, it’s typically spelled chainmail, truncating the -le; But, I like The Olde English spelling a little more, and it helps prevent people from mistaking it for chain letters or spam mail. Trust me, if you get into chainmaille, it will happen - we’re in the 21st century, not the 11th, and English is an ever evolving beast of a language.)
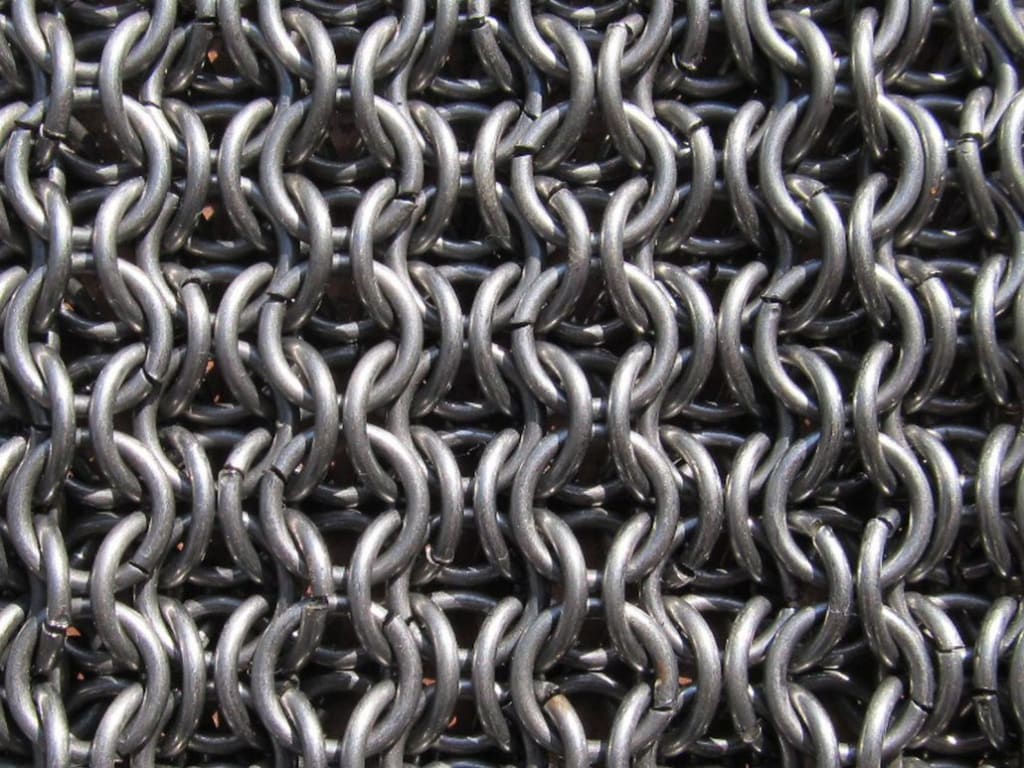
Historically, the first chainmaille patterns were fairly simple - sheets of interwoven jump rings or o-rings, sometimes forged or riveted shut for extra strength. Made from copper, bronze, iron, and soon enough mild steel or hardened steel, the European or Persian style of patterns were the most commonly used back then and still today, and also some of the quickest to learn.
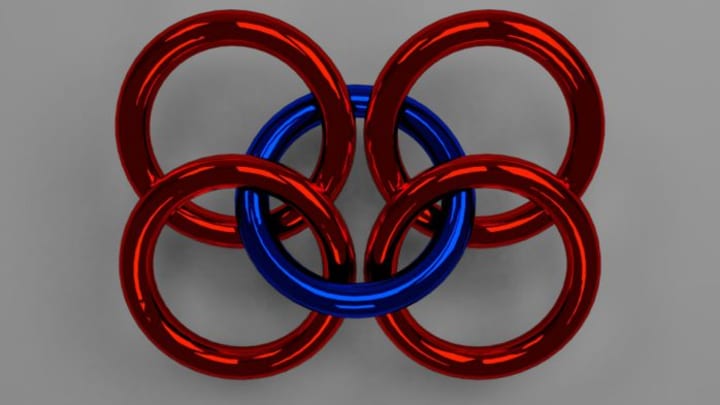
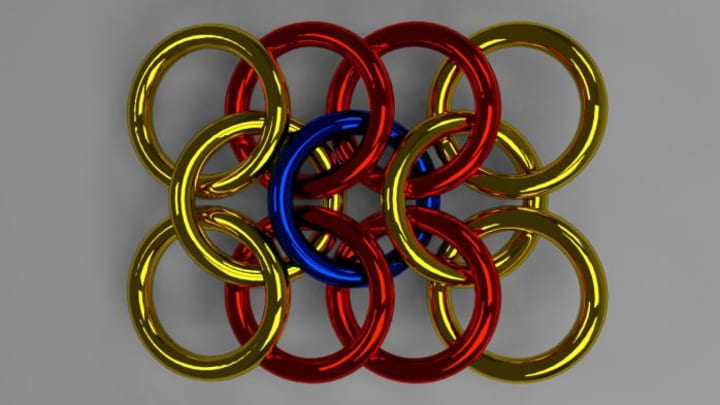
You can, of course, link the rings together in a simple straight chain, connecting 1 ring to the next 1 ring, or 2 rings to the next 2 rings, and so on. These look nice for ornamentation and jewelry or connective pieces and can be expanded into more complicated patterns such as Spiral weaves or Byzantine weaves, but to make sheets of metal fabric we’ll need some more symmetrical and expandable patterns - like the European and Persian family of weaves shown above.
Before diving right into the specific weaves, there is a small amount of vocabulary to cover.
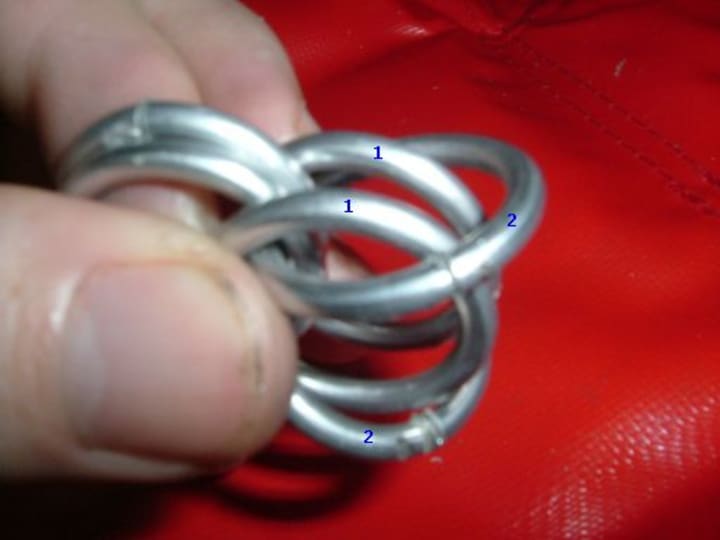
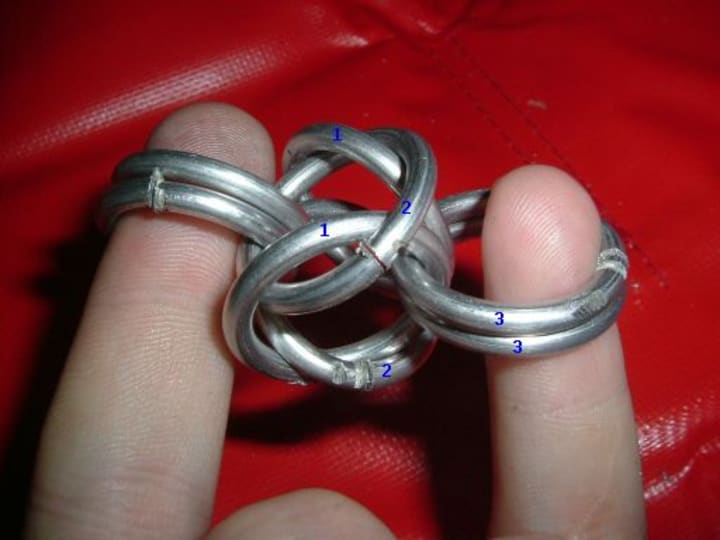
Jump rings or o-rings are the little metal rings that make up your whole pattern. Through-eye connections are rings that are joined through the “eye” of another two links, or the slight overlap they would form if you were looking at them like a Venn Diagram.
Around-Eye describes a connection where the ring is ground around the other overlapping rings, instead of through the eye. It seems self-explanatory after a while, but these are useful reference points to understand when you’re constructing your first weave so as to avoid completely jumbling things up.
Which, trust me, will happen a lot. There’s a whole family of weaves and patterns that are dedicated to exactly that: a missed or improper connecting ring leading to a whole new pattern entirely.
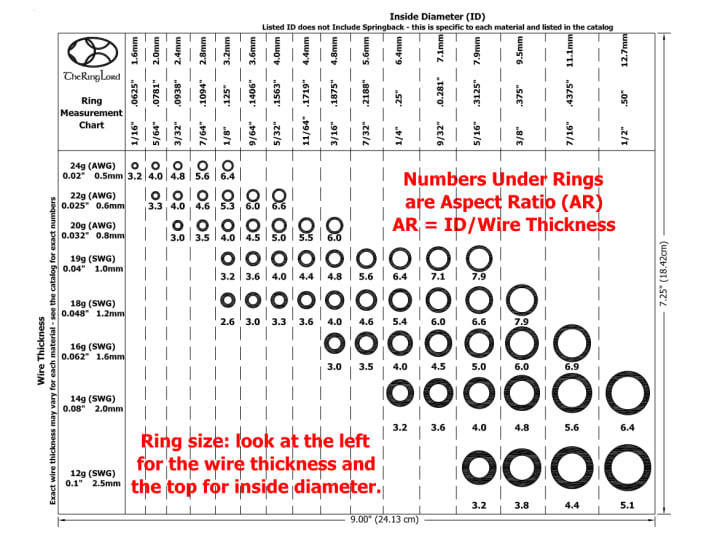
This is something also determined by the aspect ratio, or the AR of the rings you’re working with. This is a useful metric to know if a certain weave is going to be too tight to construct or too loose to properly hold its form. This is found by dividing the inner ring diameter by the thickness of the wire used, or the gauge of the wire. Note that if one is in inches, the other must be in inches, and same for millimeters or centimeters; A ratio is a unitless measurement, and so they need to cancel out when dividing.
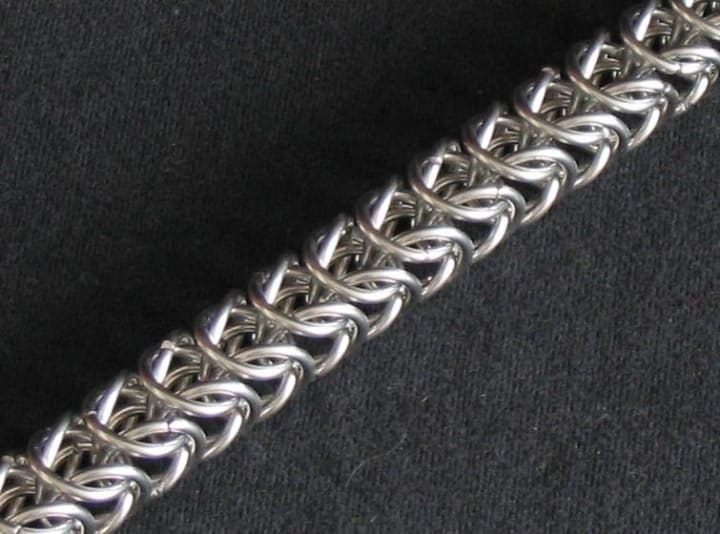
So, enough with that, onto the good stuff! To make a ribbon of European 4-in-1 chainmaille, you’ll need some rings(at least fifty or more to make a decent length segment) and two pairs of pliers. Then, you’ll loop four rings through one ring, and lay them flat and overlapping as shown.
You’ll then feed another ring through the two loose rings at the top or the bottom, making sure the ring you just inserted is oriented the same way as the other middle ring. If it goes under the top two and over the bottom two, then that’s how you want your next middle connecting ring to go.
Notice that there are two around-eye connections and two through-eye connections for each whole section of this weave. This pattern remains consistent regardless of how long or how wide the ribbon gets. Likewise, for every four rings, there is one ring holding them all together - hence the name, European four-in-one. You’ll find in time that most of the names of the patterns describe their construction or their shape, unless they’ve been given some other arbitrary name by the person who created it(Celtic Visions, Birdcage, etc).
This is the usual form for most patterns and weaves, defined as a specific series of repeatable and necessary connections to form a length of chain. You can add extra rings, but if they don’t provide support or structure for the weave, technically it’s not part of the pattern, and just ornamentation or extra dangly bits.
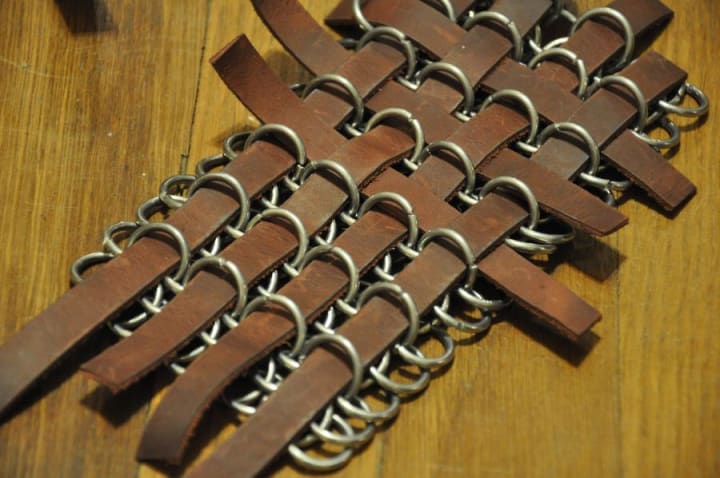
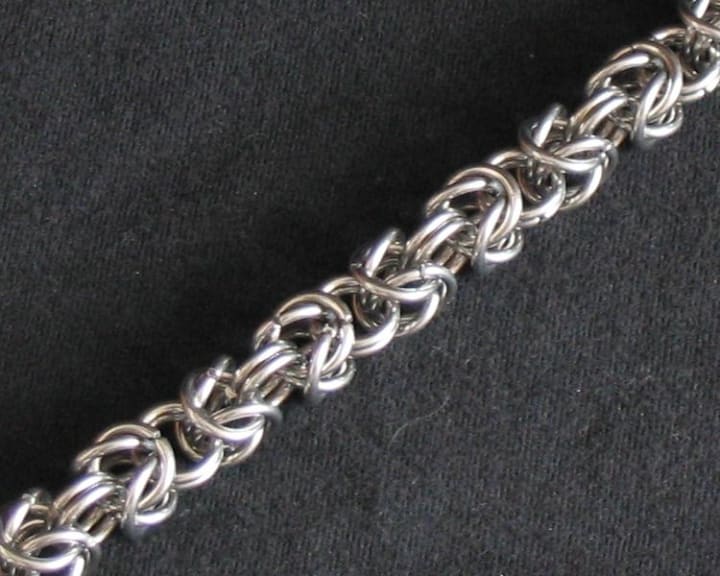
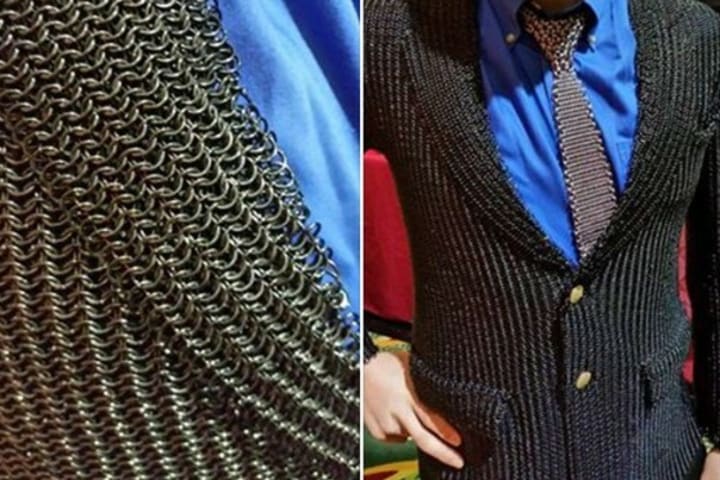
The European family of chainmaille is one of the easiest weaves to turn into a sheet of chainmaille, which can then be used to make armor or other forms of clothing. Tunics, coifs, hauberks, or if you’re feeling modern, neckties and hoods. I’ve even seen one brave soul make a modern suit coat out of chainmaille. You can likewise weave them into a circular or other geometrical patterns using 45 degree seams or other expansion and contraction techniques, which boil down to adding or subtracting rings in certain spaces at regular intervals to add or remove length.
The next two weaves I’ll discuss are variations of the European style, called Box Chain and Byzantine(or Birdcage). While E4in1 produces a flat sheet, these two styles produce a more chain or rope-like weave.
Box Chain is simple to start and continue. Starting with four closed rings, loop two more rings through the center of them all. Separating the chain into a 2 - 2 - 2 chain, fold the two rings at the end you want to extend back towards the middle rings, forming a ‘V’ of sorts. You’ll then want to add the next two rings through the eye formed by those two, which should lock them into place and create the ‘Box’ pattern that this weave is known for.
Simply continue this pattern for the length of chain you want, and you’re done! This pattern is great because it creates a smooth and elegant looking chain, while being ridiculously easy once you get the pattern down. You can use a wide variety of ring sizes, even different ring sizes or ring colors along the same chain to create a gradient effect.
For Byzantine, or Bird cage, simply add an extra 2 rings before / after each ‘Box’ link of a Box Chain. This will cause the box links to alternate in direction and create another simple but cool-looking rope of metal.
You can use these weaves as necklaces, bracelets, or as connective pieces in larger pieces of costume wear or clothing. I’ve seen people use steel rings to create boot chains, wallet chains, or even dog collars. With some imagination and creativity, the possibilities are endless.
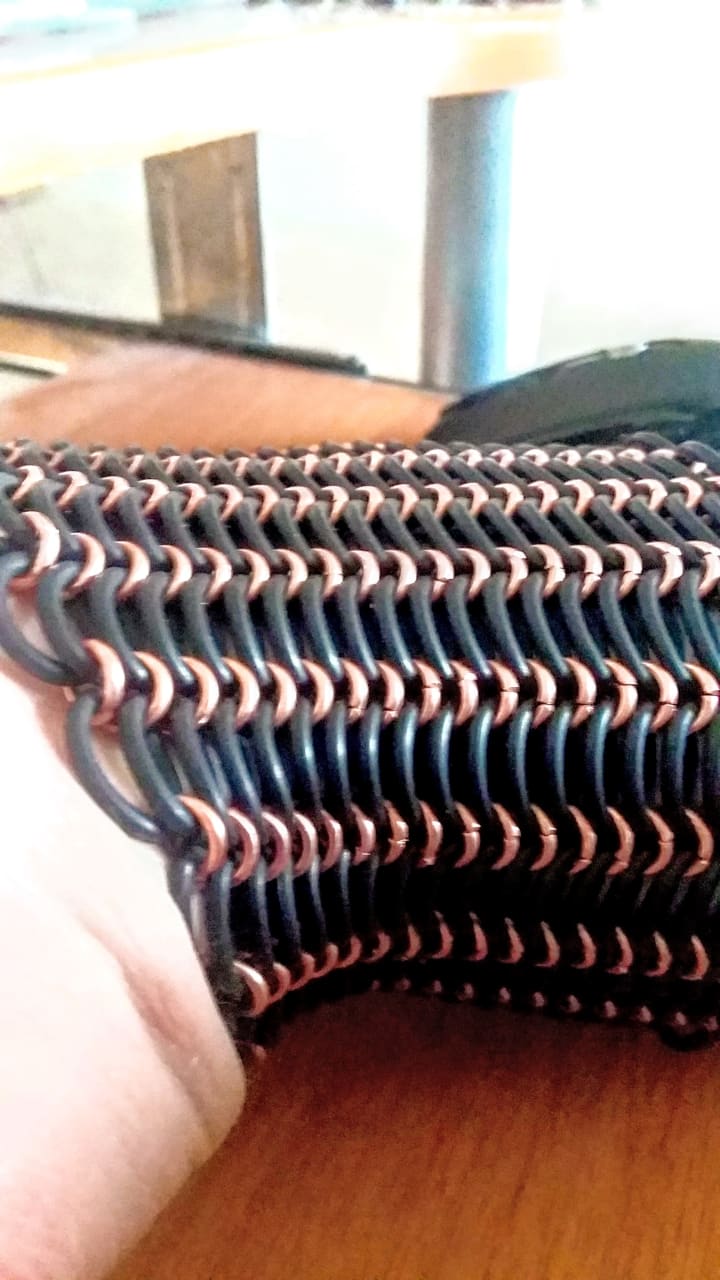
When it comes to materials, stainless steel is slightly harder to work with because of its temper and higher springback, or tendency to return to the shape it was in before, but because it’s corrosion-resistant and durable it is an excellent choice for chainmaille crafts. For softer materials, aluminum and anodized aluminum is cheaper and gives a good variety of color options.
Brass, bronze, copper, and so on are all softer metals to work with as well, but they tend to tarnish or oxidize when worn for long periods of time and require regular upkeep to retain their shine. I, personally, like working with anodized aluminum, stainless steel, and titanium - the latter of which can be hypoallergenic and extremely resistant to corrosion or damage, but is significantly harder to work with than even stainless steel.
So, while this isn’t meant to be a detailed treatise on chainmaille, I hope it nonetheless left you knowing a little more knowledgeable on the topic and maybe even willing to give it a try yourself. There are dozens of websites dedicated to the craft, both teaching people and supplying people with materials for it, so the internet is definitely your friend in this case.
I highly encourage looking into the different weaves and projects people have come up with and trying to replicate your own. It’s a time consuming hobby, but it’s a fun and rewarding one if you have the time and patience for it, and every piece I’ve made has been a great conversation piece or just a neat little bauble to give to friends and family for the holidays and special occasions.
That, I would say, is the best benefit of learning how to make chainmaille - after a certain point, you know how to make all sorts of jewelry or accessories, and then holidays or gift-giving events are cake, because you barely have to spend a penny, and you can hand-craft a beautiful or cool present for anyone with just a few hours’ worth of time and less than twenty bucks’ worth of material.
So, until next time, Make on!
About the Creator
Taylor Inman
I'm a Computer Engineering major who enjoys reading, writing, fitness, and Crafts, and who occasionally writes stuff that can be published. Most is opinion, some is fact, a good majority is fiction - unless otherwise specified. Enjoy!
Keep reading
More stories from Taylor Inman and writers in Lifehack and other communities.
How to Make Yarn from Plastic
Plastic yarn, or Plarn, is a material used by crafty DIYers and recyclers for some time. It’s easily available (since it's made from plastic bags) and made quickly with just a few steps in a couple of different methods and can be used to make all sorts of useful things or cool decorations. People online have created bags, laundry baskets, purses, placemats or wall tapestries, and more!
By Taylor Inman2 years ago in Lifehack
STUCK AT A REMOTE CORNER OF NORTH EAST INDIA, AGAIN!
It had been a great outing up to this point, to one of the remotest and unique pieces of Arunachal Pradesh. We had quite recently crossed the Gorsham stupa coming back to Tawang from Zimithang, scarcely a couple of kilometers from the Indo - China line, when I previously felt it. Initial, a slight wobble, which I attempted to disregard figuring it very well may be a result of the non-existent street that we were driving on. Then, at that point, areas of strength for a.
By prashant sonia day ago in Lifehack
Composing the Soundtracks of Our Life
Lionel Fabert is an award-winning composer known for bringing movie trailer soundtracks to vibrant life. Fabert has always loved music, beginning when he picked up the guitar at 9 years old. This love of music inspired Fabert to quit a great-paying job in corporate Paris and strike out as a freelance music composer and sound designer.
By Susan Scava5 days ago in Lifehack


Comments (2)
The need for a variety of details in the modern world is very great. Each element must meet certain requirements. Depending on its location, the part may be constantly exposed to adverse factors. Brass is an alloy of copper and zinc that has outstanding properties. The alloy is wear-resistant, does not corrode, has a beautiful golden hue, is ductile and easy to process. I advise you to learn about this in more detail here https://machiningtoday.com/brass-sheet-metal-fabrication/
Nice article. Well done on top story. Even to this day, we are starting to do a few more things by hand. To switch up my brain, I decided to wash my own clothes recently. What a refreshing insight that was.