
How to Make Custom Dolls
You want to make a gift for someone from the heart? You want to make it just for you? Keep reading to learn how to make your very own custom!

Have you ever liked dolls? Still like dolls? Have you ever wanted your favorite character from a show, movie, book, or even something from your own mind to be a doll, but they just didn't sell it in stores, or just didn't exist? Well, by coming to this page, I am going to walk you step by step into making your very own custom doll into anything you desire. Let's get started!
Choosing What You Want to Make
When it comes to doll customizing, you can either have an idea about what or who you want to make, but you can also go into it with absolutely no plan just as long as you have fun with it and you're happy with the result. I, personally, got into doll customizing very randomly. I was on YouTube about six months ago and in my recommended was a video for a doll repaint for an Eevee Evolution (Pokemon) doll from the channel Dollightful (Go check her out on YouTube) and it became a sickness ever since. Watching her video was very interesting and I wanted to try it because I love art and being creative but just never new what to do with it other than just drawing and painting. So after watching pretty much all her videos to get an understanding, I went out and got the supplies I would need for my first custom doll. Since this was my very first one, I wasn't about to get super crazy and buy all these things and just got the thing I would need like a Monster High doll (Big Lots), black acrylic yarn (Hobby Lobby), tiny detail brushes (Hobby Lobby) and black thread (Hobby Lobby also). Now, I didn't get fabric, paint, or needles, because I already had those things at home and it doesn't hurt to recycle old clothes.
What You Will Need
You don't need a lot of things to repaint your custom, but the process of making your doll could vary depending on what you make. You will need:
- A doll of any kind (Barbie, Ever After high, Monster High, Disney etc.)
- Straightener (help making the wefts)
- Elmer's Glue
- Needles and Thread (if you want to make the clothes)
- Mr. Super Clear (MSC) Optional
- Scissors and Exact Knife (Making clothes and cutting the doll hair)
- Nail polish remover or Acetone ( To remove the factory paint aka original face)
- Watercolor Pencils (optional)
- Acrylic Paint (To paint the face/any accents you want your doll to have)
- Acrylic Yarn of any color (Cheaper option for dollhair)
- Fabric (store bought or recycled to make doll clothes if you prefer)
- A Doll Stand (So you can display your doll when you're finished)
Step 1: Prepping Your Doll
You're ready to make your first custom. After taking your doll out of the box, take off everything she (or he) came with: clothes and accessories. After removing everything, run the doll's neck under hot water for about 30 seconds or so, then pull off the dolls head from the body. This makes it easier to handle the doll while you work on repainting the doll's face. Then, set the body aside and focus on the doll head. Now, cut off all the hair of your doll as close as you can and then throw it away. To get close enough to the head use an exacto knife. After all the hair is gone from the head, this is usually the part where other doll artists use needle nose pliers and remove the rest of the hair stubble from the neck hole for a more clean result (also because they re-plug the doll with better doll hair with a re-rooting tool), but if you're lazy like me and don't have pliers, leave the stubble, because you're just going to glue the yarn hair directly onto the head later on. Next, what you want to do is to get your nail polish remover or acetone to wipe off the factory paint all over the doll until it's a clean base. Now your doll is prepped and ready to start repainting it.
Step 2: Repainting the Face
When repainting the face of your doll, as I said earlier, you can either have a plan or go in without one. Personally, when I was was going to make my first doll, I wanted to make a mini me (Not the one in the picture above). So I thought, OK, I obviously want to to look like me as much as it can. With repainting the face you can do one of two things. As other doll artists, you first pin the hair away from the face into a bag or cloth and then spray MSC all over the head and wait 30 to 35 minutes for it to dry, and then you can start drawing on the face with the watercolor pencils. What the MSC (Mr. Super Clear) does is it makes a matte finish for your doll, but it also makes it easier to draw on the doll with the pencils. But if you choose to do this with MSC, PLEASE USE A VENTILATION MASK IN A VENTILATED AREA. I can't stress this enough, guys. Yea, MSC works amazingly with projects like this, but it's SUPER TOXIC TO INHALE. So if you're like me and stuff like that stresses you out, then using straight acrylic paint for the face is for YOU.
So, if you ARE NOT going to use MSC, then you're just going to paint free-handed like you would if you were drawing it with the pencils. A tip with painting with the acrylic is to saturate it down with water and to take it slow, but you can't use too much water because then it'll act as watercolors and you can't put too little water because then it'll be too clumpy and the paint won't lay flat.
Example: What You Should Have

Working on an Angura Kei repaint (May 2018)
When painting the face free-handed, start the the whites of the eyes and work your way out and do the eye brows last. Do at least three or four coats of white watered down paint and let it dry between every layer in the eye molding of the head (if you just follow the molding). In my advice, do the eye whites, then the eye shape, then eyelashes, the the pupils, and when you're done, maybe add some fake eyelashes to make your doll more life-like (E.L.F sells them for $2 and they make four pairs for future custom projects). After some time, and possibly some swear words, you're done with the face! Good Job!
Step 3: Making the Hair
The next step in the custom is making your own personalized doll hair out of yarn or yarn wefts. They are very easy to make. First, get 100 percent Acrylic Yarn in any color of your choice or whatever the theme of your custom is and cut long strands (At least ten inches). Then gather at least three or four strands at a time and wrap them at a base tightly.

Like so in this picture (picture is off of Google from search "yarn wefts ")
After you tie them down, unravel the yarn (this makes brushing it out easier), then after all the yarn is unraveled, take either a comb or pet brush and start brushing out the yarn until it's thinned out (you're going to get a lot of extra fluff, so recycle it for future projects). After it's brushed out, get a flat iron, on a low setting, and gently run it over the brushed out yarn strands and then you'll get get the end result in the picture above. Keep repeating this process until you have enough to fill the head of your doll. After you have enough hair, get Elmer's Glue, a pinch of yarn hair, and glue it down flat on a flat surface (I recommend a plate) and wait for at last an hour for the wefts to dry. When they are dry, peel them off the surface and trim off the extra dried glue for a sharp finish. One weft at a time glue from bottom to top of the head. Before long, your custom will have a full head of hair and you can cut to length as you please and style it how you like.

The wefts should look like this (Mozekytos photo under google weft search)
Step 4: The Clothes
Now with this step, you can either make your doll clothes, buy them, or have someone make them for you; or you can just use the clothes that the doll originally came with.
If you do choose to make your own clothes, you can look up patterns on Etsy or on the general internet. Again, it just all depends on the doll you make.
For shoes, if you like the shoes the doll came with but they are just one color and you like the design of them, then you can use watered down acrylics again to make them to match your design.
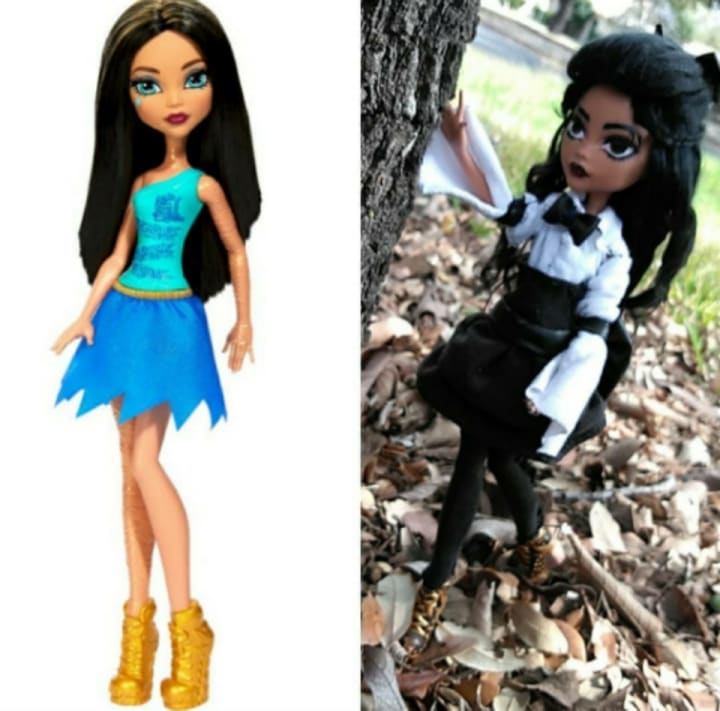
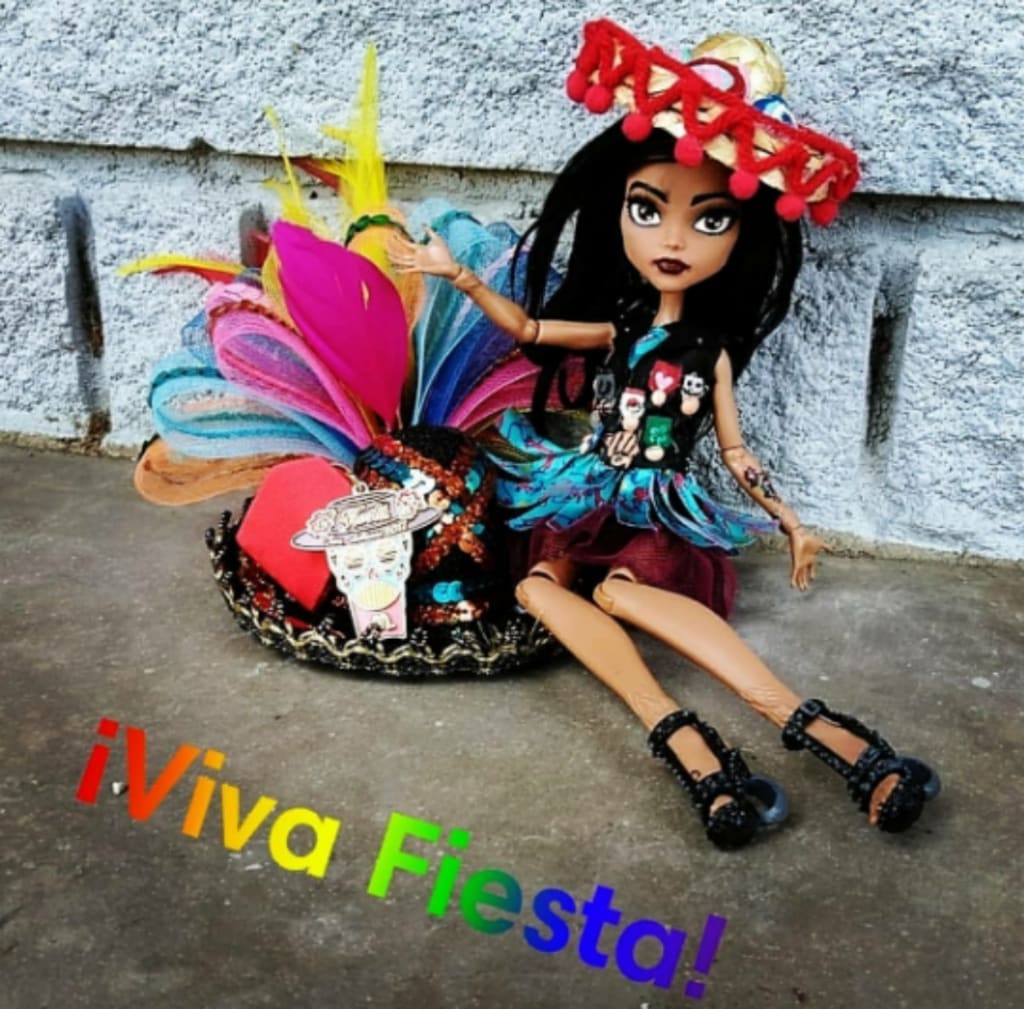
Before (Left) and After (Right)of my first custom. Go follow my Instagram @samanthasterling1989 for more pictures c:
Conclusion
So there you have it! All the minimal steps into making your very own dream custom doll! I hope that you liked my tips, and have fun making your custom! It truly is a zen and cool hobby to get into, and very time consuming. I'll probably post more about how I made my other customs, so stay tuned, and thank you for coming to my page!
About the Creator
Keep reading
More stories from Samantha Sterling and writers in Lifehack and other communities.
Meaningful Inexpensive Mother's Day Gifts
Mother's Day is closing in and you're trying to figure out what you want to do for your Mom, but you don't necessarily have massive amounts of funds to buy her something extravagant. Well, you came to the right place! I'm going to give you a couple of ideas for gifts that you could do for your Mother that will mean a lot to her but also save you some money. Now keep in mind this isn't JUST for Mother's Day; these ideas could also be for Father's Day, birthdays, Christmas, or practically any occasion.
By Samantha Sterling6 years ago in Families
The history of Lawn mower
The invention of the lawn mower stands as a pivotal moment in the annals of technological innovation, reshaping not only the landscape of gardens but also the fabric of daily life. Its significance reverberates through history, heralding a transformation in lawn care practices, liberating homeowners from the arduous labor that once defined the upkeep of grassy expanses.
By GardeningTools6 days ago in Lifehack
Tips to Budget During Your Retirement
Whether you have saved for your retirement for many years or just started, it is important that you spend your money wisely. If you don't set a budget during this time, you may end up going through all of your money quicker than you ever thought possible. Even worse, you may end up in debt, spending money that you don't have.
By Shelley Wengera day ago in Lifehack


Comments
There are no comments for this story
Be the first to respond and start the conversation.