
How to fill a raised bed
A cost-efficient approach to filling a raised bed


Filling up a raised bed with different ingredients in many ways is a better alternative than filling it up solely with soil. I will share with you today how I filled my raised bed and how it produces the most intense, vibrant flavored-fruits.
First, check out the video below on how I made my own raised bed from scratch following his instructions.

His instructions were incredibly helpful and thorough in his video and his personal website:
https://dallavita.com/2020/04/28/building-a-raised-planter-bed-with-a-trellis-diy/
*Shout out to Dalla Vita for putting that hard work into the video and the blog. Viewers like us appreciate it.*
Now, let's fill up our raised bed. I filled it up using the lasagna method, which is when you layer different organic materials on top of one another. There are multiple ways to go about it - there is no one right way. However, it is advised in the gardening world that you 1) alternate layers (for example: bottom layer is carbon, then second layer is nitrogen) and to 2) layer the bottom with any carbon-source material. In my case, I used woodchips.
What are nitrogen and carbon materials?
Nitrogen-rich material can vary from vegetables, spent coffee waste, and even urine.
Carbon-rich materials can range from dried leaves to woodchips to many more other things!
You can also add in other essential minerals like calcium from eggshells.
As you can see there is no one right way.
I retrieved the woodchips from the local mulch yard, called Municipal Mulch Yard. There are other facilities where you can pick up free woodchips and even compost, however, some of the facilities may only be open a couple days of the week.
Below is an online brochure of the nearest locations in Los Angeles. There are more venues that are not listed in the brochure. In the near future, there will be another post listing on all compost/mulch facilities in the Los Angeles county.
The bed itself was 2 feet deep. That gives us 24 inches.
TOTAL OF SIX LAYERS
BOTTOM LAYER / FIRST LAYER
The bottom layer was a thick six inch layer of woodchips. 24 inches - 6 inches = 18 inches.
SECOND LAYER
The second layer was two inches of nitrogen-rich vegetable and fruit scraps that we've accumulated over a week. I also added flower petals, dog hair, and fallen fruit from our persimmon and lemon guava tree. 18 inches - 2 inches = 16 inches.
THIRD LAYER
I added pine needles, leftover sawdust from the raised bed, and dried leaves. The third layer was 2 inches. 16 inches - 2 inches = 14 inches.
FOURTH LAYER
I added 2 more inches of nitrogen-rich materials with homemade compost and free spent coffee grounds from Starbucks. 14 inches - 2 inches = 12 inches.
IMPORTANT: In order to not burn the roots, I decided to only fill up half of the bed using the lasagna method and then fill the remaining half with compost and soil.
FIFTH LAYER
For the fifth layer, I went online to Craiglist and found free topsoil. This layer was six inches. 12 inches - 6 inches = 6 inches.
Disclaimer: Sometimes, other gardens may carry diseases that can carry on to other plants. The soil may also have seeds that can spread weeds.
SIX LAYER
The final layer consisted of mixing compost, steer manure, and some potting soil with vermiculite*. The ratio was 75% organic potting soil* and 25% compost + steer manure. The potting soil will offset the heaviness from the compost and manure. This is really important for baby seedlings. They need a well drained environment to thrive. It may sprout, but the produced fruit may be lacking in quality and taste.
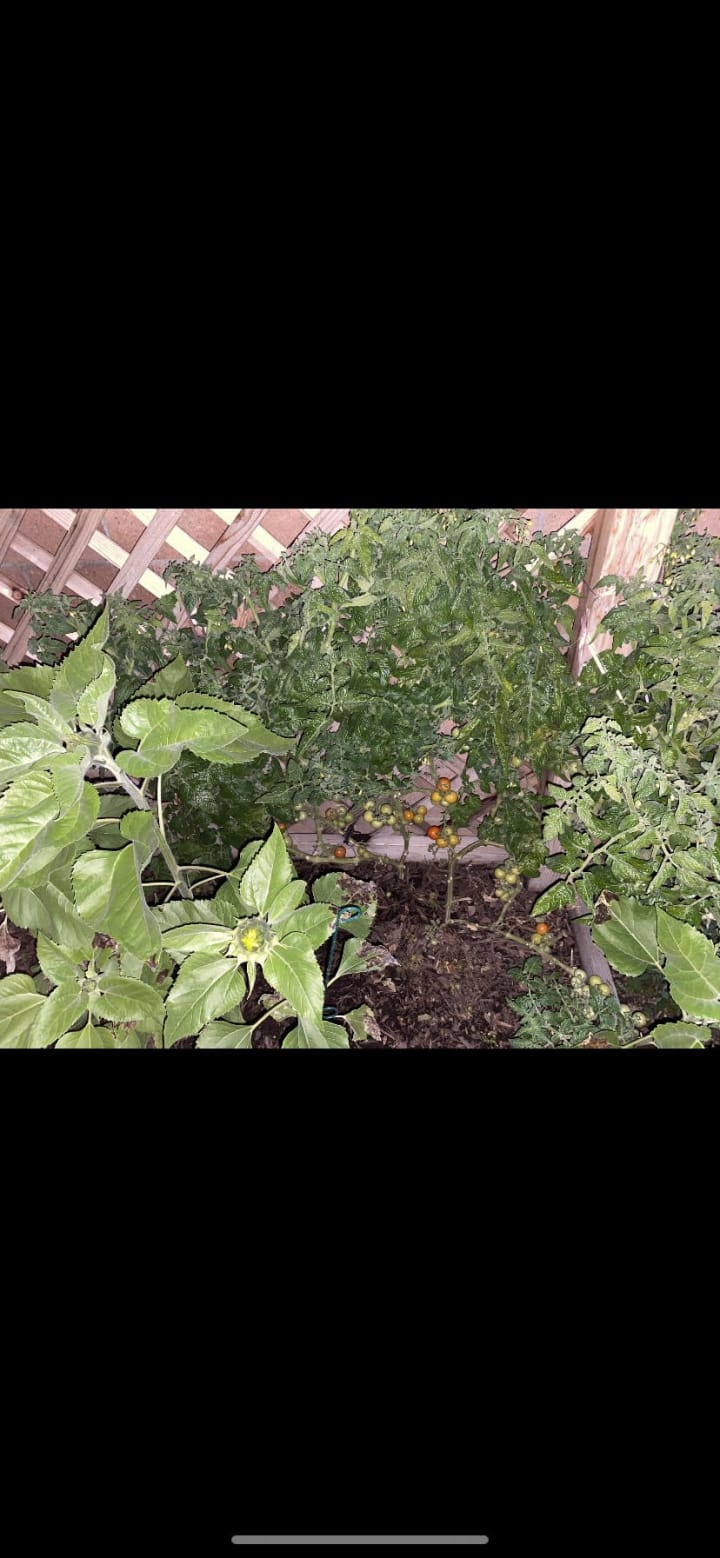
The results have been incredible. Interestingly enough, the tomatoes have taken a great liking to the rich, organic soil.
This process requires manpower and can be quite hard on the body. However, once you set up the foundation for success, it will be smooth sailing...in time.
And gardening is all about time.
I hope you enjoyed this post.
Bye!
About the Creator
Enjoyed the story? Support the Creator.
Subscribe for free to receive all their stories in your feed. You could also pledge your support or give them a one-off tip, letting them know you appreciate their work.
Keep reading
More stories from Run Tsunade and writers in Lifehack and other communities.
Solo in South Korea
South Korea has become a hotspot for many foreigners to visit and even permanently stay. As the world became more globalized and S. Korea ousted from the shadows, people took notice and visited this bold, honest, and creative culture, which has molded Korea to be the vibrant community and near-perfect host for foreigners that it is today. Traveling to South Korea is one of the best choices anyone can make and below I've compiled a list of places to go to and things to do in S.Korea.
By Run Tsunade4 years ago in Wander
Get Your Perfect Fit: Online Glasses Ordering Made Easy
Hey there, specs fans! From shades to cheaters, glasses are everywhere these days. In Australia, they're an essential accessory for tons of people. But getting a new pair can be a smooth process, especially with the fantastic Australian online optical store offering easy ordering.
By Charlotte Loin3 days ago in Lifehack


Comments
There are no comments for this story
Be the first to respond and start the conversation.