
How To Install Decking: A Step-by-Step Guide
deck builders melbourne
Whether you're an expert at do-it-yourself decking or have hired a construction professional to construct your foundations and framework, you can easily lay your own decking in a single day. With the right information, products, and forethought, you can save money while reaping the rewards of your own labour.
Consider beginning Saturday morning with a construction site and concluding the day with a barbecue on your brand-new deck.
Are you ready to begin building your deck? Let us begin!
1. Collect your tools
Having your tools on hand will significantly simplify your work. However, the toolkit required for the job will vary depending on the type of decking boards used.
For instance, if you choose Modwood Decking, you will not need any special tools and can install it using conventional fasteners, including concealed options. If you choose timber decking, you may require additional hardware such as screws, pre-drilling, and countersinking tools.
To make your life easier, we recommend that you use a power saw for cutting and an electric drill for repairing. Additionally, using a measuring tape, spirit level, and twine for layout will ensure that your decking is installed evenly.
2. Decide on your decking material (composite or wood?)
There are numerous beautiful decking options available these days, ranging from composite to wood. These all meet unique requirements, so it's critical to select the one that's right for your job. Modwood Decking is a high-quality composite decking material that is ideal for backyard decks. It has the warm appearance of wood and will last for years without the need for maintenance.
It is available in a variety of sizes, colours, and finishes, which means we can accommodate a wide variety of styles and designs. Notably, for your project, it is simple to install, does not splinter (making it ideal for use around children and pools), and does not require additional waterproofing or preparation.
3. Measurement and layout of the site
Calculate the size of your deck framework to ensure you purchase the appropriate quantity of materials for the job. Taking the time to do so will save you money and time by eliminating the need for repeat visits to the supplier's yard. Verify the width and length, taking into account any unique features of your home.
After completing this step, you can confidently cut your decking boards to size if necessary. It is recommended that you cut boards only when a shorter length is required. This saves you time and ensures that the lengths are more consistent.
4. Arrange the first board
Now comes the exciting part – laying your first board. Your first board must be straight, as it will influence how your subsequent boards sit next to it. Verify that it is true by aligning a string line with the outside edge of the deck's frame using a spirit level.
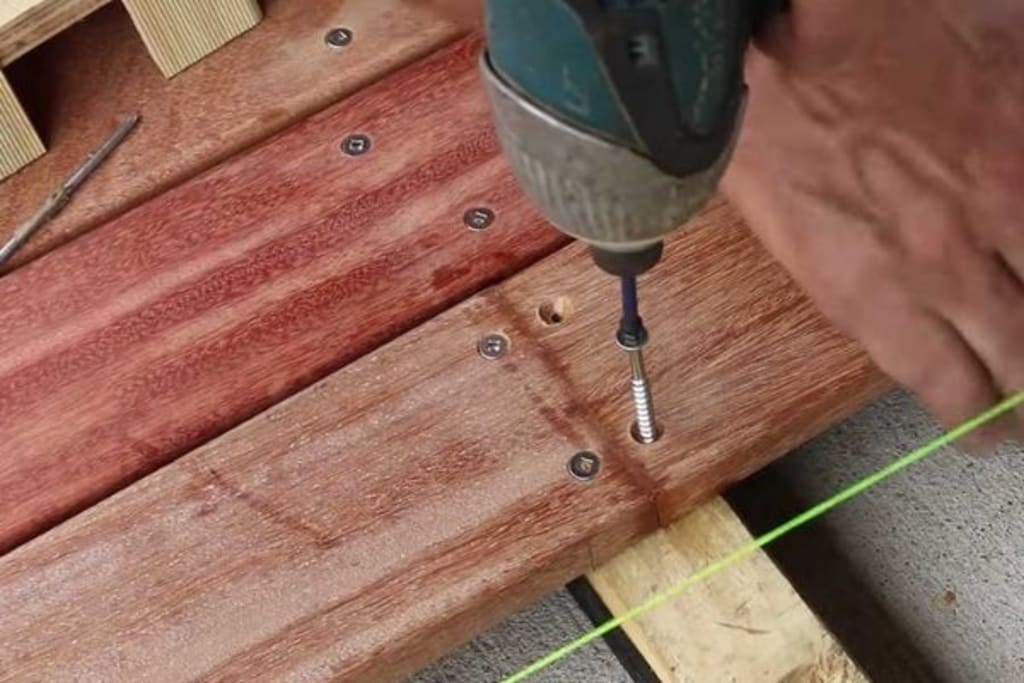
5. Ensure that your decking board is secure
Secure the first board to the joists once it is straight. Whether you fasten the decking through the top or side depends on the fastener you choose. Regardless, they must be installed in the centre of the joists to keep the decking boards secure. If you use exposed fasteners, keep them straight to maximize aesthetic appeal – after all, you want your deck to look good.
6. Position and repeat
Congratulations on receiving your first board! It's now simply a matter of repeating the previous step until your deck's framework is completely covered, leaving a 3-6mm gap between each board to allow for expansion (depending on the type of decking used). To maintain a consistent gap between your boards and an aesthetically pleasing deck, you can use spacers or wedges. Another useful tip is to simply drive a nail into the joist adjacent to each decking board and then flush-mount the next board.
If multiple boards are required to span the length of your deck, ensure that they join together over a joist. Stagger these joins to avoid a continuous gap running the length of your deck. Additionally, it is critical to lay your boards in small groups to allow for adjustments as you progress. This can be accomplished by checking the straightness of your decking every five or six boards with a spirit level and string line. Alternatively, you can hire deck builders Melbourne to complete the task.
7. Finish by trimming the ends
After installing and securing your decking, trim any overhanging boards to approximately 20mm above the edge of the deck frame. By cutting all the boards to size at the end, you can ensure a consistent finish.
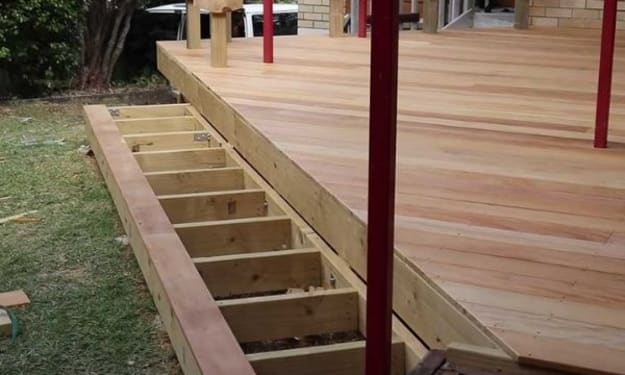
8. Include finishing touches
To finish your deck, conceal any exposed frame elements by attaching boards to the formwork. This will complement the decking you've chosen and give your project some polish, allowing you to enjoy our final step.
9. Take pleasure in
You're finished and you have installed the deck. A few hours of labour result in years of outdoor enjoyment. All that remains is for you to sit back, unwind, and enjoy the fruits of your labour.
Conclusion
Finally, if you'd rather skip this final step, contact our team and we'll be happy to supply the decking and assist you in arranging for installation.
About the Creator
Enjoyed the story? Support the Creator.
Subscribe for free to receive all their stories in your feed. You could also pledge your support or give them a one-off tip, letting them know you appreciate their work.
Keep reading
More stories from Steven goldberg and writers in Journal and other communities.
Reasons To Hire A Professional Deck Cleaner
Australians still love the outdoors in all seasons, including winter, spring, autumn, and even the middle of winter. Some of these areas are in dire need of restoration. You may be interested in restoring your exterior and interior surfaces back to their former beauty. It is possible to revive a deck that has been neglected by using pressure cleaning and deck staining. There are two ways to restore a deck's beauty, durability, and beauty.
By Steven goldberg2 years ago in Journal
10 Tips for Choosing a Lake Tahoe Wedding Venue
Imagine exchanging vows with the crystal-clear lake as your backdrop or celebrating with loved ones under a canopy of towering pines. South Lake Tahoe wedding venues offer a unique blend of natural beauty and stunning views that will create unforgettable memories for you and your guests.
By Mary Richards2 days ago in Journal


Comments
There are no comments for this story
Be the first to respond and start the conversation.