
6 Hours Behind Enemy Lines
The Glider Assault That Paved the Way for D-Day
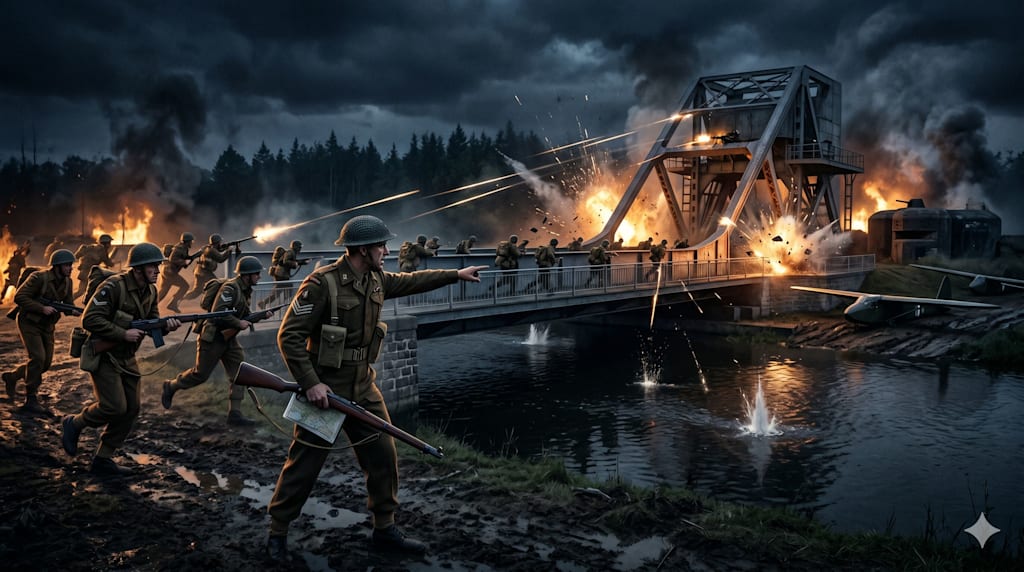
Hours before the first boots hit the beaches of Normandy, a handful of British soldiers dropped silently out of the midnight sky with a single, desperate directive: take the bridge, and hold it until relieved.
Everyone is familiar with the overall invasion of Normandy on June 6th, 1944, what made it successful were all the small battles and operations that took place from Allied airborne and glider troops behind enemy lines early that morning. One critical event was the seizure of the Pegasus Bridge over the Caen Canal. The Bridge was seized by a unit from the Oxford and Bucks Light Infantry, who were led by Major John Howard. Howard’s swift leadership and decision making led to his unit successfully capturing the bridge, which would later be used for Allied forces advancing east from the Normandy beaches.
Preparation and Planning
Prior to the invasion, Allied commanders knew that securing the Pegasus bridge and a secondary bridge nearby would be difficult and selected Major Howard for his ability to be flexible in his planning and dedicated in his work (Hill, 2014). Howard prepared his men through countless rehearsals before the mission and taught new lessons after each run. Through these rehearsals, Howard built a level of trust with his platoon leaders. This trust allowed him to delegate authority and let his subordinates take control of the situation without his constant presence. These tenants are what make a leader effective and influential (ADP 6-22). After all the preparation, Howard had done all he could prior to stepping off to ensure mission success. He knew that once actions on the objective began, he would be limited in his ability to control his entire company.
The Assault
At 0016 on June 6th, Howard and his men landed in their gliders and began the mission. Howard directed the two platoons with him to secure the Pegasus Bridge while the others secured the second bridge that was nearby. During the assault, one of the Platoon Leaders was killed and the other three were wounded. Despite this, both bridges were taken in under ten minutes (Hickman, 2004). This was in part due to Howard’s leadership and coordination between all the Platoons.
Hold Until Relieved
Once the bridges were secured, Howard informed his command, but he was not done. It was still hours before the main invasion force would land, and Howard was instructed to “Hold the bridge until relieved.” Due to this order, he had to establish defenses and prepare for a counterattack. With most of the leadership in his Company wounded, he led the defense. Howard instructed the platoons on where to emplace to best defend the two bridges that they had seized. He also used the Sappers that were attached to him to inspect the bridges for any damage and or explosives that may have been rigged (Hill, 2014). Throughout the nigh,t his company fought through multiple skirmishes and defended the bridge until friendly forces pushed to their location. This action of successfully setting up an area defense covers multiple principles of Mission Command, hence proving that he was an effective leader. He fostered competence and tactical knowledge in setting up a defense, he had strong mission orders and properly disseminated them, and he took a disciplined initiative to successfully accomplish his tasks (ADP 6-0). Through the principles of Mission Command, Major Howard had clear and direct command and control of his unit and the battlefield. Without his leadership and the accomplishments of his men, the bridges may have been destroyed which could have delayed the Allied advance across France. Although he only commanded a company, Howard served a pivotal role in the invasion of Normandy.
References
Headquarters, Department of the Army. (2019). ADP 6-22: Army Leadership and the Profession. Retrieved from https://armypubs.army.mil/epubs/DR_pubs/DR_a/ARN20039-ADP_6-22-001-WEB-0.pdf.
Headquarters, Department of the Army. (2019). ADP 6-0: Mission Command. Retrieved from https://armypubs.army.mil/epubs/DR_pubs/DR_a/ARN18314-ADP_6-0-000-WEB-3.pdf.
Hickman, Mark. (2004). Major John Howard. Retrieved from https://www.pegasusarchive.org/normandy/john_howard.htm.
CPT Hill, W. Paul. (2014). Mission Command at the Tactical Level: Operation Deadstick. Retrieved from https://www.benning.army.mil/Infantry/Magazine/issues/2014/Jan-Mar/Hill.html.
About the Creator
Sam Shroyer
I am an active-duty Engineer Officer in the US Army with a BS in Environmental Engineering from West Point. My previous positions include the following:
- Assistant Training Officer
- Sapper Platoon Leader
- Company Executive Officer
Enjoyed the story? Support the Creator.
Subscribe for free to receive all their stories in your feed.
Comments
There are no comments for this story
Be the first to respond and start the conversation.