Putting together a Poppy Flowered Centerpiece
By : Carrie Bertschy

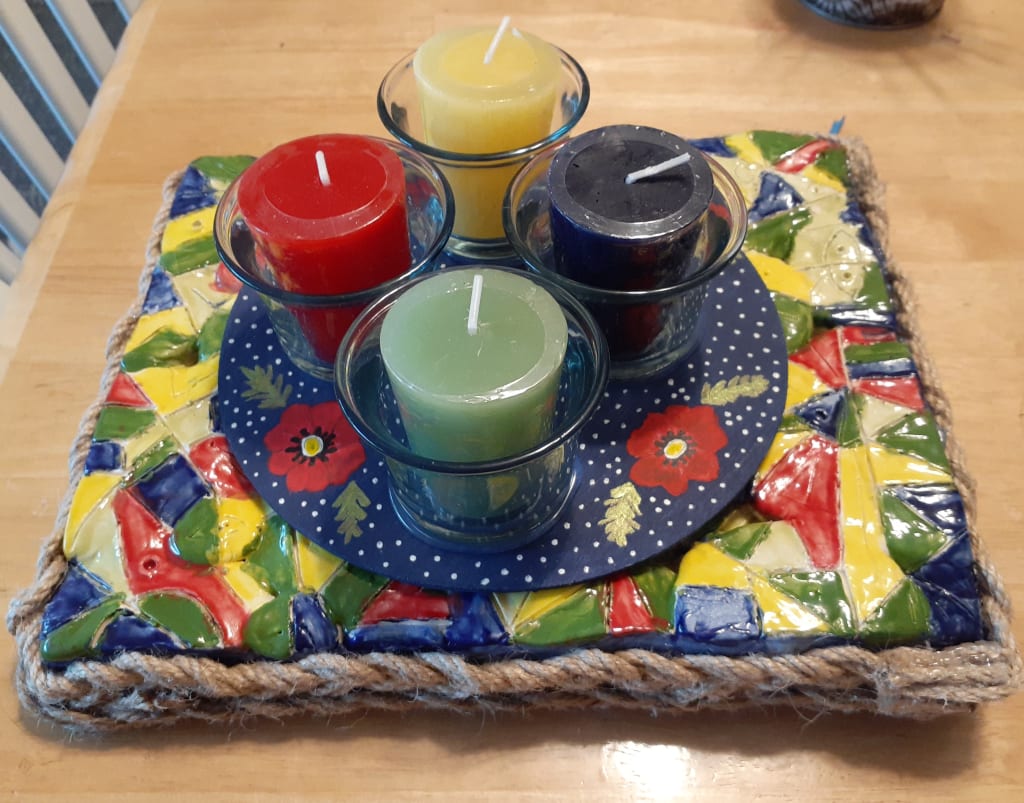
This is a craft project I wanted to share with others about how to make a candle centerpiece. I really enjoyed putting this together and it involved a lot of different items. The centerpiece is very bright and colorful. It has some nice colors such as red, blue, yellow, and green. I used 5 different items- a ceramic tile, a wooden circle, twine rope, candle holders, and acrylic paints. The theme of this centerpiece is poppy flowers and it involves four steps in putting it together. I will start with the ceramic tile and work my way to the candle holders.
For the ceramic tile, I was attending a ceramics class at Wave Pool Gallery and put together this idea. Ceramics class was a great way to put together all kinds of pieces that involve clay. This ceramic tile is made from a gray clay and was carved with a tool to get the affect of the triangles. It was fired in a kiln and I glazed the tile with the colorful ceramic paints. The ceramic tile was fired again in the kiln and it brought out this beautiful, colorful look. I took the tile home with me and came up with the idea for the centerpiece.
To start making the centerpiece, you need twine rope, fiskars scissors, a glue gun, a plain wooden circle, and glass candle holders. The first step is to use fiskars scissors to cut 6 long pieces of twine rope and braid them. You may have to do this at least 5 times depending how the length works out to put around the tile. Keep using the fiskars scissors until the twine rope is completely ready to glue onto the tile. When using the glue gun, you have to be careful of where you place the twine rope- you don't want to burn your fingers. Once the tile is completely covered on the bottom, you can wrap the rope around the outer edge. Let the glue dry with the twine and you can move onto the next step.
The second step involves getting the plain wooden circle into the theme you would like to have on it. I chose to do poppies for the centerpiece theme. Basically, you take the wooden circle, paint it navy blue, and let it dry. After the wooden circle is dry, you use a strong glue, like Gorilla, and place the wooden circle in the center. You need to let this dry overnight to make sure it is secure on the tile. In the morning, the ceramic tile should be ready for the the third step.
For the third step, you will be gluing the candle holders in the position you would like them to be placed on the wooden circle. I arranged 4 candle holders in the center of the wooden circle, but you can do as little as one candle holder if that is how you would like the centerpiece to be set-up. When you glue the holders, you can use the glue gun again. After placing and gluing the holders, let them dry and cool down. The last step is my favorite one- painting!
With the centerpiece, you want to come up with an idea that you would like to include on the wooden circle. I painted the poppies in between the candle holders and let them dry. Acrylic paint dries very quickly, so it makes it easier to continue on with the painting. I added white polka dots along with the poppies to give it a stand out appearance. After the painting is over, you add the candles to the candle holders. When it is all put together, you have a very creative centerpiece to put on a table indoors or outdoors. The candles can be any color and you can even use citronella candles for your centerpiece outdoors.
This poppy centerpiece was a lot of fun to put together and all you need for the materials are: a ceramic tile, fiskars scissors, twine rope, a plain wooden circle, acrylic paints, and glass candle holders. I hope you have the opportunity to try this craft project and use it indoors for special occasions or outdoors with citronella candles to keep the bugs away. It also could be a nice addition to your table. Centerpieces come in many shapes and sizes. This poppy centerpiece was one of my favorites to put together. I hope the next time I get to go to ceramics class, I come up with another idea to make another type of centerpiece. Enjoy!


Comments
There are no comments for this story
Be the first to respond and start the conversation.