

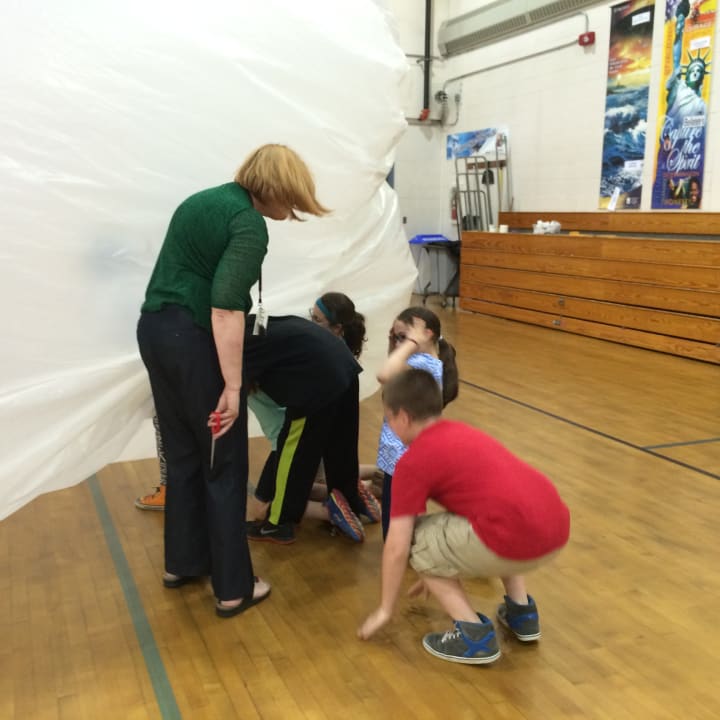
“We are going to blow things up,” I said to my class. Their eyes lit up and even the most sullen of my middle school students looked up from the phones they thought I couldn’t see. I’m sure they were thinking explosions, but I meant inflatables, giant inflatable structures.
At first it was hard for them to envision, but they got a better idea of what I meant when I explained that they were like bounce houses that don’t bounce. They are structures you can go inside. Then I showed them examples that I had built with students before.
Giant inflatables are pretty simple to make. They are made from sheet plastic and packing tape and inflated with a box fan. As school projects go, they are relatively inexpensive. Cost is always a consideration for public school teachers and it prevents me from selecting some activities. Once constructed, the structures are portable and can be re-inflated.
From a teaching perspective, this project fosters teamwork and is practical experience in measurement, model-building to scale, precision, communication, problem-solving and using tools. I have built about ten inflatables with my classes so far, and I have refined the process over the past five years.
I confess that I am not your typical teacher. I have earned a reputation as a risk-taker with a t-shirt that says, “What Was I Thinking?” This comes from my natural curiosity and my previous work as an Artist in Residence for my state’s Arts Council. My primary work as a classroom teacher has been enrichment for students identified as gifted, which allows me to develop creative activities that are fun for me, as well as for my students. My classes are dedicated to hands-on explorations of topics that are interest-based.
Our projects often involve using different tools and materials. Every year my students enter a business plan competition and inevitably at least one project involves sewing, so they learn to make patterns and sew. Last year we had to learn leatherworking since my students’ product was a device that keeps the reins of new horseback riders from dropping. We also participate in the Global Monster Project, where we build a monster based on the descriptions of its body parts contributed by other kids from all over the world. They are usually very big and often involve lots of hot glue, PVC, and power tools. The danger inherent in hot, sharp, poke-y things keeps the attention of middle schoolers, but it is definitely more mess and risk and noise than many teachers are willing to endure.
I learned about building inflatables at a professional development workshop with C.M. Judge, an intermedia artist from Massachusetts. In the workshop Judge shared her process and some examples of the work she had done in school residencies and then the participants worked together to build a structure over the course of a few hours.
I was hooked!
I returned to my school and immediately undertook to build not one, but three structures. One group of students was participating in our school district’s annual Shakespeare festival, so they suggested that we build a model of Shakespeare’s Globe Theater. Another group had been exploring architecture so they suggested building some sort of home structure. The third group was studying Ocean Life, so they wanted to build a model of the layers of the ocean, similar to a project that Judge had done. What was I thinking?
Sheet plastic comes in black and clear, but I have also found white and dark gray. It comes in thicknesses up to 6 mil. Our local hardware store had clear rolls that were 10, 12, and 20 feet wide and 20-50 feet long. We had to order special colors in a bigger roll on-line through the catalog the maintenance department used. I decided to use clear duct tape for these structures but later discovered that heavy-duty packing tape and 2 mil plastic works just fine. The heavier gauge plastic and duct tape adds weight to the overall structure that isn’t necessary.
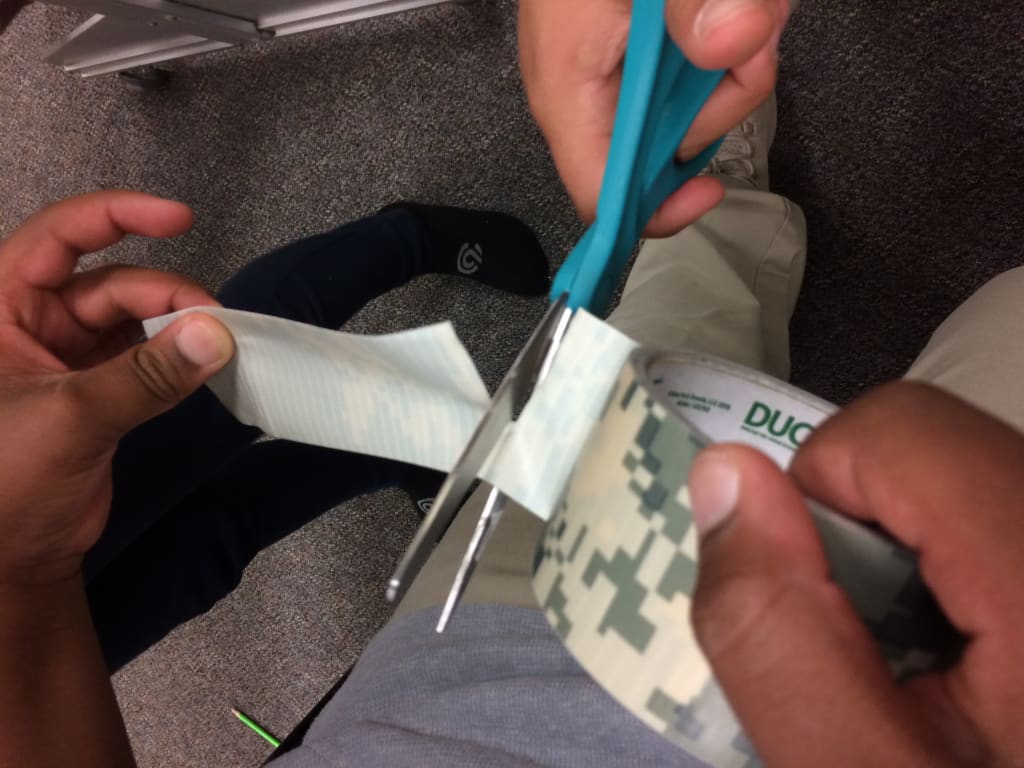
Besides plastic and tape we needed markers, measuring tools, ¼” grid graph paper, cellophane tape for the models and scissors, large and small. We used metal measuring tapes of different lengths, cloth measuring tapes, rulers, yardsticks and a big protractor. We used small scissors to construct models on graph paper and big scissors-8” and 10” -for cutting plastic and tape for construction. As a teacher, I know how frustrating it is for kids to use poorly made scissors so I always provide Fiskars scissors for my projects. Someone donated some cheap scissors from the local discount store, but they broke or didn’t work. Nobody wanted to use those.

The basic organization of this project is coming up with a concept, constructing a scale model, selecting the group project from the many ideas presented, deconstructing the scale model to create a pattern, creating a cut list of pieces needed with dimensions, and breaking up into teams to measure, cut and tape.
In its most simple form, an inflatable tube can be constructed from a single sheet of plastic, without cutting anything. Simply roll out the sheet of plastic, tape the lengthwise edges together and seal the ends. This was the plan for the layers of the ocean model. They made three tubes of different colors of plastic. The clear tube was for the layers closest to the surface. The white, opaque layer was for the middle layers and the black plastic represented the abyss. The challenge of this structure was attaching the tubes together.
Connecting round shapes requires “feathering”- cutting ½’ slits along the end and weaving them together before taping. This is similar to the slits that need to be cut into the seam joining a sleeve and an armhole when sewing a garment.
Not all of the inflatables have been huge. Inspired by those tubes with waving hands at car dealerships and football games, one of my students made an inflatable genie for our mythological creatures zoo. We found a hair dryer that could blow cool air and had a low setting. He created a holder for it that resembled a magic lamp. He crafted the genie out of blue-green colored trash can liners and put it together with cellophane tape. When he turned on the hair dryer the genie arose.
The structures can be colored using Texas Markers, which are fat tipped felt “markers” that used to be used by grocers for their weekly sale signs. They come in a variety of colors and can be refilled. We discovered, however, that the fumes are noxious, and not appropriate for minors to use due to safety issues including flammability. They can only be applied to the exterior of the structures. I have fragrance issues so it was obvious that I would need to figure out something else to color the structures.
For the ocean tubes project we created fish and sea plants by covering cardboard forms with colored duct tape. These were suspended with fishing line from the top of the structure once it was inflated. We also suspended strips of thin, green plastic tablecloths for seaweed. Some students created fish shapes, cut and taped to the outer walls. In the darkest part of the ocean we used glow-in-the dark duct tape and paints to create phosphorescent fish shapes and used blinking LED lights for the tips of lantern fish and other fish eyes.
Because of the size of the log cabin structure and because it was the end of the school year which limited time, the cabin structure we made did not get painted. It was 12’x 15’ at the base, with a 14’ peak. Likewise, the Globe Theater model did not get paintd. We had taped off where we intended to paint the brown exposed timbers of the Tudor-styled structure.

I have since added fused plastic to my bag of tricks and it is a solution to the coloring dilemma, as is the line of spray paints that have come out for painting on plastic. Fusing retains an opacity that is desirable, but it is a lot to use an iron to fuse such broad areas. I learned about fusing from another project where my students made dresses out of fused plastic grocery bags as an example of recycling and upcycling. We created “fabric” by fusing hundreds of plastic bags by ironing them between parchment. We then cut and sewed the dresses using a standard dress pattern, finishing them with binding tape with Velcro closures. This was another “what was I thinking?” project, but it has led to a solution to coloring inflatables.
Another solution to coloring an inflatable is to use strips of duct tape. One group of students chose to build a hollow log with flowers and birds on top. We used thin strips of camo duck tape on the outside of the structure to create a bark-like texture without adding a lot of weight. The challenge with this structure was creating the colored details- flowers, birds, squirrel, that also inflated. Constructing and attaching the shapes to the log/tube was tricky. This is the only structure we have built that was too short to stand up inside- on purpose. The students wanted it to be more cavelike. It was very dark inside. It inspired another group of students to build an inflatable planetarium out of black plastic. Poking holes in the top does nothing to deflate the structure and from the inside it looks like a sky full of stars. They added a “campfire” with a battery-powered personal fan and red and yellow plastic fire and used the structure as a spot to tell campfire stories.
The actual measurement, taping and construction of these structures requires teamwork. One of my groups worked like a precision drill team. They consulted the cut list for the dimension needed. A few kids worked in pairs to measure and mark. They learned how to mark the lengths across the width of the plastic. Then they worked together to connect the dots to draw the cut line. The cutters cam right behind them. They labeled edges with the dimension and piece name (roof, wall, etc). Then the construction began. There were tape cutters, holders and tapers. They learned that it was better to use shorter pieces of tape than long ones. And how to keep the tape end from getting lost on the roll by putting a pencil at the cut. When taping inflatables, there should be little overlap of plastic, but no gaps. The edges need to “kiss.” This is what the holders do, hold the edges together so the tapers can place the tape, joining the seams. When the students work together and pay attention to what they’re doing, they can get a lot done!
The Globe Theatre was a whole other story. It was 20’ in diameter and 12’ tall with two boxes 3’ deep as the outer stairwells. I got the hare-brained Idea that we could make the outer wall in one sheet and attach the boxes separately. That’s 60’ feet of plastic that had to have 8’ cut off of the whole length of a side to make it 12’ wide (for the height of the wall). No space inside the school was big enough so we had to work on the lawn, dragging the very large piece of very heavy plastic and all of our tools outside every time. We had to be quiet so as not to disturb the children stuck inside their classrooms. They still came to the windows to wonder what in the world we were doing. I asked myself the same question!.
The day of the Shakespeare Festival came and we still had to piece the top and bottom on the Globe Theatre inflatable. The students had other responsibilities in the festival The day was everything I dislike about field trips. I like to control my uncertainty.
We forged ahead anyway, feathering and taping the almost 60’circumference of the circle, top and bottom. Thankfully there were adults to help wrangle the kids and assist with taping. One was a grandfather and retired pilot. When I explained that we were going to hook this white plastic monstrosity up to a box fan and blow it up, he was skeptical. So were the kids. They were weary of the cutting and taping and fussing and just wanted it all to be over. To be honest, it was my first construction and, even though I had experienced the inflatable at the workshop, I was skeptical, too. It was so heavy and so big and it was a high stakes venue for it not to work.
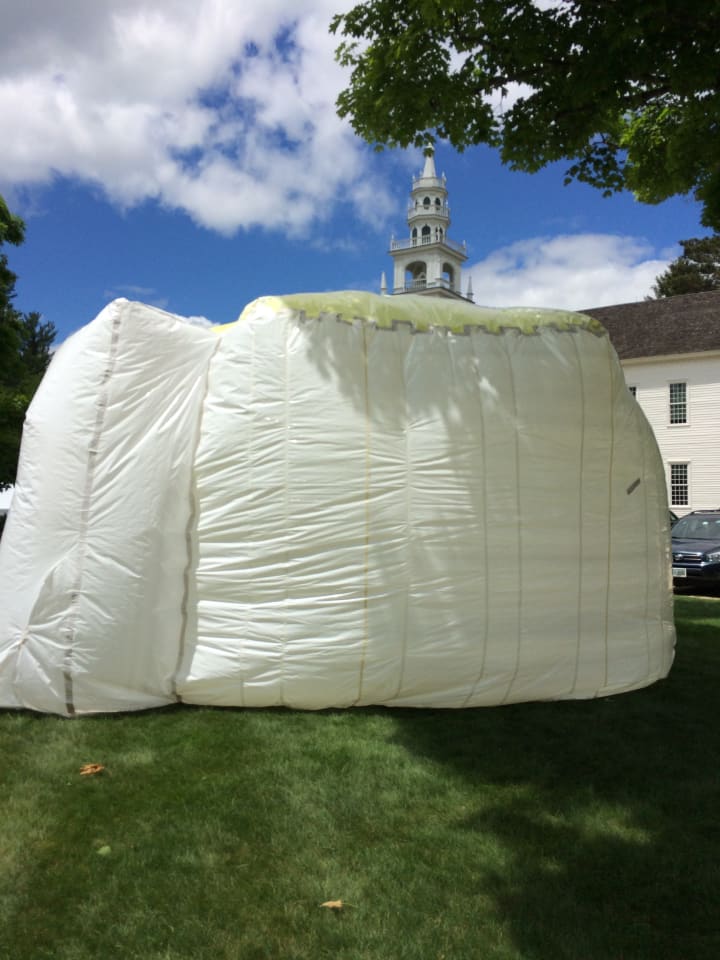
It took about 30 minutes to fully inflate. It was glorious to see the big white marshmallow, silhouetting blue skies, the spire of the town meetinghouse rising above it.
I had to make some adjustments to reinforce the entrance, which was a slit cut in the floor across from the fan. The weight of the structure sealed it closed when kids weren’t going in and out. Since that structure students have developed “doors” made up of overlapping and reinforced vertical plastic that make it easier to get in and out, especially for me, since it’s hard to get up once I’ve crawled in or out.
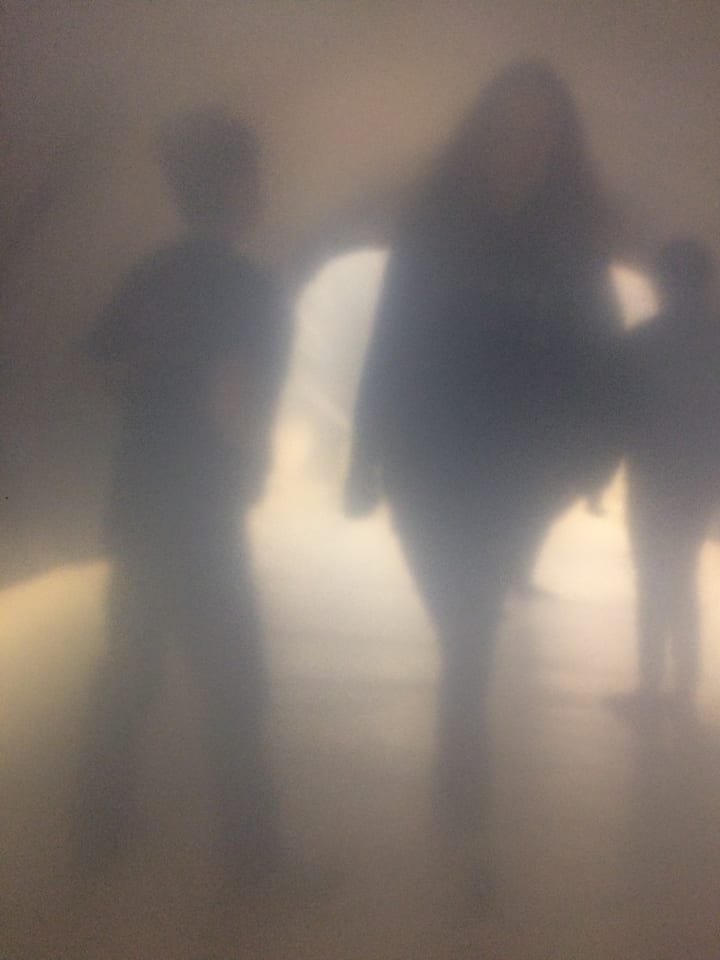
The kids who built the Globe were the first to go in. They knew that as long as the fan was blowing, it wouldn’t collapse and they wouldn’t suffocate. When we constructed the roof, we put a clear hexagon in the middle to simulate the open roof of the Globe. It let a shaft of sunlight in that was magic.
And what joy and wonder on their faces when the kids went in. Grampa was no longer skeptical.

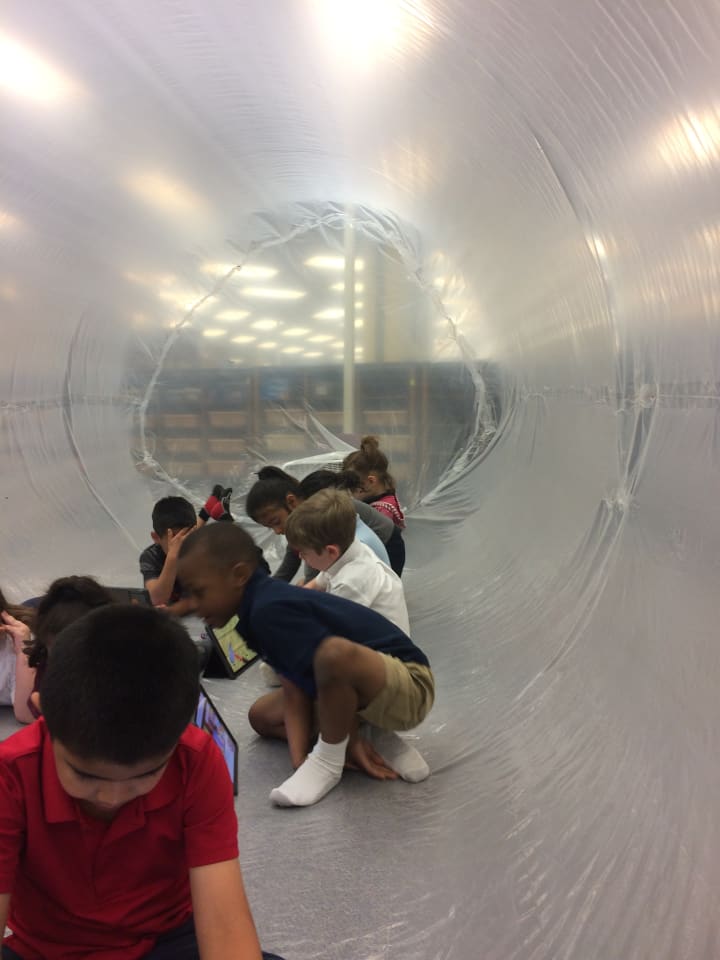
Every time I inflate one of the structures, there is that same amazement and wonder. When we inflated the big cabin, I sent a student in with my camera to take pictures from the inside. There was dancing and spinning like toddlers do, and laughter and joy, pure joy. My students are so proud to invite others in to enjoy the experience.

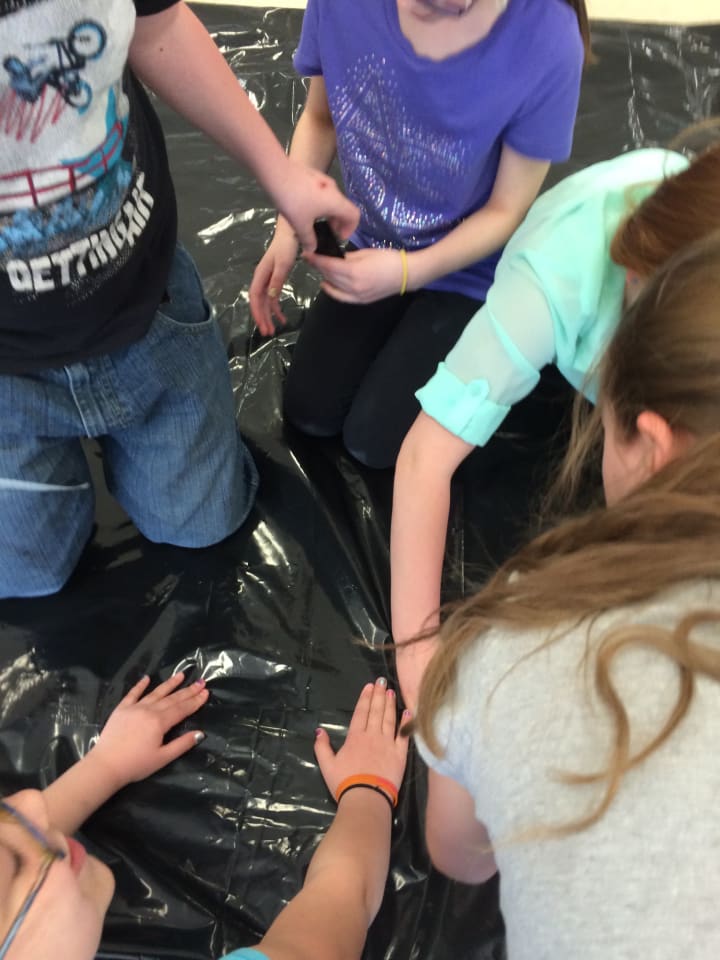
Deflating is also fun. The structures hold a lot of air and it has to be all squeezed out in order to fold and pack the plastic to fit in my car. In order to get the air out the kids lay down and roll down the length of the plastic. Then we carefully fold it in half or thirds and roll on it some more. The 5 mil and 6 mil plastic structures are very heavy and bulky. I have learned to bring rope or bungee cords to wrap them tight. In a pinch the extension cord for the fan works well, too
My husband has never adjusted to the amount of stuff teachers have- and I have a lot. The biggest challenge of these reusable behemoths is storage. Half of my storage unit is dedicated to piles of plastic inflatables. There is the submarine, the tube decorated with permanent markers by kids at a PTA event, a rocket, the dome for the football team to run out of before a game, the Brazilian looking white modern house that was supposed to connect to the cabin via a magic time tunnel in the fireplace, the giant emoji-face, the latte and pie, the huge cube with maze of hanging banners inside.
Some might wonder why on earth anyone would make inflatable structures. In fact, inflatable housing is something NASA is looking at for housing for a future colony on Mars. They were experimenting with inflatable housing in a simulation in the desert in Oman. Inflatables are light-weight and compact to transport. I know because my students built a space home to go with our rocket after reading about it.
Teaching students to use tools and build things both fanciful and practical brings me great happiness. Teachers don’t make much money, but we make wonder and joy. Some days I get to be the cool teacher wearing the “What Was I Thinking?” t-shirt and a big smile.
About the Creator
Faye Hanson
I am a teacher and professional storyteller, living between two worlds- in more than one way.
Enjoyed the story? Support the Creator.
Subscribe for free to receive all their stories in your feed. You could also pledge your support or give them a one-off tip, letting them know you appreciate their work.
Keep reading
More stories from Faye Hanson and writers in Education and other communities.
The truth behinds bully
Half of all people experience bullying before they reach the age of 20. Bullying can be incredibly challenging to endure, particularly if we don't understand the mindset of a bully and tend to blame ourselves. If you are a victim of bullying, know that your appearance, hobbies, sexual orientation, or race are not the issues. Let's delve into the true reasons behind why individuals bully others.
By Chevon Taylor5 days ago in Education
How to Study Efficiently & Effectively
As students, we’ve all experienced the agony of attempting to study. You sit down on your desk, open your modules, and just stare at your materials, as you have no will to start. It’s not even because you feel lazy; the amotivation a student feels especially around exam seasons is more common than you think, and it’s something a lot of young people face, especially now that we’re essentially done with the COVID-19 pandemic.
By Alexandra Juana Angela Manlangit3 days ago in Education
The Evolution of LGBT Portrayal in TV and Film
Happy Pride Month, all! I love Pride Month and everything that comes with it; the celebration, the festivities, the prestige. Pride Month is the ultimate beacon of positivity. Now sadly, there are a bunch of people in society who aren't really crazy about Pride Month and have their things to say against it. To those people, I'll only say this. There's a special place reserved for people who are against Pride Month. I'm too much of a gentleman to say it here, but I'll give a few hints: it rhymes with "bell," and I'm not talking about the city in Michigan.
By Clyde E. Dawkins6 days ago in Pride


Comments
There are no comments for this story
Be the first to respond and start the conversation.