
How to make a leather holster
A well-made leather holster can also add a touch of style to the gun owner’s attire.

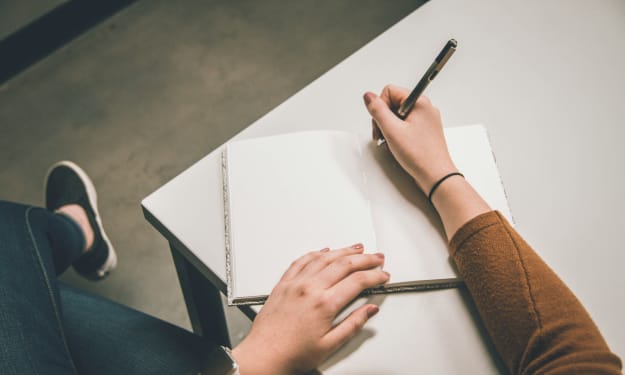
Making a leather holster is not difficult, but it requires a few specialized tools and some patience. Making a leather holster can be a challenging but also a rewarding project. Here’s how to make a leather holster:
Materials required to make a leather holster:
- A piece of leather (cow hide preferred) depending upon the size of the gun
- Holster pattern (can be found online or you can make your own)
- The gun for which the holster is to me made for
- Ruler or measuring tape
- A pen or marker
- Scissors or blade
- Sewing machine or a hand-sewing needle
- Nylon thread (bonded nylon is recommended as its chemically treated and can withstand harsher weather conditions due to its a protective coating)
- Hammer
- Soft Suede (for the inner lining of the holster)
- Hole punch
- Rivets
- Snap or buckle
How to make a leather holster:
The following are the steps required to make a leather gun holster.
Step 1:
Determine the size of the holster. The first step is to determine the size of the holster. You need to measure the length of the gun from the end of the barrel to the back of the grip, and the width of the gun at its widest point. You will need to add some space around the gun for the holster to fit properly. It’s a good idea to add about half an inch to the length and width of the gun to give you some extra room to work with.
Step 2:
Draw a pattern on the leather. Once you have the measurements, use a pen or marker to draw a pattern on the leather. You can either create a pattern from scratch or find a template online. Make sure the pattern is the correct size and shape for your gun. You will need to cut out two pieces of leather, one for the front of the holster and one for the back. The back piece of leather should be slightly smaller in size. This is because if you have two equal parts of leather (on the front and back), it will tighten the holster and you will have a hard time getting the gun out.
Step 3:
Cut the leather using a pair of scissors or blade. Make sure to cut the leather following the pattern you drew. You can either create a pattern from scratch or find a template online. Make sure the edges are smooth and even. You may want to use a ruler or measuring tape to ensure the edges are straight. Keeping an old piece of carpet under the leather will ensure a better and cleaner cut. Always cut away from you to prevent cutting yourself and for a cleaner cut.
You will need to cut extra leather for the a retention strap (if desired), and any other additional features such as a belt loop.
Step 4:
Add an inner lining to both the inner sides of your holster. It is highly recommended to use soft suede for the inner lining of the holster. You need to cut the suede slightly bigger than the size of the leather holster. This is due to the fact that when we later trim it we need something to hold on to. You need to glue it to the inside of the cut leather piece and leave it for 10 to 15 minutes to dry. Use the blade to cut of the extra suede off so it comes off with a nice clean trim finish.
Step 5:
At this step we need to use a saddle makers groover. The groover creates a groove for the stitches to lie in giving a much better and more durable stitch. The groove created also gives a much better look to the holster. It also helps the stitches last longer and they are less liable to be worn off by use.
Step 6:
Sew the two pieces of leather together. You can use a sewing machine or hand-sew the leather with a needle and thread. If you are hand-sewing, make sure to use a strong thread and double stitch for added durability. Make sure to leave the bottom open for the gun to fit into the holster. Make sure to trim off the nylon threads once you are done as the ends of the threads sticking out will look very unprofessional.
At the end of this step the leather holster should be bonded with the inner suede lining as well as stitched together making it quite sturdy and durable.
Step 7:
Create the belt loop. To create a belt loop, cut a strip of leather that is long enough to fit around your belt. The width of the strip will depend on the size of your belt. Fold the strip in half and sew the two sides together.
Step 8:
Attach the belt loop. Use a hole punch to create two holes at the top of the holster. Insert the belt loop through the holes and secure it with rivets. Make sure the belt loop is attached securely to the holster.
Step 9:
Create a snap or buckle closure. To keep the gun secure in the holster, you can create a snap or buckle closure. Use a hole punch to create two holes at the top of the holster, just above the gun. Insert the snap or buckle through the holes and secure it with rivets.
If you do not want to use a thumb strap or buckle closure, you can add a screw at the end of the holster with a rubber grommet in the middle of the two sides of the holster. This will greatly assist in increasing the retention level of the holster and the screw can be adjusted to increase or decease the retention levels.
Step 10:
Mold the holster to the gun. Once you have completed the basic construction of the holster, you will need to mold it to the shape of the gun. Insert the gun into the holster and use a hammer to gently tap the leather around the gun. You want to mold the leather to fit snugly around the gun, but not so tightly that you can’t remove the gun easily.
Step 11:
The last step is to finish the edges of the holster. You can use a leather edger, belt sander or sandpaper to smooth the edges. You need to wet the edges of the holster that you are going to smooth off. If you do not follow this step it will lead to rough raw edges that is found in many factory mass produced holsters.
Step 12:
At this stage you can emboss it with a customized stamp if you want to give it a personalized look. It is important to remember that any time that you want to make an impression in the leather (stamping or logo) you need to dampen the leather. In a damp state the leather will take its shape easily and hold when it dries.
Step 13:
You may also want to apply a leather conditioner to the holster in the end to give it a nice shine and a protective layer.
Step 14:
Don’t forget to soften the leather gun holster.
Note:
Keep in mind that making a leather gun holster requires a certain level of skill and experience in leather working. It’s important to take your time and work carefully to ensure that your holster is safe and functional. If you’re new to leather working, you may want to start with simpler projects before attempting to make a gun holster.
About the Creator
Keep reading
More stories from Hayden Cooper and writers in Education and other communities.
Gun Holster Belt
A gun holster holds your firearm firmly and securely. Similarly, a gun holster belt holds your gun holster securely. In other words a gun holster belt holds the holster the same way the holster holds a gun in place. A good quality gun holster will determine how comfortable and easily accessible a gun is especially when you keep your firearm on you for prolonged periods of time. Having a quality gun holster belt is just as important and people often underestimate and overlook the importance of a gun holster belt.
By Hayden Cooperabout a year ago in Education
A Significant Day: An Excursion of Sympathy and Self-Disclosure
A Critical Day: A Trip of Compassion and Self-Revelation Today was a day I will continuously recall, a day that showed me the value of compassion and the pleasure of giving. I had acknowledged my most critical pay of my life, 90 days' compensation close by leave. As I got back, it was Eid time, and my family was energized. I gave over all the money to my mother, and she, with her liberal heart, confined 33% of it, proposing to spend it in God's way. She prepared me to buy extents with that money and pass it on to a widow's home in a distant locale.
By Muhammad Tariq5 days ago in Education
Why Just Write Is The Best Advice You Don’t Listen To
Before the last 6 months, I hadn’t written anything that wasn’t for my job or university for a number of years. I wanted to write more, I used to write all the time just for fun. I used to write poems and short stories that were just for me. I used to show them to certain members of my family but it was the process of writing them that I really enjoyed.
By Michael Naylor3 days ago in Motivation


Comments
There are no comments for this story
Be the first to respond and start the conversation.