
Celestron StarSense Explorer LT 114AZ Telescope, Full Review
Unboxing and the detailed review of the StarSense Explorer LT 114AZ telescope.

In this article, we will be unboxing the Starsense Explorer LT 114AZ telescope. This is one of the telescopes from the StarSense series of Celestron launched just a few years ago.
We will unbox the telescope, assemble it, align it, and will also see the celestial objects. We will also tell you the pros and cons of this telescope. If you buy this telescope, you can follow this article to assemble your telescope.
The telescope was very well & efficiently packed in 3 different boxes. One box is for an Optical tube assembly, one box is for a tripod, and an accessory tray & one box is for the eyepiece and accessories.
The 4th box is an empty box to fill out the empty space in the big package to protect the moving of the other 3 boxes while transporting.

You get the manual for setting up the telescope, with some other information about how to register your telescope on Celestron’s website and instructions to download Celestron’s sky portal app.
You will also get the code for the Starsense app without which you cannot use the telescope with your phone.
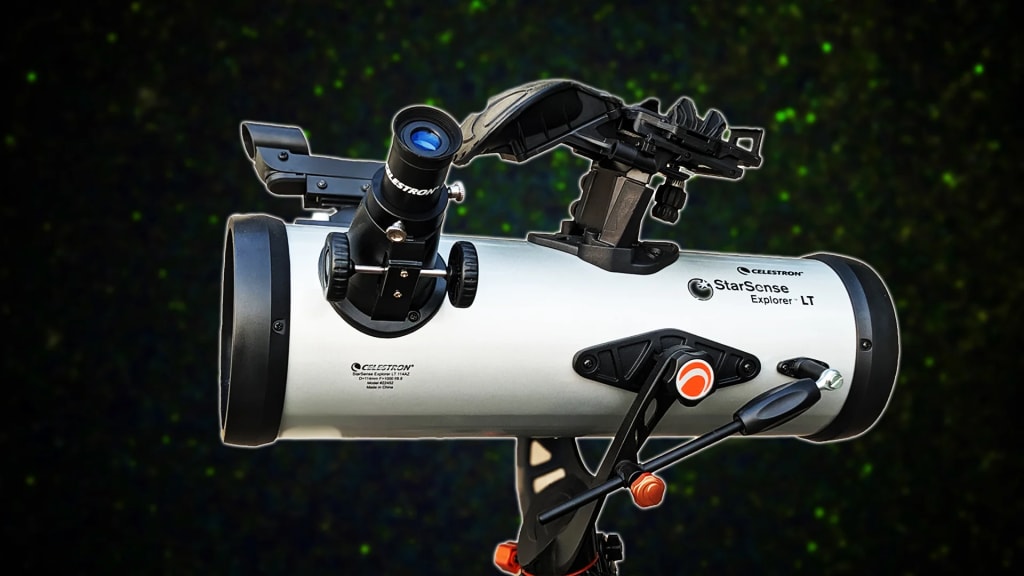
Optical Tube Assembly
Let’s see the optical tube assembly.

This is the optical tube, that antenna-like part is the altitude rod for adjusting the vertical motion of your telescope. The aperture is 114mm, its focal length is 1000mm and its focal ratio is 9.
Notice that the focal ratio is 9, which means the telescope is mostly suitable for the moon and planets. If you don’t know how the focal ratio works, then you need to read this article.
The weight of this optical tube assembly is 6.5 lbs around 3 kg. It is very easy for any adult to carry & move this telescope around.
Eyepieces and Accessories
The accessories box has a bunch of accessories and eyepieces. There is a starsense smartphone dock to mount your smartphone which is the whole point of this StarSense series. Then you get one 10 mm eyepiece. One 25mm eyepiece. One 2 times Barlow lens.
The Barlow lens is lightweight and made of plastic & mostly just unusable. Then we have the finderscope or red dot finder.
Next, we have a stand to fit the Red dot finder on the telescope. A knob to adjust your vertical motion or you can say altitude.

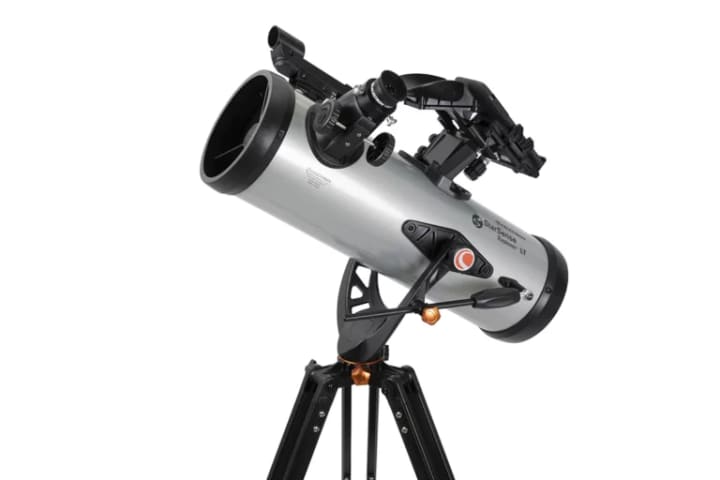
Tripod & mount
Next is the tripod box. It has a tripod and an accessory tray. The quality of the tripod is good enough and easily handles the weight of the optical tube assembly. The height of the tripod can be raised upto 4.5 feet.
Assemble the telescope
Fix the optical tube assembly
Now let’s assemble the telescope. While assembling the telescope. First, we’ll attach the accessory tray. On the side of this yoke mount, this part is an altitude rod guider.
Now you have to fix the optical tube assembly on the mount. You just have to hold the optical tube like this and precisely guide the altitude rod through the hole of the altitude rod guide.
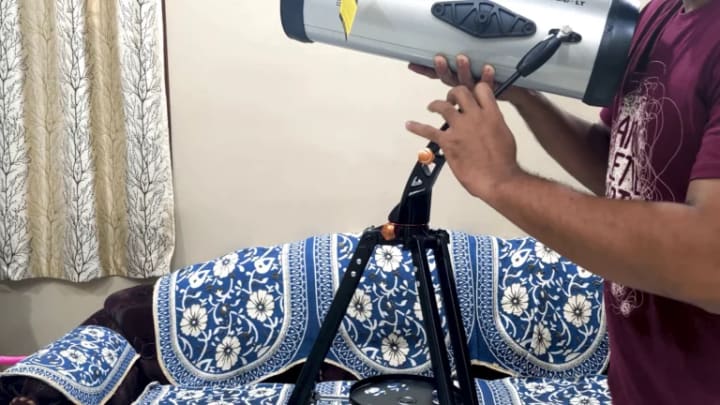
Next is to fix the optical tube assembly on the mount, adjust the altitude rod guider, and fix it to the optical tube assembly. And with this, you have successfully assembled the main telescope.
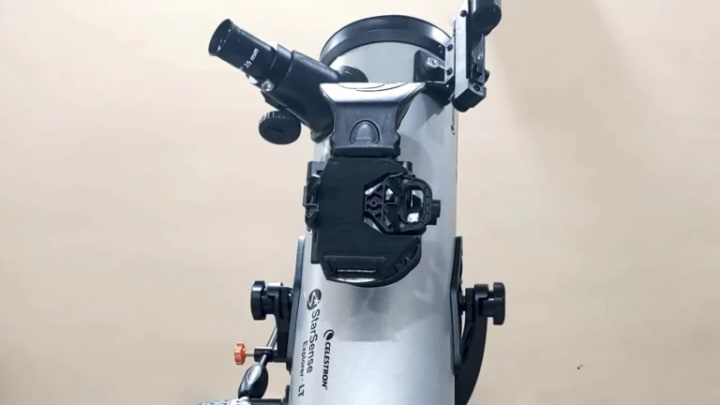
Assembling the accessories
Next is to attach the remaining accessories. First fix the finderscope base, then just slide your finderscope onto the base and you are done. Next is fixing the eyepieces, just remove the dust cap and put the eyepiece.
About the Creator
Alien Tech
TheAlienTech.com is focused on astronomy, stargazing, and space technology.
We will be also discussing the future of humanity.
Keep reading
More stories from Alien Tech and writers in Education and other communities.
Everything About Celestron NexStar 8SE, Evolution 8 & Evolution 8 Edge HD Telescopes
The Celestron NexStar and NexStar Evolution both these series have an 8-inch telescopes. In fact, the evolution series has two 8-inch telescopes. So in this article, we will compare these three telescopes and see how they are different from each other.
By Alien Techabout a year ago in Education
What to Expect from Standard IT Support Packages?
In recent technological advancements, businesses heavily depend on their IT systems to simplify operations, boost efficiency, and remain ahead of the competition. Yet, handling this technology can be intricate and demanding, particularly for companies without specialized IT knowledge. It is where IT support packages play a crucial role in providing vital services and assistance to ensure businesses operate seamlessly. In this situation, IT support services offer a wide range of functions to businesses so that they can focus on the core business objectives.
By Layer One Networks4 days ago in Education


Comments
There are no comments for this story
Be the first to respond and start the conversation.