
What Is The Process Of Arlo Setup
Best Procedure for setup Arlo camera
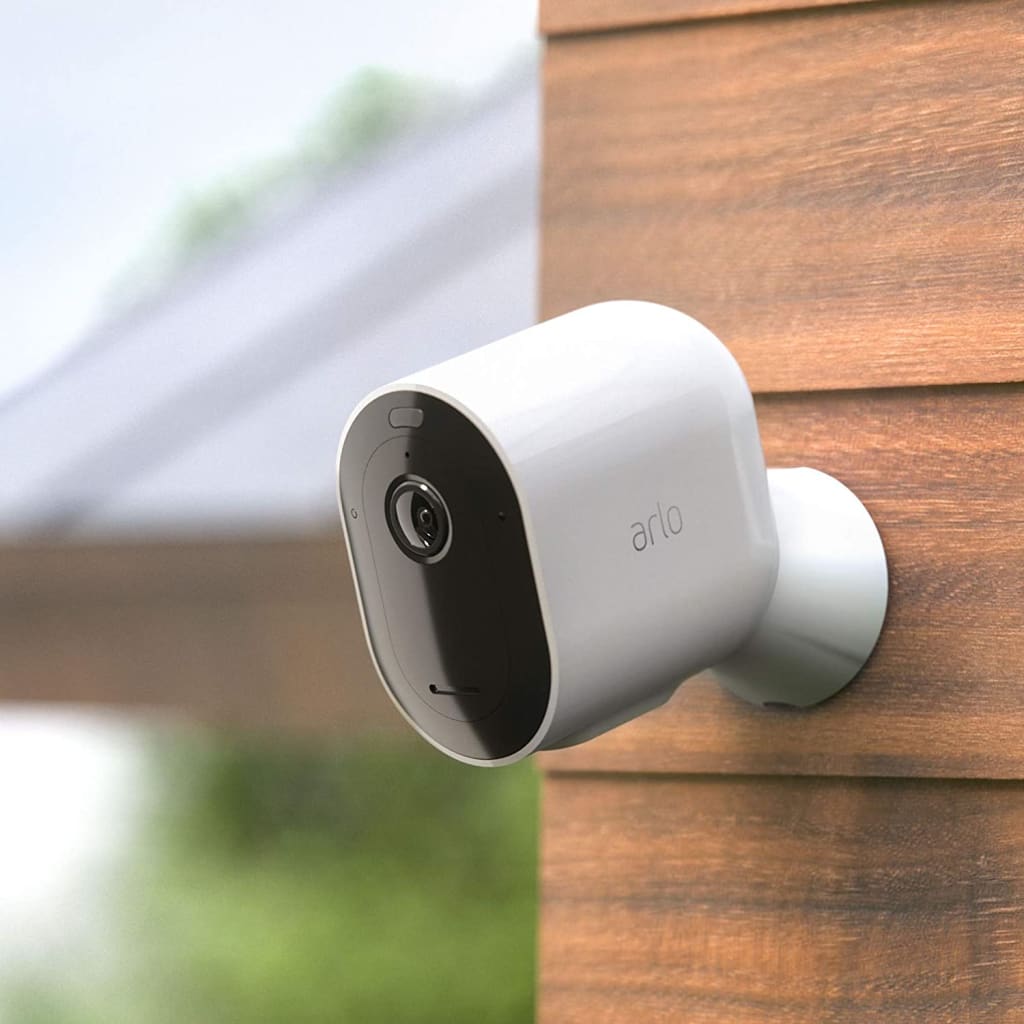
Most users want to use wireless cameras for keeping security at their property. Well, this is going to be handy as well as very easy to install. If you are looking for the best camera, then you must know the process of Arlo setup.
There are some issues with the Wi-Fi Cameras. You can witness these issues when you compare it with the wired camera Arlo wi-Fi cameras from all the other cameras that it is battery powered.
This will mean that you do not have to plug it into the outlet to record and stream the video. Most of the Wi-Fi Camera needs to be connected to some kind of power source. The Arlo cameras use the central hub to which all the Arlo cameras are going to connect.
That is for the reason as the cameras use the Z-wave to nake a wireless communication. The Arlo cameras need to connect to the base station that can communicate with the home Wi-Fi network.
Let us see what are the steps that you need to follow in order to set up Arlo
Download And Setup Arlo App:
Even though you have a base station with you, the process of the setup is very easy and painless. It will not take more than a few minutes. After that, you need to download the Arlo app to your smartphone.
This is a free app that is easily available for Android devices and iPhone users. After that, you are required to open the app and then tap on the new to Arlo button. After that next on-screen, you need to select the Arlo product when you are setting it up. Make sure that it is the Arlo Wire-free.
The app is going to tell you to install the Arlo base station hub. In order to do this, you need to plug one end of the included ethernet cable in the base station and then the other end into the ethernet port of the router.
Then you need to plug in the power cord, then you need to press the On-Off button next to the power connector on the back of the hub. The moment you have got the base station setup, then you need to press the option of continue.
- First, what you to start off with is to unlock the battery compartment.
- You can do it by sliding or holding the latch.
- Try to move the battery door back.
- Then you need to lift it to open the compartment.
- After that, you have to insert the batteries and then close the battery.
- Make sure that the camera is within three feet of the base station.
- Sync the cameras to the base station. On the Arlo base station, press the sync button that is on the side. It could also be at the back of the base station. Press it for a couple of seconds and then you need to leave it.
- Ensure that you do not have to press the button for long. If you do then this way the sync process can be blocked.
- While using the Arlo base station, press the sync button on the side. Press it for about 2-3 seconds and then leave it idle.
- Then, check whether the LED light turns green or not.
- After that, press the sync button located on the top of the camera for about 2 seconds and then release the button.
- Make sure that all the cameras are synced one at a time. A blue light will blink that will confirm the process of the sync.
- If you find out that sync is not successful, you will see an amber light flashing. You must repeat the process of the Arlo Login Setup.
This is the process through which you will be able to set up the Arlo devices.
About the Creator
Keep reading
More stories from jacobmartin717 and writers in 01 and other communities.
Troubleshoot Guide On Arlo Camera Blinks Orange
Cameras from Arlo are an excellent choice for monitoring and securing your home. It includes motion detection, night vision, two-way audio, and cloud storage. Smartphones and tablets can be used to access them remotely. They can also be monitored by multiple users at different locations and are affordable. In addition to weatherproofing and having a long battery life, these cameras provide continuous monitoring. There are times when Arlo's camera blinks orange light. The problem must be solved quickly.
By jacobmartin71712 months ago in 01
Senate Takes Historic Step to Reclaim Power: Votes to Repeal Authorizations for Gulf and Iraq Wars
The Gulf War Authorization, passed in 1991, gave President George H.W. Bush the authority to use military force to expel Iraqi troops from Kuwait. The Iraq War Authorization, passed in 2002, gave President George W. Bush the authority to use military force against Iraq. Successive administrations have used both authorizations to justify military actions in the Middle East and North Africa.
By Aurora Audrey2 days ago in 01
Hosting Types: Advantages and Disadvantages
When we open a certain website, we don’t think about where the images, text, or design came from. Each virtual page is loaded because a computer is running somewhere in the memory of which all the information on the site (pictures, scripts, videos, etc.) is stored; such a computer is called a server. Its task is to load the contents of the web portal when the user opens the site. The more popular the web platform is, the more power it consumes. If we look at this using Facebook as an example, we see that this platform consumes more than 50,000 servers.
By Elizabet Sun2 days ago in 01


Comments
There are no comments for this story
Be the first to respond and start the conversation.