
The Best Ways To Increase Your Battery Life
Once upon a time, you had to really keep an eye on your Android phone to make sure the battery wasn’t being depleted prematurely.

Manually toggling connections, constantly adjusting brightness, and the like are basically all things of the past now—but there are still things you can do to maximize your handset’s battery life.
Before we get into the how, however, let’s talk about how far Android has come. Back in Android 6.0 Marshmallow, Google released a new feature called Doze Mode, which promised to improve battery life by “forcing” the phone into a deeper sleep when it’s not in use—leave it lying on the table or desk for a bit, and Doze would kick in, saving you precious juice.
Then, with Android Nougat, they improved this even further by making it a bit more aggressive: instead of kicking in while the phone is completely still, Doze now works while the phone is in your pocket, bag, or anywhere else it isn’t in active use. This means fewer apps will take up precious resources on your phone when you aren’t using it, translating to longer battery life.
With Android Oreo, Google implemented a new set of features called “Vitals” that, among other things, aim to intelligently limat background activity in order to save precious battery life.
And so far, it works exceptionally well. There’s just one problem: not everyone has Oreo, Nougat, or in some cases even Marshmallow. If your handset happens to be forever stuck on Lollipop or KitKat (or older), there are still some things that can you do to make sure you’re getting the most life out of the battery.
If you do have one of the newer versions of Android, however, the following will also apply, though to a somewhat lesser extent. We’ll cover some of the newer features—like Android’s built-in Battery Optimizations—further down below.
First: Know Where to Check Your Usage
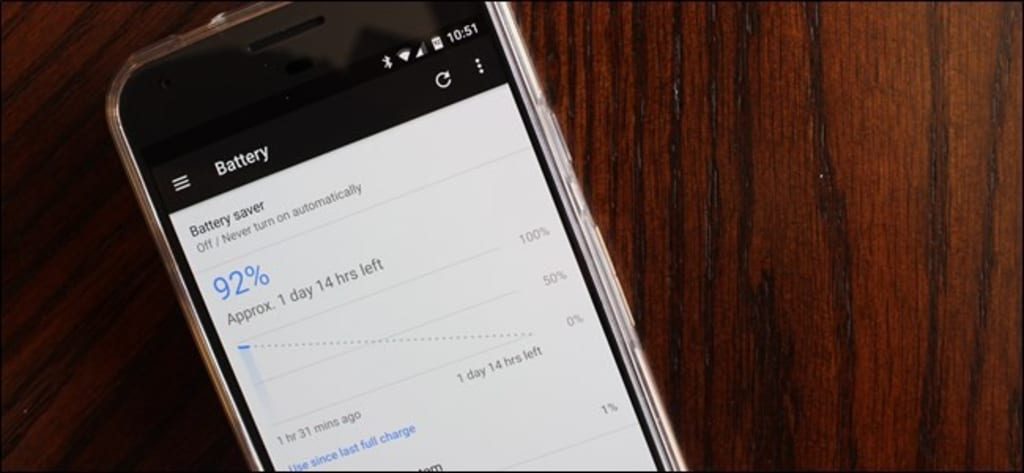
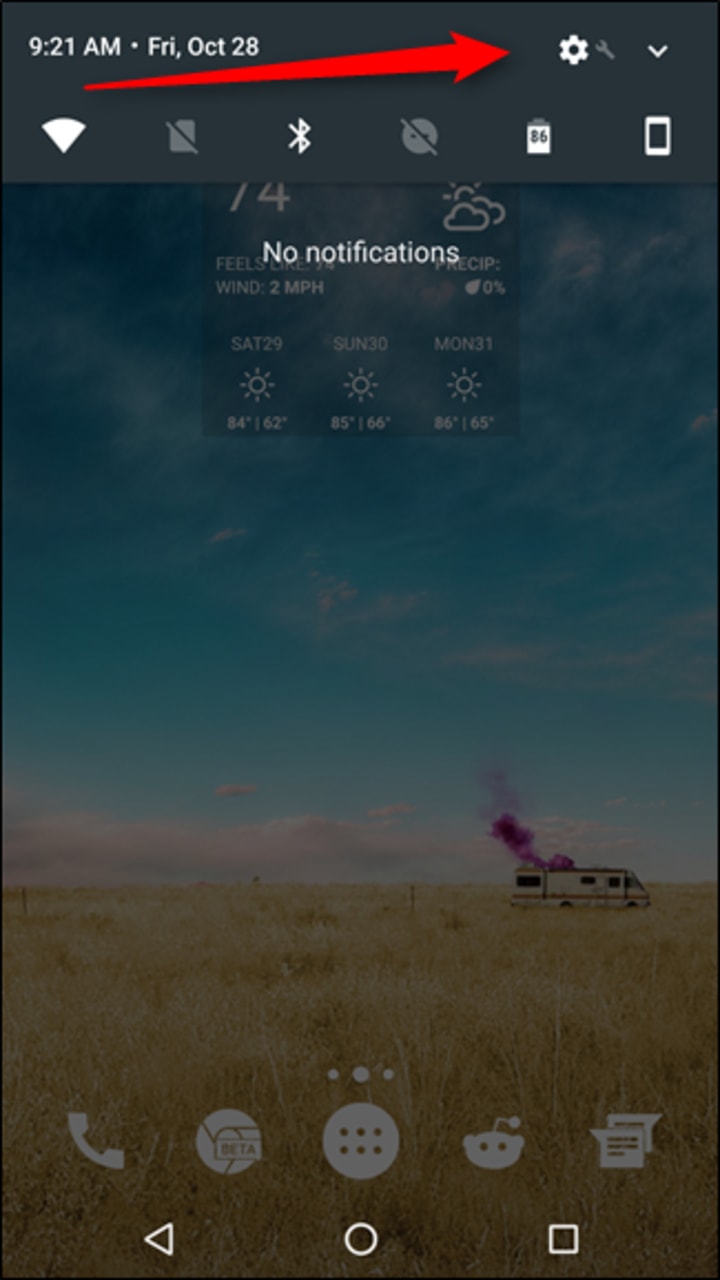
Look, this may seem like common sense, but I’m going to say it anyway: if you think your battery is draining faster than normal, look at your phone’s battery stats! This is very, very simple: just pull down the notification shade, tap the cog icon (to go to the Settings menu), then scroll down to the Battery section.
One some devices—like most things from the Samsung Galaxy series, for example—this will just show you a basic screen with some estimates. While those are marginally useful, you’ll want to hit the “Battery Usage” button to see the real meat and potatoes here.
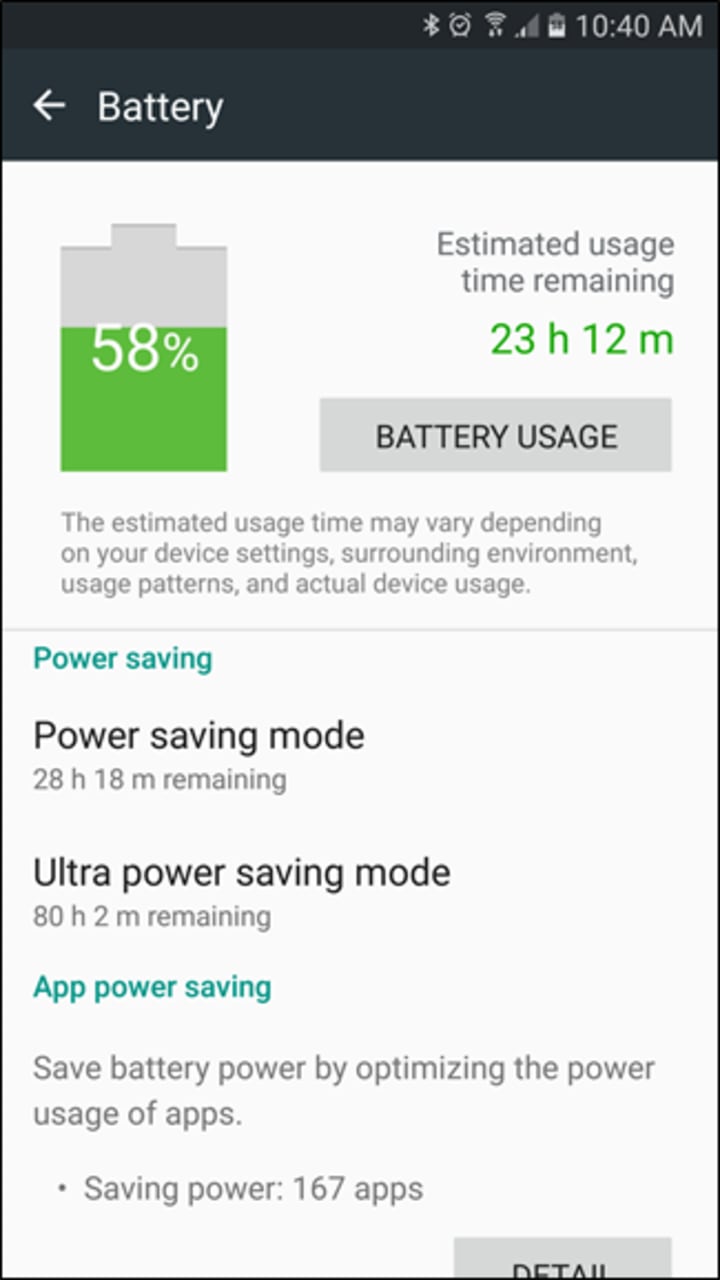
On this screen, you can see what’s chewing through your battery, complete with a nice graph and a breakdown by app or service. If there’s an app causing issues, this is where you’ll see it.

But wait, there’s more! What many users may not realize is that if you tap on the aforementioned graph, you’ll get a detailed look at when the device is awake—or “wakelocks” as they’re generally called.

There’s a really simple way to read this screen: the bars show when each particular sub-head is “on.” Since I never disable my phone’s Wi-Fi, the screenshot above shows that Wi-Fi is always on and connected. Same with Cellular network signal. But as you can see, GPS, while always on, isn’t being used.
The “Awake” indicator shows when the phone was allowed to come out of a sleep state—this is what you want to pay close attention to. If this bar is basically solid and “on” all the time, that means something is keeping your device awake all the time, which is bad. You want to see very short bursts on the “Awake” bar while the display is off. (If the screen is on—which you can easily see from its status bar below—then the phone will naturally be awake as well. It’s not going to sleep while it’s being used, after all.)
If you’re seeing something different here, then there’s a problem. And, unfortunately, there’s no easy way to diagnose wakelocks without rooting your phone, which makes it difficult for casual users to diagnose battery issues. (If you do have a rooted phone, you can use an app called Wakelock Detector to pinpoint the problem.)
Lastly, in Oreo, Google brought back the option to “show full devices usage.” That means you can switch between seeing which apps are using the battery, and hardware stats for battery usage. To show this, tap the three-dot overflow menu in the upper right corner, then select “Show full device usage.” To switch back to app view, do the same thing and select “Show app usage.”

By switching back and forth between the two, you’ll be able to better determine what (if anything) is acting out of the ordinary.
In Oreo, Nougat, and Marshmallow: Check Android’s Battery Optimization Settings
In modern versions of Android (which I generally think of as Marshmallow and newer), Android has some built-in battery optimizations. While most of these are enabled by default, it never hurts to check and make sure everything is working as it should.
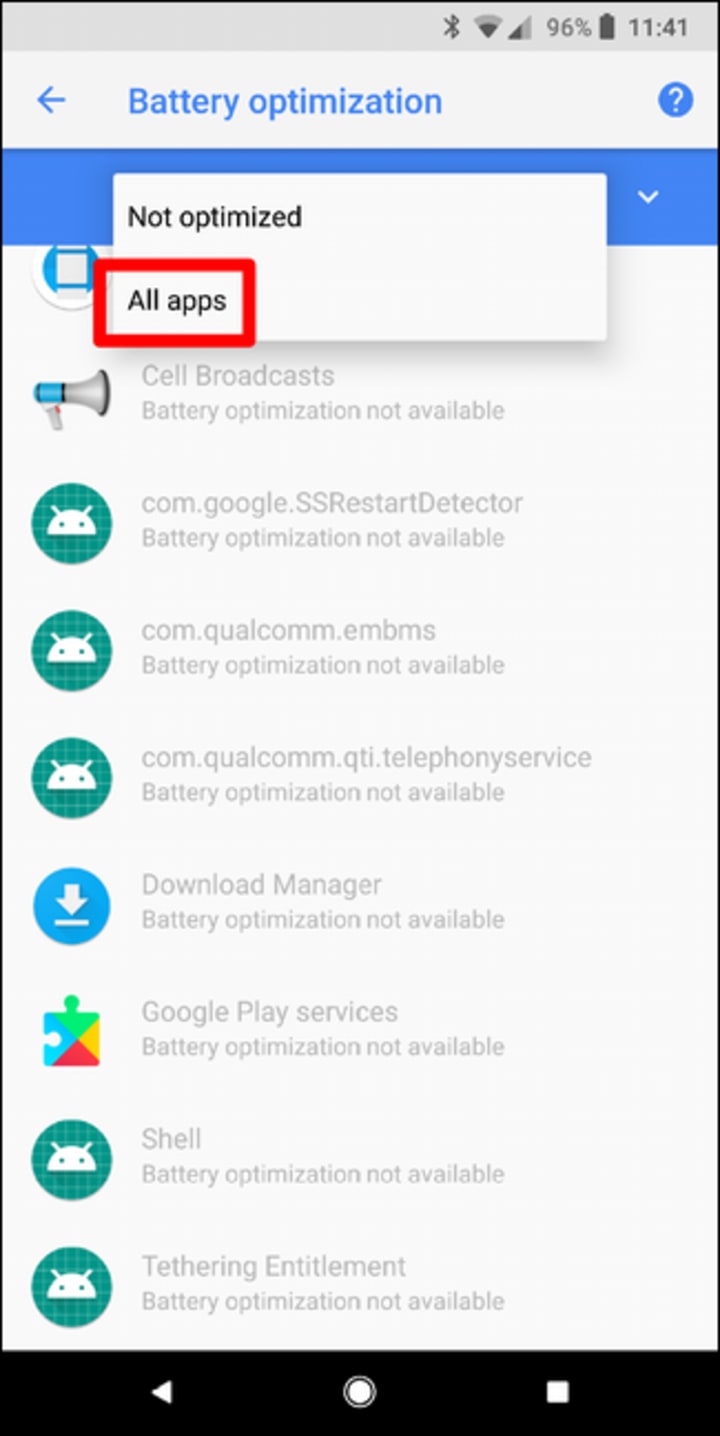
To access these settings, jump back into the battery menu (Settings > Battery), then tap the three-dot overflow menu in the upper right corner. From there, select “Battery optimization.”

By default, this will show apps that aren’t optimized out of the gate. Some of these won’t be able to be optimized, which is why they’re not optimized in the first place. Others may have the option available but may be disable for practical purposes—like Android Wear in my case here. Optimizations for that particular apps are disabled so the watch will always stay connected to my phone.

If you want to see a list of all apps (both optimized and unoptimized), just tap the dropdown and choose “All apps.”
I recommend just looking through this list and seeing if there’s anything that can be tweaked. Maybe there won’t be, but it never hurts to look.
Disable Wireless Connections
Look, I’m not going to pretend that this is going to make a monumental difference in your mobile battery life, but I’m going to say it anyway: disable Wi-Fi, Bluetooth, and GPS if you don’t need them.
See, this used to be a very important step in optimizing your Android device’s battery life, but as time has gone on and Google has improved Android, it’s almost unnecessary at this point. Still, if you never use something like Bluetooth, turning it off isn’t going to hurt anything. It’s also worth mentioning that if you do disable Wi-Fi when you’re away from home, don’t forget to turn it back on—you don’t want to chew through your data plan, after all. To toggle Bluetooth and Wi-Fi, pull down the notification shade and tap the appropriate toggle, or jump into Settings and then into each service’s respective entry.

With GPS, things aren’t as cut and dry and “on” and “off.” Back in the day, this was a monstrous battery hog, so Google optimized the absolute snot out of it—nowadays, it’s pretty much only used when it absolutely has to be, and only for as long as it needs to be. For example, your weather apps may briefly check for current location when you open the app so it can provide the most accurate forecast. If you’re using Navigation, on the other hand, GPS will stay on the entire time, because, you know…directions.
All that said, you can still actually control how GPS works. For example, you can allow the phone to use “High Accuracy” mode, which will find your location using a combination of GPS, Bluetooth, and Wi-Fi/cellular networks. This uses the most battery, but it’s also the most accurate.
So, if you head into Settings > Location, you can control this. Just tap on the “Mode” entry to see the available options. Remember, the less battery it uses, the less accurate it is! If you don’t use GPS or location services very often, go ahead and try one of the less-accurate and more battery-efficient modes. If you notice anything funky after that, then you may have been using an app that relies on a more accurate location service, so you’ll either have to deal with some jankiness or revert back to a higher accuracy mode.

Check Notification Settings
You’ve probably heard that notifications can drain your battery, but as with all things, it’s a bit more complicated than that. These days, the majority of apps use Push Notifications. Instead of constantly monitoring for new notifications (which is very taxing on the battery), push notifications use an always-listening port that’s built into Android to receive information. In other words, instead of the app connecting to the internet every several minutes to see if there’s any new information, Android is always ready to accept new information from services that are enabled on the device. This is far more battery efficient because it’s a passive service.
There are, however, still apps out there that rely on non-push notifications. The biggest offender is generally going to be email services that still rely on POP3—while these are likely few and far between at this point, they’re still out there. A few social networking apps may do something similar.
The easiest way to tell if this is the case with an app is to check its notification options: if you have to specify a “refresh” or “update” interval, the app or service isn’t using push notifications, and you’re probably best off turning off notifications for that app entirely.
Source:Howtogeek.com
About the Creator
Keep reading
More stories from Student Matters and writers in 01 and other communities.
How to get WhatsApp like disappearing feature on Instagram
WhatsApp is introducing its disappearing messages feature on the app, which was rumoured to be in the works. Disappearing messages are not exactly new. Apps like Telegram, Signal, Wire and Snapchat already offer such an option. In case of disappearing messages, a user can set a time limit on a particular message after which it will disappear automatically from the chat.
By Student Matters3 years ago in 01
How to Throw a Fantastic Barbie Party on a Boat for Your Friends
Welcome aboard, party enthusiasts! If you’re in search of an unforgettable experience that combines the charm of Miami’s waters with the excitement of a themed celebration, look no further than party boat charters. Set sail amidst the azure waves and vibrant skyline of Miami, and let your imagination run wild as you host the ultimate Barbie-themed extravaganza.
By Miami Boat Charterabout 14 hours ago in 01
Vocal Bonus Leaderboard: 05/01/2024
Welcome to the weekly update of the Leaderboard! We're thrilled to showcase Vocal's most discussed stories, popular picks, and rising stars. Let's dive into this past week's standout contributors and their remarkable achievements.
By Vocal Team6 days ago in Resources


Comments
There are no comments for this story
Be the first to respond and start the conversation.