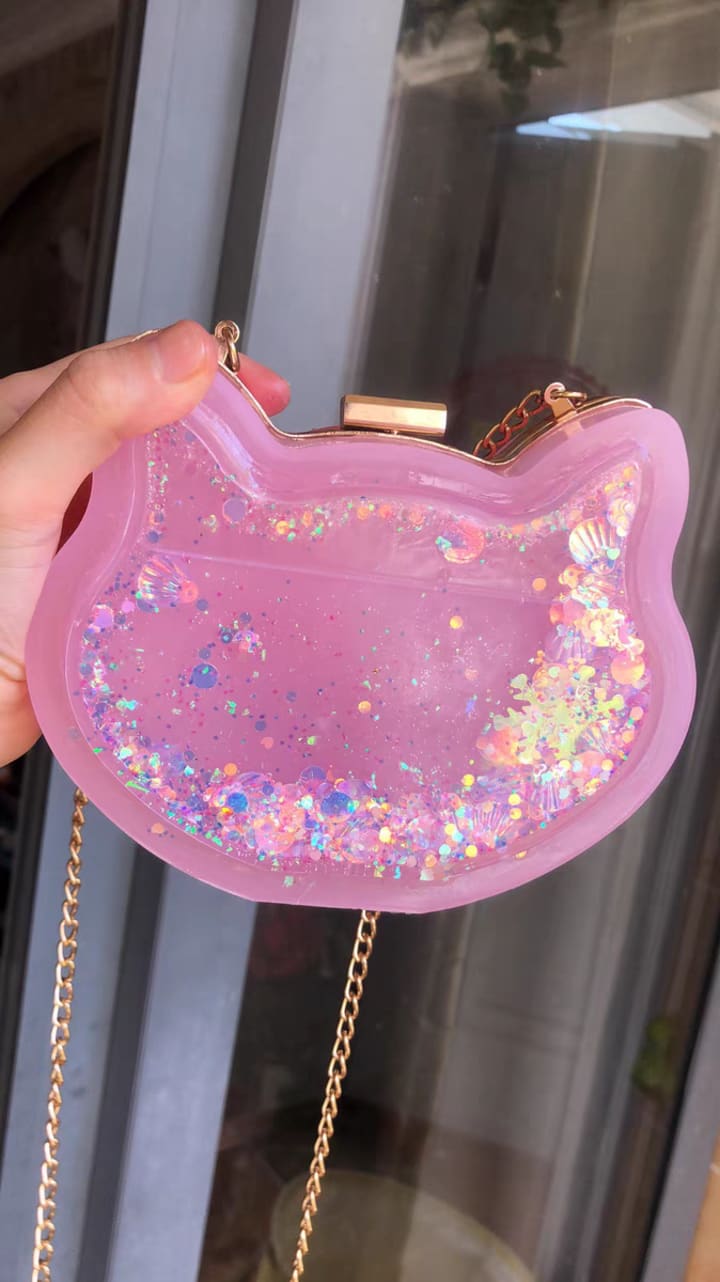
How to make a resin purse?
7 steps to make a unique resin purse

Resin is a versatile material that can be used to create beautiful and unique pieces of art. One popular application of resin is to use it to coat or decorate a purse. If you're interested in learning how to resin a purse, follow these simple steps:
Materials you'll need:
Epoxy resin
Mixing cups and stir sticks
Disposable gloves
A well-ventilated workspace
A heat gun or torch
Purse silicone resin molds
Metal hardwaves
Purse chain
PVC Cloth
Optional: pigments, glitter, or other decorative elements
Step 1: Prepare your workspace
Make sure you're working in a well-ventilated area and wear disposable gloves to protect your hands from the resin. Place your purse resin mold on a flat surface and cover it with a protective layer, such as a plastic sheet or newspaper.
Step 2: Mix the resin
Follow the instructions on your epoxy resin kit to mix the resin and hardener in a mixing cup. Stir the mixture thoroughly for about 2-3 minutes until it's well-blended.
Step 3: Add pigments and glitter (optional)
If you want to add color or sparkle to your resin, you can mix in pigments or glitter at this point. Use a small amount of pigment or glitter and mix it into the resin until it's evenly distributed.
Step 4: Fill up the molds ,make 2 pieces of your purse
Use a stir stick to apply the resin to your molds. Start by applying a thin layer of resin, spreading it evenly over the surface of the purse mold. Use the stir stick to smooth out any lumps or bumps in the resin.Resin 2 times to make 2 pieces if you have only 1 purse mold.
Step 5: Cure the resin
Allow the first layer of resin to cure for about 12 hours. Once it's hardened, you can apply a second layer of resin if desired. Repeat the process of mixing and applying the resin, making sure to spread it evenly over the surface of the purse.
Step 6: Apply UV resin along the gap of the metal frame
After the resin has cured, use a heat gun or torch to remove any bubbles that may have formed during the curing process.
1)Measure and cut the plastic sheet,cut 2 pieces;
2)The plastic sheet will be glued to the metal frame, you can cut the excess
3)Apply UV resin,place&glue the plastic sheet onto the frame;
3)Cure the resin with UV light
The above steps are optional, make a clutch with the PVC clothes on both side as a barrier so items don’t fall out when opened while standing up.
Step 7: Place and glue the resin pieces of purse to the frame on both sides
Then you can attach the purse chain and done.Use only AB Epoxy Soft resin if you want to make a flexible bag. Or a Hard type AB resin if you want a more sturdy bag.
If you want to make a resin shaker purse, like below , then you will need to resin the shaker parts of the purse. (According the same steps to resin the both sides of the purse: a)Demold the resin piece & fill it up with glitter/embellishments,etc. b),Apple UV resin onto the egde of the resin pieces. c),Place and glue the cluth onto the shaker part).
You will need around 200-300ml of resin to make the clutch bag with the shaker part.

In conclusion, resin is a great way to add a unique and personal touch to your purse. With a few simple steps and some basic materials, you can create a beautiful and unique resin-coated purse that you'll be proud to carry or start to make money with your creative works.
CLICK HERE TO GET RESIN PURSE MOLDS:


Comments
There are no comments for this story
Be the first to respond and start the conversation.