

We will be integrating the stellar network with our app. In order to do this first, you need to understand what is Stellar.
Stellar is a decentralized payment network. It is a non-profit organization that aims to connect banks, payment systems and people to make cross-border payments faster and more affordable.
The cryptocurrency that Stellar issues are called Stellar Lumens or XLM.
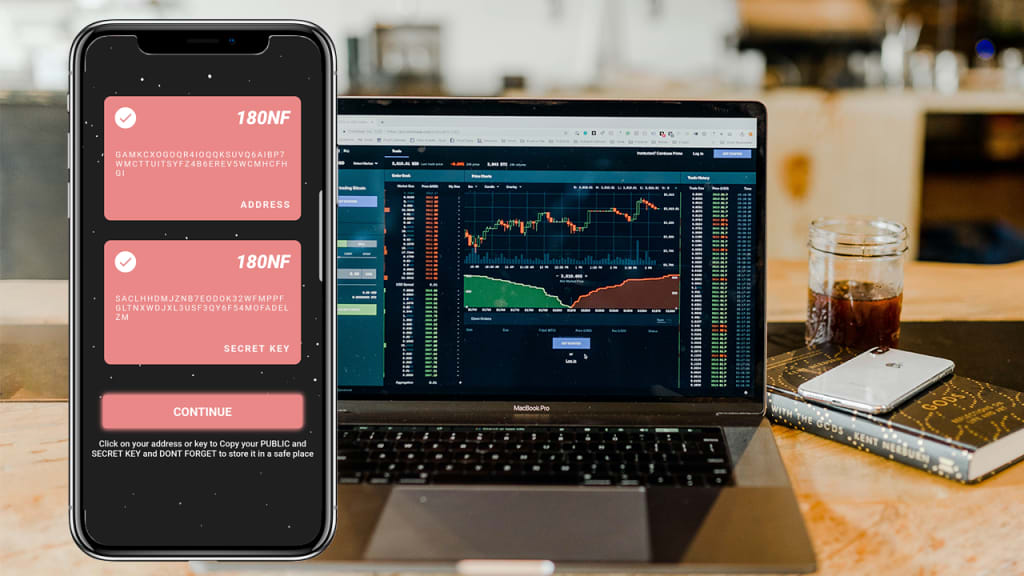
When creating a Stellar wallet, you need to keep two things. The first one is your public key and the second one is your private key. The public key is the address that you send your XLMs to. You use your private key to log in to your account. You should keep the private key safely to avoid your assets being stolen.
They look like this:
Something that you need to have into account is that 180NF asset was created in the stellar protocol. So besides creating a new wallet, we have to create a trustline with 180NF and activate your account.
However, like always if you prefer to see the video instead of reading here is the full video
Trustline
When using a payment service, you are trusting the service provider to store your deposit and to honor your withdrawals. This idea of trust is made explicit on Stellar through trustlines. Trustlines are added to your Stellar account and let you hold a token as well as specify the amount of that token you’re willing to hold. Trustlines also keep you from receiving unwanted assets. For example, you wouldn’t want someone trying to pay you with counterfeit dollars from a person or service you don’t trust.
In order to trade, receive, or hold any asset on the Stellar network you must first establish a trustline with the anchor’s issuing account. An issuing account is an anchor’s Stellar account that created the asset. Trustlines are set using the Change Trust operation and cost a base reserve fee of 0.5 lumens each. What this means is that for each trustline you set, your account will be required to maintain 0.5 lumens in reserve that can’t be spent until you close your trustlines.
If the technical details sound complex don’t worry, most wallets hide most of this stuff and make adding trustlines as easy as a few clicks. Though it may be easy to add trust lines, only interact with assets that you have done your research on. Many interfaces (e.g. StellarX) provide information about anchors. You can also check out their associated websites and look for reputation within the ecosystem. Ultimately how you choose to trust anchors is up to you. Don’t blindly trust assets.
Activate Account
All Stellar addresses are required to keep a minimum balance of XLM at all times. The current minimum is 1 XLM, which is set by the Stellar network. The minimum balance requirement is in place in order to prevent people from overwhelming the network and to aid in prioritization. The first use of a new Stellar address must be to receive at least 1 XLM. This will activate the address and allow it to be used in further transactions on the network. You will never be able to send your entire balance from your Stellar address. That 1 XLM minimum will always have to be kept as a balance.
Putting everything together
So in our app, while the user is seeing a loading screen in the back-end I’m creating a new address with your keys, activating an account, and creating a trusting with 180NF because for new users using this technology is just to complicated. However, there is a big downside to this
WE HAVE TO FUND THE NEWLY CREATED ACCOUNTS
Which in theory the user will pay back and in the 180NF app the time frame to pay back the loan is 30 days. But we already got the experience that users don't like to comply with this.
There is actually another way to avoid this, actually two options
- Let the user activate their account and create the trustlines
The big problem with this is that users aren't the most compliant person using apps or even new technology. I know a lot of people will get mad at this but when you are a developer you must create everything as easy for the user but still users WILL mess up.
2. You can create one address and manage everything with MEMO
A memo is a unique 9-digit figure assigned to each Stellar-based cryptocurrency account (e.g. XLM, WLO). It is used to identify the recipient in a transaction. When sending the Stellar-based cryptocurrency, you need to provide the following information:
- the target account’s address
- the target account’s memo
So what you want to do is create one address for your entire app or platform and manage each user as a memo in your database. However, in my case is not an option because it will become a centralized solution and in our app users will be able to have absolute control of all the funds without depending on third parties.
But if this option is for, well go for it.
Creating a Stellar Wallet
We will be installing Python SDk via pip utility:
pip install stellar-base
It will install the main SDK along with all dependencies. I have been on Python3 for long time, not sure it will work for Py2 or not, give it a try. Most important give Python3 a try!
The very first thing we need to do is to generate at least a couple of wallets here; one for the company receiving payments and other for the customer. This post is using Flask for writing app so It’s assumed you know Flask well, if not, you may find some good tutorial out there.
from flask import Flask, redirect
from flask import render_template, request
from stellar_base.keypair import Keypair
import [email protected]("/gen_address")
def gen_address():
kp = Keypair.random()
publickey = kp.address().decode()
seed = kp.seed().decode()
return json.dumps({'publickey': publickey, 'seed': seed})
After importing Flask related stuff, I imported Stellar’s Keypair class. It will be responsible to generate a new wallet address and a private key aka seed that will be a private identification or password for the wallet itself. You keep this thing secure somewhere and provide a public key aka Wallet address to others for transaction purpose. Since we want to return both private and public keys aka Wallet Addresses, I will convert dict into a json and return.
Start the flask server by running python app.py from command line. It shows something like below:
* Running on http://127.0.0.1:5000/ (Press CTRL+C to quit)* Restarting with stat* Debugger is active!
Once it’s running you should access http://127.0.0.1:5000/gen_address to generate the address. If all goes well it will generate output like below:
{
"seed": "SABA7LBKQOIWZENE7TU442ZLJM7HAPRKTFBSM656UONB2UMCVB3MDK24",
"publickey": "GA36WRQJSJIKTAKD2MJNVGUXUGLBAXEKKXIQENRNU3J5PNEZLCCD3M5L"
}
Let’s run it one more time to generate another address and this time it produces:
{
"seed": "SBGUJJV6FSUL5S3AWH36XPYFIGGMAV3RQK7NSZWO7PTIS2ZCSPFVREGT",
"publickey": "GBYVSIXRDKJDHY5JGK6N37RFLZ2JDH3GDZPYOWXITQCWOCQ26VSRSXZF"
}
So, there we go we have created your own stellar address but we still need to create a trusline and activate your account. Also, I am not going to cover the entire idea of communicating between flutter and was which I am using but this is the start.
Creating the trustline
Allow Trust class stellar_base.operation.AllowTrust(trustor, asset_code, authorize, source=None)
The AllowTrust object, which represents a AllowTrust operation on Stellar’s network. Updates the authorized flag of an existing trustline. This can only be called by the issuer of a trustline’s asset.
The issuer can only clear the authorized flag if the issuer has the AUTH_REVOCABLE_FLAG set. Otherwise, the issuer can only set the authorized flag. Threshold:
Low Parameters
- trustor (str) — The trusting account (the one being authorized)
- asset_code (str) — The asset code being authorized.
- source (str) — The source account (defaults to transaction source).
classmethod from_xdr_object(op_xdr_object) Creates a AllowTrust object from an XDR Operation object. to_xdr_object() Creates an XDR Operation object that represents this AllowTrust
#create trust
issuing_secret = 'SCTJB4WAC44G5JLZT3MKDUKTPE3RFKKHIEC5VV5CGFADPAGWY422YVUV'
issuing_public = Keypair.from_seed(issuing_secret).address().decode()
receiving_secret = key
receiving_public = Keypair.from_seed(receiving_secret).address().decode()
# Create an object to represent the new asset
my_asset = Asset('NF', issuing_public)
# First, the receiving account must trust the asset
builder = Builder(
receiving_secret, horizon_uri='https://horizon.stellar.org', network='PUBLIC').append_trust_op(
destination=my_asset.issuer, code=my_asset.code)
builder.sign()
resp = builder.submit()
Sending a Payment
You already know how to create an address and create a trustline using Python, now we need to activate the account by sending some XLM to it.
When we created an account, we already created a transaction. We can build a transaction with a Builder, or with a Transaction object by itself. We recommend you use the builder, as it handles a lot of the details for you, and you can focus on the important parameters in each method’s signature.
Let’s send Bob a payment that we owe him. We’d go about this in the following way:
from stellar_base.builder import Builder seed = "SCVLSUGYEAUC4MVWJORB63JBMY2CEX6ATTJ5MXTENGD3IELUQF4F6HUB" builder = Builder(secret=seed)
# builder = Builder(secret=seed, network='public') for LIVENET bob_address = 'GABRGTDZEDCQ5W663U2EI5KWRSU3EAWJCSI57H7XAMUO5BQRIGNNZGTY' builder.append_payment_op(bob_address, '100', 'XLM') builder.add_text_memo('For beers') # string length
Or if you want to pay him with NF:
# This is a stellar issuing account ID for an anchor that issues CNY NF_ISSUER = 'GCG7BBEAVOATBULKR6IOSVIQKZIIPFC3OHC52DH4RYRZOHJ7MAIQFHCB' builder.append_payment_op(bob_address, '10', 'NF', NF_ISSUER) builder.add_text_memo('For beers') # string length
Putting everything together
At the end you will have something like this:
I am using aws, python and flutter to complete this full process. If you want me to create a video of how to integrate everything well comment down bellow but this are all you need.
Hope you like it !
About the Creator
180NF
Building the world's largest nutritional database, the decentralized app for nutrition and fitness.
So What’s Next After Bitcoin Halving in the Year 2024
A key occurrence in the world of cryptocurrencies is known as the Bitcoin halving. This occurs when the reward for mining new blocks is cut in half, which in turn reduces the rate at which new bitcoins are generated on the network.
By Estalontech6 days ago in The Chain
BERACHAIN: A Step By Step Guide On How To Qualify For A High Potential Retro-Drop
It is well-known that crypto airdrops can be a profitable endeavour for every crypto enthusiast looking for a quick buck or two. But, as with everything in life, and especially in the volatile and uncertain world of decentralized finance, you must be selective with what you give your attention, money and time to. Without further delay, let me explain why Berachain is such a good idea to consider for your airdrop portfolio and walk you through how to actually qualify for the airdrop (step-by-step):
By Bogdan Batrinu2 days ago in The Chain


Comments
There are no comments for this story
Be the first to respond and start the conversation.