
What is the best option for how to measure hair system base size? I'm comparing brands before buying.
Size and Shape: the measurements of a perfect Hair System

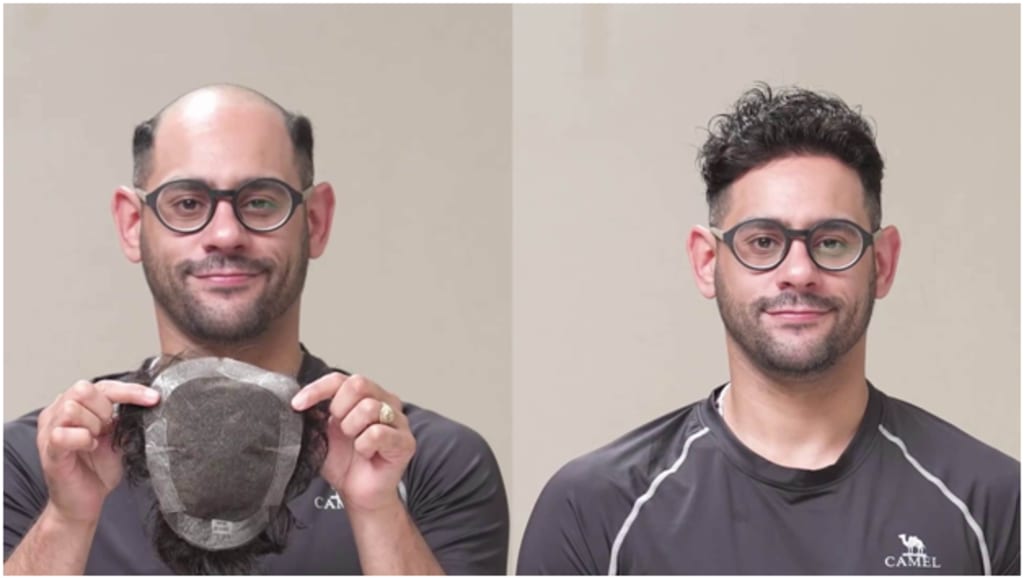
How should I measure for a custom hair system if my head shape is irregular?
Hair systems often lift at the edges or leave awkward gaps if their base size relies on flat measurements alone. If your head shape is even slightly irregular, you need a custom unit built for your scalp's true contour. Basic length and width just won't cut it.
Lordhair fixes this using a strict 3D contouring process. It delivers a smooth, seamless fit that hugs the exact curves a standard tape measure always misses.
Key Takeaways
Create a taped scalp mold that preserves your scalp's true contours.
Mark your hairline using facial proportions before cutting the template.
Flexible ultra-thin skin bases conform better to irregular scalp contours.
Why Standard 2D Tape Measurements Miss Irregular Head Shapes
A standard measuring tape gives you the basic width and length, but it can't tell you how your scalp actually rises, dips, or angles in between. A tiny ridge adds surface distance, even if the straight line across it stays exactly the same. And a flat spot? That can leave your base sitting loose on one edge, even if the math looks right.
This mismatch is exactly why a base built just from two flat numbers might pinch over a bump, bridge across a hollow spot, or lift up at the edges. It's a totally fair concern. A truly snug fit relies on the full shape of your scalp, not just the longest and widest points.
Lordhair's 3D contouring process maps out those height and curve changes. So, instead of forcing a flat shape onto your head, the custom hair system naturally hugs your scalp. This is a big deal around the front, crown, or sides, since even a tiny gap can show up when you move around. The goal isn't perfection. It's a more predictable fit.
The Scalp Mold Method: How to Make a Template for a Custom Hairpiece
An irregular scalp can't be accurately measured just by width and length. A physical template records the actual raised areas, dips, and shifting curves that decide exactly where a hairpiece sits.
For a customized fit, Lordhair needs a scalp mold that actually holds those contours after taking it off your head. That solid 3D record helps the team shape the base around your unique surface, rather than just forcing a flat pattern to work. The right tools and wrapping method make sure that shape stays perfectly intact. That's it.
Tools Required to Create a 3D Scalp Mold
The tools you need to measure for a toupee are pretty simple, but each one handles a specific job. Just use clear plastic wrap to copy the scalp's surface and clear packing tape to stiffen it up without hiding the wrap underneath.
Keep a China-marker or grease pencil close by to draw clear lines on the finished shell. These waxy tools write on taped plastic way better than a standard pen. Plus, they're much less likely to smudge while you handle the template. And a mirror is going to help you check if the wrap is staying smooth across those hard-to-see spots.
Have some blunt-tip scissors ready, but only use them to safely remove the finished mold. Grab a clean towel, too, so you can keep hair out of your workspace. Don't try swapping in stretchy film, opaque tape, or ink that bleeds everywhere. Bad idea. Lordhair can always check and let you know if your finished mold works for a custom fit.
Mapping Ridges and Bumps Using Plastic Wrap and Tape
When you're making a template for a custom hairpiece, just place clear plastic wrap over the coverage area. Hold it right against the scalp with light, steady pressure. But don't stretch the wrap tight. Stretched wrap can easily bridge right across a hollow spot or flatten out a raised ridge, completely changing the true surface the scalp mold needs to capture.
Now, cover the wrap with clear tape using short, overlapping strips. Lay each strip right along the natural curve instead of pulling it flat across the head. Start where the contour sticks out the most, then work your way out from there. Keep checking your reflection from a few different angles. The taped wrap should actually touch the scalp over every single bump and dip. You really don't want any air pockets hiding over low spots.
Having a helper is great for the crown since you can't easily see if the tape has accidentally formed a bridge back there. Use your fingertips to gently press the tape down, but don't try to reshape the mold itself. If a taped section suddenly looks perfectly smooth over a spot where your scalp actually isn't, peel that part off. Reapply it with a lot less tension. Simple.
Once the tape shell feels firm enough to lift without losing its shape, Lordhair can use those preserved contours to figure out the right customized fit. Using clear plastic wrap just makes it easy to see if the mold actually follows your head's surface before you even pull it off.
How to Measure the Area of Hair Loss and Mark the Frontal Hairline
A scalp mold captures curves, but you still need clear placement lines. If your hair loss area is uneven, guessing might leave the frontal hairline too high, too low, or totally off center.
Clear marks give Lordhair a reliable map of your thinning area and hairline. The goal isn't perfect facial symmetry. Instead, it's about finding a natural placement that blends with your own features and remaining bio hair. Simple.
Finding Hairline Height with the Three-Finger Rule
Think of the three-finger rule as a starting point rather than a strict measurement. Just place your index, middle, and ring fingers vertically above the center of your eyebrows. Make sure your index finger rests right at the brow line. Then, mark the top of your ring finger on the taped scalp mold to get your first frontal hairline reference.
Foreheads aren't always perfectly symmetrical, so one side might naturally sit higher. Keep your center mark tied to the midpoint between your eyebrows, and then check both temples in a mirror. Draw a gentle, slightly irregular line toward each side instead of forcing it to be perfectly level. A hairline that actually follows your facial balance looks much more natural than a ruler-straight line.
Check the line while holding a normal expression and head position. If it feels too high or too low, tweak it before cutting the template. Lordhair can always review the marked mold to help confirm the frontal hairline placement matches your facial proportions.
Marking the Perimeter of an Asymmetrical Balding Area
Mark the edge exactly where your remaining hair shifts from solid coverage to the thinning area, not just where you want the hairpiece to stop. On an uneven scalp, this line might dip behind one temple, widen out over the crown, or sit closer to your existing hair on one side. All these little details are incredibly useful for building a custom hair system.
Starting at your frontal hairline mark, trace one side of the hair loss zone in short sections directly on the taped mold. Follow every change in direction across any ridges or dips, moving around the crown and back up the other side. Don't force the line into a perfect circle just to match the opposite side. An accurate outline is often pretty uneven. That's totally normal.
When you need to measure the width of a balding spot, measure across the widest marked points instead of just assuming the center is the widest part. Make sure to label the front, back, left, and right sides of the mold. Lordhair can then use those labels along with the contour record to figure out your exact coverage boundary.
Choosing the Right Base Material for Non-Standard Scalp Contours
An uneven scalp can make a perfectly measured hair system feel completely wrong if the base material can't follow your ridges and dips. When dealing with irregular contours, flexibility matters just as much as a custom fit. A stiff base might just sit right above the skin, even if the perimeter is spot-on.
Thin skin usually hugs the head much closer. Rigid monofilament and thicker bases, on the other hand, often leave gaps. Your choice here also decides if a stock unit can be tweaked or if you'll need a full custom build.
Ultra-Thin Skin (0.03mm) for Contour Conformance
Ultra-thin skin is almost always the most forgiving option if your scalp has low ridges, shallow dents, or an asymmetrical shape. Because it's only 0.03mm thick, this material has very little built-in structure. That means it lies right against the scalp instead of bridging over small bumps and dips.
This tight contact cuts down on raised edges and makes a custom fit feel incredibly secure. Plus, when it's attached right, skin bases make it look exactly like hair is growing straight out of your head.
But there's a trade-off with durability. A 0.03mm base is delicate. It can tear if you handle it too roughly during daily wear or when taking it off.
It's perfect for guys who care more about getting a seamless fit on an uneven scalp than having a piece last forever. Make sure to share clear details about your head shape with Lordhair before picking your material. This lets the team check if thin skin actually matches the size and shape of your specific coverage area.
Why Rigid Monofilament and Thick Bases Cause Bridging
Stiff monofilament and thicker bases often cause "bridging." This happens when part of the hair system bridges over a ridge or dip instead of resting flat against your skin. Since monofilament is a woven fabric, it wants to stay flat. If your scalp suddenly changes height, the material will fight that bend.
The end result is usually a small air pocket, a lifted edge, or a tight spot every time you move your forehead or turn your head. Your tape or glue might hold the surrounding areas down fine, but it simply can't force a stiff panel to match every single contour.
Getting an oversized base isn't a solid fix for a bumpy head either. The extra material usually just wrinkles or lifts up instead of sinking into a hollow spot. If your scalp has obvious ridges or dips, let Lordhair know exactly where they are. That way, the base material and custom fit can be planned out together.
Can You Trim an Oversized Stock Hair System to Fit an Irregular Head?
You can sometimes trim an oversized stock hair system down to a smaller size, but it won't fix a tricky scalp shape. Cutting it just removes the extra base. It doesn't magically make stiff or loose material mold to ridges, dips, or sharp curves.
If you have an irregular head shape, the real question is whether the extra base sits outside the area you need to cover without folding up or lifting at the edges. If it doesn't lay flat before you attach it, simply trimming the edges probably won't fix the fit.
A stock unit might be a decent starting point if your coverage area is just a little uneven, as long as the base is big enough to leave a clean margin around it. Just make sure a pro confirms the exact outline before you start cutting. Once you trim off too much base, you can't undo it. Plus, an uneven edge is much harder to stick down securely.
Go with a custom hair system if your hairline is heavily asymmetrical or if your scalp has obvious ridges and hollows. This route lets Lordhair look at the exact shape details you send over and recommend a base that's actually built to lay flat. Bottom line: it gives you much better daily wear than trying to force an oversized base to do something it wasn't made for.
Troubleshooting Base Fit: What to Do If Your Hair System Lifts or Bubbles
A toupee lifting at the same edge or bubbling up isn't just annoying. It usually means part of the base isn't sitting flat against your scalp.
Tape and glue can't reliably hold down a base that bridges over a hollow spot or wrinkles across a ridge. A good custom fit needs to lay flat before you even add adhesive. So, if it keeps lifting, you definitely need a fit check.
Check Where the Base Loses Contact
When a bubble pops up, don't just shove more glue or tape into that spot. Doing that can trap a fold, making the edge way harder to fix later.
Take off the toupee carefully following your provider's instructions. Then, find the exact spot where the base stops touching your skin. Pay attention to whether this happens near a ridge, a dip in the scalp, or along a curved hairline.
Stop Reapplying Adhesive to the Same Problem Spot
If that exact same spot lifts again after you carefully reattach it, the problem is usually the base shape or how it's placed on your head—not a lack of glue. Don't keep piling on adhesive to force it down. It won't work.
Snap some clear photos of the lifted area and let your provider know when it happens. Lordhair can actually use those details to double-check your measurements and fix the shape before making your next one.
How Lordhair Customizes Hair Systems for Complex Scalp Topographies
A scalp ridge, a little dip, or an uneven curve can leave a normal base floating in one spot, even if the general outline looks fine. You're not overreacting if you worry about this. A custom hair system actually needs to hug the exact shape of your scalp across the entire wearing zone, not just match the basic length and width.
Lordhair treats your physical mold as way more than a simple sizing guide. When checking the template, the mold tells the team exactly where the base has to curve, where it should sit lower, and where a flat cut might pull too tight. This creates a true 3D map for a custom fit, so nobody is just guessing based on standard head shapes.
Clear edges on the mold and notes about spots that keep lifting really help Lordhair read your shape right. The goal isn't just looking perfect on paper. It's building a base that rests evenly against your skin. That way, sticking it down is a lot easier, and your finished hair system feels totally natural every single day.
Frequently Asked Questions
How do I measure my head for a hair system?
Use a clear plastic-wrap and packing-tape scalp mold. Tape measurements miss ridges and dips.
How do I find the correct base size for a hair system?
Trace the actual thinning area on the mold. Don't force symmetry.
Can I measure my own scalp for a hair system?
Yes. Mark your hairline with the three-finger rule, then preserve the full contour.
About the Creator
Leo
Passionate men's hairstylist with a keen eye for detail and a knack for creating on-trend looks. Dedicated to delivering hair restoration education that enhances individual style.
Enjoyed the story? Support the Creator.
Subscribe for free to receive all their stories in your feed.
Comments
There are no comments for this story
Be the first to respond and start the conversation.