
How to Make Cannabutter
Smoking and vaping weed is great, but edibles can also be wonderful. Learn how to make the best edibles with a tutorial on how to make cannabutter.

The process of how to make cannabutter is something of an enigma in weed culture. Everyone has their own tricks and tips, and everyone seems to get different results. In fact, it’s this last aspect of edibles that people often complain about; the lack of consistency. This can be easily resolved with the right steps, letting you enjoy a delicious treat that will get you high and keep you high all day long. With that being said there’s no further reason to delay, let’s learn how to make cannabutter today!
Tools You Will Need:
- Large saucepan
- Spatula
- Water
- Unsalted butter
- Cheese cloth
- Large glass bowl
- Whisk
- Grinder
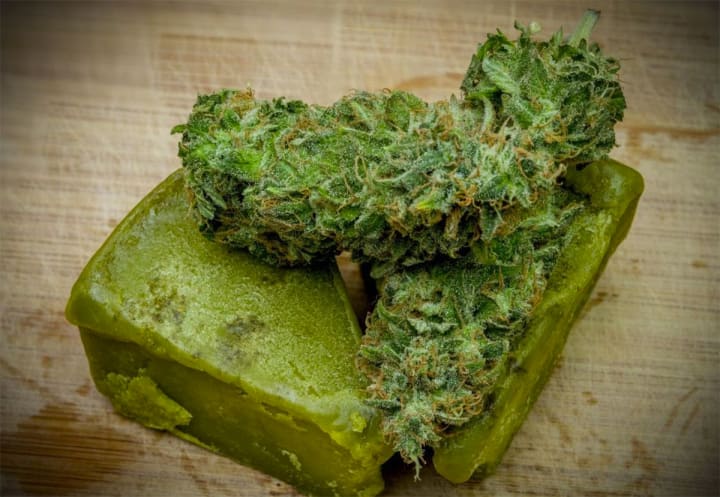
- Weed
One of the most important things in the cannabutter production process is the prep. The first thing you should do is place the whole nugs you want to use on a piece of foil and baking pan and put it in the oven at around 220 degrees Fahrenheit for 15 minutes. This turns the THA in your weed into THC. The scientific name for this process is decarboxylation, and it’s one of the most important things that people skip when making cannabutter. Failure to do this can mean that you will get a much weaker batch of butter than you are expecting based on the amount of material you used.
Once the decarboxylation step is completed you should use a grinder to crumble the weed. Breaking the weed up into grounds increases the surface area exposed and allows the chemical process of the THC going from your weed into your butter to happen faster and more efficiently.
Cooking
Once you have your materials prepped, heat your butter in the large saucepan you have. It is important that you use as little heat as possible. Using low heat ensures not only that your butter will not be burnt, but also that the THC you’re after will be absorbed into the butter rather than evaporating off. This is another area where people often lose potency. There’s no rushing this process if you want to do it correctly, so low and slow is the way to go when you’re learning how to make cannabutter.
When the butter starts to melt you can add the ground marijuana. You should stir this combination regularly both in order to encourage the extraction process as well as to make sure nothing is getting burnt.
One thing that some people like to do, but may be more suited for experienced weed chefs, is to constantly add water to the pan as their cannabutter cooks. The water pulls out a lot of the material in weed that you don’t want. Think things like chlorophyll and other standard plant matter. THC, CBD, and terpenes that you want from weed are not water soluble, so this won’t decrease your potency in a noticeable way. Another added benefit of this step is that water is an excellent form of heat control. Water and butter have different densities, with water being denser. Thus the water stays on the bottom of the pan, absorbing most of the heat. This prevents the butter from getting above 212 F, which is the boiling point of water. As a result you can be confident that your butter will not be burnt. As you can imagine from the benefits this tactic provides, it is one of the first tricks people use once they get comfortable with how to make cannabutter.
You should let this process run for at least an hour, but longer is always better. Don’t be afraid to add more water to the pot as the water you initially use will evaporate off. One random benefit from this is that the bubbles from the water evaporating will help stir the oil, keeping the THC extraction process going strong and ensuring that you get the most potent cannabutter you can manage with the materials at your disposal.
Separating and Straining
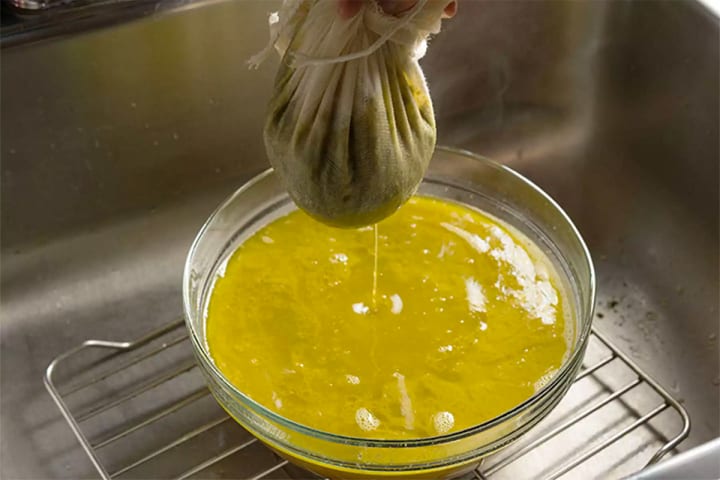
Once you’re satisfied that it’s time to remove the cannabutter from heat, you should prepare a large glass bowl. If you have a buddy handy one of you can hold the cheese cloth open to while the other slowly pours the contents of the saucepan through the cheesecloth and into the bowl. Otherwise attach the cheese cloth to the mouth of the bowl with a rubber band and slowly pour the contents of the saucepan into it.
Once you’ve poured, bundle the plant material in the cheese cloth and squeeze out any remaining liquid you can get. The better you squeeze the more butter and the more potency you’ll get. It is important to be careful as the cannabutter mixture may still be hot, so be sure to take appropriate measures to protect yourself. Second degree burns on your hands are a great way to make yourself wish you never learned how to make cannabutter.
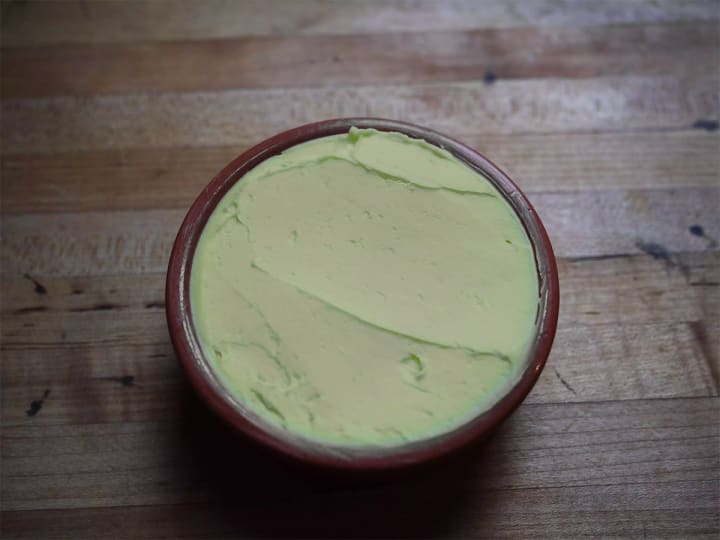
Discard the plant material in the cheese cloth. Place the bowl in a refrigerator for a couple hours. The butter will re-solidify, leaving the water with waste extraction to be poured out. If you’re not patient enough to wait for the butter to cool to separate the product then you can also skim off the butter while it is still liquid. There should be a clear line where the butter ends and where the water begins to make the process easy for you. From there the process is nearly done.
Storage
You can store your cannabutter safely for up to two months in the refrigerator, and for as many as six months in the freezer. Make sure that it is sealed tight and not exposed to any open air, as this will help preserve the freshness for longer. You can now use it like you would use butter in any recipe, just with an added kick of a pleasant buzz.
As you can see the cannabutter process is not terribly complicated. It requires patience and confidence that science does what it does. Follow these steps and you’ll be the person all your friends come to when they want to learn how to make cannabutter.
About the Creator
Aunt Mary
Lives in Englewood, NJ, and can often be found sharing her weed wisdom at Starbucks.
Enjoyed the story? Support the Creator.
Subscribe for free to receive all their stories in your feed. You could also pledge your support or give them a one-off tip, letting them know you appreciate their work.
Understanding ADHD in Society
Introduction to ADHD: Definition, Types, and Symptoms Attention Deficit Hyperactivity Disorder (ADHD) is one of the most prevalent neurodevelopmental disorders affecting both children and adults worldwide. Characterized by patterns of inattention, hyperactivity, and impulsivity, ADHD can significantly impact various aspects of an individual's life. In this article, we delve into the intricacies of ADHD, exploring its definition, types, and symptoms. Our aim is to provide a comprehensive introduction that is both intriguing and informative, utilizing key viral keywords to ensure a broad reach and engagement.
By Steadia Kyosiimire6 days ago in Potent
I First Saw Him
When I first saw him sitting on the wall, relaxed and looking out over the water, I was sure he wasn't a local. Not including children, there are only about 250 or 300 of us in this area full-time, though that number is ten-fold in the summer, and I know everyone at least by sight or by family resemblance. And yet, the way he sat looked familiar and started my mind sorting and discarding among the families I knew, not quite like this one, not quite like that one.
By Natalie Wilkinson7 days ago in Fiction


Comments
There are no comments for this story
Be the first to respond and start the conversation.