
How Do You Choose the Right Gray Hair Percentage in a Hair System? A Salon Guide to Flawless Client Consultations
Gray Hair Percentage Guide for Hair System Salons 2026

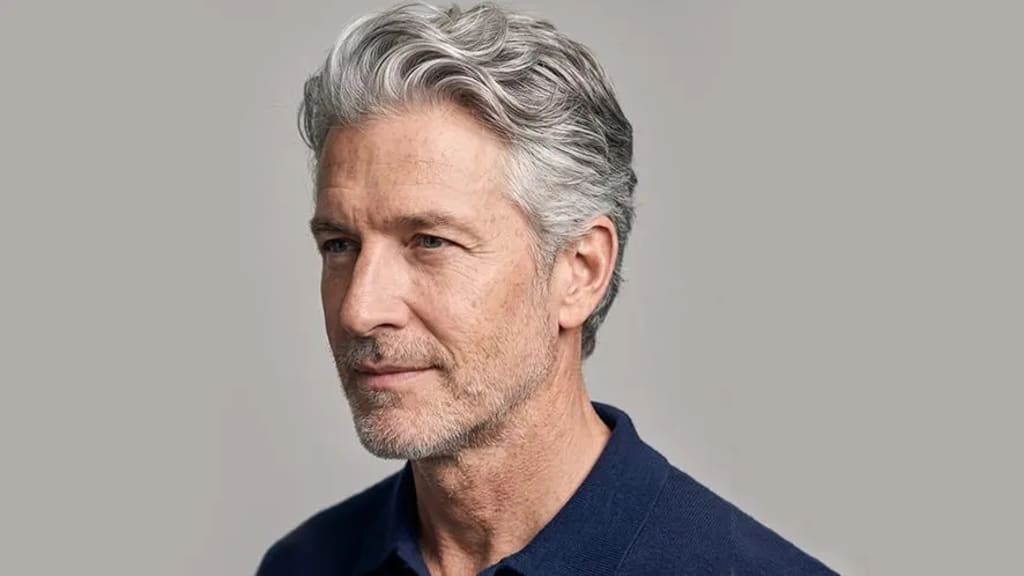
How Do You Choose the Right Gray Hair Percentage in a Hair System? A Salon Guide to Flawless Client Consultations
Gray hair percentage needs to match your client's visible gray, not the age on their birthday cake. A solid hair system consultation starts by checking the natural hair at the temples, sides, and back, since that's usually where gray shows up the clearest.
You need to figure out this pattern to handle clients who ask for less gray, and to place custom Bono Hair orders that blend perfectly right from day one.
Key Takeaways
Gray percentage should match visible bio hair rather than chronological age.
Perimeter swatch comparisons need consistent salon lighting to reveal accurate gray tones.
Gray placement should follow each client's visible temple and perimeter pattern.
Why Age-Based Guessing Fails: Age vs. Actual Gray Hair Percentage
Why does age-based guessing fall short? A 35-year-old client might have way more visible gray than someone hitting 60, and the reverse is totally possible too. Age-Appropriate Aesthetics is all about what the client actually has right now. Not their birth date.
For any Hair Replacement Specialist, looking at the visible gray pattern is your most reliable starting point for color matching.
Chronological Age vs. Biological Hair Pattern
Genetics and personal aging rates set the pace. That means chronological age just can't predict a client's gray percentage. Two people born the exact same year often show wildly different amounts of gray in their hair.
Pick the Hair System based on what you see, not some rigid age rule. This keeps Age-Appropriate Aesthetics tied directly to the client's actual appearance. Simple as that.
The Vanity Gap: Why Clients Request Less Gray Than They Have
Clients often ask for darker hair because they link gray with getting older, or they're just remembering a younger version of themselves. But during a Client Consultation, that wish easily clashes with the gray everyone else already sees.
Just explain that Color Matching is about getting a believable blend with their remaining hair. A lower-gray choice might look younger holding it in your hand, but it looks far less convincing once it's actually on the client.
The Uncanny Valley of Hair System Color Matching
Going with too little gray creates a harsh contrast between the Hair System and the client's natural hair on the sides or back. The human eye picks up on that mismatch instantly. It makes the piece look like it's just sitting there instead of actually growing out of their scalp.
A solid Salt and Pepper Effect really supports the client's existing color story. Any good Hair Replacement Specialist needs to judge the full visible result. Don't just look at the top.
Key Risks of Over-Graying vs. Under-Graying
Over-graying washes out the overall color. It can easily make the Hair Piece look much older than the client actually is. Under-graying does the exact opposite. It creates a dark, heavy block against their natural visible gray.
Natural Blending lives right between those two mistakes. You want to match the hairpiece to what's left around it. That way, the color doesn't grab attention before the actual style does.
Why Uniform Gray Percentages Look Unnatural
Flat gray coverage almost always looks manufactured. Why? Because natural gray rarely sits like one perfectly even veil across the head. A Custom Hairpiece needs to reflect the natural variations in the client's visible hair, rather than just using a flat blanket effect.
Make sure to confirm the Gray Hair Percentage as part of the overall blend, and then review it right next to the client's own hair. Too much uniformity will just make the system stick out.
The 4-Step Consultation Diagnostic for Gray Hair Matching
What makes a gray-match consultation actually work? It starts with the client's visible bio hair, not their age or a quick request for darker hair.
This four-step check gives your salon a repeatable way to nail down a realistic gray percentage before ordering a custom hairpiece. Simple.
Step 1: Measuring Bio Hair Gray Ratio with a Color Ring
Start Color Matching at the sideburns and right above the ears. That's where the client's bio hair will stay visible next to the system. Separate a few small sections, then compare them against a standard gray swatch ring.
Record the closest Gray Hair Percentage range instead of forcing an exact match. The real goal is a believable blend from a normal viewing distance. That's it.
Step 2: Evaluating Natural Hair Density and Base Contrast
Hair Density totally changes how much gray the eye actually picks up. Thin side hair shows more scalp, so the exact same gray percentage can look much lighter than it would in thick hair.
Look at the client's remaining hair as a whole, not just one random strand. And a balanced Salt and Pepper Effect needs enough gray to bridge the hair system with the visible sides and back.
Step 3: Mapping Regional Hair Loss Patterns
Map out exactly where the client's hair gets thin or stops, especially around the temples, sides, and the back. Those borders form the line where the hair replacement system has to blend into their natural hair.
A Hair Replacement Specialist needs to note if gray clusters sit near the temples or spread out through the back. Natural Blending follows the client's real transition zones, never a generic pattern.
Step 4: Finalizing the Target Percentage Range
Use the color-ring results, Hair Density, and your regional pattern notes to pick one target gray range for the custom hairpiece. But if the client asks for less gray, make sure to explain the harsh visible contrast that choice might create.
Document the agreed percentage in your Client Consultation notes right before placing the order. Clear records make future refits and repeat orders way more consistent.
How Do You Determine the Right Gray Hair Percentage for a New Client?
The right gray percentage always comes down to visible bio hair, density, and how gray shows up across the client's sides and back. Age can help guide the chat, but it can't ever replace real Color Matching. No exceptions.
Pick the hair system percentage that backs up the client's existing color pattern in real life. Once you set that baseline, just map where the gray belongs across each scalp zone to get a much more natural result.
Mastering Zonal Distribution: Placement Rules for Hair System Realism
Should gray hair sit evenly across a hair system? Usually, no. Natural graying tends to start around the temples long before it shows up across the top of the head.
Your client's visible bio hair needs to set the map, not their age. By using zonal placement, you can take a single gray percentage and turn it into Natural Blending. That way, it looks believable all the way from the hairline right back to the crown.
The 60/40 Rule for Temple and Sideburn Integration
Try using the 60/40 rule as your placement guide. Put more visible gray toward the temple and sideburns, then soften the rest through the upper zones. This backs up the Salt and Pepper Effect without making the whole piece look washed out.
When tackling Temple and Sideburn Integration, look closely at each side of the client's actual bio hair. If one temple has more gray, a custom hairpiece needs to match that difference instead of forcing a perfectly mirrored look.
Crown and Top Zone Blending Strategies
Keep the top zone a bit more controlled than the temples. You don't want the hair system looking too gray-heavy from above. A dense top can actually make a moderate gray percentage look way stronger, just like dark paint makes white flecks pop.
Always match gray placement to Hair Density, especially if your client has thinner sides and a fuller top. The contrast you can actually see matters way more than the client's age or whatever percentage is written on the order form.
Graduated Front Hairline Transitions
Feather the gray through the front contour instead of leaving a solid, blocky band of gray at the hairline. A gradual mix lets the Hair System flow naturally from the forehead right into the darker or grayer top zone.
Natural Blending does its best work when the front follows the client's existing temple pattern. Just keep the lightest gray concentration near the spots where their bio hair already shows it. Then, slowly reduce it as you move inward.
Custom Zonal Hair Placement vs. Stock Standard Blends
Go ahead and order a Custom Hairpiece if your client's gray is obviously stronger at the temples, uneven between the sides, or totally different from the crown. On the flip side, a single-percentage stock blend works fine when the gray is evenly spread and the perimeter has enough hair to hide minor differences.
As a Hair Replacement Specialist, you'll want to use stock systems for easy, straightforward matches. Save the multi-zone placement for those highly visible transition areas. Making that simple choice really helps cut down on obvious perimeter contrast during the first fitting.
How to Blend a Hair System with Natural Graying Temples?
To bridge the system into aging temples, match the gray level closest to the sideburn roots—not the darkest hair sitting further back. From there, comb and trim the perimeter so the system hair gently overlaps the client's bio hair for a smooth, soft transition.
Always check your Temple and Sideburn Integration under the exact same salon lighting you used for the consultation. Ambient light plays tricks. It can easily make gray look cooler, brighter, or way more noticeable than it did when you were looking at the color ring.
Visual Calibration and Lighting Control in Salon Consultations
Can salon lighting change how much gray a client seems to have? Yes. A gray percentage that blends perfectly at your consultation table might look cooler, brighter, or way darker just a few steps away.
Color Matching requires a consistent light check. You can't just guess based on age or a quick glance. Once you control the lighting, you can pick fibers that match both texture and reflection. Simple.
Salon LED Lighting vs. Natural Daylight Calibration
Overhead LED lights tend to make gray strands look cooler or more silvery. Daylight, on the other hand, often reveals warmer or softer tones. Keep in mind that synthetic and human hair reflect light differently. It's exactly like how matte and glossy paper display the exact same ink.
To get Color Matching right, check the Hair System under your station LEDs first, then move near some indirect daylight. But don't judge swatches in direct sun. Harsh sunlight just exaggerates brightness and hides those subtle tone differences.
How Hair Density Alters Visual Percentage Perception
High Hair Density easily buries gray strands inside darker hair, making the exact same Gray Hair Percentage look much lower. Switch to a lower-density system, and each light strand gets more room to stand out.
Show your client the gray swatch against a density that's close to their planned hair system. A 20% gray blend won't look the same across different densities. So don't just pick a number based on their age.
Preventing Tone Discrepancies Under Flash Photography
Flash photography has a habit of making gray fibers look brighter than they do in normal indoor light. Before you confirm Natural Blending, take a quick picture using the salon's regular lighting. Then take another one with the flash turned on.
Look at both photos right next to the client's bio hair during the Client Consultation. If the gray in the Hair System suddenly jumps out on camera, fix the blend before you order. It's much better than trying to explain a mismatch after the fitting.
Station Setup Checklist for Accurate Color Audits
A solid color-audit station requires neutral surroundings, a handheld mirror, gray-hair swatches, and a daylight-balanced task light. Keep that light right in front of the client and slightly above eye level. Never put it directly behind them.
A Hair Replacement Specialist should also get rid of colored capes, bright towels, and shiny surfaces from the immediate area. Those colors bounce light onto the gray strands and mess up your Color Matching, even if you're being incredibly careful.
Material Selection: Synthetic Gray vs. Human Gray Hair in Systems
Which is better for a client's hair system: synthetic or human gray hair? Synthetic gray usually keeps its original tone longer. Human gray, on the other hand, gives a closer texture match and moves more naturally.
Match the fiber to your client's bio hair first. Then, set clear expectations about color changes over time. It makes those later consultations a lot easier.
Synthetic Gray Fiber: Light Reflection and Color Stability
Heat-resistant synthetic gray fiber keeps its manufactured shade better because it doesn't oxidize like natural hair. It also resists chemical color changes. This helps keep that clean silver or white look.
The way it reflects light can look more uniform than human gray. Always check it right next to the client's bio hair under both salon LEDs and natural daylight. If a synthetic strand is too bright, it'll stand out in the finished blend.
Human Gray Hair: Realism, Texture, and Heat Handling
Human gray hair usually gives the best natural blending. Why? Because it moves, feels, and reflects light just like the client's own hair. For textured, wavy, or fine bio hair, this difference matters way more than basic age-based gray percentages.
It also handles heat styling exactly like natural growing hair. But here's the catch: that natural structure makes the gray shade more prone to tone shifts over the lifespan of the system.
Yellowing Risks and Environmental Factors in Fiber Selection
UV exposure and chlorine can cause oxidation in human gray hair. This slowly pushes those bright white or silver strands toward yellow. Think of it like a white t-shirt that picks up a warm cast after being out in the sun too much.
Ask about your client's pool habits, outdoor work, and time in direct sun before you place an order. Synthetic gray fiber is usually your safest bet if keeping the color stable matters more than nailing an exact texture match.
What Is the Difference Between Synthetic Gray and Human Gray Hair in Hair Systems?
Synthetic gray is a manufactured fiber with a locked-in color. Human gray is natural hair with a real cuticle and unique variations in texture. That big structural difference is what drives the choice for each hair system.
Go with synthetic gray when your client needs a consistent tone. Pick human gray when matching their exact movement and feel is the top priority. Either way, always base the gray percentage on their visible bio hair. Don't base it on their age. Simple.
Client Psychology and Objection Handling: Consultation Scripts for Stylists
Client psychology determines whether adding gray feels like a loss or a totally believable match. Once you match the fiber to your client's bio hair, just turn those visible gray patterns into a clear system spec.
Age-appropriate aesthetics just means working with what the client actually has today. Don't assign gray based on how old they are.
Reframe Strategy: Shifting Focus from Age to Realism
Lead with realism instead of age. Tell them, "I'm not adding gray to make you look older. I'm just matching the gray people already see around your hairline and sides."
Show the client a blended reference right next to their natural hair. A believable pattern keeps the focus on a great haircut. But if the system is too dark, that blend line becomes painfully obvious.
Consultation Script 1: Addressing the "Too Dark" Vanity Trap
When an older client asks for zero gray, don't just shoot them down. Try saying: "I get that you want a darker look. My only worry is that a solid color might clash with your natural sides."
Then follow up with: "A light salt and pepper effect keeps the color rich but softens that harsh contrast." It's all about recommending gray that mirrors their actual hair, rather than an arbitrary age label.
Consultation Script 2: Explaining Temple Density vs. Top Gray
Blending the temples and sideburns needs a totally separate conversation since these areas frame the face. Just say, "Your top can stay a deeper color, but your temples really need to blend with the gray on your sides."
Explain that perfectly uniform color isn't always natural. Putting gray exactly where the client already has it makes the edge of the hair system much harder to spot.
Managing Long-Term Transitions as the Client Ages
Plan out gray changes in tiny steps over future orders, based on whatever bio hair pops up. Tell your client: "We'll take pictures of today's blend and tweak your custom hairpiece whenever your natural pattern changes."
That prevents a sudden shift that might feel totally unfamiliar. Plus, clear consultation notes give manufacturers the exact specs they need for consistent future orders.
Sourcing and Manufacturing Precision Systems with Bono Hair
Nailing the exact gray specs turns your consultation notes into a standard you can repeat every time. Bono Hair helps salons that need custom hairpiece orders built around a client's actual gray pattern, rather than just guessing based on their age.
Having clear records is a lifesaver when clients come back for a replacement system months down the line. It's that simple.
OEM and Custom Manufacturing Specifications for Hair Systems
Hand Bono Hair a complete custom hairpiece brief. This means base type, hair color, density, length, curl pattern, and gray percentage by zone. Think of a zonal diagram like a paint-by-number sheet. It shows exactly where every single gray blend belongs.
Make sure the system matches the client's visible natural hair, especially around the front and sides.
Factory-Calibrated Gray Color Swatches and Rings
Stick to the same Bono Hair color ring during both the client consultation and the order review. This gives your color matching process one solid reference point, so you aren't relying on photos, phone screens, or just your memory.
Write down the selected color code and gray hair percentage in the client's file. That one small step makes verifying future production orders so much easier.
Ordering Multi-Zone Gray Percentages for Custom Toupees
Mark each area separately on the order diagram: top, front, temples, and sideburns. Your custom toupee can have a deeper color on top, while using more gray where the temple and sideburns meet the client's natural hair.
Jot down the percentage right beside every marked zone. Saying something like "more gray at the sides" just leaves way too much room for guesswork.
Maintaining Consistency Across Batch Orders for Salon Inventory
Repeat orders need the exact same approved color codes, gray-zone map, and hair system specs from that first production run. Keeping things consistent protects your salon inventory from obvious color shifts between a client's current unit and their new one.
Every hair replacement specialist should save the final order sheet along with consultation photos and fitting notes. Those records are the backbone of reliable reorders.
Station Consultation Tools and Professional Support
Put together a station kit with color rings, gray-percentage diagrams, client photos, and written order forms. These tools help your hair replacement specialists explain exactly why actual gray placement matters way more than just the client's age.
Reach out to Bono Hair for B2B guidance on documenting custom specs and training your styling team. Having shared standards helps your staff deliver the exact same consultation quality during every single appointment.
Frequently Asked Questions About Gray Hair Systems
How do I choose the right gray percentage for a hair system?
Match visible side, temple, and back hair. Not age.
What is gray blending in a hair salon?
Gray placement that mirrors natural perimeter variation.
How do I figure out my best hair color?
Compare swatches under salon LEDs and indirect daylight.
How do I match hair color to my skin tone?
Skin tone matters less than matching existing bio hair.
What hair colors offer the best coverage for grey hair?
No universal shade. Match the client's salt-and-pepper pattern.
About the Creator
Leo
Passionate men's hairstylist with a keen eye for detail and a knack for creating on-trend looks. Dedicated to delivering hair restoration education that enhances individual style.
Enjoyed the story? Support the Creator.
Subscribe for free to receive all their stories in your feed.
Comments
There are no comments for this story
Be the first to respond and start the conversation.