
Can a torn hair system base be repaired? A Cost Analysis for Salon Owners
Repairing Torn Hair System Bases: 2026 Salon Cost Analysis

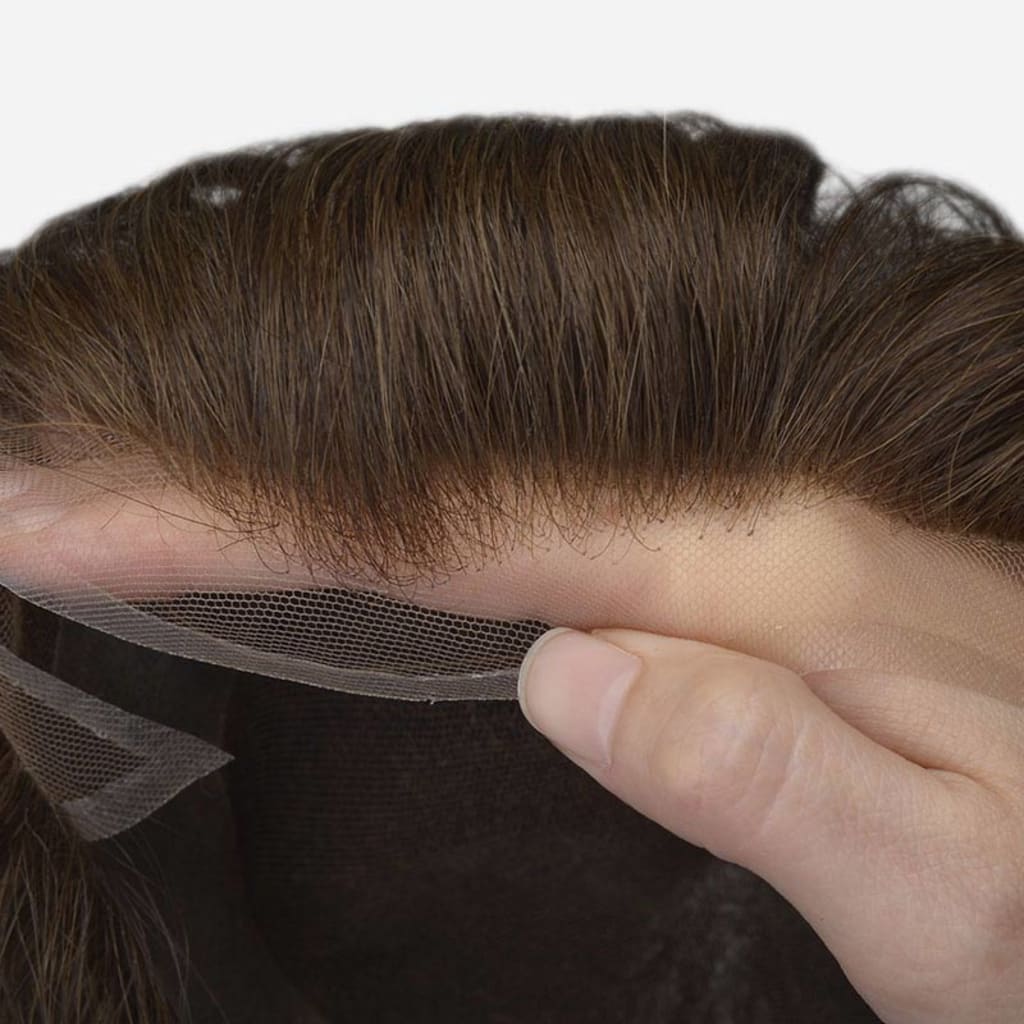
Can a torn hair system base be repaired? A Cost Analysis for Salon Owners
You can often fix a damaged Hair System Base, but not every repair actually makes business sense. It really comes down to whether the fix saves more money than it costs over time.
For every Hair Replacement System, salon owners have to balance out labor, materials, and client retention against just getting a full replacement. These clear, practical benchmarks will help you make the right call.
Key Takeaways
Not all bases repairable; ultra-thin skin usually requires replacement.
0.08–0.12 mm poly or lace repairs can extend lifespan weeks.
Small edge tears under 1 cm are most cost-effective to repair.
Labor time often outweighs repair savings compared to full replacements.
Use ROI per chair hour to choose repair or replacement.
Feasibility Analysis: Can All Base Materials Be Repaired?
Not every Hair System Base handles a repair the exact same way. Material thickness and structure set hard limits on what you can actually fix—and how long that fix will hold up.
For salon owners and suppliers, this hits Maintenance Costs directly. It decides whether a repair service adds real value or just puts off a full replacement for a few short weeks.
0.03mm Ultra-Thin Skin Bases
A 0.03mm ultra-thin skin base rarely survives a tear well enough to hold a reliable fix. These bases use super fine Liquid PU (Polyurethane) built for a natural look, not heavy-duty strength.
Once it tears, the material around the rip is already stretched out and weak. Putting on adhesive or patch material just won't bond evenly. Because of this, the spot usually splits open again in a few days or weeks under normal wear.
From a business standpoint, trying to give this base type a "Second Life" repair just drives up Maintenance Costs without adding any real durability. Most salons find that totally replacing it is the only way to keep clients happy and avoid wasting time on repeat fixes.
0.08mm–0.12mm Poly and Skin Bases
You can repair 0.08mm to 0.12mm poly bases with much better luck because the material is actually thick enough to grab onto a bond. You can apply Liquid PU (Polyurethane) to seal up tears and reinforce weak spots, especially around the edges.
The fix works by melting the torn area back together, making a flexible seal that moves right along with the base instead of cracking. Do it right, and the system can stay in action for several more weeks or even months.
For B2B operators, this opens up a real chance to save money. Fixing the edges on these bases cuts down on how often you need to replace them. It lowers your overall Maintenance Costs while still giving clients the solid durability they expect.
French and Swiss Lace Bases
You fix French and Swiss lace bases with mesh patching instead of liquid seals. You simply stitch or glue a tiny piece of lace right into the tear. This brings back the structure while keeping the airflow totally intact.
Precision is everything here. Bad alignment or patches that are way too big will choke off breathability and make the fix look obvious. Good, skilled work keeps that lightweight feel clients always expect from a lace Hair System Base.
For salons, fixing lace gives you some great customization options. You get to stretch out the unit's lifespan without messing up the look or fit. It's an easy way to keep Maintenance Costs in check while still delivering a top-tier finish for the wearer.
Strategic Decision Matrix: Tear Severity vs Repair Protocol
Tear size and location tell you right away if a unit is worth fixing or replacing. A basic rule of thumb? Small, clean edge tears are totally repairable, while big splits or crown damage usually aren't. This matrix helps you standardize your Repair Services, cut down on failed fixes, and keep client results predictable.
Small tears under 1 cm on the edges or perimeter tabs respond really well to sealing or patching. This is especially true on 0.08–0.12 mm poly or lace bases. You can expect a few extra weeks to a couple of months of added wear. That's it.
Mid-size tears (1–3 cm) near stress zones need extra reinforcement and careful alignment. They can definitely hold. But just keep in mind, the unit's overall lifespan will take a hit.
Large tears over 3 cm, multiple rips, or damage right in the crown area risk visible defects and quick failure. Replacement is just the safer bet here.
Once you know what's actually fixable, you just have to decide if the bench time is worth the cost compared to grabbing a brand new Bono Hair unit.
Salon Financial Analysis: The True Cost of Repairing vs Replacing
Fixing a damaged unit might look cheaper at first glance, but the real costs pile up quickly once you track labor, delays, and overall risk. Running the numbers proves that constant in-house repairs drain your margins much faster than just planning for replacements. Maintenance isn't only about buying materials. It covers technician hours, redo rates, and lost time in the styling chair.
Labor is your biggest hidden expense. A 45 to 90-minute repair ties up a stylist who could be doing a full install instead. Botched repairs just lead to rework, completely doubling the labor spent on the exact same unit. Plus, every extra time someone handles the piece, the risk of tearing the base goes up.
Your inventory takes a hit, too. Sitting on partially fixed units ties up your cash and kills turnover speed. Meanwhile, a set replacement cycle keeps your revenue steady and makes forecasting a lot easier. That's it.
Calculating the Repair ROI: The Salon Profit Formula
Fixing a hair system only makes sense if the profit actually beats a full replacement once you factor in labor and risk. Salon owners need to treat every unit like its own mini P&L. Don't just look at the raw ticket price—compare the net profit per service. The goal is simple. Pick the option that gives you better profit per chair hour with way less risk of a redo.
Let's look at a quick formula. Repair ROI = (repair price − labor cost − redo allowance) ÷ time spent. Replacement ROI = (install price − unit cost) ÷ time spent. Say a 60-minute repair nets you $80 after costs, but a 60-minute install brings in $140. Replacement wins. Over the course of a year, that gap drives up the individual user cost per year for your clients. And worse, it puts a hard cap on your overall margins.
In-Salon Quick Repair Protocol: Essential Tools and Setup
A quick, clean repair station protects your profit margins and keeps chairs turning. To make your repair services actually profitable, every salon needs a dedicated kit built for the real-world issues of a damaged hair system base. Think speed, precision, and doing it right every single time.
Start off with a magnifying lamp (3x–5x) so you can catch tiny tears. You'll also want fine-tip tweezers and micro scissors for careful trimming. Keep medical-grade adhesive nearby, along with double-sided tapes in a few different widths (1/4", 1/2"). Don't forget a small heat tool to reactivate those bonds. Throw in a clamp board or a mini mannequin head to keep the base steady while you work. Simple.
Round out your kit with alcohol wipes, residue remover, and color-safe markers to blend the edges perfectly. Having this setup ready cuts down on costly rework and keeps your service time well under 30 to 45 minutes.
Step-by-Step SOP for Skin Base Repairs Using Liquid Polyurethane
A solid Liquid PU repair can stretch a skin base's life by 2–6 weeks and cut down on replacement costs for damaged units. For salons and suppliers, the payoff is simple: more billable services and way fewer write-offs.
Just follow a strict SOP so the repairs actually hold, stay flexible, and keep looking natural right at the hairline.
Preparation and Degreasing
A torn polyurethane edge needs to be perfectly clean before any bond even touches it. Any leftover tape, scalp oils, or remover will block adhesion and cause your hair replacement system to lift early. Not good.
Trim the frayed PU into a smooth line using micro scissors. Then, wipe the area down with alcohol until the pad comes back completely clean. Let it air-dry for 60–90 seconds. If the shine looks a bit uneven, just repeat the process once. This is your basic fix to stop poor adhesion.
Keep the base flat on a clamp board so the edge doesn't curl up. Having a stable surface stops uneven thickness later on. It also cuts down on rework time, directly protecting your service margins.
Liquid PU Application and Curing
Put the Liquid PU (polyurethane) on in a thin, even film right along the edge—you're aiming for a 0.2–0.5 mm thickness. Grab a fine brush and work from the intact material toward the tear. This way, you won't accidentally push product under the hairline.
You'll build better strength with two light coats instead of slabbing on one thick layer. Wait about 3–5 minutes between each coat until the surface gets tacky, not wet. This keeps things flexible and stops hard spots that clients will definitely feel.
Let the final layer cure flat for 20–30 minutes at room temperature. Don't blast it with high heat, because that will stiffen the edge. Do this right, and the unit gets a second life. Plus, you gain a repeatable, highly profitable repair service.
Step-by-Step SOP for Patching and Stitching Torn Lace Bases
A solid lace repair gives Human Hair Wigs / Toupees another 2–4 weeks of sellable life. It actually turns a near write-off right into a billable service. The main idea is simple: stabilize the tear, match the mesh, and make your stitches so fine they completely vanish at the hairline.
First, isolate the tear and snip away any loose strands. Align a matching lace patch right under the damage. Keep the grain direction the same so your tension stays even. Grab some medical-grade thread and a curved needle, then drop micro stitches 1–2 mm apart along the edge. Just make sure you don't sew across the hair knots.
Focus on Repairing Edges first. Then, reinforce the center if you have to. When you get this right, it cuts down replacement spending and boosts your margin per unit. Simple as that.
Factory-Level Ventilation vs In-Chair Emergency Fixes
You can patch small lace tears chairside. But missing hair in a stressed zone usually needs factory Adding Hair / Ventilation to actually hold up under daily wear. The rule is simple: if knots are gone across more than a 5–10 mm area or the base is thinning, an in-chair fill just won't last.
Emergency fixes work well for edge splits or single-line loss because they fix the structure fast. Plus, they add 2–4 weeks of usable life. But thick spots like the front hairline or crown need even knot spacing and the right hair direction. That's something only controlled ventilation can deliver. Repair services that send units back for re-knotting protect your margins. They extend the unit's resale life instead of forcing an early replacement.
Root Cause Diagnosis: Why Hair System Bases Tear Prematurely
Most base tears happen because of handling mistakes, not factory defects. Ripping the system off while strong glue is still bonded, scraping too hard during cleanup, and daily stress from tight styling will quickly weaken lace and thin poly bases. Bottom line: bad habits during wear, removal, and maintenance will shorten the unit's lifespan and cost you way more in upkeep.
Figuring out the problem usually starts with how you take it off. If you don't let solvents sit for at least 60 seconds, the glue stays hard and literally pulls the fibers apart. Then there's the cleaning process. Using metal tools and stiff brushes will just cut right into the knots and edges.
How the system fits and your daily routine matter, too. Units installed way too tight put constant stress on the hairline and crown. Pinpointing the exact cause helps you set realistic expectations for how long a piece will last. Plus, it makes it much easier to weigh the cost of repairs versus buying a brand-new replacement.
Client Expectations and Liability Management for Repaired Systems
Fixing up a hair system definitely stretches out its lifespan, but it's rarely going to act like a brand-new unit. Salon owners and stylists need to make that crystal clear before touching the piece. The main rule here is pretty straightforward. Repairs give the system a second wind, not a total reset, and the final result really depends on how much wear and tear it already had.
Make sure you get written agreements in place. You'll want to limit the warranty strictly to the spot you fixed and keep the timeframe tight, like 7 to 14 days. Take a few photos to document exactly how the piece looked before the repair. Also, be upfront about potential risks like thinner hair density or weaker edges. Doing this protects your bottom line while keeping your clients trusting you.
Preventing Base Damage During Maintenance and Adhesive Removal
Stopping base damage starts with how you handle regular maintenance, not just how you fix failures. For any hair replacement system, the goal is simple. Just limit the tension and chemical stress. This keeps each unit working longer and keeps your maintenance costs predictable.
Use low-residue adhesives, and take them off using specific solvents in small sections instead of soaking the whole piece. Lift the edges slowly with a tail comb rather than just pulling. This is a big deal for lace fronts, where knots can loosen up fast.
Keep your cleaning schedule on track—usually every 2 to 4 weeks. This prevents that heavy buildup that forces you to use harsh chemicals. Train your team to physically support the base while brushing and rinsing, so they don't stretch out the thin spots.
But when a unit gets damaged beyond a safe repair, having a dependable wholesale supply is what keeps your client service running without a hitch.
Streamlining Salon Inventory with Bono Hair Wholesale Replacement Solutions
Replacing a ruined unit is usually a lot more profitable than trying to fix it once the base is compromised. For salon owners and professionals, the game plan is easy: stop dumping labor into repairs that rarely last. Just switch to a steady flow of wholesale stock from Bono Hair.
Sewing lace right in the salon easily eats up 60 to 90 minutes. And it can still fall apart in a few weeks. That doubles your labor costs and risks major client complaints. Sure, a signed waiver covers your liability. But it doesn't protect your reputation when a patch job breaks early.
Buying wholesale replacements keeps your service times totally predictable. It also lets you give people clear Customization Options, so your clients walk out with a reliable result. No annoying repeat visits required.
Hair System Repair Frequently Asked Questions
How to Fix a Torn Hair System Base in a Salon Environment?
Yes. Clean it, align the tear, seal with Liquid PU or fine lace stitching. 45–90 minutes. Done right, you get 2–6 extra weeks on poly, 2–4 on lace. Mess it up, you just doubled your labor.
Can You Repair a Ripped Lace Hairpiece Base Versus a Thin Skin Base?
Depends. Lace? Usually yes—small tears under 1 cm are easy, weeks of life added. Ultra-thin skin (0.03 mm)? Forget it. It tears, it's basically done. 0.08–0.12 mm poly can survive a proper seal.
+
Is It More Cost-Effective for a Salon to Repair a Unit or Replace It?
Often no. A 60-minute repair might net $80. Same hour installing a new unit can hit $140. Labor kills your margin. If repair profit per chair hour loses, replace it. Simple math, not sentiment.
About the Creator
Leo
Passionate men's hairstylist with a keen eye for detail and a knack for creating on-trend looks. Dedicated to delivering hair restoration education that enhances individual style.
Enjoyed the story? Support the Creator.
Subscribe for free to receive all their stories in your feed.
Comments
There are no comments for this story
Be the first to respond and start the conversation.