
Want to Make Objects Float in Your Photos? Here's What You Need to Do!
A step-by-step guide to levitation photography


Many photographers shy away from taking photos of floating objects because they think it's too challenging--especially if they don't consider themselves Photoshop wizards. But the truth is that the concept behind "levitation" photography is quite simple and requires minimal editing skills.
Preparing the Set
Levitation photography uses a technique called compositing. It involves combining two or more images into one.
When doing compositing, you must keep your camera in the same position throughout the photoshoot. Doing so ensures all the photos you take would perfectly align once you combine them. To make this possible, all you have to do is place your camera on a tripod.
Position your camera and tripod in front of the scene you want to photograph. For still-life photography, it's most often a table. You can also call it a set (just like in movies) if you have props on it.
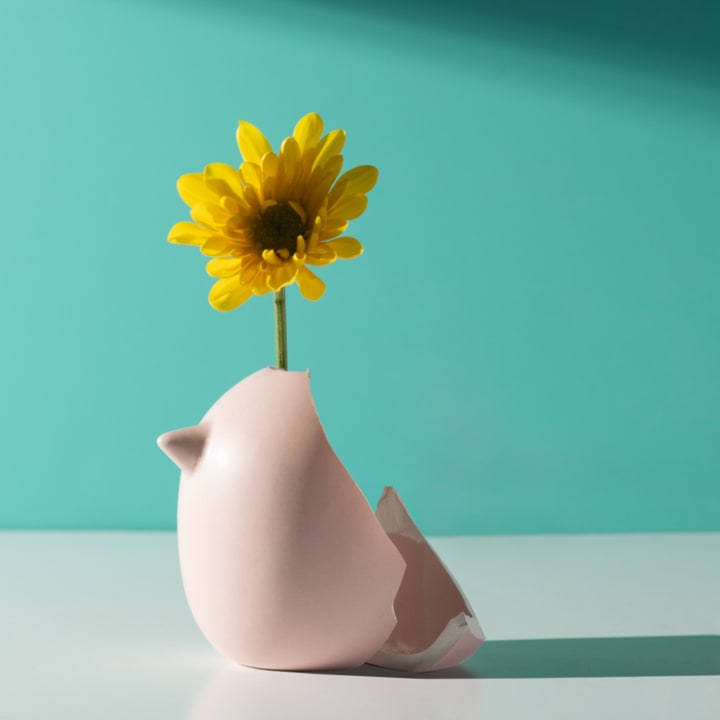
Once your camera is in place, take a picture of your set with "non-floating" objects on it. In our case, it's a broken ceramic vase. This first image is called the "plate." It will function as your background image for your composites later.
Rigging the Shot
Once you photograph your plate, you can now start styling your set. Make sure you don't move your camera at all during this process. That way, you won't have trouble aligning your images in Photoshop later.
The most straightforward method to take photos of floating objects is to throw them in the air and hope you perfectly capture the moment. But unfortunately, this process involves too many variables. Apart from the fact that you need perfect timing, there's also a good chance you might end up breaking the items you want to photograph in the first place.
So what's the easier way to take photos of objects in the air? The secret is rigging. In other words, you'll need to suspend things in the air using anything from fishing lines to hobby wire and even rods (chopsticks are perfect for this job!). And if you don't have time to rig, you can even hold the object with your hand!

The options you can use for rigging are endless as long as you make sure you're not blocking the side of the object that faces the camera.
Typically, you can tie a fishing line around the object and make it dangle in the air. But when you're working with delicate items (such as broken vase pieces in this case), the best way is to attach them to a rod or a wire with a hot glue gun. Just make sure you glue the wire or rod behind the object. That way, it doesn't show up in your final image.
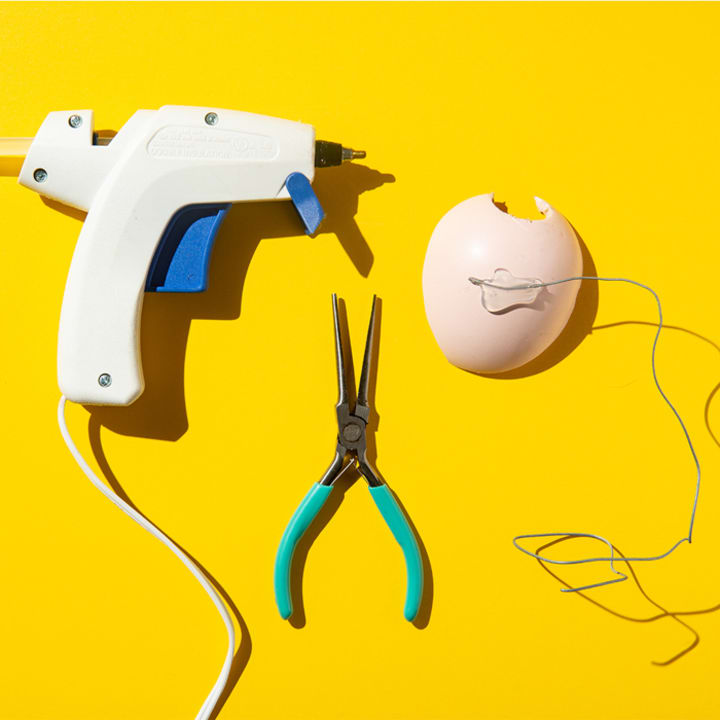
After you finish gluing the items to rods or wires, the next step is to place them on the table. In my case, all I had to do was to create small loops at the end of the wires using pliers to make them stand. For added stability, I taped the wires to the table.
You can use pliers to change the position of your wires. Be patient since it would take a lot of minute adjustments to get the pieces where you want them.
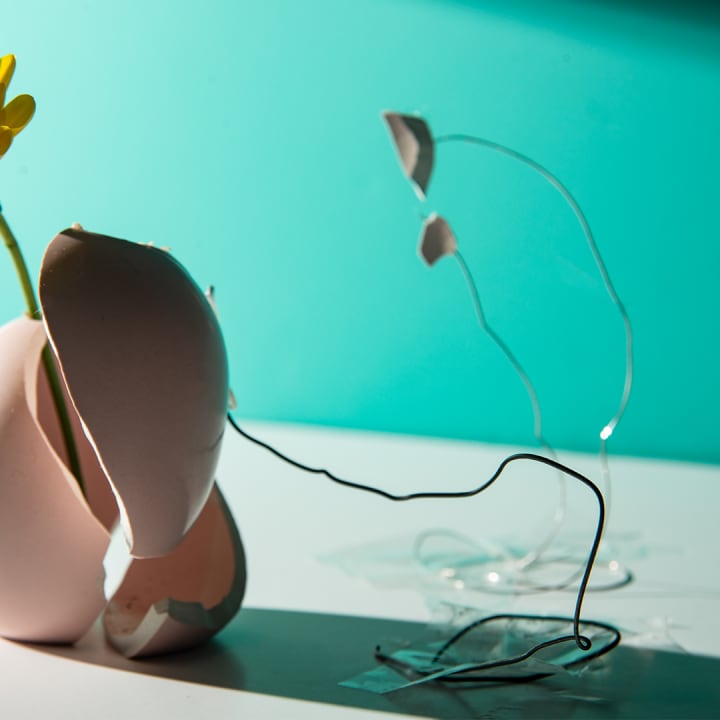
Once your rig is ready, all you have to do is take another photo.
As you can see, the image so messy that it would be virtually impossible to edit the wires out of the image. That's why the plate is crucial. Since the plate has a clean background, you can use its visual elements for compositing.

Now that you have both the plate and the rig photos, I will show you how to combine the two images in Photoshop!
Editing the Photos
Before I discuss the editing process for compositing, you must first understand how it works.
Compositing involves placing one image on top of another. When you erase parts of the top picture, you'll end up seeing the photo beneath it.
For this project, the plan is to erase the wires from the main image, so the plate (background) appears underneath.
However, when you erase an image, you effectively destroy it because you can't bring back what you've already removed. That's why using a mask is crucial for this technique.
A mask allows you to "erase" parts of the photo without destroying the image file. So, in case you make a mistake, you can always "paint" it back.
Now that you understand how compositing works, it's time to apply it in Photoshop!
To load your compositing images, go to File > Scripts > Load Files into Stack.

Next, press Browse and load the two images you took. Click Attempt to Automatically Align Source Images to ensure your photos line up in Photoshop. Once the files finish loading, press Okay.

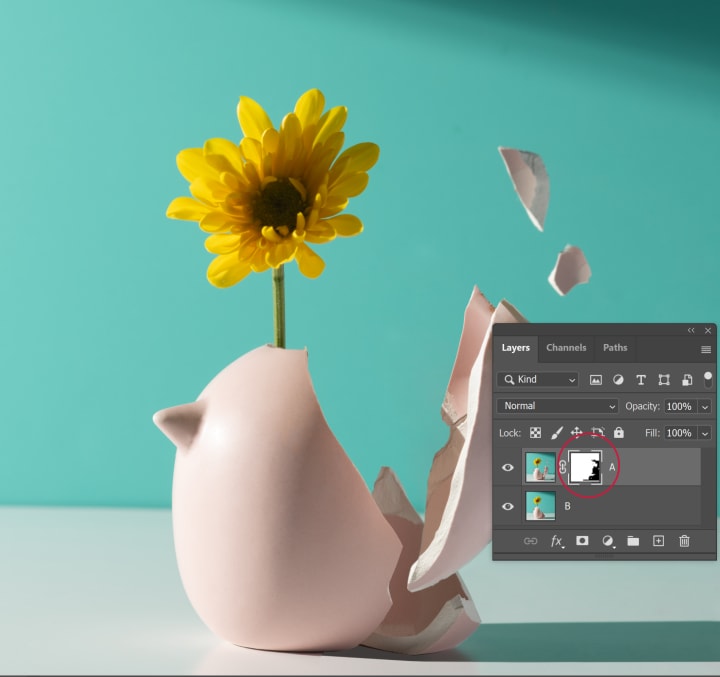
When the two files appear in Photoshop, go to the Layers Panel and make sure the plate (a.k.a. your background photo) is at the bottom. For the sake of convenience, we'll refer to the photo with wires as Image A and our plate as Image B.
Click Image A and go to the bottom of the Panel Dock. Look for Add Layer Mask and select it. Doing so allows you to add a mask to Image A.

The next step is to go to the Default Foreground and Background section in the Tools Panel. Make sure your foreground color is Black (the outer box), and your background (the inner box) is White.
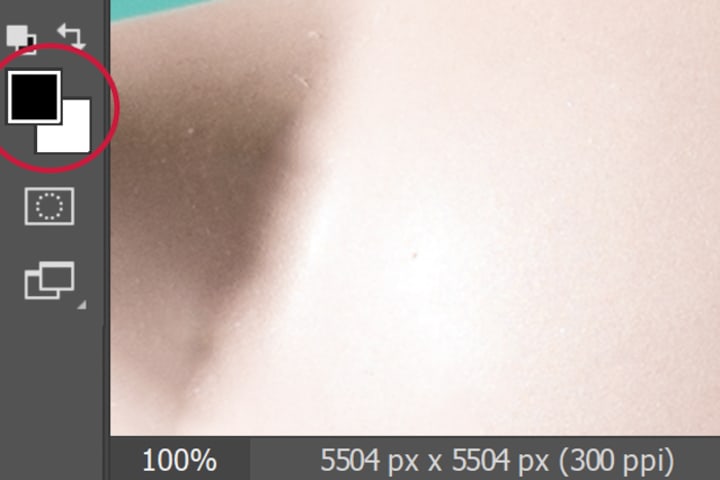
If the foreground and background colors are different, you'll need to click on the boxes to open the Color Picker panel. From the color palette, you can select Black or White depending on which color you need to change.

Once you fix both the foreground and background colors, it's time to select the Paintbrush tool.

But before "painting" the wires out of the image, make sure you click the Mask instead of Image A. Otherwise, you'll end up seeing black paint all over your photo.
After selecting the Mask, all you have to do is use the Paintbrush to "erase" the wires. This is part is the most magical because this is where the wires disappear as you paint on them.

If you make a mistake and want to bring back some parts of Image A, select the Background Color (the white box) to switch your paint to White.
When you apply the White paintbrush to Image A, you'll once again see the parts of the photo you just erased.
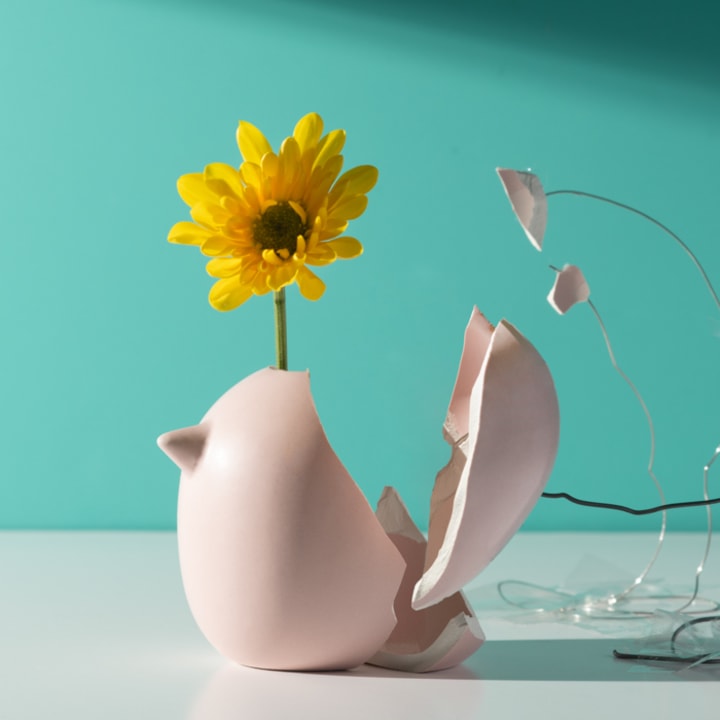
Once you finish erasing the wires, your final image should look like this.
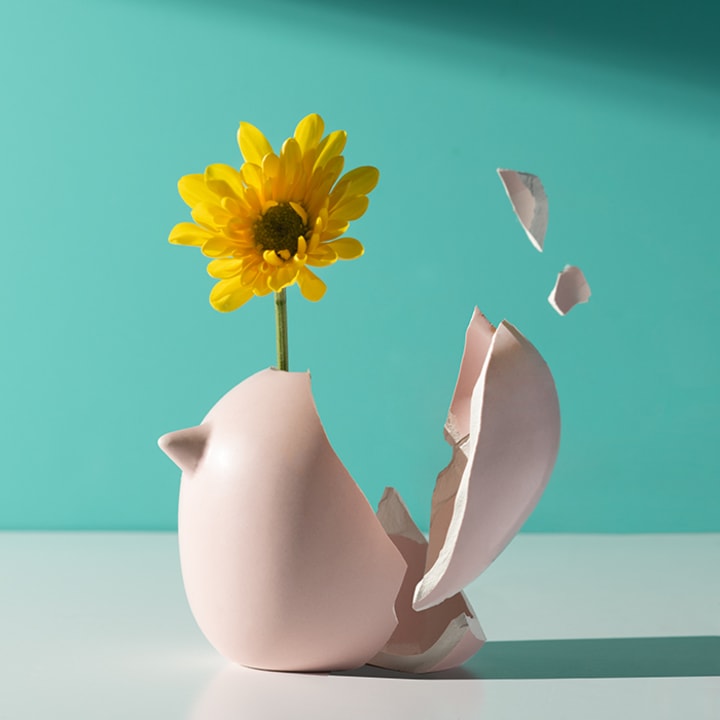
At this point, you can do some exposure and color adjustments to make your image appear more vibrant.
Once you're satisfied with the image, save your file, and congratulate yourself for creating your first composite image!
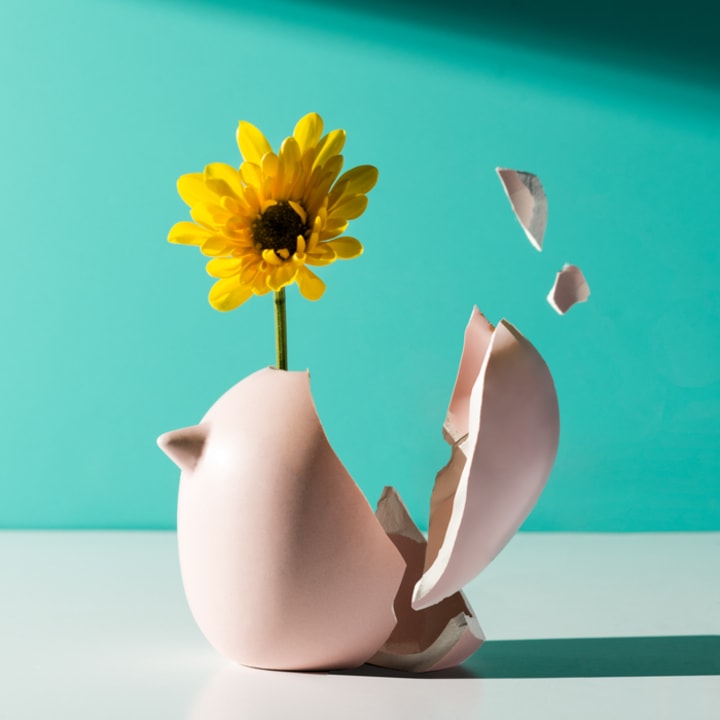
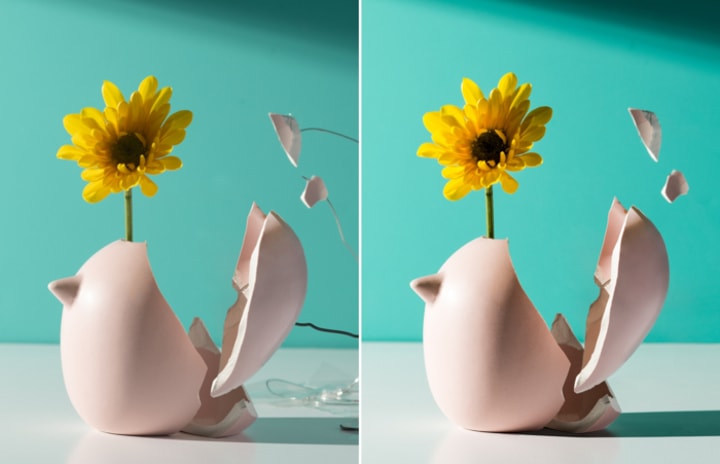
Now, let's take a look at the Before and After diptych below to see how much our photo has changed!
I admit that everything you just read is a lot of information, especially if you're new to Photoshop. But in reality, you can condense all this tutorial into a few points:
- Load the images as Stack
- Make sure the plate is at the bottom layer
- Add Layer Mask to the top image
- Select Paintbrush tool
- Select the mask beside the top image
- Paint the wires with Black to erase them
- Use White to bring back the parts of the photo you accidentally erased
- Apply exposure and color adjustments
- Save your image
As you can see, compositing is a simple technique, especially now that you know how the process works. If you think about it, it's really just a matter of erasing and/or painting your images.
... and we all know that anyone can paint and erase! So go ahead and give compositing a try!
Feel free to share your photos or thoughts on my Instagram. You can also view more of my work on my www.lathalacreativestudios.com ! Thank you!!! :D
About the Creator
Chad Verzosa
I write and take photos.
Reader insights
Outstanding
Excellent work. Looking forward to reading more!
Top insights
Easy to read and follow
Well-structured & engaging content
Eye opening
Niche topic & fresh perspectives
On-point and relevant
Writing reflected the title & theme
Keep reading
More stories from Chad Verzosa and writers in Photography and other communities.
- Third Place in Create Your Happiness Challenge
Learning Magic One Frame at a TimeThird Place in Create Your Happiness Challenge
The Beginning Growing up in the 90s, I'd often hear adults talk about all the harmful consequences of television. They argued that apart from exposing kids to obscene content, tv also caused all sorts of adverse psychological effects on young minds.
By Chad Verzosa3 years ago in Photography
The Ultimate Photography Tips For The Travel Photographer.
You may think that all you need to take quality travel photos is your camera, your smartphone, or even your digital SLR; and while that’s true, there are still many more things to consider before you press the shutter button, no matter what type of camera you’re using. The following photography tips will ensure that you get quality photos every time – regardless of whether you’re traveling across the globe, or just to the next town over.
By Vijay Mistry4 days ago in Photography
Good Picture
This comprehensive guide to photography focuses on capturing moments, emotions, and stories, not just clicking a button. It covers key principles and techniques such as composition, lighting, and camera settings, aiming to elevate photography to the next level.
By Praveen Pkabout 7 hours ago in Photography


Comments
There are no comments for this story
Be the first to respond and start the conversation.