
Turn Any Photo Into a Unique Pattern
That You Can Sell or For Personal Use


First off; you won’t find any promotion or affiliate links throughout this post, so rest assured that this is simply a fun idea for you to do in order to show your creative side. Websites and software are mentioned, but they are all free and I have no financial interest or investment in them. You can sell the patterns you make, however; this is not a work from home tutorial or anything such as that. It is… very fun, though.
This was originally created to be a paid online mini course, but there are so many creative and amazing people here- like you- that it was decided that it would be shared on here for you, without having to buy a course. Since it would not make sense to do otherwise, the videos that would have made up the course will be included at the end of each section.
Okay; grab your drink, grab a snack, go to the bathroom while you are up. I’ll wait.
Done? Good. Now; put your creative cap on and let’s get started.
Introduction and What to Expect
A surprising number of people don’t realize that you can transform any image into a new and unique pattern. This is great if you want to design your own pattern to use on your blog or just for fun. Also; you can use print on demand services and even put your new pattern on blankets, phone cases, and many other objects. This gives you something that is purely unique and one-of-a-kind for just you.
The steps we will be taking are as follows:
- Introduction
- Downloading Photoscape X
- Plan Ahead- Take Your Own Photos For Use
- Getting an Image or Photo to Use
- Using Canva to Create a Usable Image
- Edit Time! Manipulating the Image to Create a Pattern
- Where Can You Sell Your New Pattern?
Introduction Video- If you would like to watch the introduction video to begin, feel free to click play on the video below.
Setup and Concepts
Steps 2 through 5 listed above are broken down in the accompanying videos for easier understanding; despite being considered all one process.
In step 2, you need to download a free program called, Photoscape X from their website. Choose the type of system you are using and click the appropriate download button. If you are using a PC, then be sure to click the big button on the left and not the small section that says “Pro” on it. That is the paid version; which you don’t need. After it has downloaded; be sure to install the program.
Step 3 of the outlined lesson plan is called, “Plan Ahead” because one of the best and easiest ways to be sure you have the colors you want to use; is to take the photos yourself. You can take a photo of anything around you. There is no need to worry with what the object is, only the colors you are able to capture in the photo. It is the colors in the photo that will be important when you begin to design your pattern. Great ideas for this stage are:
- Close up photos of clothes in a closet.
- Photos of your favorite colorful rug or carpet.
- Photos of the colorful meal you prepared for dinner or lunch.
- Even… a photo of your favorite painting hanging up.
You can use any photo or image you want; regardless of copyright, because the finish product will mean that the original photo is unrecognizable. However; if you take your own photos, even if it is of an existing painting or photo, you can control which colors are included in the new image. This gives you better control of what is possible when creating your pattern. The more control you have over the finished product and possible outcomes; the better. After all, it’s your creation.
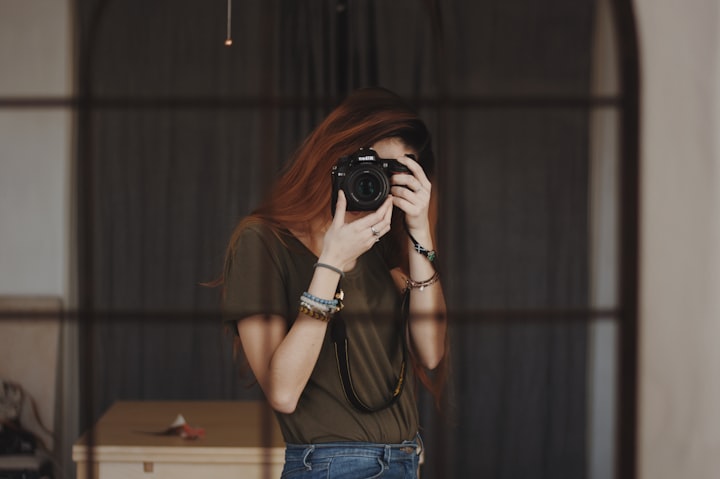
In the interest of saving you time and reading; we are going to combine steps 4 and 5 together. The fourth step is using the internet to download photos that can be used for your project; which we can do with a site called, Unsplash. As you can see in the credits beneath the above photo, this photo came from the site Unsplash. You are allowed to use any photo found on their site; which is outstanding for a number of reasons. An entire website full of royalty free photos, is nothing to scoff at. You simply navigate to their website, choose a photo you want, and click the down arrow located in the corner of the image to download that photo to your computer for use. Outstanding!
Step 5 in our lesson plan, involves using Canva to create simple images with colors side by side in a square or rectangle. This way; you have an image that is nothing but color, in order to create the really bright and colorful patterns.
Gather the images you’ve taken or created and the images you’ve found on the internet all into one single folder on your computer. Open Photoscape X and on the left side, navigate to that folder until you see your images in the bottom left box. Now; you are ready to begin learning how to turn these images into patterns.
Setup and Concepts Video- If you would like to watch the video on the setup and concepts, simply click the play button on the video below.
Manipulating an Image to Create Your Pattern
Using Photoscape X with your image open, be sure that you are in the “Editor” section by looking across the top of the software and clicking the editor tab. Once you are sure you are in the correct mode, click the photo or image you want to begin manipulating. Look to the right side of the software and choose the “Effects” panel by clicking the plus sign next to the word, “Effects.”
Inside this panel is where you will find tons of options that you can play around with in order to manipulate the image you’ve loaded. For this step in the process, only visuals will be able to explain how to go about using these tools, to ensure the look and feel you are searching for. Because of this; we will need to refer to the video below to fully explain how to use the various options on your image.
Manipulating Your Image Video- To see how to use the software in order to manipulate your image and create a pattern, simply click the play button on the video below.
Now that you have watched the above video, remember; be sure to play around and become familiar with what each tool and function in the software does to your image. The more familiar you are with the effect of each aspect; the better you will be able to control the outcome of your pattern. You can always go back and undo what you’ve done, so don’t be afraid to try something daring or even strange. You never know; you may end up loving the result.
If you plan to only use your created patterns for personal use, then you can skip the next section. However; for those who may want to sell their patterns, I wanted to be sure to include the next section just for you.
How and Where to Sell Your New Patterns
For those who may want to sell your patterns, this section will help get you started. Having said that, though, be sure to research on your own and find the methods and sources that are best suited to you and your needs.
Two of the top websites that allow you to upload your pattern and possibly earn some extra money from the sales are:
- Weaveup- Your patterns are available for sale on fabrics for those searching for unique patterns on material.
- RedBubble- Your patterns will be placed on products such as, t-shirts, phone cases, blankets, throw pillows, tapestries, and more.
With both of these platforms- and those similar to them- you upload your design for free and earn a commission each time a sale is made that contains your pattern. There are many others that are available online where you are able to follow this same strategy to earn money from the sale of your patterns. A simple Google search will provide a long list of them for you. Of course; there is a video to help steer you in the right direction as well. The video is provided below if you need further help, or wish to get a walk through of these sites; as well as one other platform to consider.
Where to Sell Your Patterns Video- Click play on the video below if you would like further help or a walk-through as mentioned.
Great Job and Good Luck to You!
From here, it is all up to you. Go be the creative genius that you are. Become familiar with the software or find another that works better for you. Then, create as many patterns as your heart desires. You have done a great job of following along and deciding to learn a new skill. Don’t let the merit of that decision escape you. It’s no small thing to decide to improve yourself in any way; great or small. Be proud of yourself for taking the initiative.
Best of luck to you in your creation as well as your journey going forward. You are a creative genius; now go show the world.
About the Creator
Timothy A Rowland
I’m an every day human Xennial from the United States. I have many interest. I just want to improve your life and maybe entertain you. Available for editing and LeadsLeap projects at: https://www.fiverr.com/greyhatcompany
Keep reading
More stories from Timothy A Rowland and writers in Photography and other communities.
Extra Income Using Shutterstock
What Is Shutterstock? If you are a professional photographer or if you build online businesses, there is a good chance that you already know what Shutterstock is. For those who may not know, Shutterstock is an online website that allows people and businesses to purchase a license for the use of stock photos and videos. Anyone who may need a stock photo or video is able to purchase the rights to use that content in their own advertising or content creation.
By Timothy A Rowland3 years ago in Photography
Capturing Magic
In the world of photography, timing is the key to everything. While skilled compositions and technical proficiency are undoubtedly crucial, the perfect lighting can create the perfect photo. Nowadays, we can determine any light ourselves and are no longer dependent on any natural light source, thanks to the developed technology. We can turn every day into a night by using the right filters. And we can illuminate every night to be seen as a day. A typical process, especially in the film industry.
By Krishan Mubashar7 days ago in Photography
The Secret of Lighting
“Light is not just an element, but the essence that breathes life into images.” Whether it is capturing the delicate contours of a portrait, the vibrant hues of a landscape or the intricate details of still life, lighting plays a tremendous role in shaping the mood and visual impact of a photo. Understanding the nuances of lighting is crucial for us to elevate our craft from snapshots to interesting works of art. It is not just about having the right equipment, it is about harnessing the light creatively to transport emotions, tell stories and evoke reactions from our viewers.
By Krishan Mubashar3 days ago in Photography


Comments
There are no comments for this story
Be the first to respond and start the conversation.