
Three Tips for Better Food Photography
Without spending any money
It seems like everyone is taking pictures of food and posting them online. Many of them make you wonder, not only what were they eating, but what were they thinking. Whether you want to be a professional food photographer, or just make your food photography look professional, here are three tips for better food photography.
Light it Properly
If you scanned through the subheadings, you might think that Make it Look Good should come first, but you need to think about the lighting before you order, or cook, your food. If you are in a restaurant, choose a table with good window light and decent ambient light. If you are sitting in a dark booth in the corner, nothing you can do will create proper light.
If you are shooting at home, don’t worry about fancy lighting equipment, and never, ever, use your on-camera flash. Find a good window, preferably north-facing, or covered with heavy sheers to diffuse the light. Put a table next to the window and add a lovely place setting. This will be the stage for your food. Get some white poster board to use as reflectors.
Before you cook your food, think about how you will plate it and set up a similar scene. Use the same plate and utensils. Put something to work as a stand-in for the food. I like to use a piece of bread on a plate because the texture allows me to achieve sharp focus. Put your camera on a tripod and shoot the scene, adjusting your exposure, and adding reflectors as needed. When you are happy with the lighting and exposure, then it is time to get the food going.
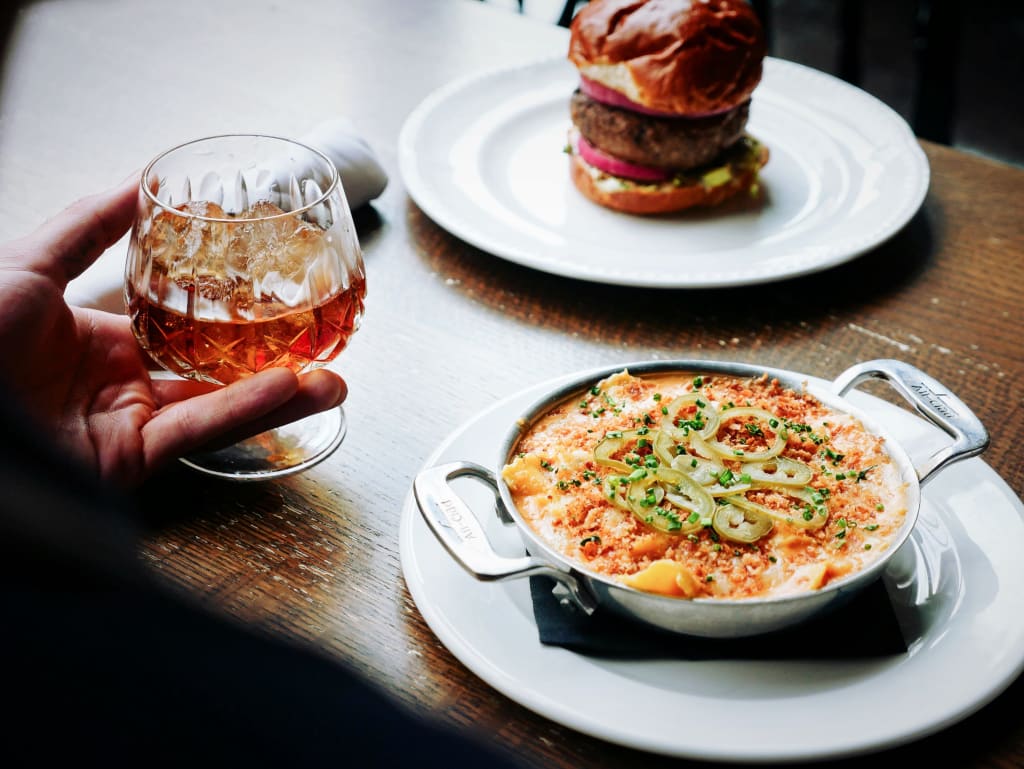
Make it Look Good
There are a lot of tricks that professional food stylists will use to make their food look great. Most of these are expensive and time-consuming and only relevant for someone getting paid a lot of money for their food photography. You just need to make it look good.
If you are in a restaurant, hopefully, the food is presented well on the plate, so you just need to make sure the rest of the image works. Move the plate close to the window and remove distracting elements from around it. Add a couple of props, such as a water glass or salt and pepper shakers. You want to get in fairly close. Choose an angle that fills the frame with the food, and you are good to go.
At home, while your food is cooking, go back to your set and make any final arrangements. Think about the food you are shooting and what might make it look appealing. You could add a small plate or bowl with a green herb, such as basil or parsley, or add some grated cheese. You want something else in the scene to add balance to the main attraction but doesn’t distract the viewer’s eye. Use complementary colors to the main food or plate. Put an empty plate where your food will be and take your final test shots. Use something to mark the location of the plate.
You will also need to think about plating the food yourself. Carefully place each piece of food on the plate in a pleasing way. Use tongs if necessary so as not to lose control of the placement. Use paper towels to wipe up spills or drips. Once you have it appropriately plated, move it to your set, and take your shots.
Try Different Angles
Shooting the standard forty-five-degree angle of food from where a diner would view it is boring. Mix up your angles. If you are at the table in a restaurant, your choices are limited, but you can still alter the angle slightly. Don’t be afraid to stand up and shoot straight down at the food. Zoom in tight on details, letting the background go out of focus.
In your home set, do the same thing. Change the angles and shooting direction. Use back-light and side-lighting to give depth and dimension to the dish. Straight down shots are still trendy, so take one of those. Come in from a tight side angle with your window light in the background. You can quickly achieve a dozen or more great shots from a single plate of food. But work fast. Food loses its luster quickly, leaves wilt, and sauces skim over.
Food photography doesn’t have to be complicated or expensive. Think about and plan the shot and then nail it when the food is ready. Follow these three tips for great food photography.

About the Creator
Darryl Brooks
I am a writer with over 16 years of experience and hundreds of articles. I write about photography, productivity, life skills, money management and much more.
Keep reading
More stories from Darryl Brooks and writers in Photography and other communities.
4 Areas of Georgia You Absolutely Have to Photograph
As a photographer, you are always looking for that next great location. No matter where you live, there are beautiful, scenic spots you can reach in less than a day. Georgia has some of the most diverse geographies in the nation. From the mountains in the north to the beaches and swampland in the south, it is rich in scenery and photo opportunities.
By Darryl Brooks3 years ago in Photography
The Ultimate Photography Tips For The Travel Photographer.
You may think that all you need to take quality travel photos is your camera, your smartphone, or even your digital SLR; and while that’s true, there are still many more things to consider before you press the shutter button, no matter what type of camera you’re using. The following photography tips will ensure that you get quality photos every time – regardless of whether you’re traveling across the globe, or just to the next town over.
By Vijay Mistry5 days ago in Photography
Good Picture
This comprehensive guide to photography focuses on capturing moments, emotions, and stories, not just clicking a button. It covers key principles and techniques such as composition, lighting, and camera settings, aiming to elevate photography to the next level.
By Praveen Pkabout 22 hours ago in Photography

Comments
There are no comments for this story
Be the first to respond and start the conversation.