
The Secret to Creating Your Own Signature Photo Look in Lightroom
Let me introduce you to the one Lightroom tool that will take your photo editing to the next level
Have you ever scrolled through a professional photographer's Instagram account? If you're reading this article, I'm gonna guess that you're interested in photography, and I'm gonna take that guess one step further and assume that, yes, you have scrolled through the Instagram accounts of a number of professional photographers. And when you did, you probably noticed something: all of there photos have a uniform look to them. I used to scroll through these Instagram accounts and wonder how they achieved this. Each photo was different, yet there was something that gave them all a similar feel.
I tried editing all of my photos with the same Instagram filter to achieve a similar look. It didn't work out so well, as I found out Instagram filters didn't always make my photos look the best. But, it turns out, the idea I had in mind wasn't too far off. There's something out there even better than an Instagram filter. It's called a Lightroom preset.
Basically, a Lightroom preset is a way for you to save all of the edits you made on one photo so that you can apply them to any other photos. If you adjusted the exposure by +2 and decreased the contrast by -10, every photo you apply the preset to will have an exposure increase of +2 and contrast decrease of -10. So, yeah, pretty much an Instagram filter... but better, I promise!
One of the key factors that makes presets better is that you can create them yourself. You can create your own signature look like the photographers on Instagram. Hello, aesthetic! But there's one tool in particular on Lightroom that will really take your signature look to the next level. Allow me to take you through the process of creating a signature look and turning it into a preset to use on all of your photos.
The HSL Sliders
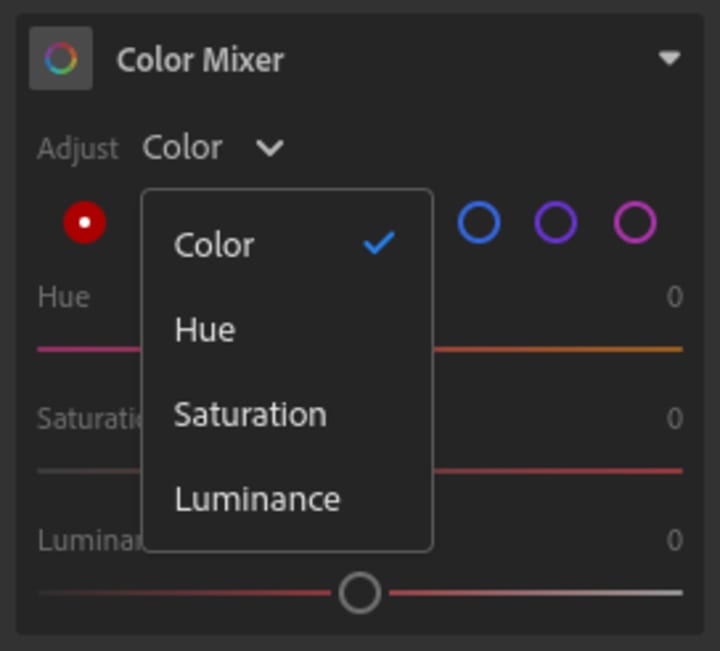
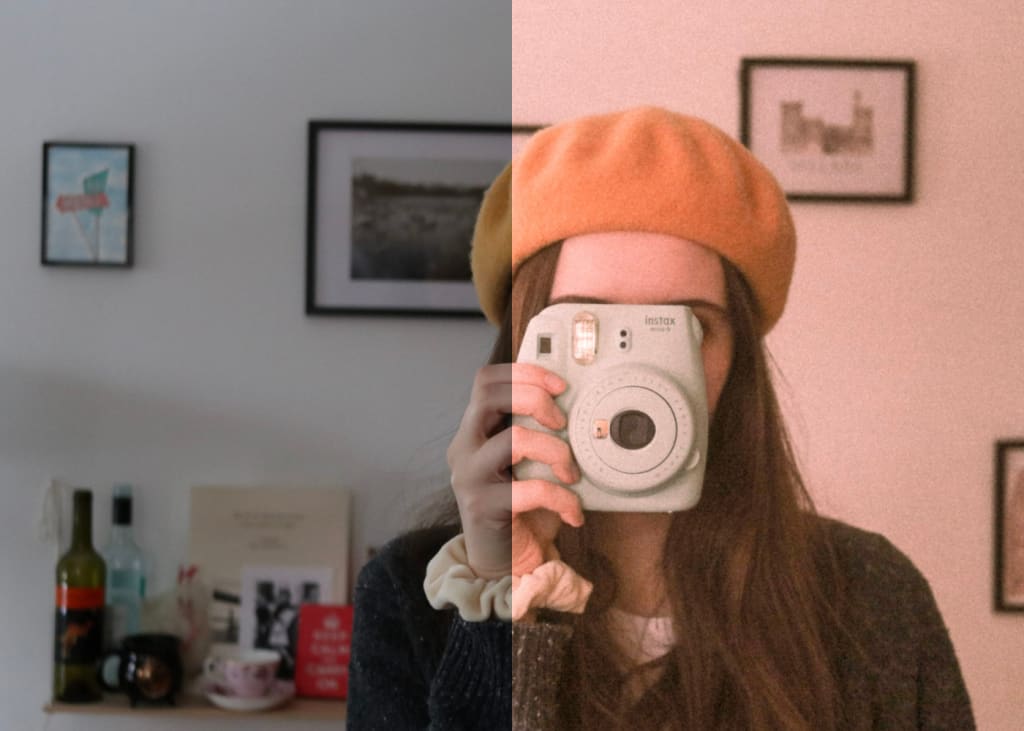
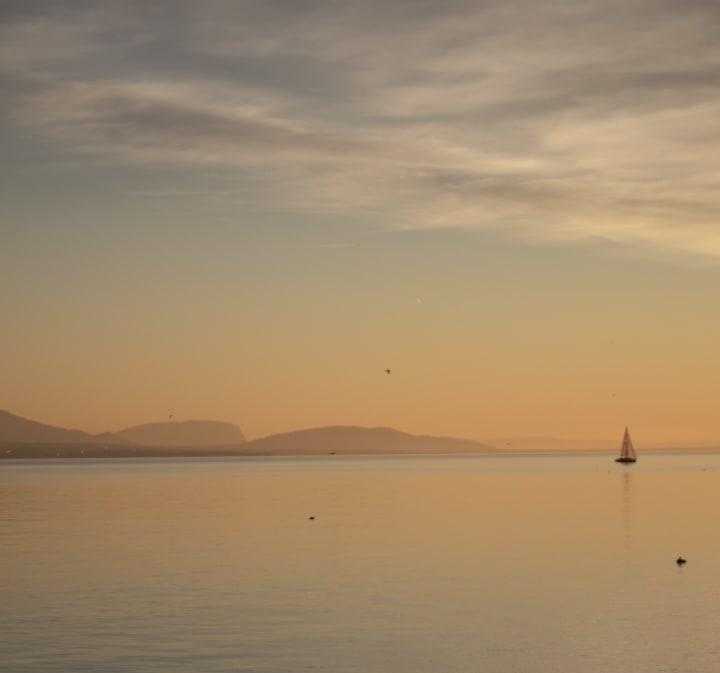
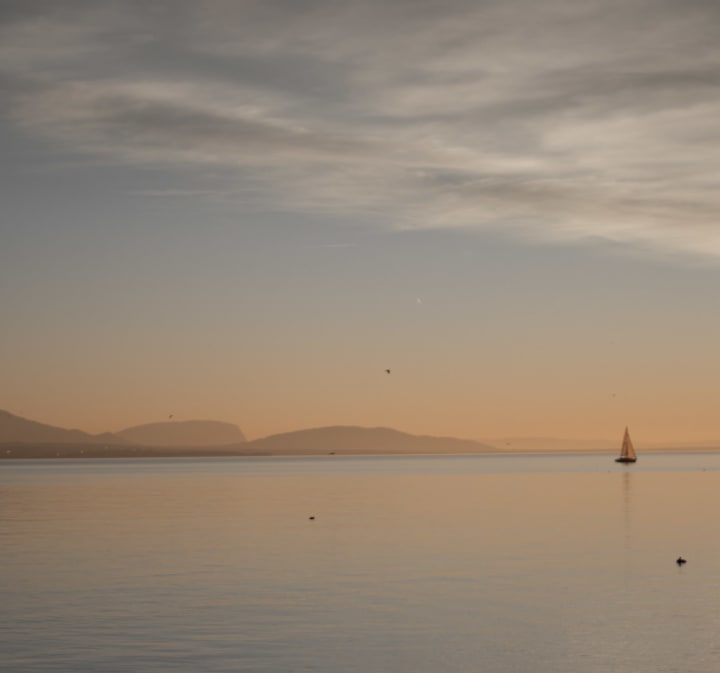
Below the temperature, tint, vibrance, and saturation sliders, you will find the HSL sliders. HSL stands for hue, saturation, luminance, and this tool allows you to adjust the levels for each color individually. To give you a better idea of what this all means, let's edit this lovely sailboat photo together.
Saturation
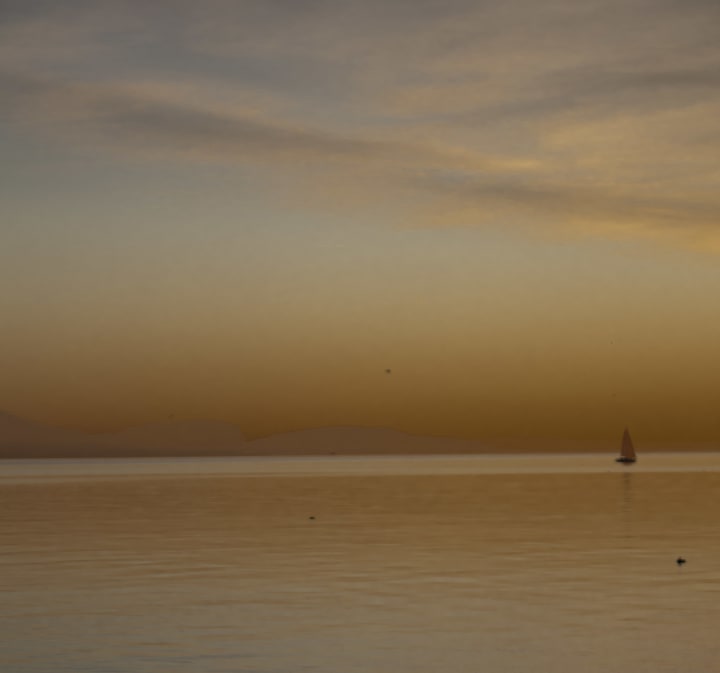
Even if you're a beginner photo editor, you're probably familiar with the idea or saturation, and how it makes the colors in your image pop. But the cool thing about the HSL sliders is that you can saturate, or de-saturate, one color at a time. Let's try working with our yellows, for example. Click the yellow circle. And let's drag the saturation all the way to 100.
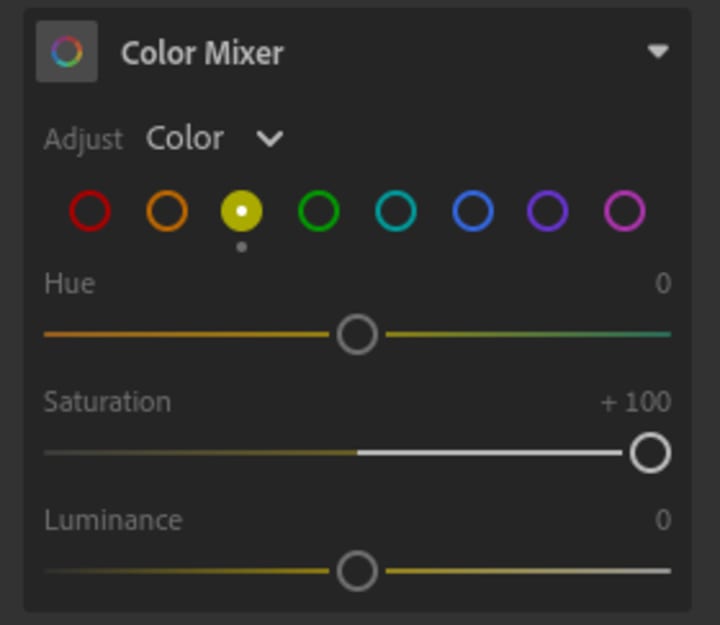
Here is the result on the photo:

And if we do the reverse...
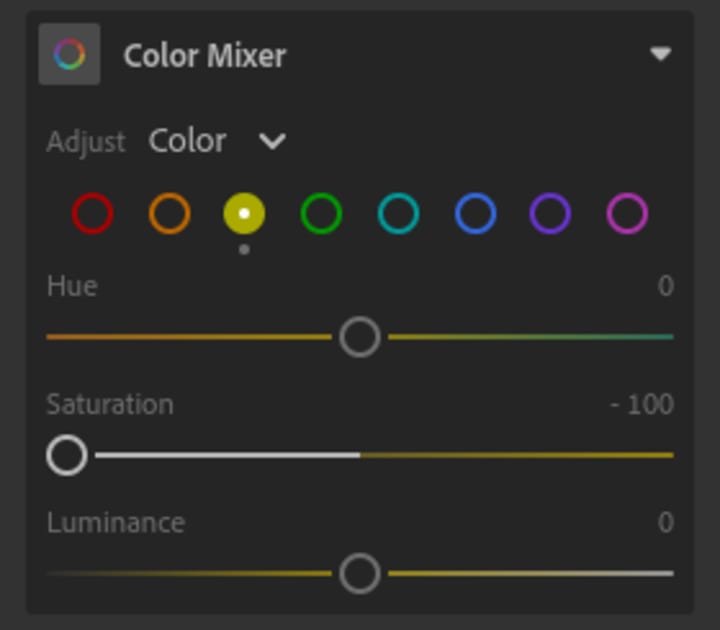
Here is the result:
Pretty cool! Plat around with it, see which colors you like seeing more of and which you prefer to see less of. And when you're ready, let's move on to luminance.
Luminance
This slider allows you to control the lightness or darkness of each color. Let's try making our oranges nice and deep.

The result...
Ok, that one got a little crazy, but you get the idea, right? Finally, let's move on the hue.
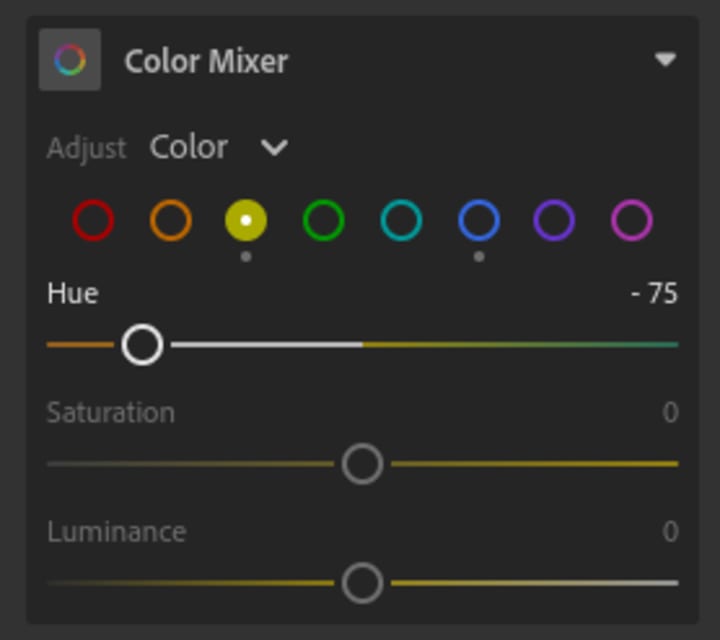
Hue
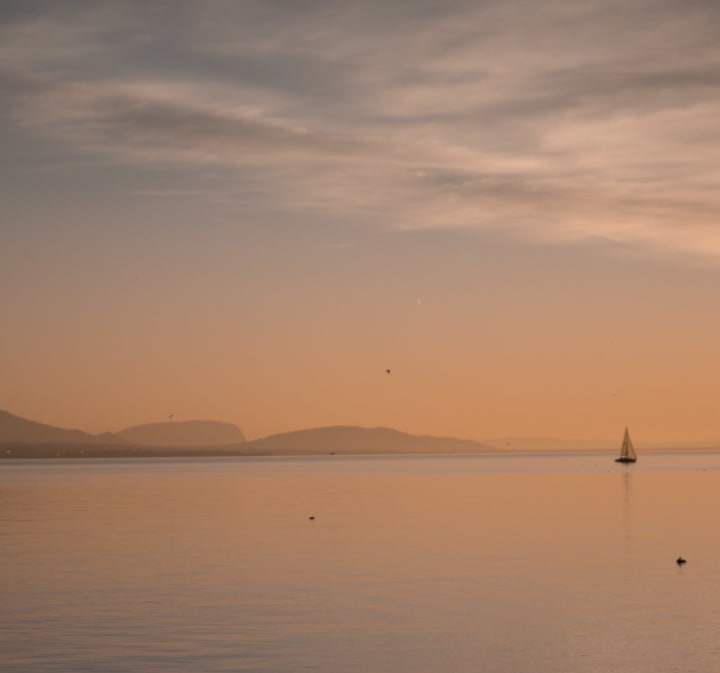
I saved this one for last because it's my favorite, and, in my opinion, the best slider for creating your own unique look. It allows you to change the shades of your colors. Greens, for example, can be pushed more towards yellow or more towards blue. Yellow can be pushed more towards orange or more towards green. I personally love pushing my yellows towards the orange end of the slider. Let's check out what that does!
Now that you know a little bit more about the HSL sliders and what they do, play around with them until you get a look you like. Then you're ready to create a preset to apply to more photos!
Click the three dots in the upper right corner of your phone screen, the select, "create preset."
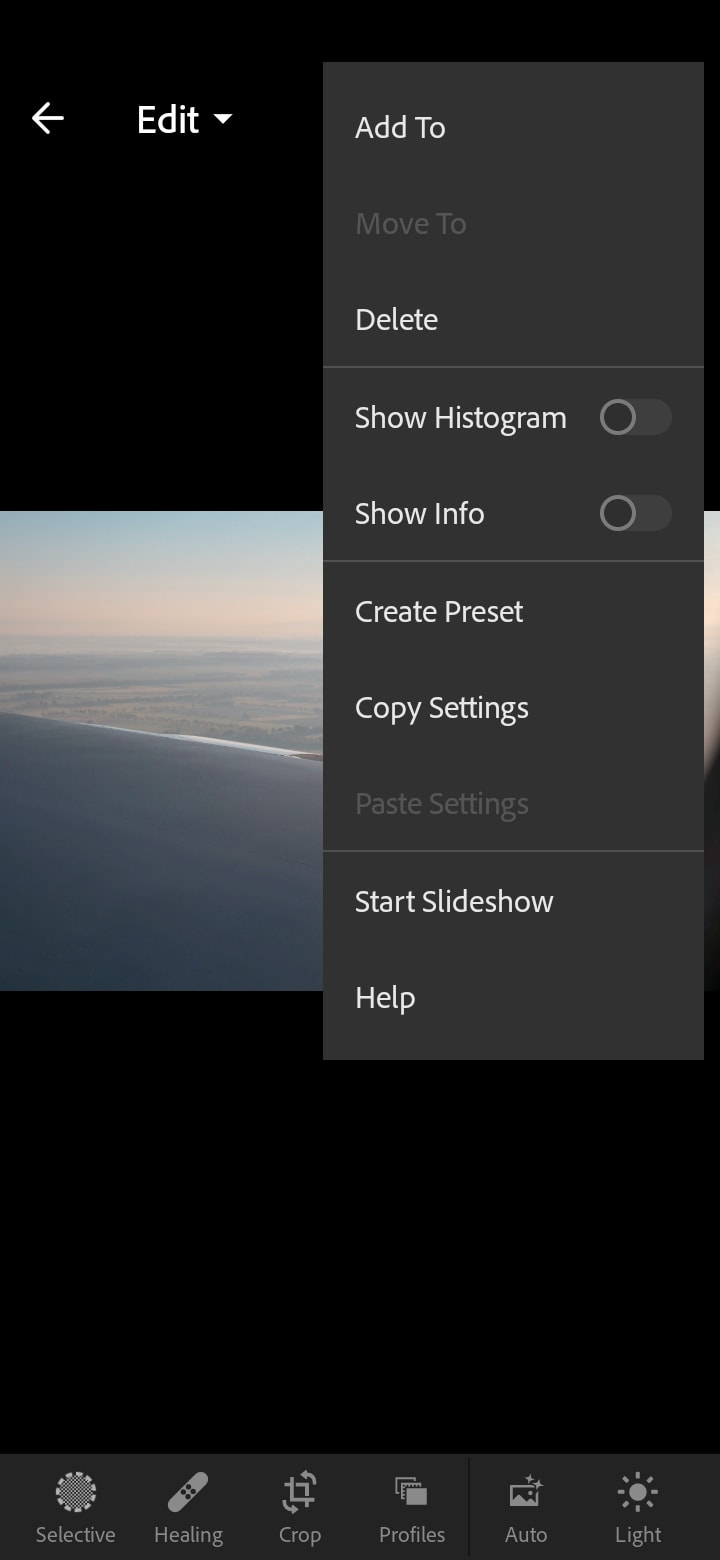
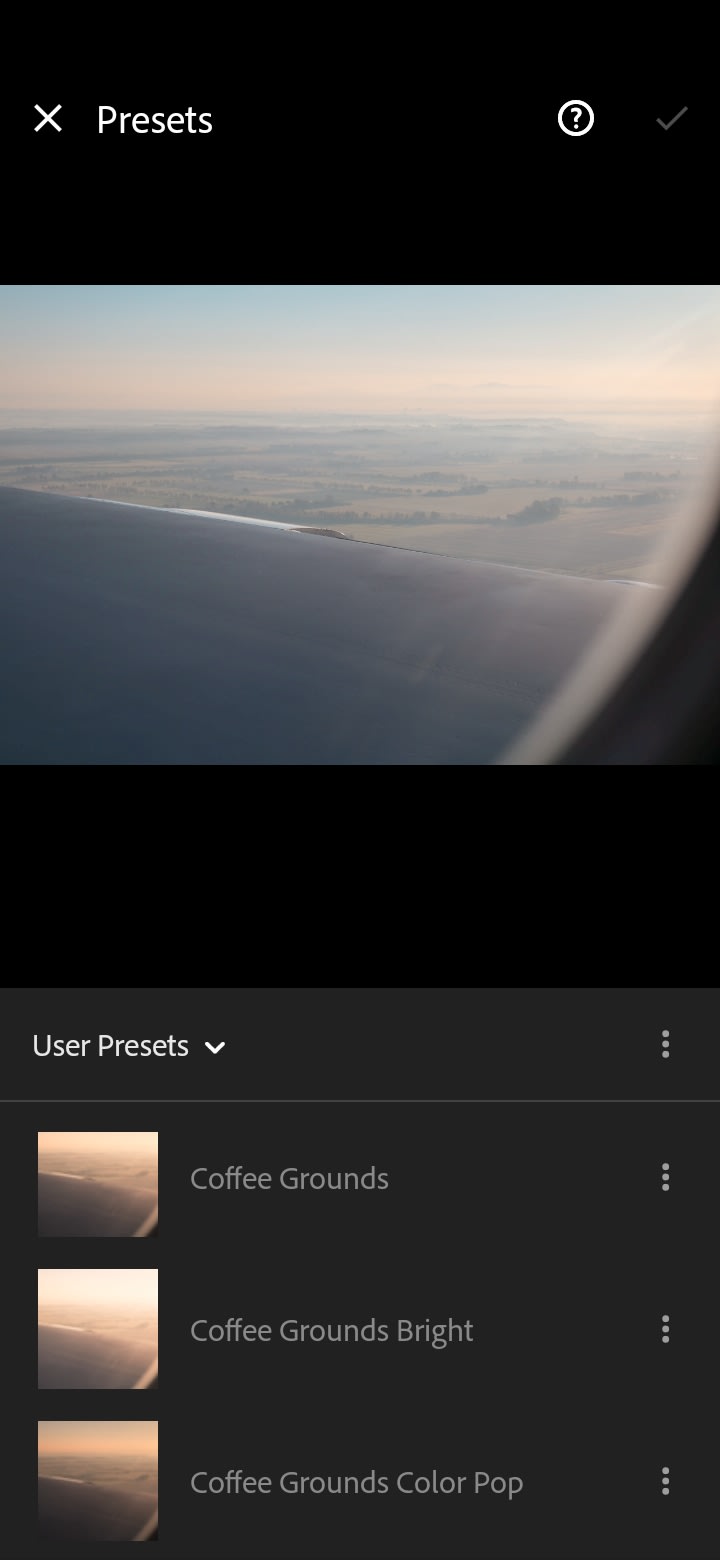
I like to name my presets based on the photo I used to create them. This one, I would call, "sailboat." You can find your presets under "user presets" in the presets tab. (How many times can we fit the word "presets" into a sentence?)
And there you have it. Get sliding! Adjust your hues, saturations, and luminances. Create beautiful presets, apply them to your photos, and before you know it, you'll have a uniform and aesthetic Instagram!
Happy editing!
About the Creator
Reese Marie
"That the powerful play goes on and that you may contribute a verse"
Keep reading
More stories from Reese Marie and writers in Photography and other communities.
A Shot in the Dark: My Crazy Night Sky Photography Story
Basically, this is the story of a lucky shot. To begin, let's go back a few years. First of all, I am far from a pro-photographer. I shoot on a DSLR, for which I only have one lens. But I am an aspiring photographer. Over the past year or two, I have been learning more and more about photography, not to mention falling in love with it. Also, I am a stargazer by nature so night sky photography has always intrigued me. I remember being in the Upper Peninsula of Michigan a couple years ago, gazing mesmerized at the star-filled sky. This was not long after I bought my first DSLR, and I figured I could use it to snap a quick photo of the beautiful sky. I turned it on and pointed it towards the sky, in auto mode. To my dismay, the blurry picture that resulted hardly captured any of the millions of pinpoints of light I could see with my eyes. This was my first experience with "night sky photography."
By Reese Marie6 years ago in Photography
The Ultimate Photography Tips For The Travel Photographer.
You may think that all you need to take quality travel photos is your camera, your smartphone, or even your digital SLR; and while that’s true, there are still many more things to consider before you press the shutter button, no matter what type of camera you’re using. The following photography tips will ensure that you get quality photos every time – regardless of whether you’re traveling across the globe, or just to the next town over.
By Vijay Mistry5 days ago in Photography
Good Picture
This comprehensive guide to photography focuses on capturing moments, emotions, and stories, not just clicking a button. It covers key principles and techniques such as composition, lighting, and camera settings, aiming to elevate photography to the next level.
By Praveen Pka day ago in Photography
First Starlight of Summer
Your whole being is constituted by yearning. You miss the stars but have never seen a fully-realized night sky sparkle to life before your eyes. You write things, funny but short but profound, emulating the archaic cosmos that turns by its own unknowable calculus emulating love in all its celestial glory turning in that same cryptic way, but fully know neither and hardly know both, and it feels disingenuous, so you write about writers. It feels vaguely masturbatory, but it’s funny but short but profound and it impresses the people around you enough, so you run with it forever until you can’t anymore.
By Steven Christopher McKnight4 days ago in Fiction

Comments
There are no comments for this story
Be the first to respond and start the conversation.