
Story Through the Lens
Writing with Your Camera

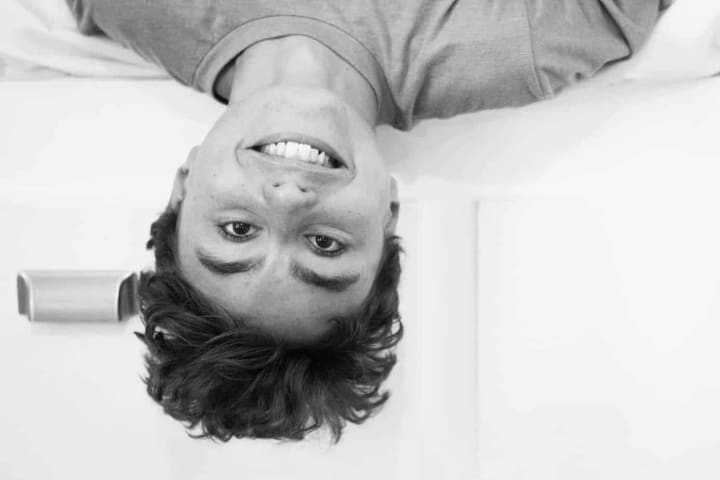
[Foreword: this is an article I wrote in my senior year of high school. The advice is solid, but the images really aren't, so I look back with a heaping measure of irony and invite you to have a good laugh with me. Do as I said - not as I did!]
You have a story burning a hole in your pocket, but you can’t seem to find a way to make it reality. Every time you try to write a novella, your thoughts get tangled up, and your sentence structures look like spaghetti. Writing a song could work, if you had any semblance of pitch, but you don’t. In desperation to express your idea, you even tried sketching the tale, but alas, you can’t draw the simplest of stick figures to save your life.
You ultimately resolve to succeed as you turn to your final option: your camera.
____
Telling a story through photography, otherwise known as photojournalism, is no less an art than painting a watercolor landscape or hammering out a Beethoven sonata on the piano. There are four steps to making your story come to life with your camera: imagine, plan, shoot, and postprocess. I recently shot two stories, so we’ll use one as an example and then take a look at the other as a finished product.
{ imagine. }

Here’s where your idea first begins to take shape. In my earlier article on perspective (check that out here), I discussed forming a vision in your head. Editorial photographer TPSer Melanee Kate Thomas (see her work here) discusses her idea-finding process:
“I constantly have random ideas pop into my head! And when I do, I start developing the idea and then write it down for later. I find ideas in literature, people, movies, etc. Some of my favorite authors would be Roald Dahl, Charles Dickens, and Victor Hugo. I am also a sucker for fairy tales. I love looking at theatrical costuming and coloring for inspiration, and sometimes even a relationship or simple concept spurs on a series of images.”
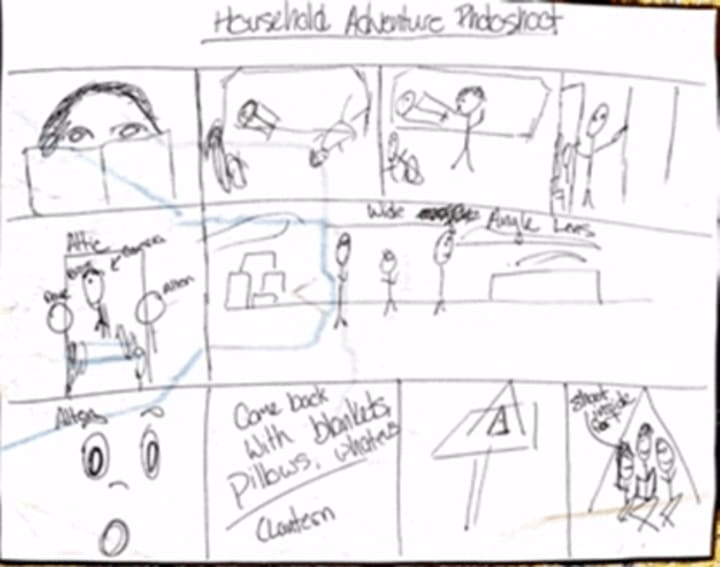
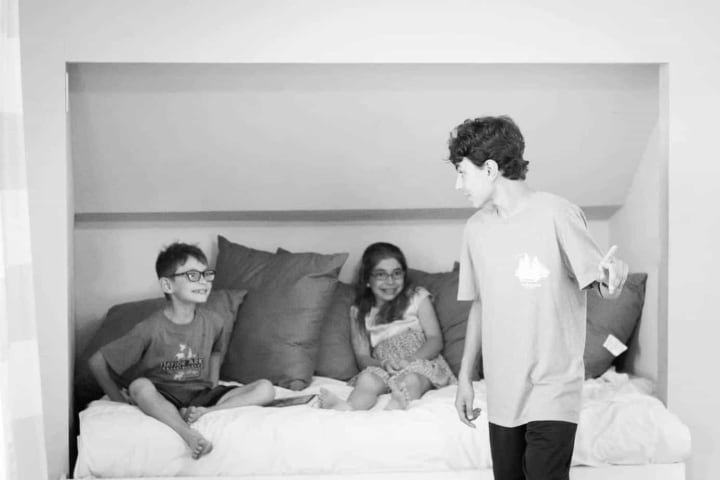
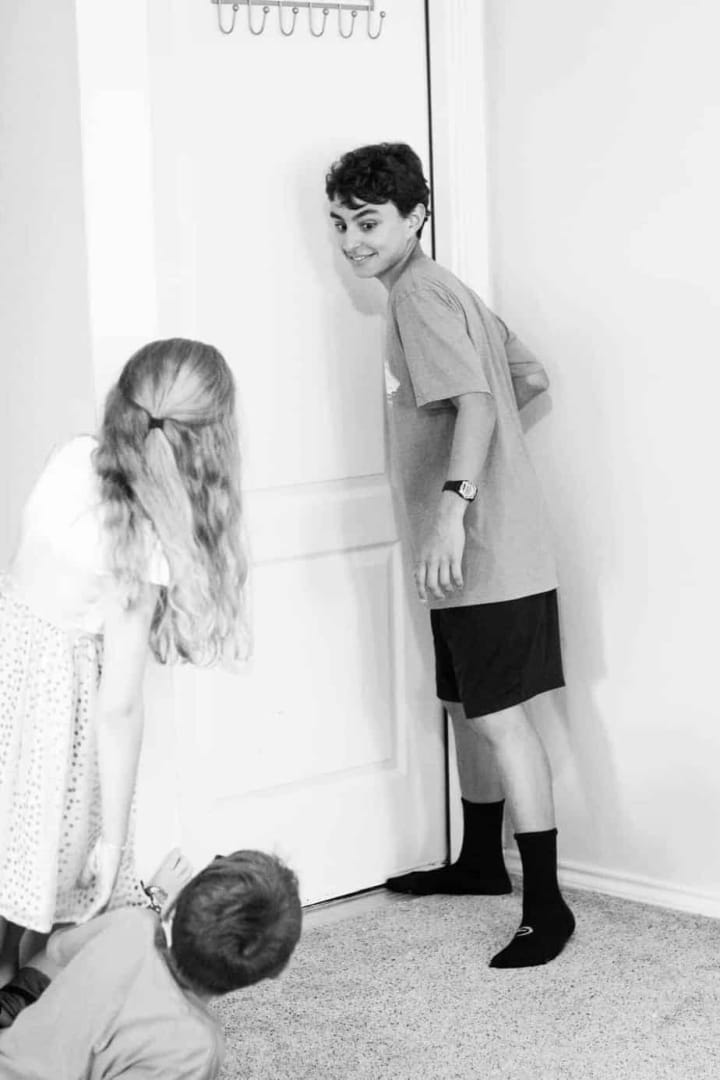
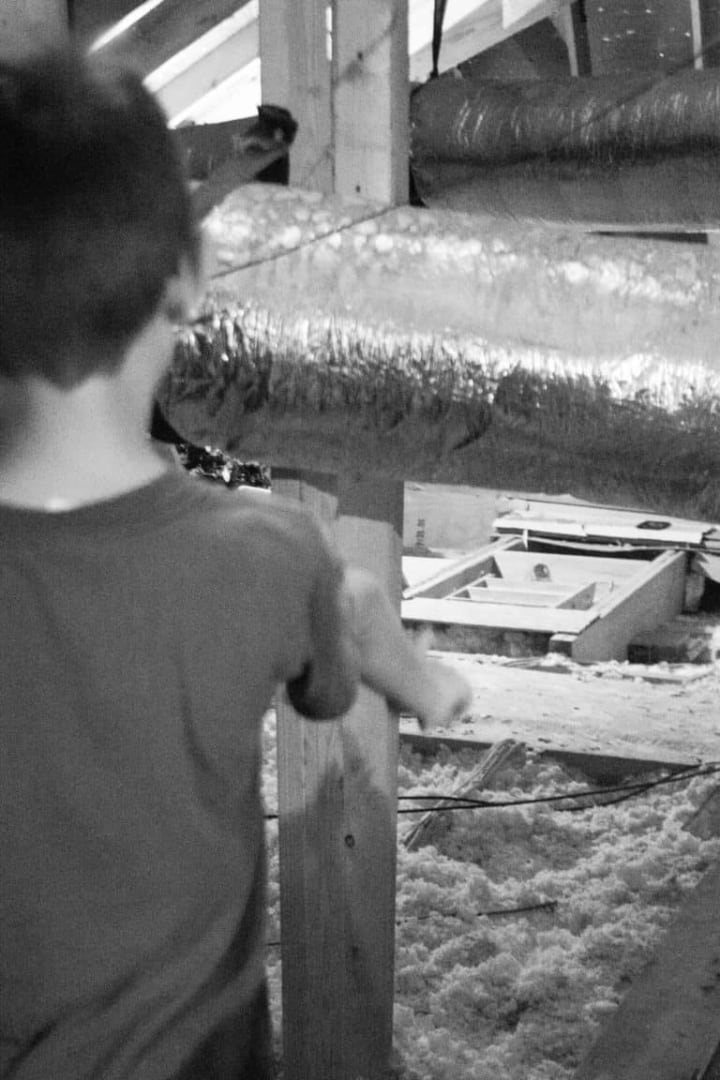
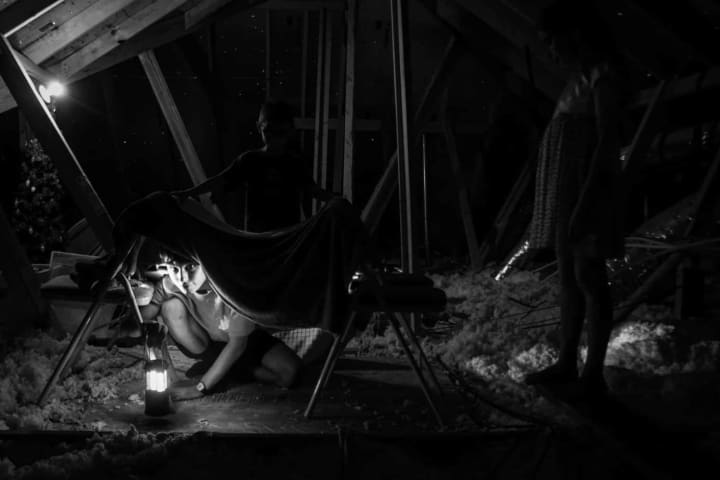
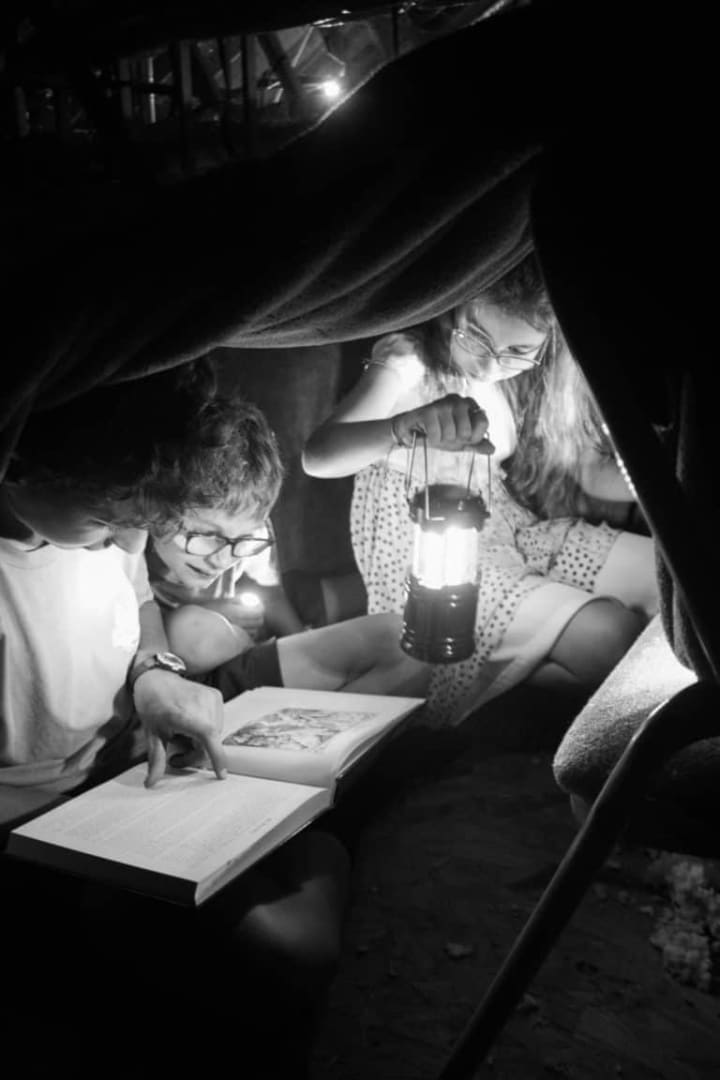
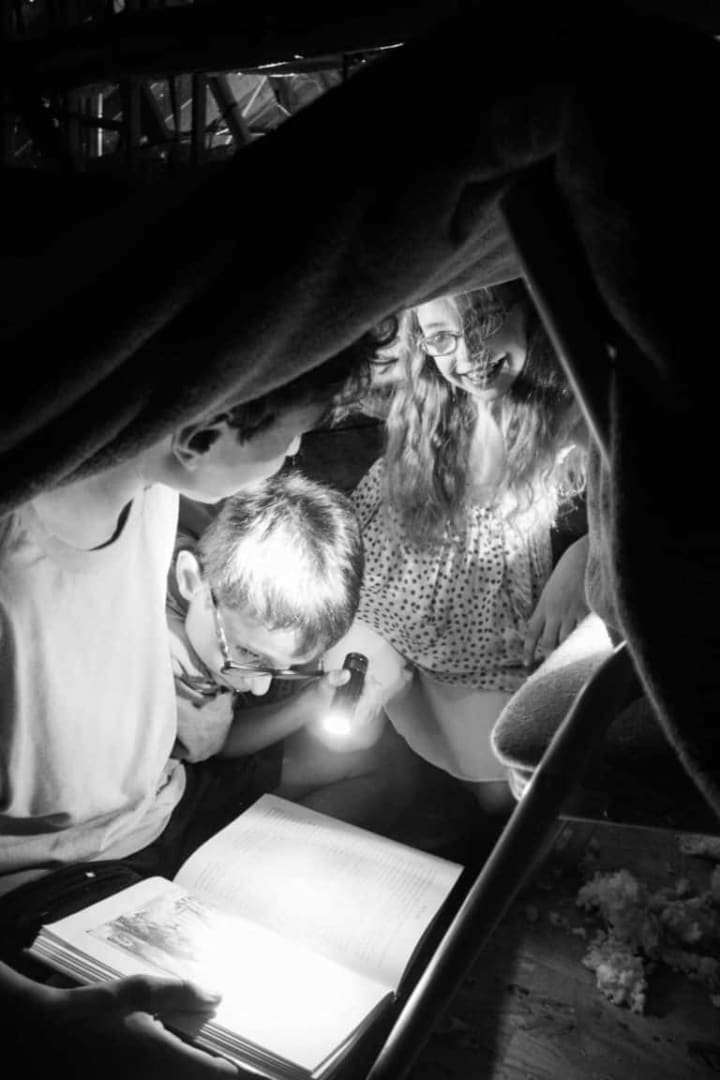
I came up with a sweet, simple story based on my own childhood: three siblings find themselves with nothing to do on a boring day, until one of them comes up with an idea, and an attic adventure ensues. Once you have your own idea, draw a storyboard. This is a simple series of sketches that charts your planned path through the shoot. You can use a regular piece of paper like I did, or for a more elaborate shoot, go with a piece of poster board–or several!
Here’s my storyboard, through which you’ll come to understand why I choose to use a camera rather than a pencil to tell my stories:
Don’t be afraid of crazy plans–you can make them happen, and acting on those special ideas can really give you your own unique style. Once you have an idea, you’re ready to start planning!
{ plan. }
What kinds of materials and people do you need to make your idea happen? At this point in the photojournalism process, you figure out the answer to that question and gather what you need. For my photoshoot, I decided my story called for three kiddos who looked similar enough to be siblings. You could go ahead and search for models, or for a more laid back shoot like mine, ask someone you know. I opted for my friends’ kids, who worked perfectly. Melanee, who has a ton of experience in the professional model world, finds most of her models through social media model calls using hashtags. She gives this advice:
“I find most of my collaborators through social media (#utilizehashtags!). My makeup artist, models, and often even wardrobe stylist collaborate for free as long as I am not making any money off the images. I keep note of who my friends in the industry are following via Instagram…I also would encourage, however, for people who don’t have a huge network yet to use sites like backstage.com to find models, start setting up a LinkedIn account and social media where you can find collaborators, and look out for people in your community! When I shoot in NY I only work with industry professionals, but when I shoot in TX sometimes my models are cute kids I know from around town, and my makeup artist and assistants are talented high schoolers and college students looking for experience. Talented people are everywhere, so if you keep your eyes peeled, you can pull together a creative team anywhere.”
Don’t be intimidated to jump right into the business–just keep up a professional appearance and learn the tricks of the trade!
As far as creating a set goes, thrift stores are great places to start. Once you have a vision for your set, check out those antique shops or even yard sales around town. Also, make sure you have plenty of light for your shoot. You may have an amazing idea, but if you’re lacking light, all will come to nought! If you don’t have or don’t know how to use umbrella lights or strobe lights, simple bright lamps with diffusers will work. I’d also suggest a light reflector, which can act as a diffuser for any light source. You can buy one for as little as 12 dollars below, and I promise it will become one of your best friends!
Finally, you’ll need a location on which to shoot. For my attic adventure shoot, all I needed was my own house! If you need something more elaborate, don’t be afraid to ask a local business to use their space on a day they’re empty. Many of them will be happy to allow you to do so in exchange for the ability to use your photos for publicity, which is a win-win situation.
{ shoot. }

Once you’ve planned your shoot, schedule it and be ready to click away! If the key to real estate is “location, location, location,” then the key to photography is “confidence, confidence, confidence.” [Fun fact: I was projecting.] If you’re working in a professional setting or with models, don’t show up on set fumbling for a plan and telling everyone that this is your first shoot. Put on a smile, have all your photography gear ready to go the night before, and stick to your storyboard when you arrive. If you’ve planned well, it’s easy to “fake it ‘til you make it,” even if you’re not super comfortable yet. Don’t worry, you’ll get there!
If the key to real estate is “location, location, location,” then the key to photography is “confidence, confidence, confidence.”
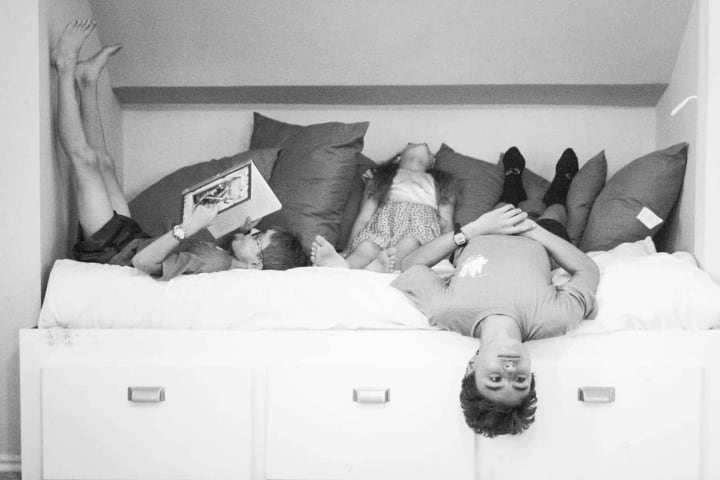
Here’s my shoot. I converted to black and white because I forgot to follow my own advice and find adequate lighting for my attic, so don’t make the same mistake!

{ post processing. }
In the above series, I’ve already edited the photos, but be sure to remember to tie up your loose ends using the editing process! Organize your photos in the planned order, and find a way to share your work. [Vocal is one great option.]
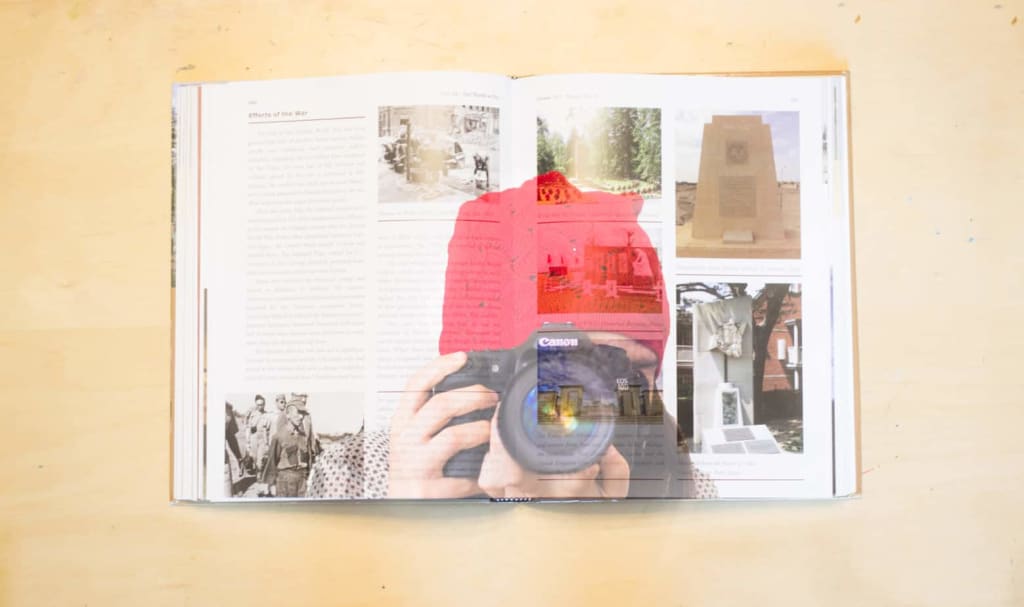
Below I’ve included a short photo series of Lucy meeting Mr. Tumnus in The Lion, the Witch, and the Wardrobe. I dreamed up the idea, reused my friends’ children as models, found a lamppost, created some special effects for snow, and my vision became reality!

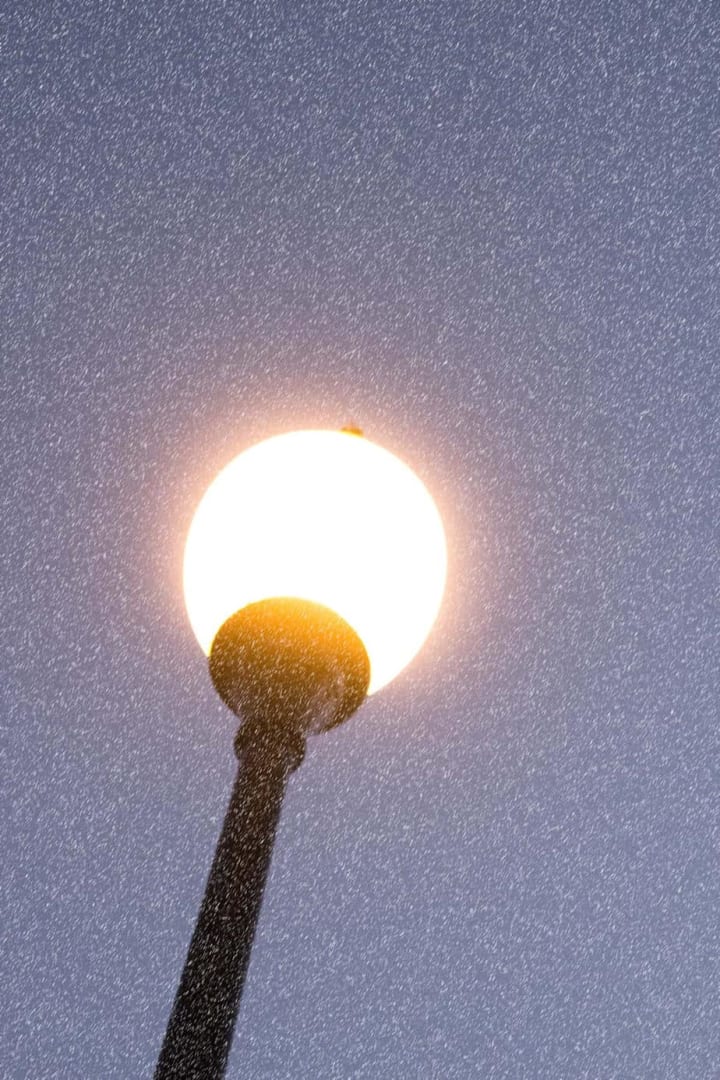
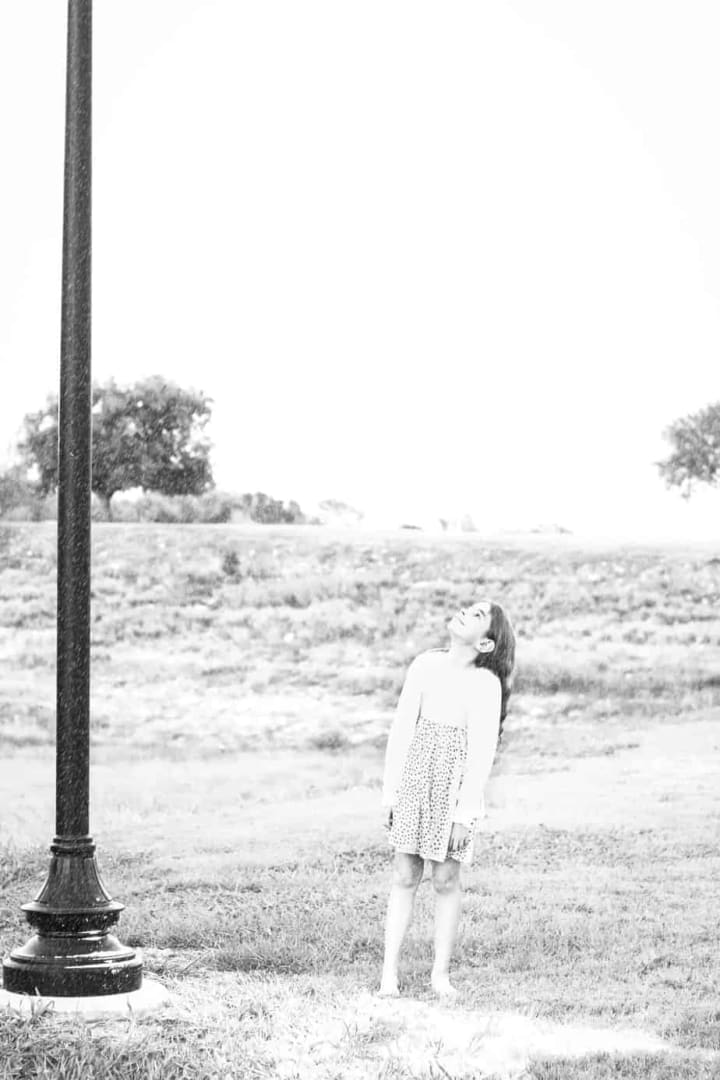
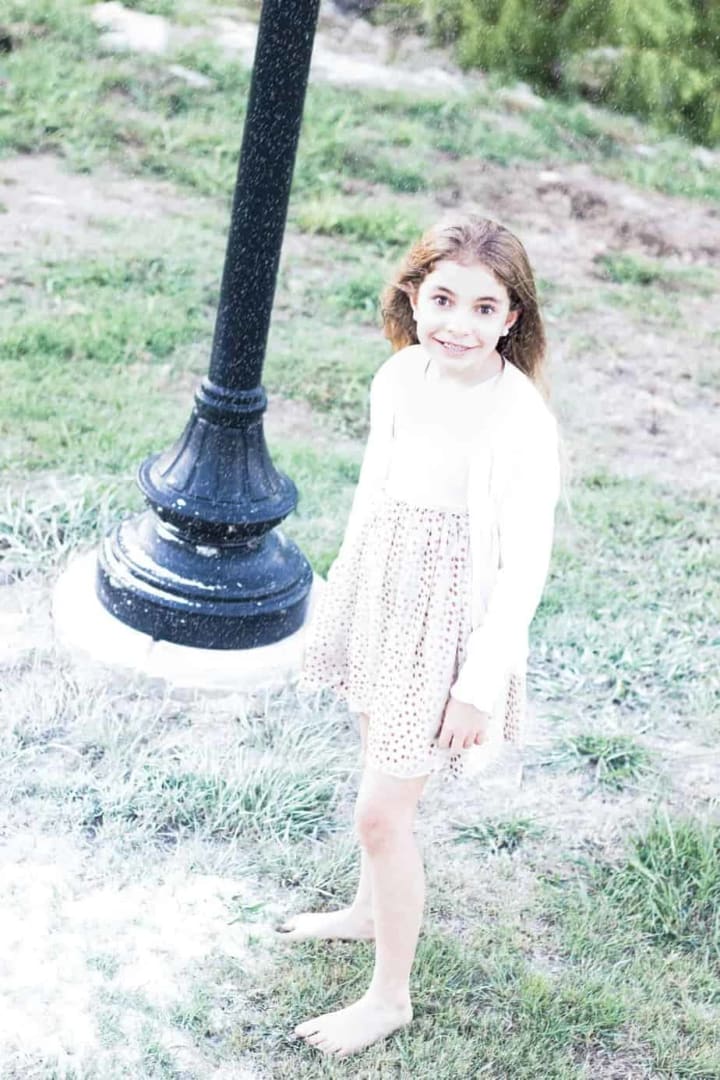
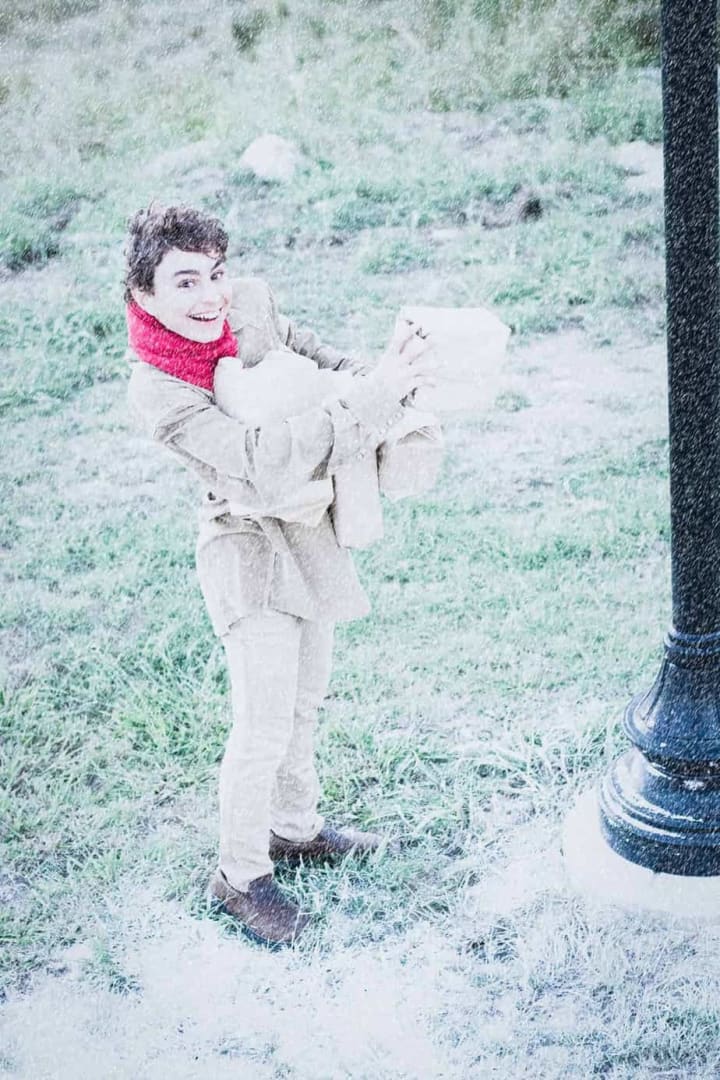
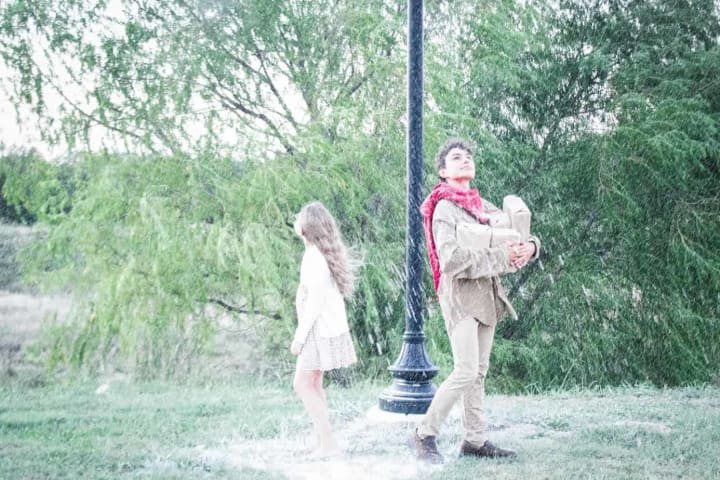
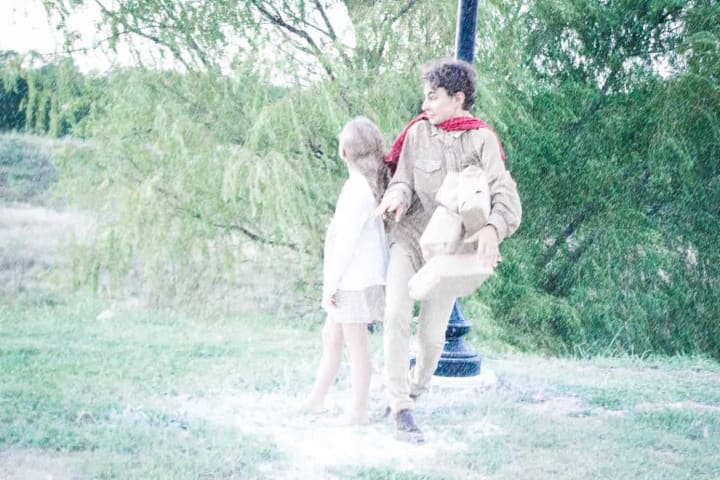
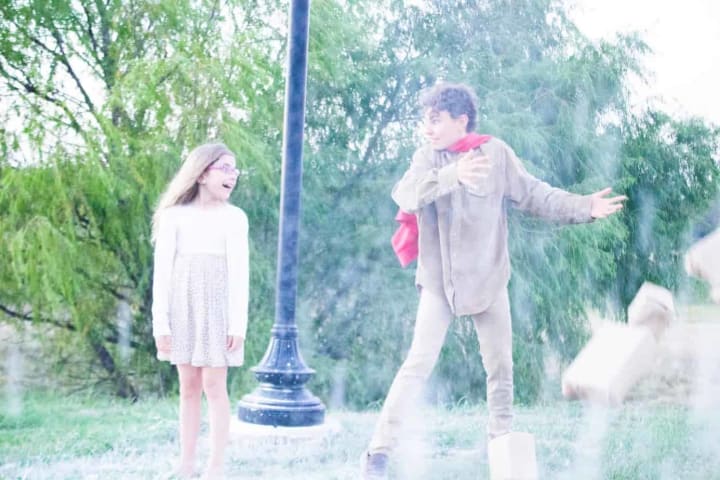
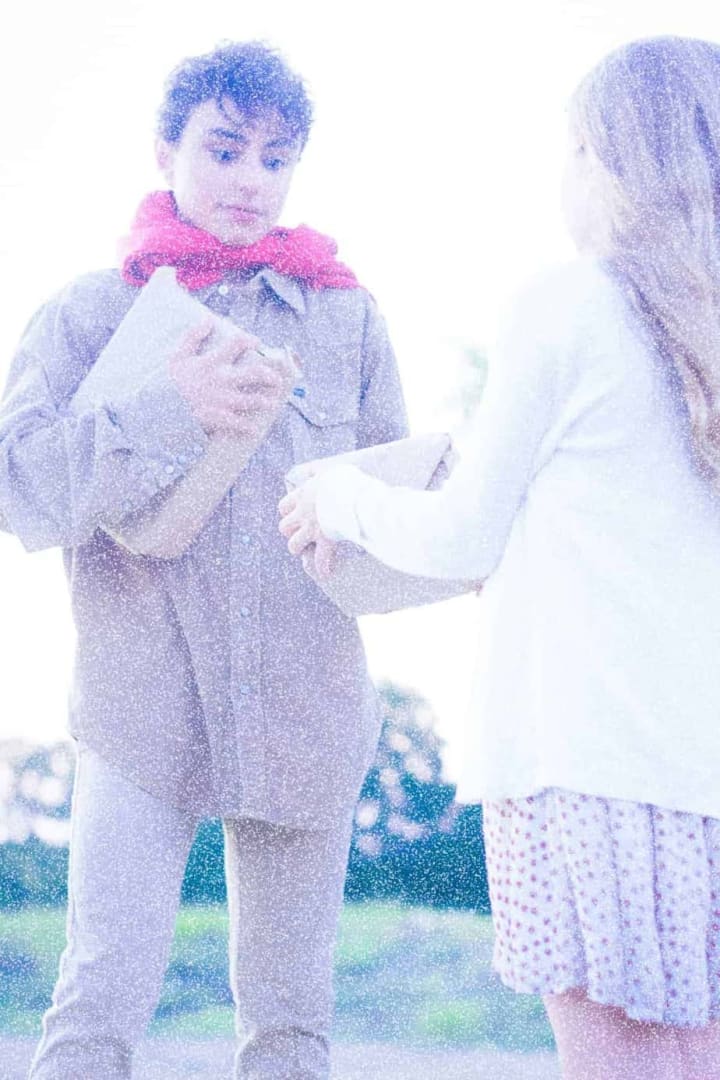
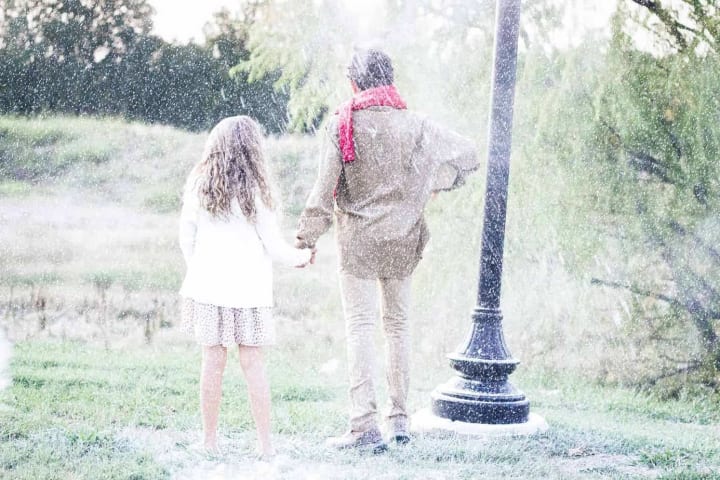
P.S. Flour is a great snow substitute, and it keeps the little models occupied!

[Hope you enjoyed a quick throwback Monday. Feel free to roast me in the comments.]
About the Creator
Raelen VanDuzer
college student who likes the idea of gardening and dog-owning and taking trips to Europe and eating so much sushi but just really isn’t in that stage of life yet.
Keep reading
More stories from Raelen VanDuzer and writers in Photography and other communities.
The Photographer's Perspective
Imagine we’re taking a stroll with our cameras and pass a construction site. Typically, photographers aren’t interested in construction, but this particular build catches our eye because of a certain photogenic object in the middle of all the silent machines and piles of dirt: a rusty old truck. It’s adorable. Its surroundings are anything but adorable. Weeds and even turkeys have overtaken the field, and a few dumpsters further obstruct the view. Whichever way we shoot, it seems we’ll run into something ugly.
By Raelen VanDuzer4 years ago in Photography
Crafting Humble Brilliance
In a world dominated by social media and constant self-promotion, the art of sharing one's photography without appearing boastful has become a delicate balancing act. Crafting Humble Brilliance isn't just about showcasing your work; it's about doing so with grace, humility, and authenticity.
By Thomas Vasas6 days ago in Photography
Capturing Magic
In the world of photography, timing is the key to everything. While skilled compositions and technical proficiency are undoubtedly crucial, the perfect lighting can create the perfect photo. Nowadays, we can determine any light ourselves and are no longer dependent on any natural light source, thanks to the developed technology. We can turn every day into a night by using the right filters. And we can illuminate every night to be seen as a day. A typical process, especially in the film industry.
By Krishan Mubashar2 days ago in Photography


Comments
There are no comments for this story
Be the first to respond and start the conversation.