
Simplified Photography Editing
Panoramas, Complex Editing, Simple Editing


Although I have did digital imagery and digital art creation for previous companies when working for them. When it comes to my own photography, I find that I’m often the exception to the digital world. I like my images to reflect the natural state in which I took them. Perhaps this lends itself to honesty or creativity, I’m not sure, but I don’t like to do massive photo edits.
I’ve done photo editing before in depth in some of my pictures. For example, I make sweeping panorama pictures on occasion and that involves a lot of photo editing. It used to involve a tremendous amount of work stitching images together, but now software has gotten so good they almost automate the entire process. One of the new preferred ways to make a solid panorama picture is by using Adobe Lightroom. Adobe Photoshop will also do it, but it’s not as streamlined as Lightroom is.
Ten years ago, I was using a different program, I want to say it was also Adobe, but I honestly don’t remember now. But with panoramic pictures, they take information assembled from many different images, and sometimes you are missing the images, so you must fill in the information. Here is a series of images from a picture of Iceberg Lake in Glacier National Park.
Here are two individual pictures, a single picture I'd use to then bring in a complete image:

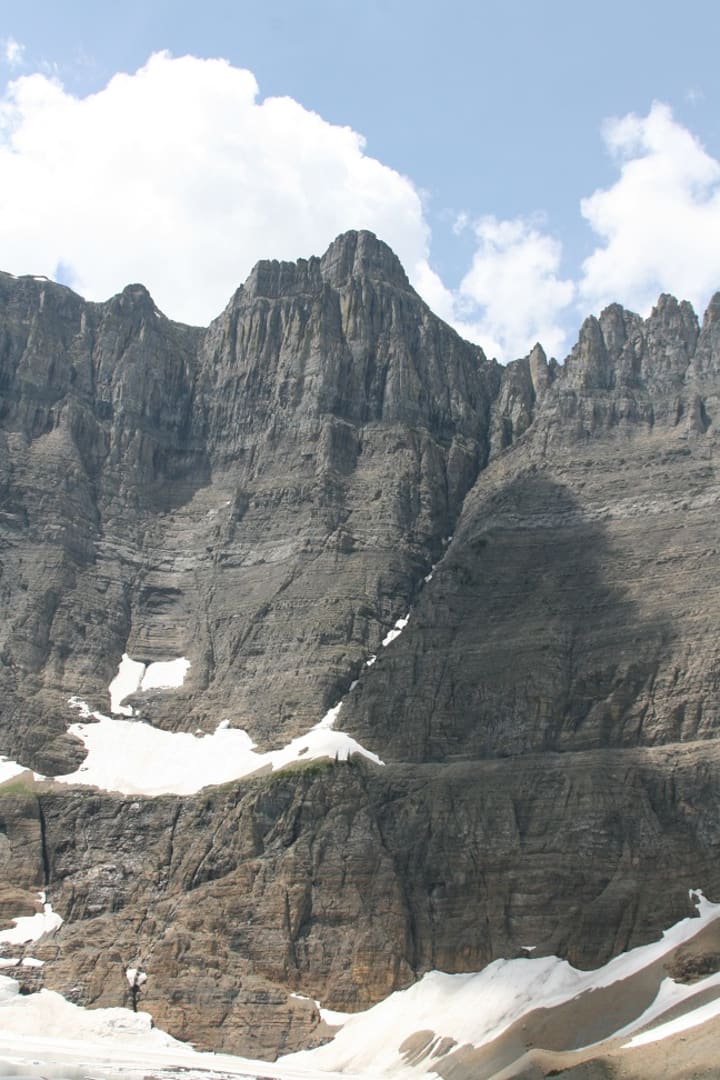
These are full size images, but then when you take about 15 of these and you put them into a huge image, you get a sweeping complex landscape. The initial combined image resulted in the holistic image reflect below.

If you do some investigation, the first two images can be found stitched into the above one. This presented the full expanse of the area, and even this picture still doesn't do the scene sufficient justice as it doesn't convey the climb, I had to hike up to get above the basin that the lake sits in.
The glaring issue with the above image though is that I'm missing information. When I did the picture, I slowly migrated downward with the images, and the results are I'm missing the sky in the top right. Now I could just crop the image, but then I'd wipe out a huge chunk of the mountain’s expanse across the image and that is a huge part that fosters the essence of grandeur that the image presents. So that's not an option. I fabricated the rest of the image.
The fabricated image, came out looking like this:

This was done in Photoshop and if someone compares the two images, they probably can quickly notice how I fabricated the images. Nothing magical, except stealing existing content, flipping, inverting, or even just uplifting it to replicate similar surroundings. The damage was so extensive though it wasn't simple replication, this took quite a bit of time to replicate properly. It still doesn't look 'good' per se, but it almost passes for something natural and the somewhat goofy clouds doesn't take away from the overall grandeur of the photo.
The above pictures are from Glacier National Park, and that is a trail out of Many Glacier called Iceberg Lake, it's a phenomenally magical place.
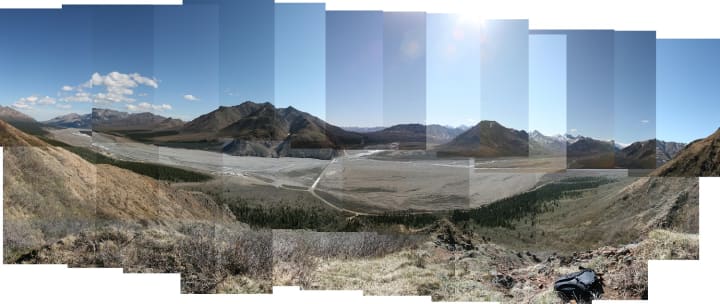
One of the few places that will rival GNP's beauty, is DNP (Denali National Park, Alaska, USA). It also points out another more common tool in photo editing, and the single most common tool I use when manipulating any of my images, and that's the simple cropping. Since we are dealing with panoramas let's utilize another one of those as an example.


You'll note again in this panorama after I built it, I was missing material in the lower left. You can also note the human standing right above that for some sense of scale of this image, the landscape is massive. A simple crop though in the image becomes even more grandeur. The largest reason for this is because the foreground is largely removed, making the background look even more expansive. Of note is the area on the right side that is removed, making it collapse into a rolling hill instead of the partial road that it was.
Overall context is critical with panoramas though, let's take that same image and just tweak the visual on it into a different scene, and let's view it again.

How much more expansive again does that image look (even if our human and roadway for size and expanse). It looks truly massive in the above context.
Some panoramas I've made are colossal in size. One of the largest I've ever put together I'll show below, it is also in Denali. In stitching it together, my rending software, which I'm fairly certain was Photoshop at the time, failed to stitch it together, so it actually broke the final image into all the various component images, which was actually just as incredible.
The image contains about 20-30 overall pictures, and the completed image when it was done is roughly at 100 megs. The photoshop file I have it created in, sits just short of 1 gigabyte. The image was so complex I could never render it as a single image, I had to break it down in its component parts, and eventually put that together. One of the component parts is below.

After spending hours on this image, I finally rendered a complete work, which is seen below.

Even this 'perfected' image, sits at 80 megabytes.
Another piece of editing I'll do is label my work. Although all of the above images aren't labeled, I've tried to get more serious about that when I capture images, I truly think are worthy of being noted.
An example of this is trying to do it professional and subtle, probably something I haven't mastered yet, but I have taken a couple pictures I'm particularly proud of and have marked them. One would occur in Denali again, although seven years later from the above pictures.

I've tried to standardize on this font and style, although I have forgotten to follow through with it on all of my images, but another photo, one I consider to be one of my best I've ever taken, I displayed it similarly.

That photo is the actual photo as well. It isn't cropped, edited, or altered. Perhaps that is why I am so fond of it. People may in fact laugh, but for a ton of my photography career I haven't wanted to spend the money on Photoshop (although their now monthly subscription model actually makes it very affordable and user friendly, and I now highly, highly, recommend it). But even so, I spend a lot of time doing editing just in simple Paint. Sad, but true.
Microsoft Paint:
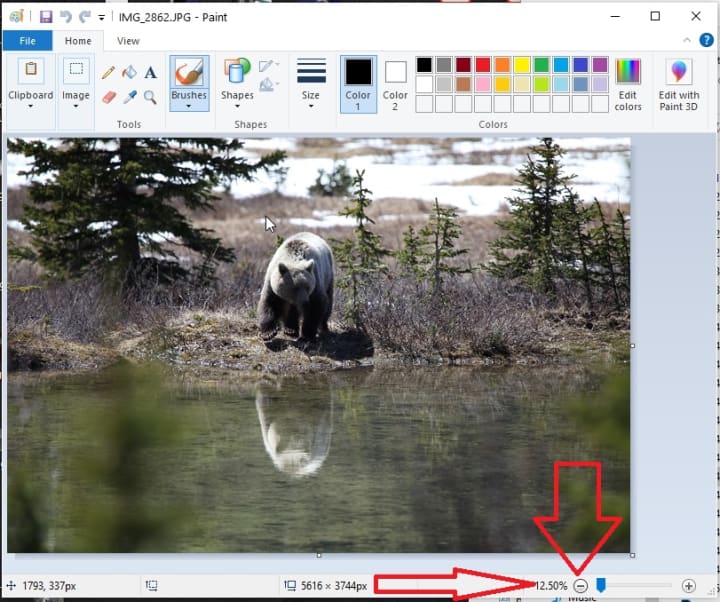
As I said, most of my editing involves cropping and appropriately sizing the image, and paint makes this incredibly easy to do. The first thing is quickly sizing the photo properly so you can work at it holistically. This is changing the reference zoom. The above picture (the North American Grizzly is a 7mb file, so it's huge). Quickly changing how Paint displays this is key (lower right in the below image):
Next, let's actually make the bear bigger, by eliminating some foreground. Half the reason this picture is so amazing though is the reflection, so we don't want to lose that. Let's crop out a partial image:

After cropping the image to enhance and enlarge the overall effect, lets drop in our signature. Where to place it is always a question.
Clicking the 'A' for the text field and then editing text options for style, size, and type of font comes next. This image, even after removing 75% of it in the below caption, still has the text at size 72, the picture is still that large.

After that and some final cropping and you are left with a final image, that's quite impressive and done with all free software, and looks like a professional result.

Zooming in, and utilizing Paint come with a bit of a cost though, the digital zoom has compromised the quality a bit in the image. Paint, being the software that it is, also just loses the quality of the image when used, but overall, that's still solid image. Keeping in mind that 75% of the original picture is now gone to accomplish the digital zoom.
The expensive and complex tools are available, and they honestly have become very affordable. You can visit Adobe.com and see their cloud plan options for monthly subscription rates. I use these, and I cancel them, and then I use them. I never thought I would be able to use Photoshop affordably, but it is very doable now.
For Adobe Plans visit:
https://www.adobe.com/creativecloud/plans.html
The ones of note for Photographers are:

If I found the time to do photography full time, I would never not be subscribed to the first option. However, I do photography in bursts, so it just doesn't make sense, but even so I'll join for two months and then cancel my subscription and then rejoin.
Even though I speak highly of Adobe, and I do believe they are best in market for photography software. I do want to point out how quickly and efficiently you can complete basic tasks in the various host of software like Microsoft Paint. It might not be fancy, but you can rapidly and efficiently get things done. It's not the high form, deep manipulation of the image that you can leverage with Photoshop and other software, but it can quickly resize, crop, layer, and add small piece of information if required.
As I said on the onset, I don't like to manipulate my original photos too much. I don't go into the weeds of digital manipulation. I have done some powerful manipulation of images in Photoshop, but to me always seems that there is something almost dishonest about manipulating the images too greatly. I always want to keep the integrity and honesty of the real image by not manipulating it too much.
I hope this was helpful, it's just a casual overview of how I approach some of my photography, when given an opportunity.
About the Creator
Daryl Benson
Just trying to write a little on the side to see if anything can come of it.
Keep reading
More stories from Daryl Benson and writers in Photography and other communities.
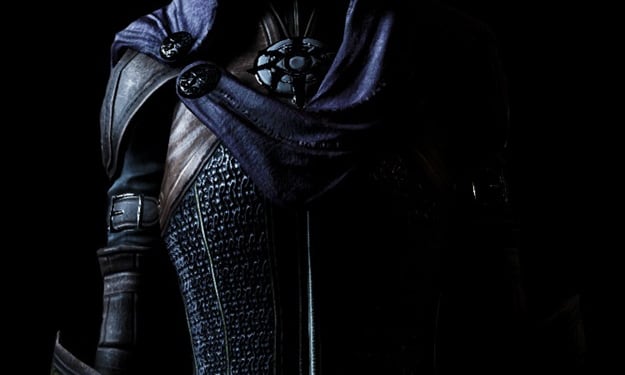
The Ashen Horse
“It has become a national issue, Josie,” commented Tim. Timmy Burkman, senior detective for the Federal Bureau of Investigation, preferred to be called Tim. This steaming pile of excrement had fallen on his plate, and although he didn’t want to get anywhere near it. He had to defend the company line to Josie, a lieutenant in the Salt Lake City Police Department.
By Daryl Benson3 years ago in Horror
Capturing Magic
In the world of photography, timing is the key to everything. While skilled compositions and technical proficiency are undoubtedly crucial, the perfect lighting can create the perfect photo. Nowadays, we can determine any light ourselves and are no longer dependent on any natural light source, thanks to the developed technology. We can turn every day into a night by using the right filters. And we can illuminate every night to be seen as a day. A typical process, especially in the film industry.
By Krishan Mubashar6 days ago in Photography
Offbeat Places in Malaysia: Travel Secrets
Malaysia is most popular for stunning urban areas like Kuala Lumpur and George Town. In any case, there are such countless odd spots in Malaysia anticipating nature sweethearts and travelers. We've assembled a rundown of 10 mystery objections that make us need to book a pass to Malaysia this exact instant!
By prashant soni3 days ago in Photography

Comments
There are no comments for this story
Be the first to respond and start the conversation.