Shooting With An Iphone
An Inexpensive Photography Tool

The perfect shot comes into view, the lighting is almost surreal and the colors are bright, bold and beautifully contrasted. Everything needed for a memorable shot is there, but the only thing you can think is "If only I had a Sony or Canon, then I'd be able to get this on camera", and the scene is lost. We forget, though, the powerful device that resides in our pockets: our phones.
Although there are some limitations in what one can capture with an iPhone, much of what a professional photographer does can be replicated if you have an image in mind of what you want to produce. This comes with some extra effort put in in terms of editing, as a limiting factor when using an iPhone is the inability to adjust brightness or other things on the spot.

If you have an eye for photography and know what angles will result in a great shot, then a DSLR is simply a crazy expensive way to showcase that vision. The initial professional look won't be present, but with the use of apps such as Afterlight, DazzCam, Tezza or PicsArt, you can adjust certain elements to make it so.
What should be kept in mind is to not overly edit a photo, as you can get caught up in the idea that editing a lot will give you the result you're looking for when it really comes down to simple adjustments that enhance the beauty of the initial shot.

The photo above is an example of enhancing and not changing completely, as what I saw in my mind and what I knew I wanted to make the focal point was what the sun naturally created as an outline. I decreased the overall brightness of the image and slightly saturated the entire image to strengthen the sun's color. The red from the bricks was too strong so I decreased color's intensity while also dulling slightly the surrounding imagery to really make the central graphic the main event. It took some time to edit, but the final result, in my humble opinion, was entirely worth it. And I didn't need to lug around a big, fancy camera to get what I was looking for.
It comes down to practicing with editing applications and finding one that best fits your needs, playing around essentially until you really get a feel for the theme you are drawn to, your "aesthetic" if you will.
Filters are a great starting point for simple edits to make your photos pop, as they come equipped with automatic color adjustments so that you don't have to do it manually. This photo, for example, was edited with only one filter, and the picture itself had a vintage feel so I accompanied a similar themed filter to go with it:

Once you get comfortable with editing, it will begin to get easier to find shots that you wouldn't originally have thought to capture with your phone. Manual editing of colors, brightness, contrast and other things will also allow you to develop your own personal style.
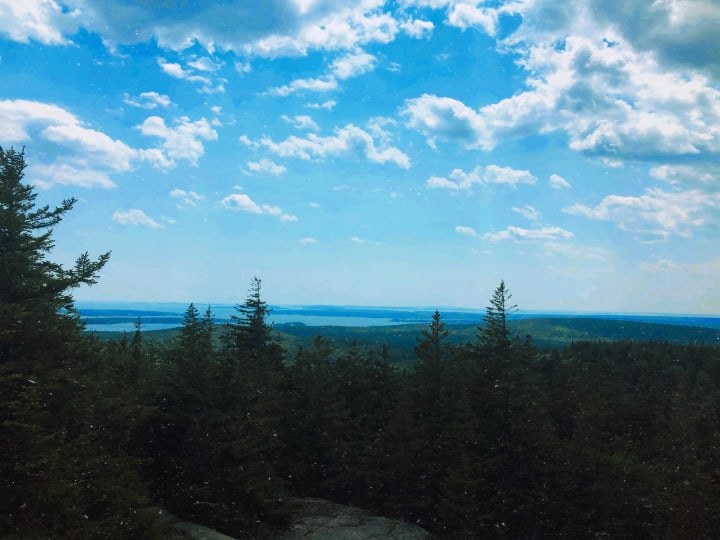
I personally like making colors pop, displaying the natural beauty of the scenery as I had seen it in my mind upon initial viewing, such as these shots I got while in Maine:


The original photos were relatively dull in color and contrasting elements, which is often why many chose to not use iPhones as their main camera, but with some time and effort put into editing, the end result is something that catches the eye.
Another great thing about using your phone as a camera is the maneuverability it offers in terms of getting otherwise impossible to reach positions and angles for photos. This shot, for example, required me to balance on a small rock and lower my phone close to the water in order to get the perspective I wanted to capture:

Another example is the picture below that called for me to reach through ropes and hold the phone in one hand, but this shot I got while on a sailboat was too good to pass up:

I desperately wanted an HD camera for a long time, but once I realized that what I had at my disposal was just as effective, I began to work with what I had. Like an expensive piece of equipment, using your phone to replicate professional photography takes time, and it requires practice to get really good at using it to your advantage.
I experienced many a photo that I thought would look good after editing but the end result was almost difficult to look at, but it I kept at it because I knew that a couple thousand dollars wasn't something I had readily available.
It's about trial and error, and the age old saying "practice makes perfect" is as true as it's ever been in this scenario, but of course my photos are far from perfect and I have a long time before I even come close to producing publishing worthy images.
My goal with this, though, is to give some tips on how to utilize the device many of us take for granted, as although the initial turnout is something of a lower quality image, with some extra effort, you can turn it into the memorable shot you envisioned.

About the Creator
Andrew Uncles
My name is Andrew Uncles, I'm 19 years old and love writing, poetry and novelist writing to be specific, photography, music, basically any genre, cooking, fashion- anything art related really.


Comments
There are no comments for this story
Be the first to respond and start the conversation.