
Product Photos in a Hurry and on a Budget
Easy, better photos for beginners, with simple tools

Let’s face it, we’re in the age of the side hustle and the gig economy, and that’s unlikely to change any time soon. If you’re selling anything, anywhere, the better your photos are, the more likely you are to make a sale. If a picture is worth a thousand words, a good picture could be worth a thousand sales. Or just that one sale that means the difference between eating ramen noodles all week and a cart full of groceries.
I opened an Etsy shop a few years ago to sell some of the excess things from my crafting hobbies (obsessions), and the first thing I learned is the value of a good product photo. I am by no means a professional photographer and I’m still learning, but what I have figured out is how to take and edit photographs quickly, with minimal fuss. This is important for those of us who are not professionals taking product photos for other people. We usually need to sell our stuff now and have a lot of other things to do, like making and marketing, pricing and packaging.
Have you thought about opening an Etsy shop? Do you sell, or want to sell, on Ebay, Poshmark, Facebook Marketplace, Craigslist, or Amazon? You’ll need to be able to write good product descriptions, but without a decent photograph people are unlikely to click on your link. Let me emphasize, your photos do not have to be fine art or perfect. They need to show items clearly and be just a cut above the run-of-the-mill photos people often take of their products on their kitchen tables. So, let’s get to it.
What Tools Do You Need?
The Camera
Confession time. I’m poor. I take my photos with an okay, mid-range Samsung phone that’s a few years old. Nothing fancy, or even all that great. The photo editing software that comes with the phone is good enough for social media posts, but I upload my product photos to my computer and do my editing there.
The Software
The less you spend on this, the more profit, so free is what I go with. You might be surprised at how simple, free programs can elevate your photos. None of this is professional level. I do all of my editing work with Paint, Photos, and Snapseed (the free version). Wait, Paint and Photos? The very often reviled programs that come with Windows computers? Yep, them. They do a couple simple things very well, they load fast, and that’s all you need. Snapseed is a great app for your phone that you can find in the Google Play store. All you need is the free version.

Props
Anything can be a prop, and you can take photos anywhere. Every photo here is taken on my messy bed. Every photography how-to article will talk about the importance of natural lighting, and it is important, but you can overcome bad lighting. Again, we’re not going for professional photos. We’re going for a little better than “good enough”. My photos were taken next to a west facing window on a dreary, gray, rainy afternoon and I turned off all the lights.
The Nitty-Gritty
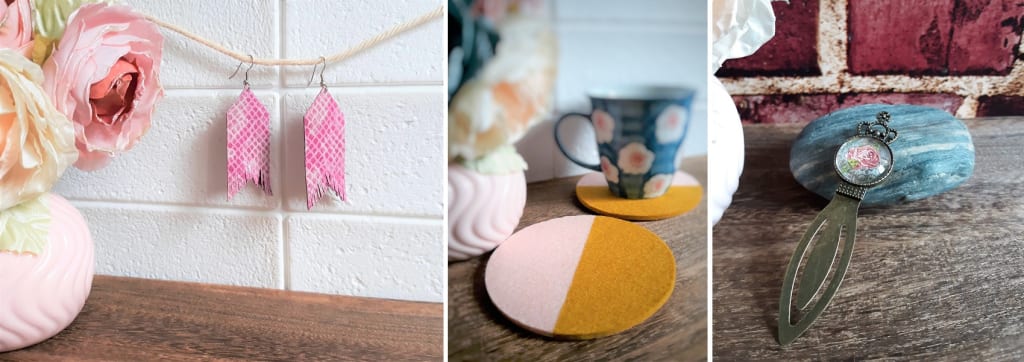
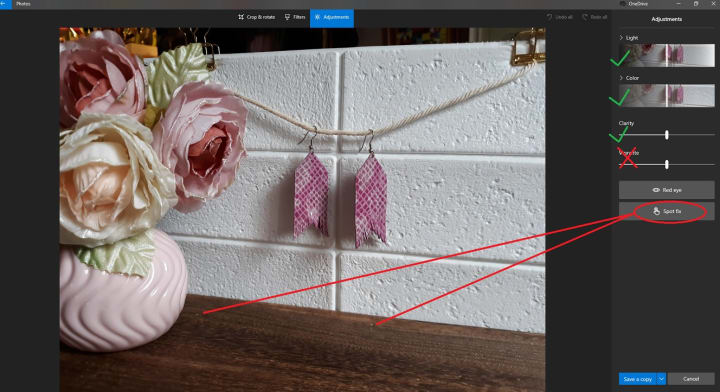
For the following earrings photos, I opened the photo in Microsoft Photos, cropped and straightened, and adjusted the light, color, and clarity. Most average phone photos need more light and more color saturation. I bump up the clarity to around 20 in almost every photo I edit because that's incredibly important for product photos. I also removed a few pieces of dust with Spot Fix. It took just a few minutes.
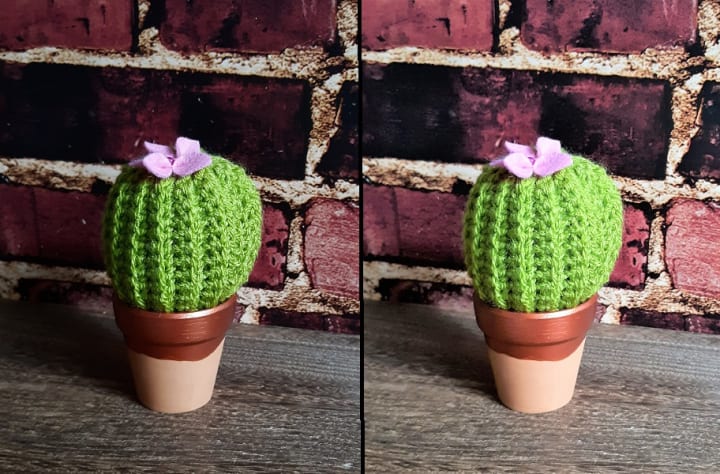
I also decided to play with the Lens Blur option in Snapseed to highlight the earrings a little more, and ended up with 2 final photos.

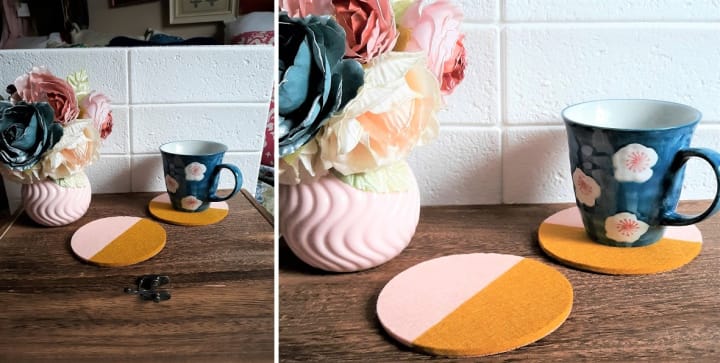
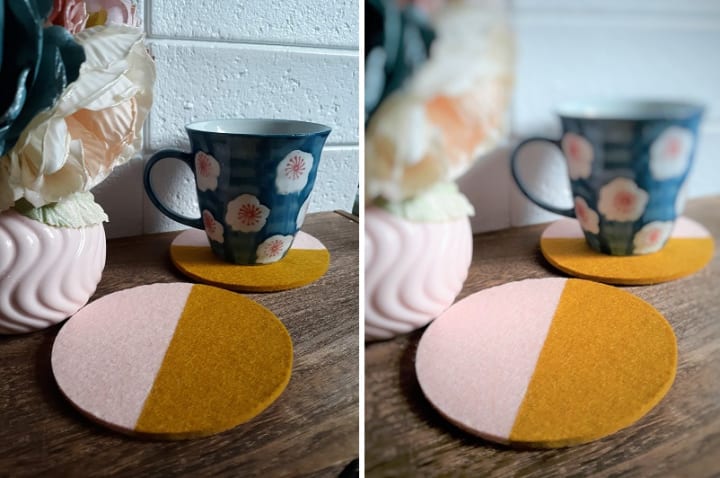
I followed the same process with some wool felt coasters that are big sellers for me. Make sure that when you're adjusting the light and color (especially the color saturation) that your picture remains true to the actual color. You don't want to falsely advertise. A little variation is fine because colors look different on different screens - just add a disclaimer to your product description.
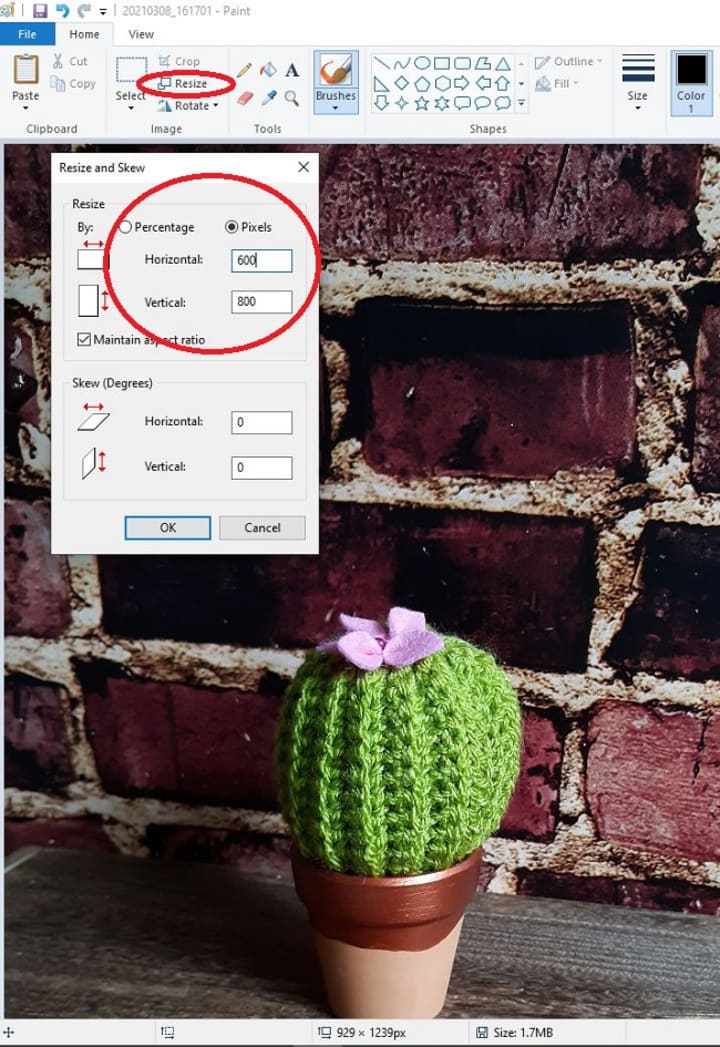
I use Paint (yes, the Microsoft Paint that comes with every Windows computer and is never used by the pros) for two things: cropping and resizing. Different selling platforms have different rules for photo sizing and I find that I often need to make my photos smaller. Paint makes it easy and fast. Do make sure that the Maintain aspect ratio box is checked or you'll end up with a distorted photo.
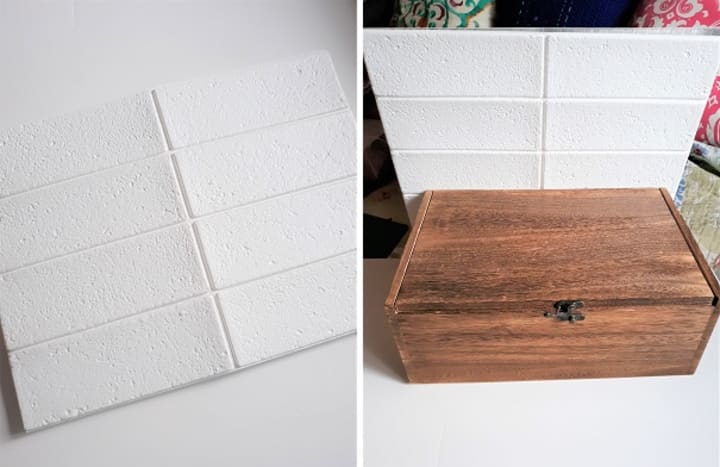
A word about backgrounds. That brick wall in the photos above is a piece of inexpensive photo paper purchased from Amazon taped to a piece of foam core. I've also found that contact paper on a piece of cardboard works well, and is super cheap. If you're using a background with color and pattern, go easy on other props to avoid distractions.
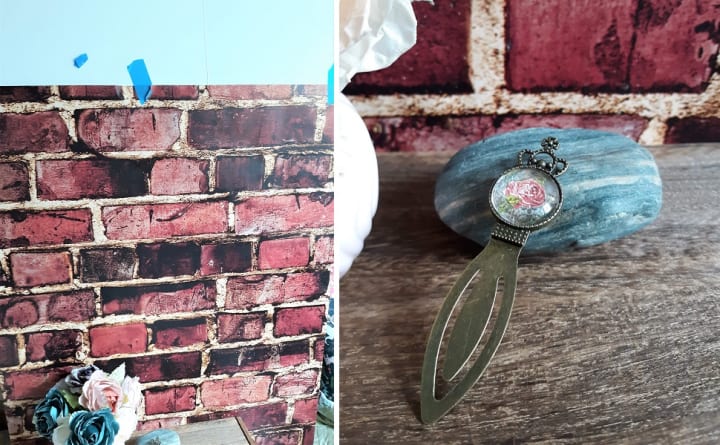
A note about photographing glass or other items that show light glare and reflections, like this bookmark clip that has a glass cabochon. Use Spot Fix in Microsoft Photos to minimize glare and hide reflections. Just hover over the spot and click. It will take the adjacent background and use it to fill in the spot you want covered.
That's it! 3 software programs, crop, straighten, light adjustment, color saturation, clarity, spot fix, and resize are all you need to take photographs that sell. Sell your stuff, that is.
About the Creator
Maria Shimizu Christensen
Writer living my dreams by day and dreaming up new ones by night
Also, History Major, Senior Accountant, Geek, Fan of cocktails and camping
Keep reading
More stories from Maria Shimizu Christensen and writers in Photography and other communities.
Facing the Rest of My Life Alone
I’ve been single for 25 years and a lot of people find that shocking, or something to be pitied. They rarely ask if it’s been by choice. They see a woman in her 50s, a woman past her prime with diminishing prospects for finding a lifetime partner. After all, how much time does she have left? They see the things that are supposed to be unattractive to potential mates: wrinkles, a belly pooch, hair that’s beginning to gray. Unless, of course, that potential partner is also aging in unattractive ways. But then again, aren’t aging men only seeking out younger, firmer women?
By Maria Shimizu Christensen3 years ago in Humans
Capturing Magic
In the world of photography, timing is the key to everything. While skilled compositions and technical proficiency are undoubtedly crucial, the perfect lighting can create the perfect photo. Nowadays, we can determine any light ourselves and are no longer dependent on any natural light source, thanks to the developed technology. We can turn every day into a night by using the right filters. And we can illuminate every night to be seen as a day. A typical process, especially in the film industry.
By Krishan Mubashar7 days ago in Photography
Top Modern-Day Cameras
In an era where every moment seems to demand documentation, the quest for the perfect shot has become an integral part of our daily lives. Enter the world of digital photography, where innovation knows no bounds. From the sleek sophistication of the Saneen Digital Camera, boasting 4K capabilities tailored for both photography and video, to the rugged resilience of the KODAK PIXPRO WPZ2, designed to withstand the harshest of environments, The range of options available is as diverse as the creative visions they aim to capture, offering not only cost-effective choices. And amidst this landscape of technological marvels, the 4K Digital Camera for Photography emerges as a beacon of versatility, offering auto-focus precision and anti-shake stabilization, ideal for the ever-evolving realm of YouTube vlogging. As we embark on a journey into the intricacies of modern-day photography and the evolution of cameras, these innovative tools serve as our guide, illuminating the path towards boundless creativity and endless possibility.
By Kaleb M4 days ago in Photography
In The Blink of Her Eye
Time itself bent and morphed, allowing Shannon the precious seconds needed to see and adjust to the disaster unfolding in front of her. Each frame showed minute details she would have missed had the clock not slowed down until she heard every click of the hands as they swept toward the end of everything. If only she was being melodramatic...
By Lisa VanGalen2 days ago in Fiction


Comments
There are no comments for this story
Be the first to respond and start the conversation.