
Photography Project Ideas: Rain Reflections
Make the most of horrible weather by capturing unique photographs in the rain. People may think you're a little weird, as you’ll be pointing your camera at the ground for pretty much most of this project but I promise you, it will be worth it in the end.


In This Article
- Photographers who inspired this idea
- Equipment you’ll need
- Best type of location to take your photos
- Optimum camera settings
- Composition of your image
- Editing your pictures in Lightroom and Photoshop
- Examples of my photos
Inspiration

Instead of one specific photographer who inspired this project, it was actually just one image.
Whilst scrolling through google images, I came across this photo taken by Ronya Galka, and I was drawn to the amount of contrast and texture.
This one image motivated my whole project and was the picture that I kept referring back to when taking my own.
Equipment
Any camera can be used to take these images, but I do recommend a camera that has a manual mode, as you will have a lot more control over the lighting of your photo to capture as much detail as you can.
Location
I took my photos outside of the Tate Modern in London, as it conveniently started to chuck it down with rain just as I arrived, but you can take these pictures pretty much anywhere just as long as it is/has been raining.
I recommend you take photos on concrete, so down any road or path would be perfect, but being on paths with tiles can give an interesting effect and will add even more texture to your photos.
Camera Settings
As it will most likely be overcast when you take these photos, I would recommend using an ISO of 400, but this does depend on the camera and lens that you are using so this may vary.
You will want to have a fast shutter speed—for example 1/200, 1/400, or maybe even higher. This will get you crisp and sharp images. You could slow your shutter speed down to create motion blur whilst people are walking. Have a play around and see what kind of effects you can create.
The f-stop is usually the setting that I change the most as I usually tend to keep the ISO and the Shutter Speed the same throughout my shoot.
Change your f-stop so that the exposure dial on your camera is centred and work from there, you will be able to tell whether you want your image to be slightly lighter or darker.


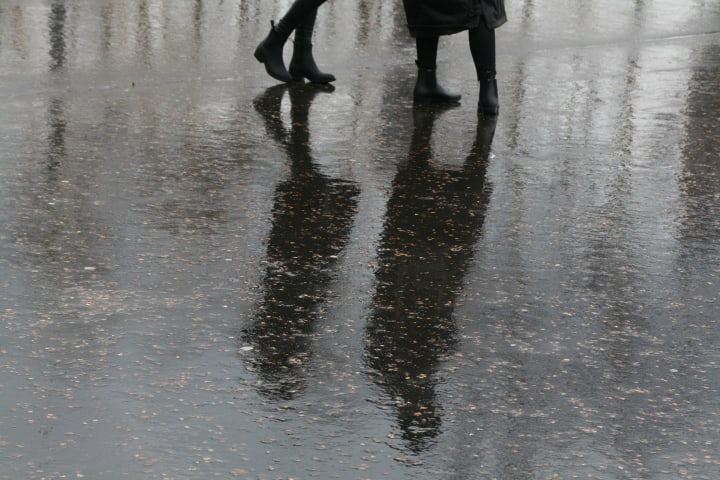

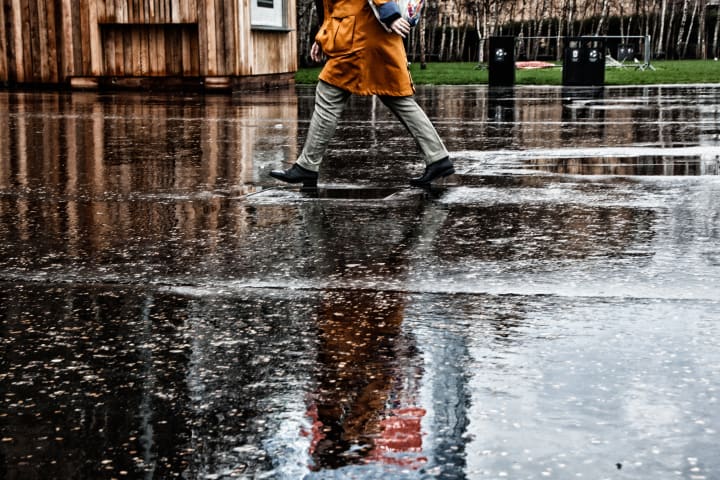
I took a few photos where both the reflection and the actual person were fully in view to give a full perspective.
Some of these photos I didn’t flip upside down in the editing process because the overall composition of the image was suited to staying upright.
Editing
I began by picking the photos I liked and importing them into Adobe Lightroom. I used the rotate button to flip my photos upside down and for some, used the crop overlay feature to slightly rotate them into the place that I wanted.
I edited most of my photos in black and white because most of the colours were quite dull as it was very overcast that day—although you can edit these in colour if you wish.
Making them black and white meant that I could focus on the contrast and bring out a lot of the texture in the image, as I think it didn’t come through as well when I edited them in colour.
Using the black and white setting in Lightroom meant that I had access to the black and white mix sliders (which can be found in the develop tab on the right hand side). This meant that I had control over the tone of black/white that I used for each specific colour. This is where I did my main editing and made the reflections really stand out from the rest of the ground.
For most of my images, I increased the clarity as this really brought out the texture in the rain and the ground to make the image sharper.
Once the main editing was done, I transferred some of my images into photoshop to use the Silver Efex Pro plugin within the Nik Collection (which was free at the time) to add some film type filters to my photos.
It’s always fun to experiment with different types of software and the Nik collection gives you a lot of control and many options for your photos.
Experiment
It's up to you how you want to edit your photos and its always good to try new things and be experimental and come out of you comfort zone when editing because you could come up with something amazing.


Like what you read? Send me a gift below to help contribute to my next project!
About the Creator
Keep reading
More stories from Becky Street and writers in Photography and other communities.
Photography Project Ideas: Car Window
In This Article Photographers who inspired this idea Equipment you’ll need Best type of location to take your photos Optimum camera settings Composition of your image Editing your pictures using Lightroom and Photoshop Examples of my photos
By Becky Street6 years ago in Photography
Capturing Magic
In the world of photography, timing is the key to everything. While skilled compositions and technical proficiency are undoubtedly crucial, the perfect lighting can create the perfect photo. Nowadays, we can determine any light ourselves and are no longer dependent on any natural light source, thanks to the developed technology. We can turn every day into a night by using the right filters. And we can illuminate every night to be seen as a day. A typical process, especially in the film industry.
By Krishan Mubashar8 days ago in Photography
Revolutionize Your Content with the Top 6 AI Tools to Make A Picture Talk Online
"How do I make a photo talk?" - Christopher With the rapid development of AI technology, it brings benefits to everyone, from individuals to photographers, teachers, marketers. One of the most impressive applications of AI technology is that it leverages deep learning to analyze a photo, animate it and make it talk with audio. The talking photo conveys stiff and complicated messages in an entrancing way, which is very suitable for using in advertisement videos, educational videos and training videos to enhance the storytelling. Individuals can also make photos of deceased loved ones to talk, bring the cherished memories to life.
By JaniceCAabout 5 hours ago in Photography
📢 Raise Your Voice Thread: 04/25/2024
Our “Raise Your Voice Threads” are hosted every other Thursday at 12PM ET to offer creators more avenues to uncover exceptional stories on Vocal. As we are continuously searching for fresh creators and inspiring stories, this thread provides an opportunity to exchange and discuss the stories that have moved and motivated us on Vocal.
By Raise Your Voice by Vocalabout 4 hours ago in Resources


Comments
There are no comments for this story
Be the first to respond and start the conversation.