
Photography Project Ideas: Car Window
Capture Stunning Bokeh Just by Focusing on Rain


In This Article
- Photographers who inspired this idea
- Equipment you’ll need
- Best type of location to take your photos
- Optimum camera settings
- Composition of your image
- Editing your pictures using Lightroom and Photoshop
- Examples of my photos
Inspiration
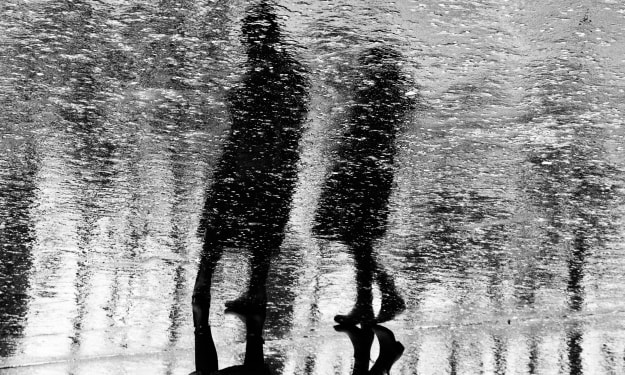
The selection of images that inspired this project was Nick Turpins’ collection of images called ‘On The Night Bus’.
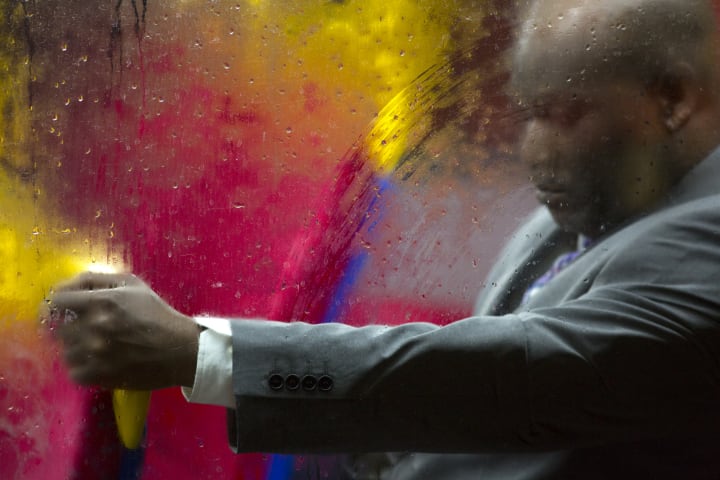
Nick Turpins' photo from 'On The Night Bus'
His images were taken from outside bus windows looking in, capturing commuters as they travelled home. I love the bright and contrasting colours that are evident in his collection of images and the detail that stands out from the rain and condensation on the windows.
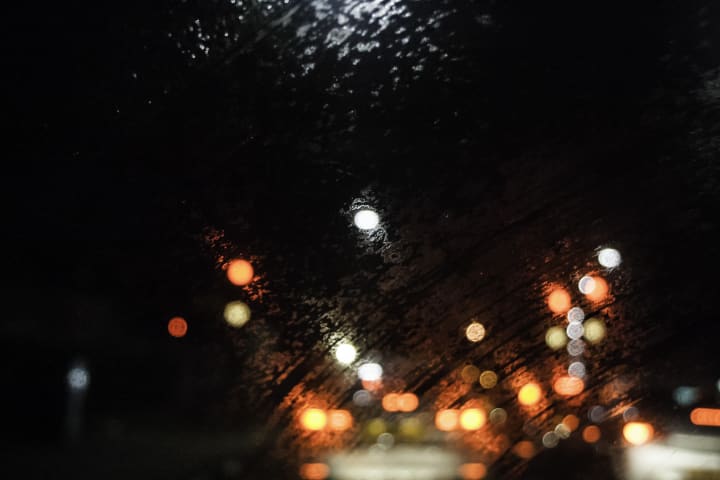
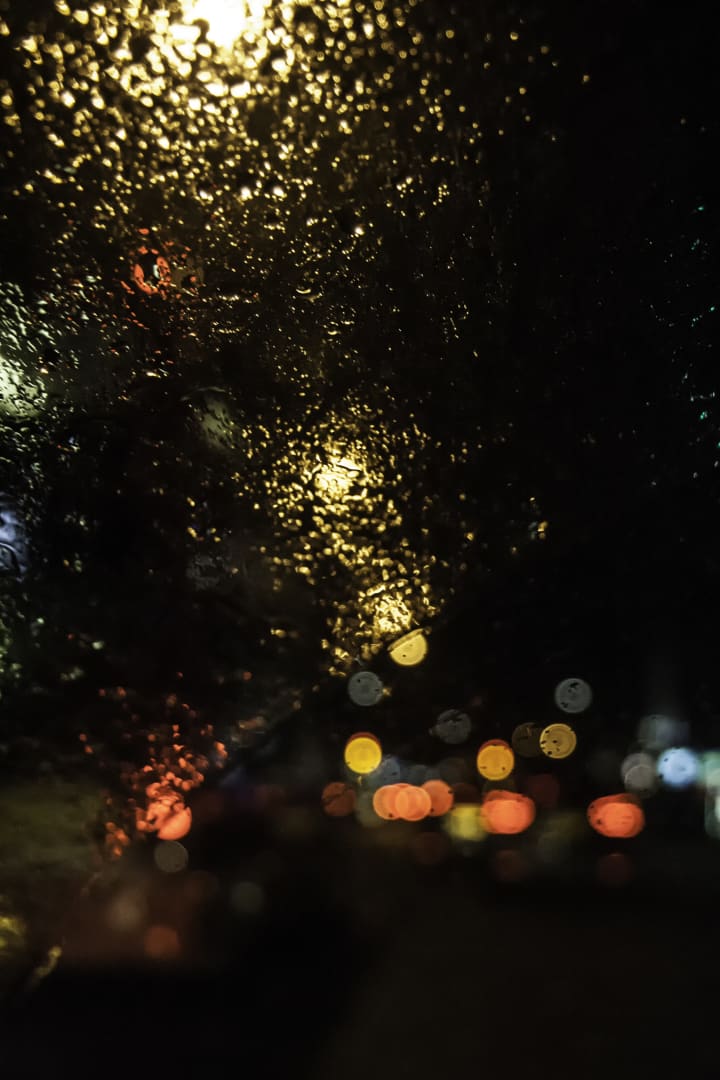
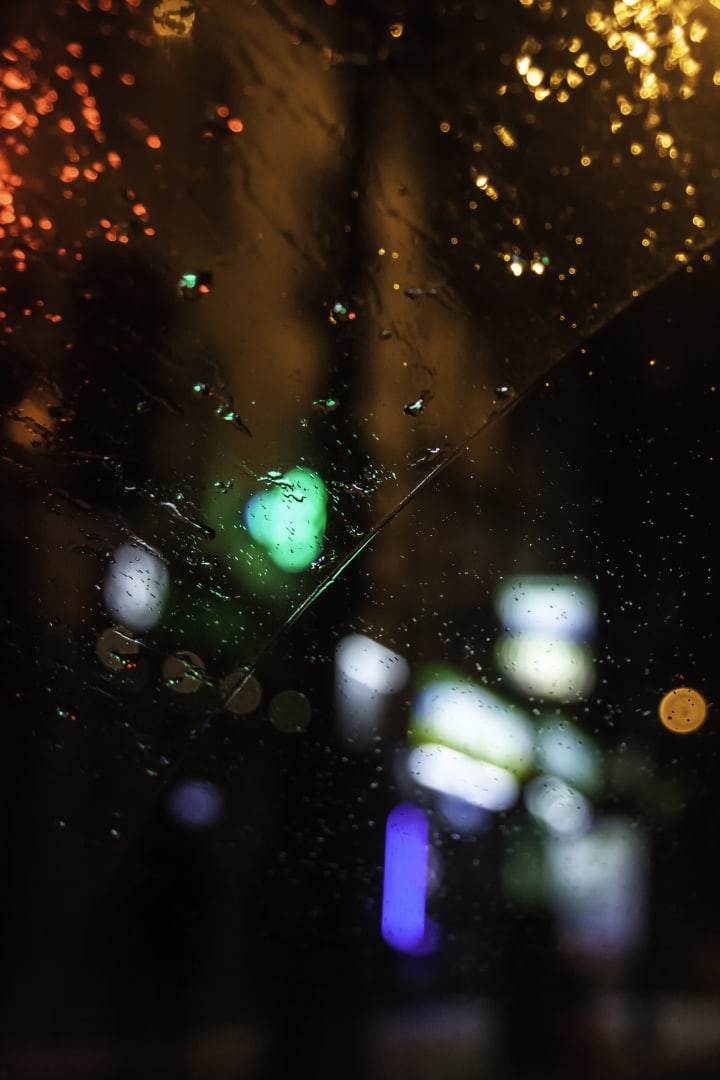
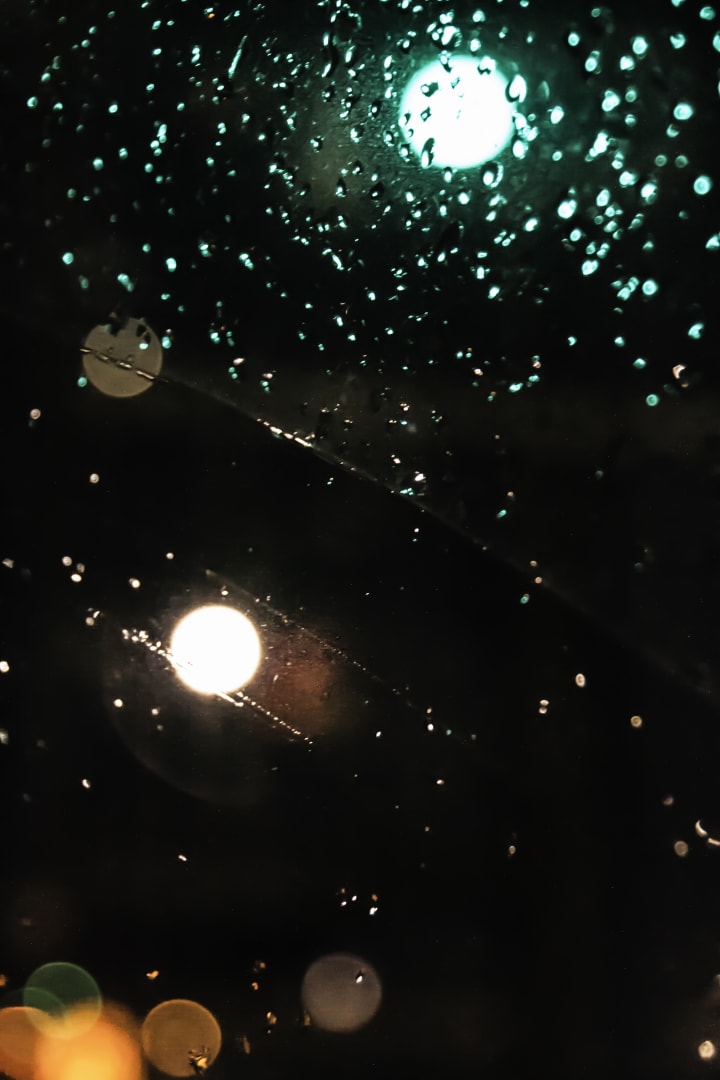
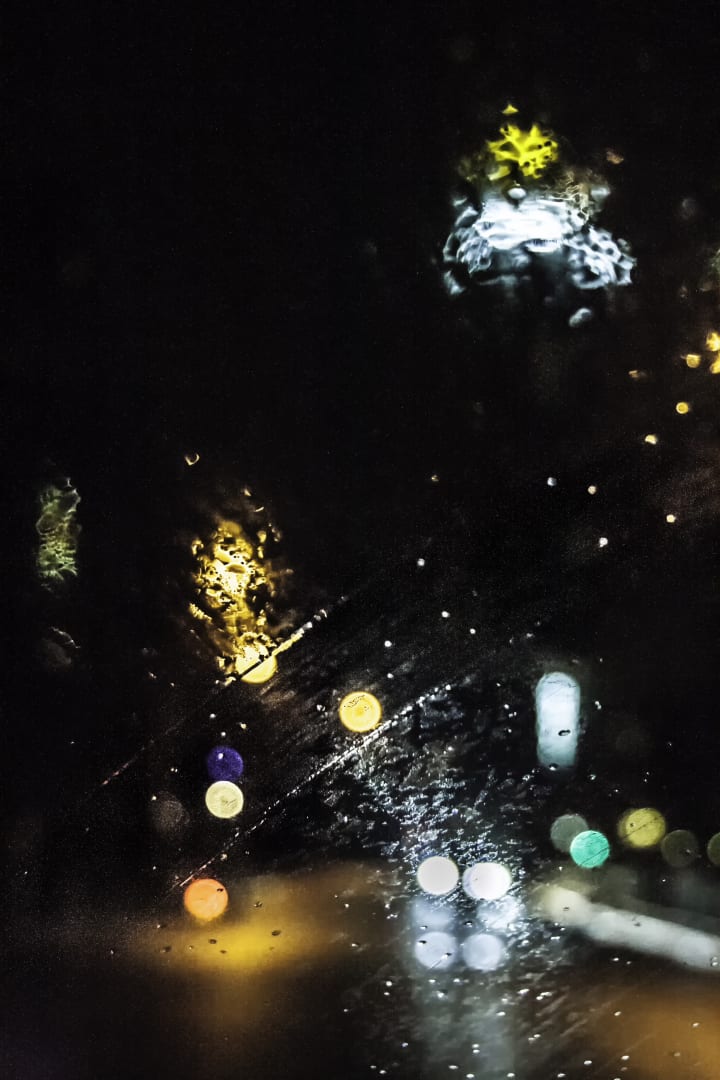
To make this project my own I decided that instead of using people behind the windows, I would capture other cars whilst sitting in the passenger seat of a car to create bokeh from their lights.
Equipment
Any camera can be used to take these photos but I do recommend a camera that has a manual mode as you will have a lot more control over the lighting of your photo to capture as much detail as you can.
Location
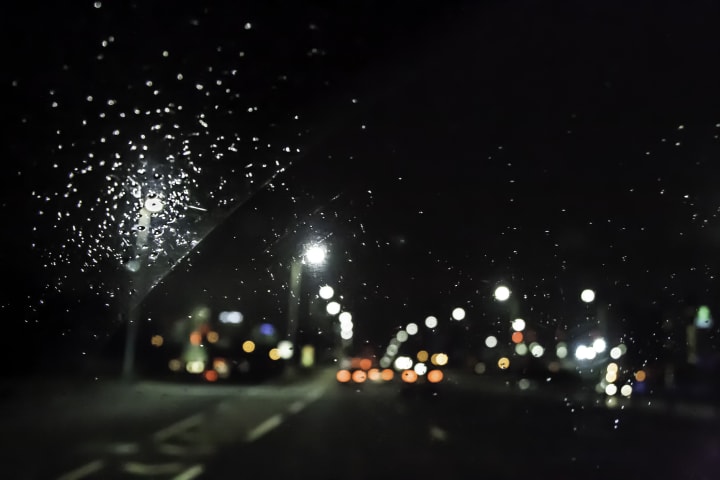
The best location for you to take your photos would be in the passenger seat of a car. This means that you will be able to capture more light from the cars in front of you. Do not try to take your photos whilst driving yourself!
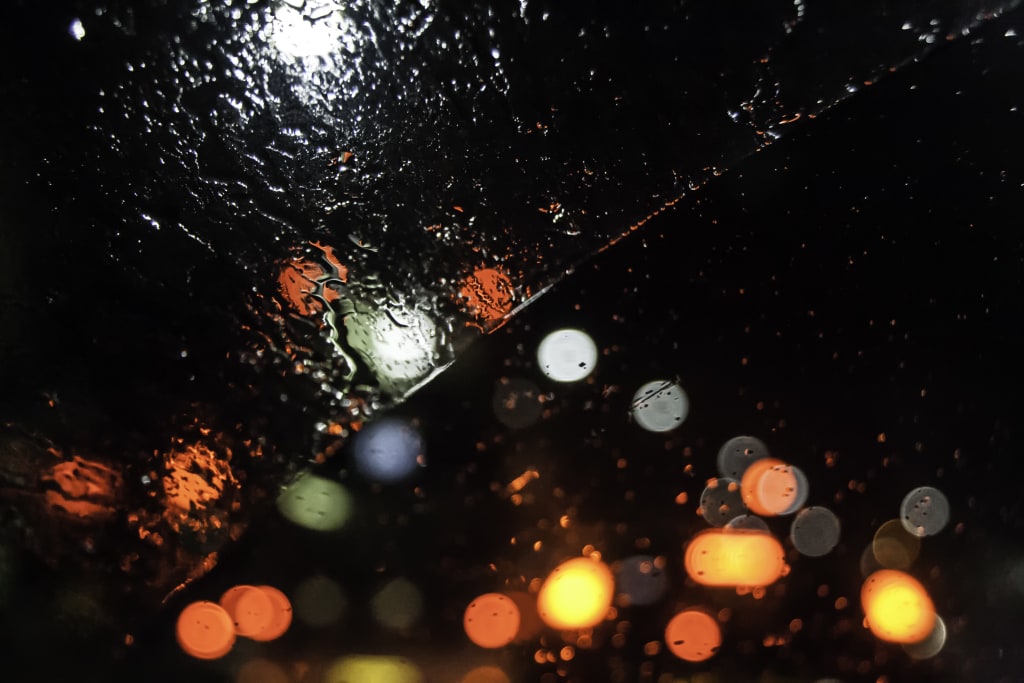
A major part of this project is to make sure there is rain on the window so that your camera has something to focus on upfront to then blur the background to gain the bokeh from the car lights - so make sure it has recently rained!
Another tip would be to drive around in a busy area to get as many lights in the background as possible from cars or even surrounding buildings or shops nearby.
You can try taking these photos during the night whilst it’s dark out or during the day but I recommend trying when it’s dark outside to get the best results. This is because the rain on the window is more visible when the light catches it and it creates more contrast between the light and dark to make a more interesting picture.
Camera Settings
As it will most likely be dark outside you will need a high ISO so I went with 1600 as that is the maximum on my camera but a lot of newer and more up to date cameras can achieve higher than this.
You will want a fast shutter speed so that the rain on the window will be perfectly in focus and sharp so I used 1/125.
By using a faster shutter speed, the f-stop will need to be lower so that more light is let into the camera. This is a good thing because if you have a low f-stop, then you will have a smaller depth of field. This means that the car lights in the background will be blurred more to create better bokeh. However, sometimes focusing on the window and keeping still to keep that focus point on the window is sometimes tricky when the car is moving, so I recommend that you take multiple photos of one shot to ensure that you have the best chance of the right spot being in focus.
I used an f-stop around f/4 to f/5 but this will vary as all lenses let in different amounts of light.
Composition
The composition of your photos can really be anything you like.
It may depend on where the cars around you and where the rain is on your window but other than that, its all down to you to find the best shot!
Editing
I mainly used Adobe Lightroom for this project to do basic adjustments and to brighten up some colours.
I started by increasing the overall brightness of some of my photos as some were quite dark. I increased the brightness of the highlights as well which brought out the rain on the window and also made the bokeh more vibrant.
I also played around with the clarity to bring out a bit more detail in the raindrops but didn’t go overboard as some grainy areas started to emerge around the photo.
I then moved onto brightening the colours by using the saturation sliders. I increased the reds and the blues but decreased the oranges and the yellows which meant that the more colourful bokeh was more prominent.
I briefly used Photoshop to decrease the amount of digital noise that was visible in some of my images from using a high ISO. I used the Dfine tool which is part of the Nik Collection which cut out nearly all of the noise.
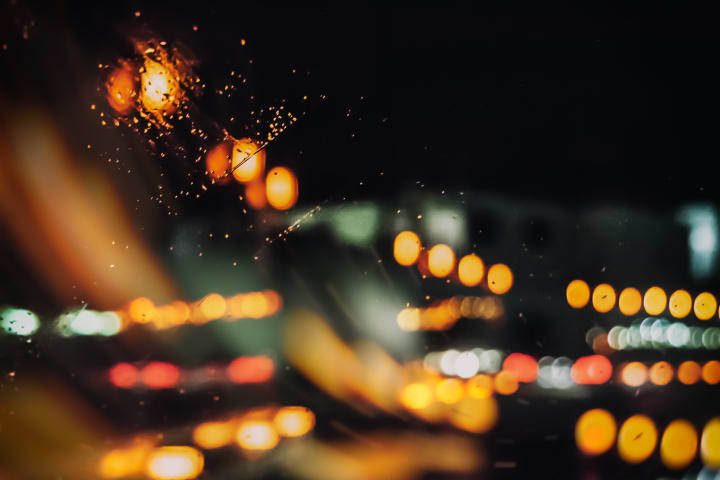
I used Analog Efex Pro, also within the Nik Collection, to create digital motion blur.
This added ‘movement’ to my photos and differed from Nick Turpins style which showed that I was developing my skills and making this project my own.
Like what you read? Send me a gift below to help contribute to my next project!
About the Creator
Keep reading
More stories from Becky Street and writers in Photography and other communities.
Photography Project Ideas: Rain Reflections
In This Article Photographers who inspired this idea Equipment you’ll need Best type of location to take your photos Optimum camera settings Composition of your image Editing your pictures in Lightroom and Photoshop Examples of my photos
By Becky Street6 years ago in Photography
Capturing Magic
In the world of photography, timing is the key to everything. While skilled compositions and technical proficiency are undoubtedly crucial, the perfect lighting can create the perfect photo. Nowadays, we can determine any light ourselves and are no longer dependent on any natural light source, thanks to the developed technology. We can turn every day into a night by using the right filters. And we can illuminate every night to be seen as a day. A typical process, especially in the film industry.
By Krishan Mubashar6 days ago in Photography
Offbeat Places in Malaysia: Travel Secrets
Malaysia is most popular for stunning urban areas like Kuala Lumpur and George Town. In any case, there are such countless odd spots in Malaysia anticipating nature sweethearts and travelers. We've assembled a rundown of 10 mystery objections that make us need to book a pass to Malaysia this exact instant!
By prashant soni2 days ago in Photography

Comments
There are no comments for this story
Be the first to respond and start the conversation.