
Mistakes Beginner Filmmakers (and Photographers) Make #6... Composition
How to frame your scenes (or how not to)

 Make #6... Composition")
When I first started out as a photographer, I would take pictures of just about anything no matter what got in the frame. Over time I would look at the photos and think “I wish I taken this without that in it” or “why didn’t I get closer to that flower”. The problem was I was wanting to put so much detail into the frame that I wasn’t thinking about what looked visually appealing and compositionally sound.
The ultimate goal for photography (and videography for that matter) is only capturing relevant details in the frame. Some of you might say, well not everyone does that, and that’s true; there are people who “break the rules” of composition. The argument I make for that is: they know the rules therefore they know how to break them; they take creative license. Now I am not saying never break the rules, but I encourage all photographers and filmmakers to learn and master the rules before you try breaking them.
Here are some tips and tricks that I have learned over the years for great composition and what draws the viewer’s eye (and what doesn’t):
Focal Point:
A focal point is quite simple. This is the main thing in the frame you want your viewers to see, and more often than not it’s the thing that’s in focus. Simple and easy. What causes the focal point to be less and less noticeable as the main thing is when you add other things into the frame or other things in focus. You want your viewers eyes to always be drawn back to the focal point by making everything in your frame “point” to the main subject. Ways to do that:
- Frame your subject with objects in your composition.

The bowls become a natural frame because they contain the focal point of the image: the food. This gives your eyes boundary, for lack of a better term, for where to look. You don’t have to see the whole bowl because your mind fills in the rest, but it makes it easier to find what the photo is about because there’s a natural frame inside the frame. This could be done SO MANY different way, but here some ideas: using the door frame of an entry way. Someone standing inside (or outside) and you’re capturing the image close enough to get the whole door frame (or even just the sides) in frame. Or if someone sat on a window sill. Capture the image from the front or back of them with the window in frame.
- Use a shallow depth of focus. Make your aperture as wide as possible (low f/stop)


As shown in the images above, you can have a shallow depth of field in either the foreground or the background. Which means your f/stop is as wide as it can go (number is as low as it can go) creating a soft blurred composition around your focal point. This can also be achieved if you have a long lens (I sometimes use my 70-300mm) and you take the photo from a distance; not too far away, but enough that the image looks like a close up/ medium shot. It should give you a similar shallow depth of field blur behind your focal point.
- Opposites attract. Literally. Take a photo, strip the color from it and only make your focal point in color.
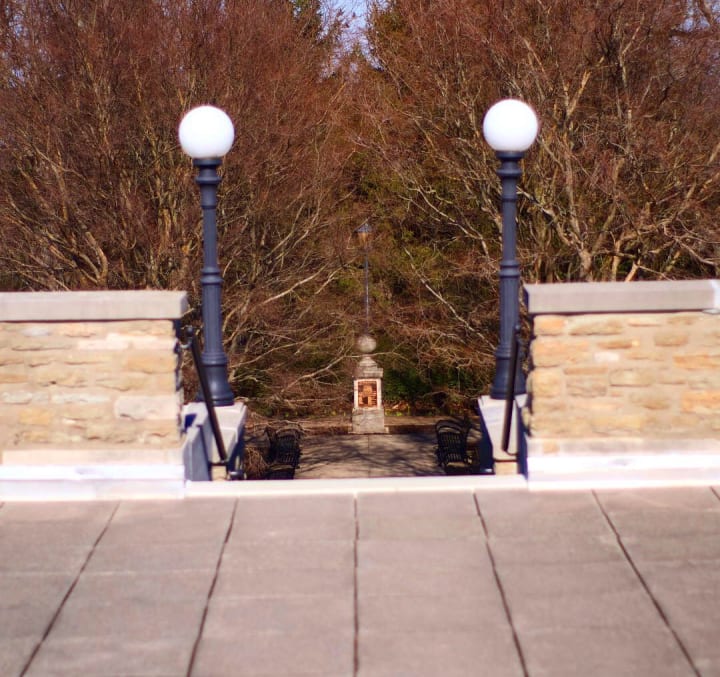
- Leading line. Pick a location like a bridge or a walking path, using the natural leading lines to point to your subject.
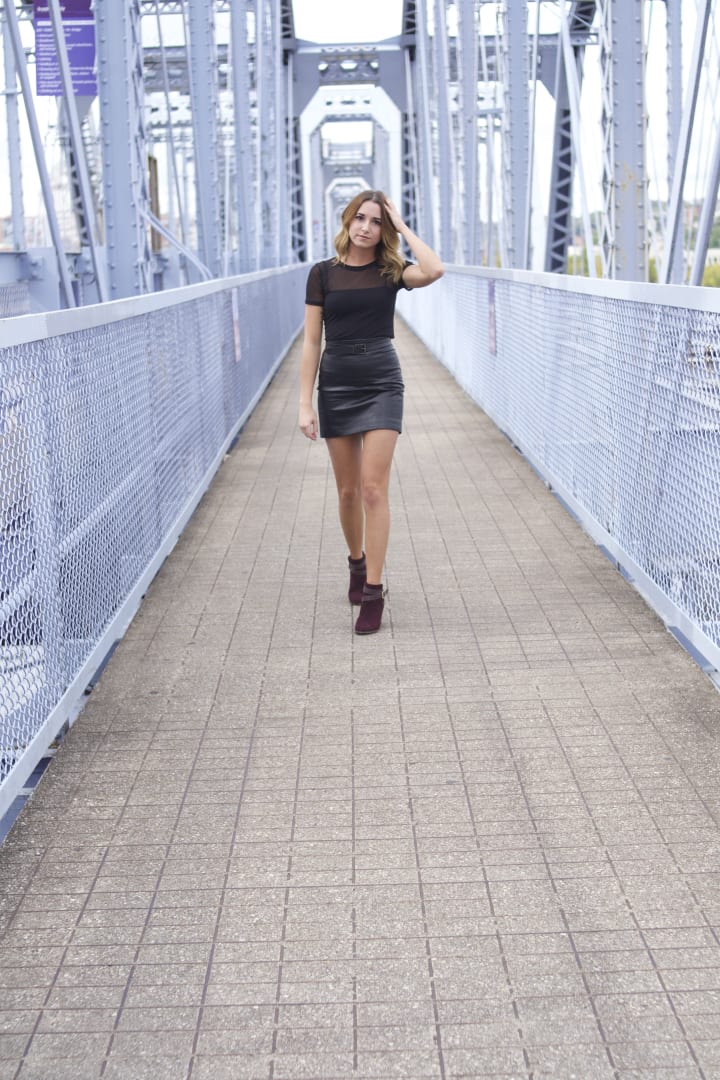
Your eyes will naturally following the path of the bridge to where it’s leading. It’s a subconscious thing your brain will do automatically. Our brains have this wonderful thing called curiosity where they will follow lines to essentially connect the dots. You want to know where it’s going or what it wants to show you. Anything that has a “line” to follow can be used as leading lines such as, books, cords, fairy lights, string lights, and so many more things.

Rule of Thirds:
This is probably the second or third time I’ve mentioned the rule of thirds in a post. However, I can’t express enough how much this plays into have a well compose image especially in portrait photography!
If you haven’t seen one of my earlier posts meeting rule of thirds, here is what it means and how to use it. Basically, the whole idea is to avoid placing your subject in the center. It's boring and doesn't show that much visual interest or dimension.
Start by breaking your frame down into 6 quadrants; a tick tack board essentially.
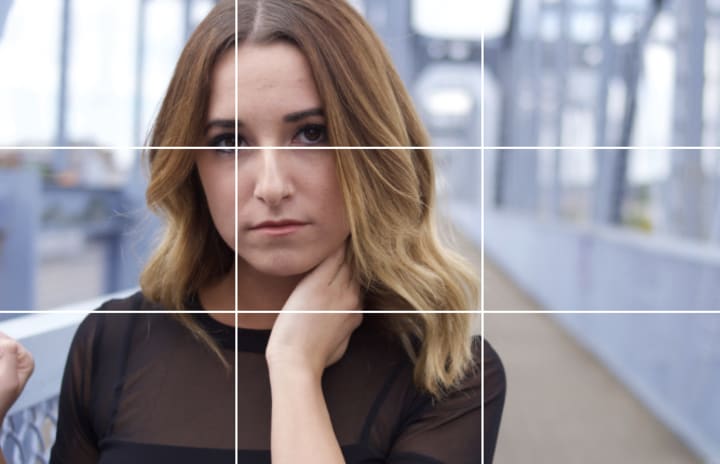
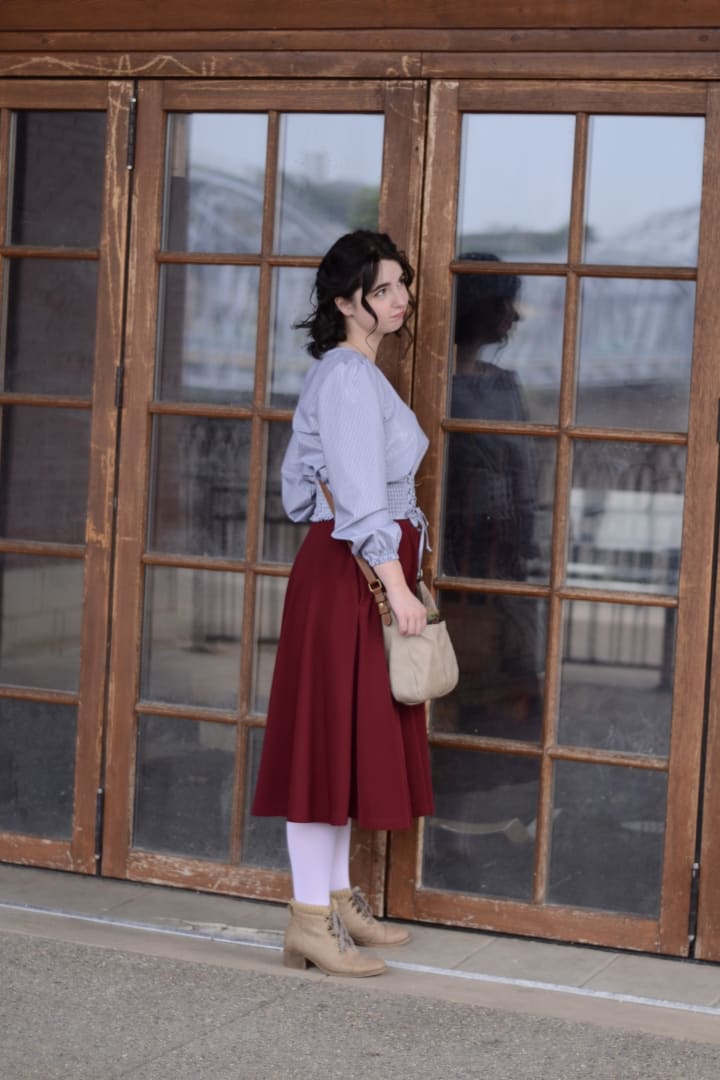
Each line represents where the division of a third would be and where they intersect are the key places to have your focal points. Depending on what you have in your frame, the subject could be “placed on a third” or “placed on an intersecting third”. For example, in portrait photography, I tend to aim for making the eyes as sharp and in focus as possible. In the photo above, placing the outside eye on the intersecting third creates a composition that is stable and draws the viewers eye in, around, and back to the subject like it should.
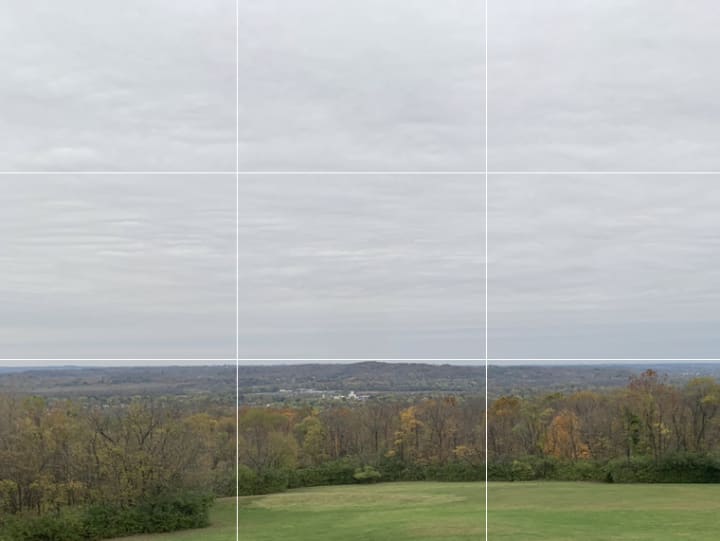
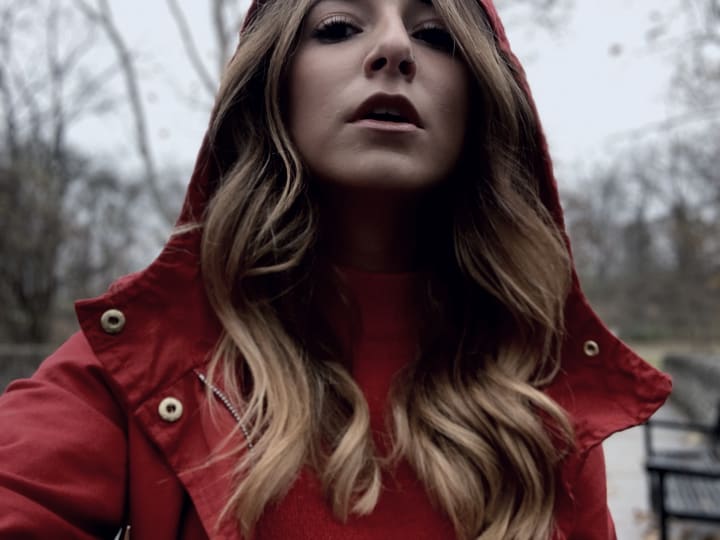
When composing a landscape, by placing the horizon line on one of the thirds you'll be able to show your audience what you want them to take notice of. In the image above, I placed the horizon on the lower third making the sky fill up most of the frame. Although this is a "well composed" image, placement wise, the content in the frame is a little boring. Most of the excitement is in the color of the trees.
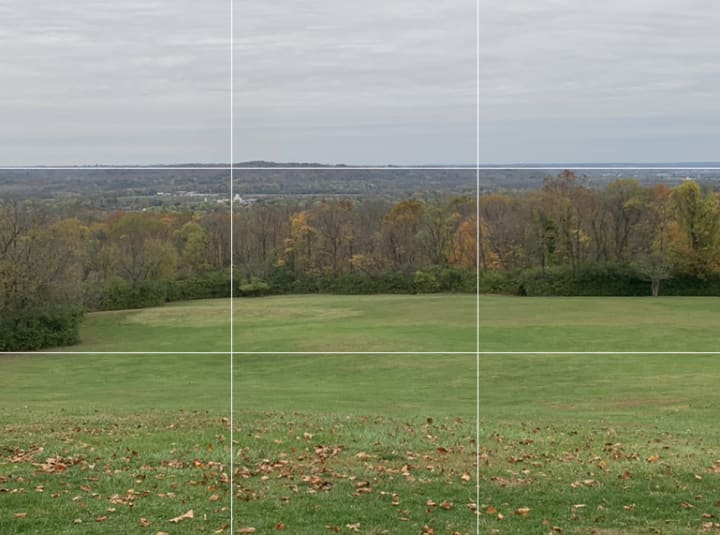
Take a look at this one. Now that the image has been retaken so that the horizon line is placed on the upper third, you have more of the interesting part in the frame. Your eyes are drawn to the leave on the ground, the trees, the world beyond the trees and less so of an overcast sky. You're able to tell more of a story here because you see more detail and contrast.
Centered Composition and Symmetry
After talking about framing on a third, now let's talk about center compositions and symmetry. The EXACT opposite of what I just talked about. Sometimes centering your frame works really well especially when it's symmetrical.

The first is almost perfectly symmetrical, and the second is a near symmetrical; however, they both work. Symmetrical images don't always have to be identical left and right, but they could also be top and bottom. Reflection are handy when you want to achieve this.
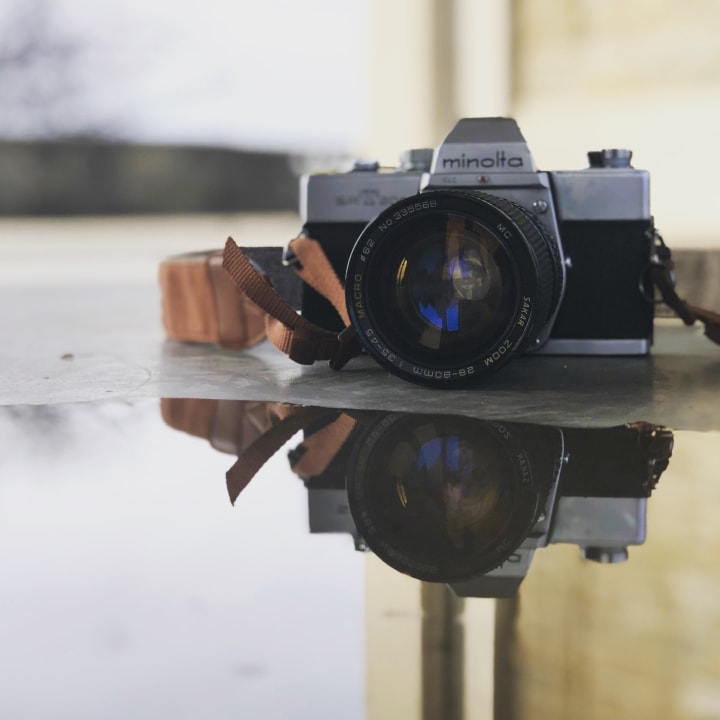
Reflection are so much fun to capture. Cityscapes are the best! Especially when you can get the building lights in the water! *insert excited squeal* I love it!
On a side note - Here’s another reflection one... more artsy than anything really, but to help get your creative juices flowing.
This was taken during the shoot of my first music video for Quinn Dorian in Newport, Kentucky.
Thank you all so much for sticking with me through this post! This is only part 1 so be on the look out for part 2 coming soon about composing your photographs!
Please leave a donation/tip if this information was helpful for you! It is all very much appreciated! Thank you all in advance! Have a blessed day!
*all photographs presented are from Sara Aulds Photography*
Instagram: sara_aulds_photography
About the Creator
Sara Aulds
I am a photographer and videographer from Cincinnati, Ohio. I write as a hobby and capture reality as a profession.
Keep reading
More stories from Sara Aulds and writers in Photography and other communities.
Where’s the Party At? – Music Video BTS
Here we go again! Another music video in the books. This Halloween, Quinn Dorian released her new single Where’s the Party At on YouTube with a music video filmed (with the assistance of Josiah Smithe) and edited by yours truly! This project was hilariously funny and a blast to edit.
By Sara Aulds3 years ago in Photography
Capturing Magic
In the world of photography, timing is the key to everything. While skilled compositions and technical proficiency are undoubtedly crucial, the perfect lighting can create the perfect photo. Nowadays, we can determine any light ourselves and are no longer dependent on any natural light source, thanks to the developed technology. We can turn every day into a night by using the right filters. And we can illuminate every night to be seen as a day. A typical process, especially in the film industry.
By Krishan Mubashar6 days ago in Photography
Top Modern-Day Cameras
In an era where every moment seems to demand documentation, the quest for the perfect shot has become an integral part of our daily lives. Enter the world of digital photography, where innovation knows no bounds. From the sleek sophistication of the Saneen Digital Camera, boasting 4K capabilities tailored for both photography and video, to the rugged resilience of the KODAK PIXPRO WPZ2, designed to withstand the harshest of environments, The range of options available is as diverse as the creative visions they aim to capture, offering not only cost-effective choices. And amidst this landscape of technological marvels, the 4K Digital Camera for Photography emerges as a beacon of versatility, offering auto-focus precision and anti-shake stabilization, ideal for the ever-evolving realm of YouTube vlogging. As we embark on a journey into the intricacies of modern-day photography and the evolution of cameras, these innovative tools serve as our guide, illuminating the path towards boundless creativity and endless possibility.
By Kaleb M3 days ago in Photography


Comments
There are no comments for this story
Be the first to respond and start the conversation.