
Mastering Kitchen Utensils Photography on a White Background
Setting the Stage: White Background Photography

In the realm of food photography, capturing the essence of kitchen utensils requires a blend of creativity, precision, and the right setup. Whether you're a professional photographer looking to add stunning shots to your portfolio or an aspiring food blogger aiming to elevate your content, mastering the art of kitchen utensils photography on a white background can significantly enhance the visual appeal of your images. In this guide, we'll explore step-by-step techniques to achieve captivating results that showcase the beauty and functionality of kitchen tools.
Setting the Stage: White Background Photography
The foundation of any successful kitchen utensils photoshoot lies in the backdrop. A clean, white background not only accentuates the colors and details of the utensils but also creates a sense of elegance and simplicity. Here's how to achieve the perfect white background for your photoshoot:
Backdrop Selection: Opt for a seamless white backdrop, such as a large white poster board, a roll of white paper, or a white cloth. Ensure that the backdrop is free from creases or stains to maintain a pristine appearance.
Lighting Setup: Good lighting is essential for achieving a seamless white background. Natural light works best, so position your setup near a window with ample daylight. Alternatively, use soft box lights or LED panels to create even illumination without harsh shadows.
Diffusion: To avoid harsh reflections and shadows, use diffusion materials such as sheer curtains, white umbrellas, or soft box modifiers to soften the light and create a gentle, even glow.
Backdrop Placement: Hang or place your white backdrop behind the shooting area, ensuring that it extends seamlessly from the surface to the background. This creates a smooth transition between the subject and the background, eliminating distracting lines or shadows.
Showcasing Kitchen Utensils: Techniques for Success
With the white background set, it's time to focus on capturing the beauty and functionality of kitchen utensils Photography. Follow these techniques to create visually stunning images:
Composition: Experiment with different compositions to highlight the unique features of each utensil. Consider close-up shots to showcase intricate details, or arrange multiple utensils in an aesthetically pleasing layout for a dynamic composition.
Depth of Field: Adjust your camera settings to control the depth of field and draw attention to specific elements of the composition. A shallow depth of field can create a sense of focus and intimacy, while a deeper depth of field ensures that all elements remain sharp and in focus.
Angles and Perspectives: Explore various angles and perspectives to capture the utensils from different viewpoints. Get down low for a dramatic, eye-level shot or shoot from above for a bird's-eye view. Experimenting with angles adds visual interest and allows you to showcase the utensils from unique perspectives.
Styling and Props: Enhance your photoshoot by incorporating complementary props and styling elements. Consider adding fresh herbs, ingredients, or kitchen textiles to create a cohesive narrative and evoke a sense of culinary inspiration.
Post-Processing: Polishing the Final Touches
Once you've captured a series of stunning images, the final step is post-processing to refine and enhance the visual appeal. Consider the following techniques:
Color Correction: Adjust the white balance and exposure to ensure that the background appears crisp and pure white. Fine-tune the colors of the utensils to accurately represent their appearance and texture.
Contrast and Sharpness: Increase contrast and sharpness to enhance the details and textures of the utensils. Be careful not to overdo it, as excessive editing can result in an unnatural appearance.
Cropping and Composition: Use cropping tools to fine-tune the composition and eliminate any distractions or unwanted elements from the frame. Ensure that the focus remains on the utensils and the white background for Photography.
Final Touches: Add finishing touches such as vignettes, gradients, or subtle filters to polish the overall look and create a cohesive aesthetic. Pay attention to small details to ensure a professional and polished final image.
Conclusion
Mastering kitchen utensils photography on a white background requires attention to detail, creativity, and technical skill. By following the techniques outlined in this guide, you can capture stunning images that showcase the beauty and functionality of kitchen tools while maintaining a clean and elegant aesthetic. Whether you're a professional photographer or an aspiring food blogger, incorporating these tips into your photoshoots will elevate your imagery and leave a lasting impression on your audience.
About the Creator
FDS Masterclass
Welcome to FDS Masterclass – your gateway to the world of visual storytelling! 🌟 We're here to share the secrets of premium product photography, video production, and entrepreneurial skills.
Keep reading
More stories from FDS Masterclass and writers in Photography and other communities.
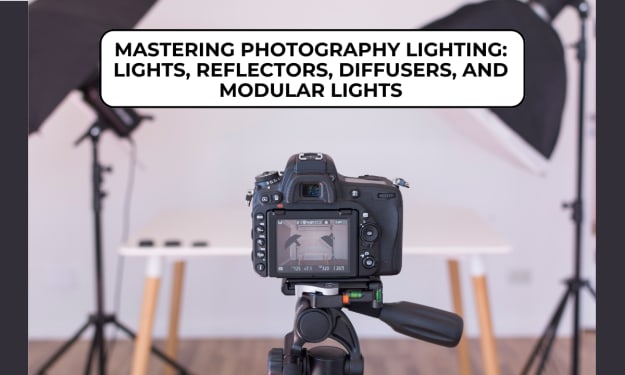
Mastering Photography Lighting: Lights, Reflectors, Diffusers, and Modular Lights
Photography is as much about capturing light as it is about capturing subjects. The manipulation of light through various tools and techniques is what sets apart a mediocre photograph from a masterpiece. In this blog post, we'll delve into the world of photography lighting and explore the essential tools every photographer should have in their kit: lights, reflectors, diffusers, and modular lights.
By FDS Masterclassabout a month ago in Photography
Capturing Magic
In the world of photography, timing is the key to everything. While skilled compositions and technical proficiency are undoubtedly crucial, the perfect lighting can create the perfect photo. Nowadays, we can determine any light ourselves and are no longer dependent on any natural light source, thanks to the developed technology. We can turn every day into a night by using the right filters. And we can illuminate every night to be seen as a day. A typical process, especially in the film industry.
By Krishan Mubashar15 days ago in Photography
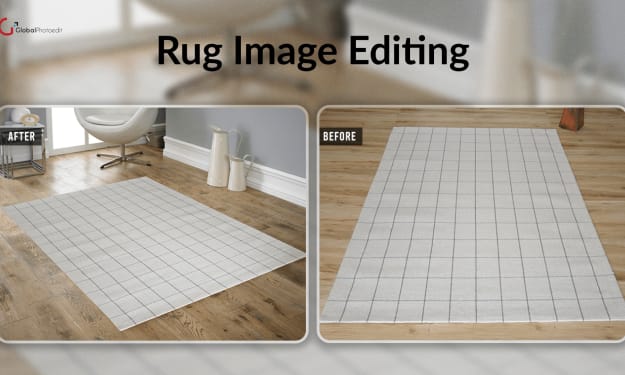
Discover the Best Rug Image Editing Services in your Vicinity for Stunning Visuals
High-quality visuals are often the most crucial aspect when it comes to displaying your products and keeping an audience’s gaze online. This is even truer for items such as carpets, where details, color explosions, and overall beauty are a significant deciding factor. Badly photographed rugs wash out the colors, hide the patterns, and reduce the edge of your masterpiece. However, rugs are notoriously tricky to photograph. Lighting and shadows, background noise, and much more can easily hinder your product’s beauty.
By Global Photo Edit6 days ago in Photography
A Digital Pandemic.
After a long day in the department, Emily dropped her worn and tired dark leather bag on the counter before navigating through the small and disordered kitchen to grab a cold beer from a contrarily empty fridge. She hadn't had a chance to unpack since moving from Newcastle to Glasgow, let alone shop for sustenance, except for cold brews naturally.
By Billie Whyte6 days ago in Chapters

Comments
There are no comments for this story
Be the first to respond and start the conversation.