
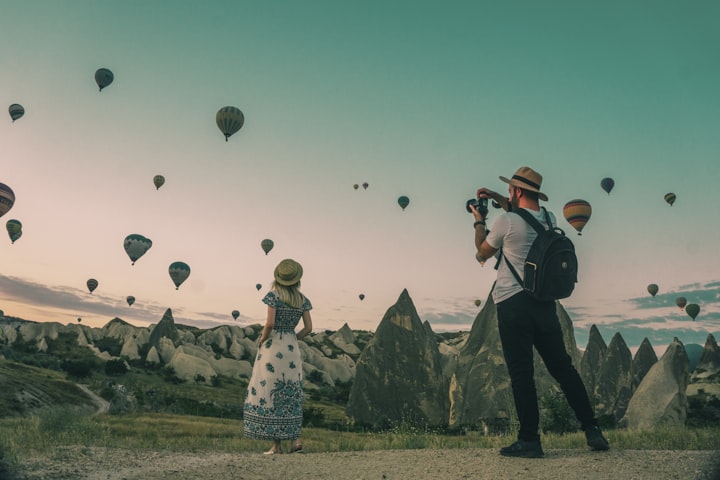
Instructions to Take Better Photos Indoors with an External Flash
Using an External Flash

The most effective method to Take Better Indoor Photos with an External Flash
This post is tied in with taking better photographs inside utilizing an outside streak. It covers the benefits and detriments of utilizing diverse screen velocities and gaps.
This first correlation is between shooting on full auto or program mode. I suggest creating some distance from shooting in these modes at the earliest opportunity. They're exceptionally restricting and you will not be making the most out of your camera.
Program mode has its uses when you're simply figuring out how to utilize your camera. It will allow you to change settings like ISO, openness pay and white equilibrium. Depending on this mode will make figuring out how to work on your photographs a battle.
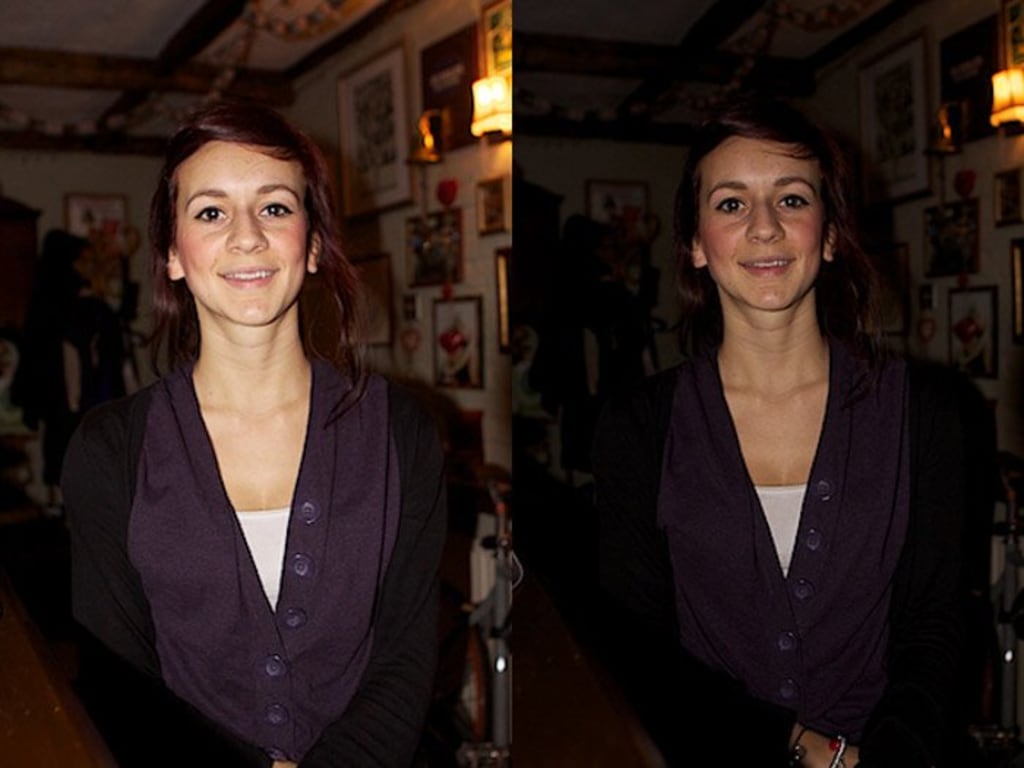
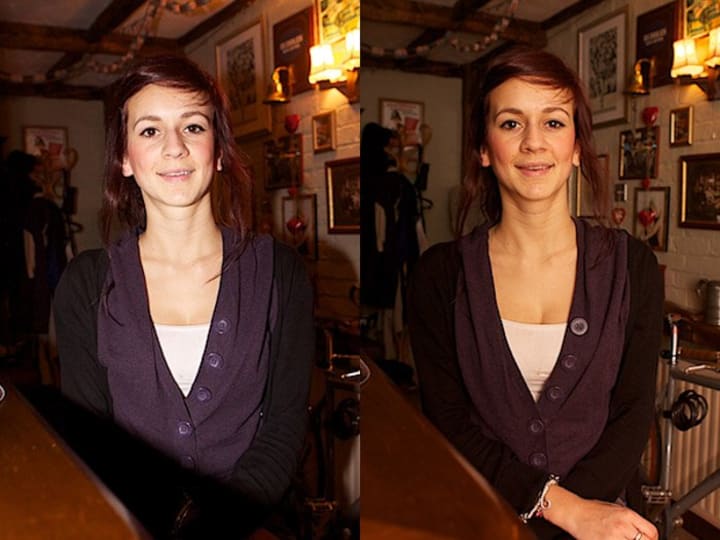
As I took these photographs inside in low light conditions, I utilized a glimmer for every one of them. The photograph on the left was in full auto mode. The settings the camera decided to utilize were ISO 400, f3.2 at 1/60 of a second.
As should be obvious, the frontal area of this picture is very level and cruel, with shadows present behind the scenes. Despite the fact that it's important that this mode has delivered a very much uncovered foundation through it's decision of ISO. The picture to one side, shot in program mode, is a conspicuous difference to the first.
Because of the brutality of the primary photograph, the blaze openness pay has been turned down in this photograph to - 1ev. To give more regular light access, the gap was diminished to 2.8.
The mix of these 2 changes on program mode with ISO 100 (picked to create the crispest picture quality) has brought about a somewhat dull and underexposed photograph. That being said, the face looks significantly more normal.

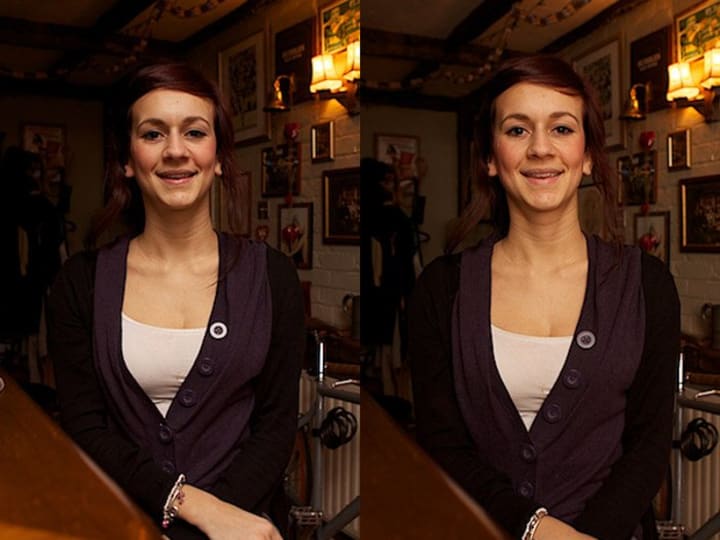
This subsequent examination shows the contrast between utilizing the gaps 2.8 and 4.0:
As should be obvious, the principal picture has a much shallower profundity of field.
These photographs were taken utilizing programmed determination central focuses. This is fine when utilizing a more modest opening as it'll have a more profound profundity of field. When utilizing a more extensive one (lower number), it tends to be shallow.
You should take care to ensure you're zeroing in on the right focuses or you'll wind up with results like the top picture. When shooting inside on a solitary subject, I suggest a most extreme opening of 4 and, when shooting gatherings, 7.1.
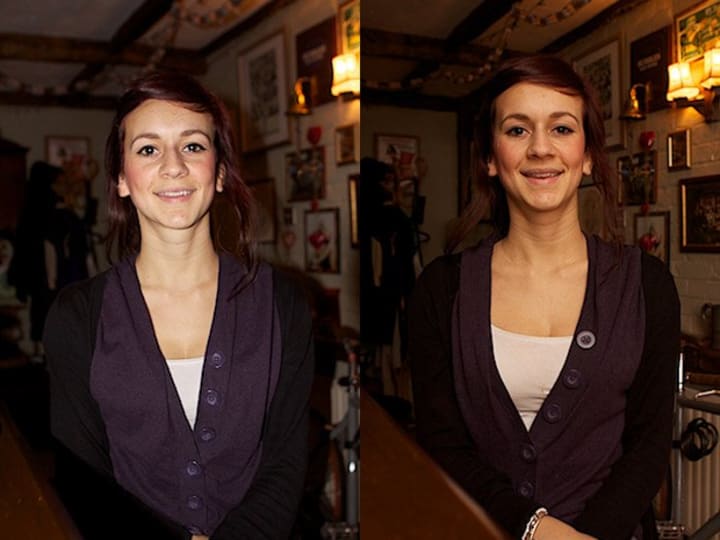
Subsequent to taking the past photographs, I chose f4 and 1/50 of a second with ISO 100. I changed the white equilibrium to 'Streak'. This had little impact contrasted with the auto mode so I returned to auto after these two photographs.
This blend of gap, permitting me to get the entire face in concentration, and screen speed sufficiently slow to take into account camera shake, is great for indoor shooting.
Utilizing an Off Camera Flash
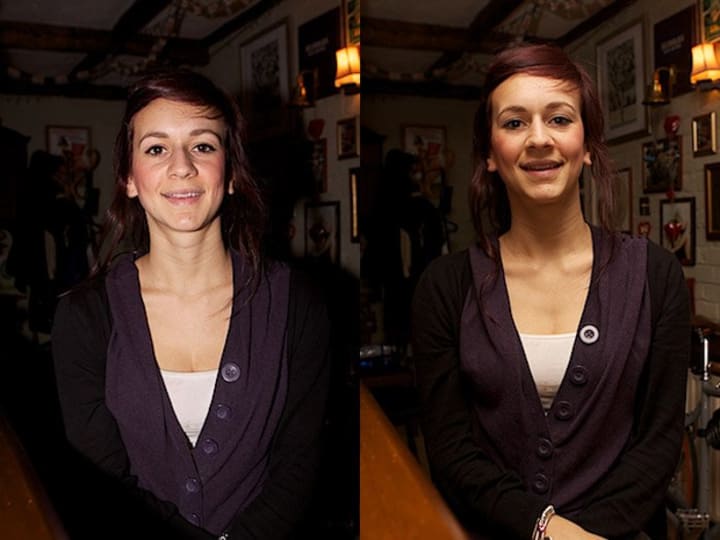
In the photographs beneath I have utilized an off camera streak: the Canon Speedlite 430EX ii. For the main photograph, the blaze is face on. For the subsequent one, it's at a 90° point up towards the roof.
The photograph with face on streak has a lot of a similar impact as a spring up streak. It levels the pictures and projects a shadow. Directing the glimmer toward the roof has a significantly more normal, satisfying impact. Be that as it may, shooting near the subject projects unnatural shadows on the facial elements.
For this next explore in various ISOs, I returned to utilizing front aligned glimmer.
The main photograph is ISO 400 and gives a lot of detail to the foundation. The subsequent photograph is double the affectability at ISO 800. This hasn't gave considerably more in the method of detail, however has created more commotion.
The picture on the left underneath has an ISO of 1250. This overexposed the photograph, giving it an extremely unforgiving appearance. The ISO I've agreed to is 400. With a blaze bobbing off the roof at 90°, it creates the photograph underneath on the right.
When shooting near your subject, you should take care not to project shadows over their face with a ricochet streak.
Here I tried two additional points to give the best outcomes. The photograph on the left had the blaze terminated at 120° from the subject. The one on the right is at 150°.
The photograph on the exactly at 150° gave the best outcomes. It took the shadows and the sparkle from the face, seeming like I didn't utilize a blaze by any means. This is the ideal outcome when shooting with a blaze.
These settings worked for me in my current circumstance. I suggest you test for yourself, as various distances and measured rooms can effectsly affect results.
Eventual outcomes
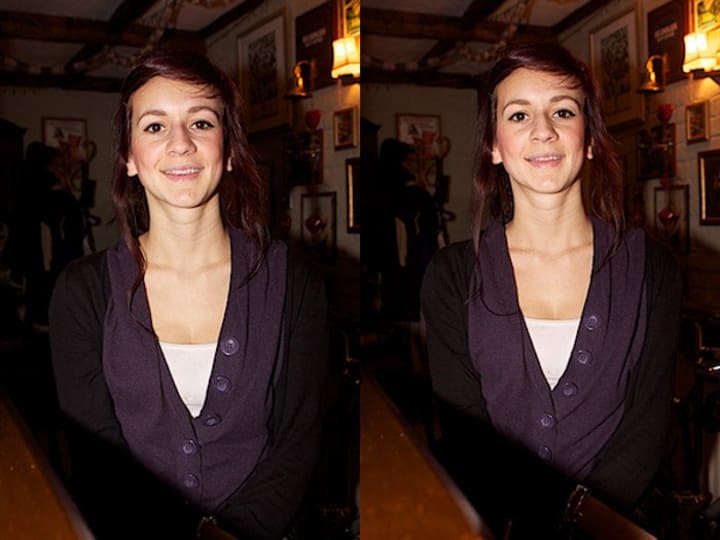
Here is a correlation of the first and only shots.
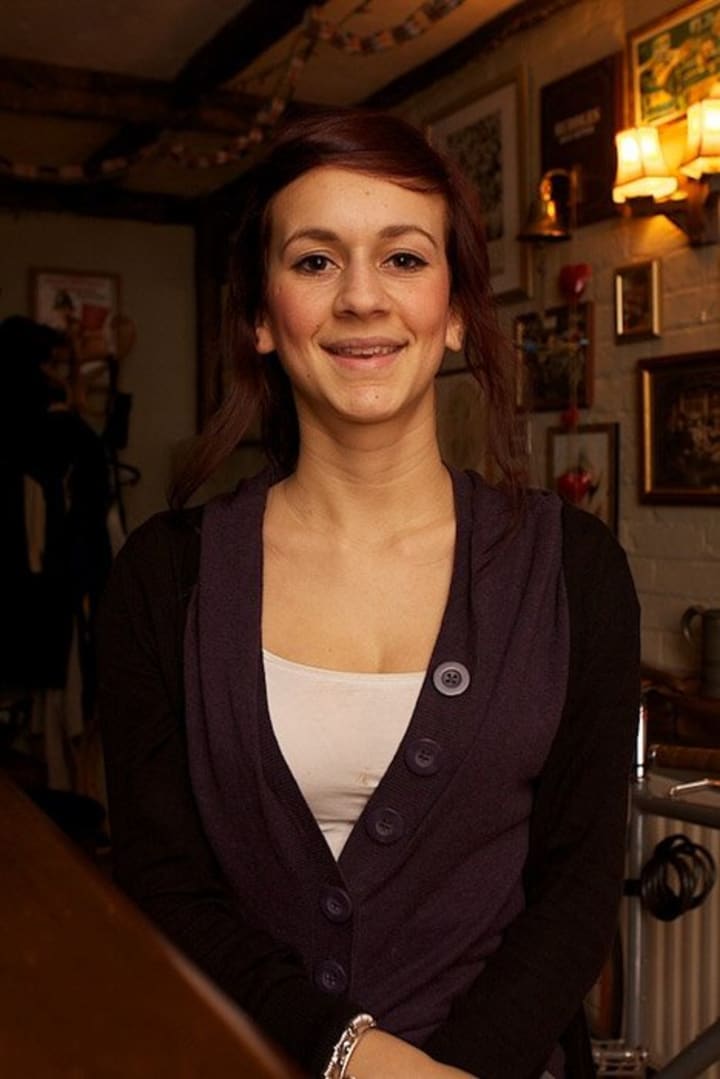
I took the primary photograph with ISO 400, 1/60 and f3.2 with a spring up streak. For the last shot I utilized ISO 400, 1/50 and f.4 with a glimmer ricocheting at 150° from the subject. These little unobtrusive changes worked on the picture in numerous ways.
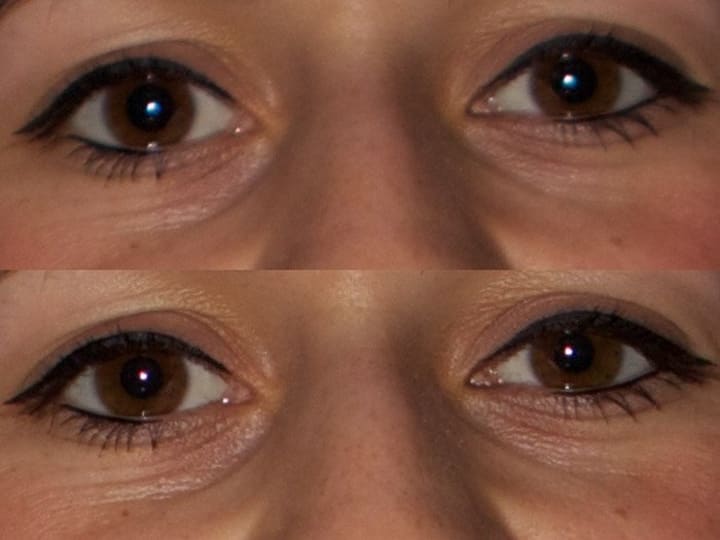
The primary thing you'll see is that the lighting in the last picture seems regular and friendlier. Also, the shadow behind the scenes has gone. The foundation is significantly more in center. The shadow from the bar in the frontal area has likewise been eliminated. This uncovers detail to the body of the model.
The facial elements are more characterized. This is on the grounds that circuitous glimmer considered a few shadows to be projected where they normally would be in an indoor setting.
At last, and maybe generally unobtrusive of all, there could be as of now not white 'spots' in the focal point of the eyes. This is an indication that a blaze has been utilized. It likewise adds to the unnatural look of a photograph.
Here is the last picture:
About the Creator
Thomas Vasas
Hello, my name is Thomas Vasas. I'm a Professional Photographer, living and residing in Columbus, Georgia. I also enjoy art as well. I also enjoy reading books; astronomy, weather, geology, archaeology, art history.
Keep reading
More stories from Thomas Vasas and writers in Photography and other communities.
The Adventures of Wildlife Photography
The Adventures of Wildlife Photography, is always and adventure. There is wildlife everywhere all among the Planet Earth. Shooting wildlife photography, is very adventurous, and the most popular of photography in the whole world. When it comes to wildlife photography, it can be any wildlife; wild birds, waterfowl, wild cats, wild dogs, small animals, and even wildlife in the ocean, and lakes, plus rivers.
By Thomas Vasas4 years ago in Photography
Capturing Magic
In the world of photography, timing is the key to everything. While skilled compositions and technical proficiency are undoubtedly crucial, the perfect lighting can create the perfect photo. Nowadays, we can determine any light ourselves and are no longer dependent on any natural light source, thanks to the developed technology. We can turn every day into a night by using the right filters. And we can illuminate every night to be seen as a day. A typical process, especially in the film industry.
By Krishan Mubashar6 days ago in Photography
Offbeat Places in Malaysia: Travel Secrets
Malaysia is most popular for stunning urban areas like Kuala Lumpur and George Town. In any case, there are such countless odd spots in Malaysia anticipating nature sweethearts and travelers. We've assembled a rundown of 10 mystery objections that make us need to book a pass to Malaysia this exact instant!
By prashant soni3 days ago in Photography
A CLOSE ENCOUNTER
Stars twinkled brightly in a moonless sky, reflecting in the calm waters of Lake George in the Adirondack mountains of upstate New York. It was a warm August night, as we laid back in the boat, marveling at the magnificent Milky Way. Dark skies made the stars more brilliant at this time of year, especially during a new moon, causing wonder and enchantment. We never tired of stargazing while floating on water, a truly immersive experience.
By Jon H. Davis5 days ago in Fiction


Comments
There are no comments for this story
Be the first to respond and start the conversation.