
Instagram Photography
Learn to take photos for Instagram
How to Take Stunning Instagram Photos: A Guide for Photographers
When it comes to taking stunning Instagram photos, no one knows better than professional photographers. With the right camera and equipment, an understanding of natural light, creative angles, and post-processing software, anyone can take beautiful photographs for their Instagram feed. In this blog post we will explore how to take stunning Instagram photos with tips from professional photographers. We'll look at how to choose the right camera and equipment, make use of natural light, find unique angles and use post-processing software to give your images that extra something special. By the end of this guide you will have all the tools you need to create beautiful photographs for your Instagram account!
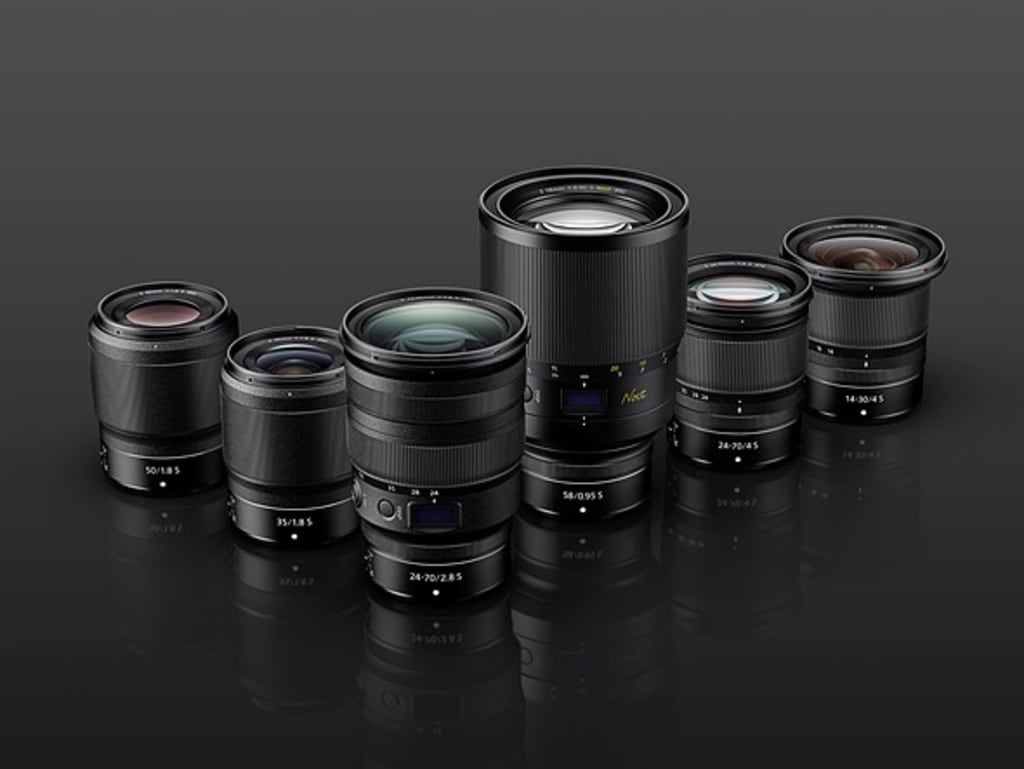
Choose the Right Camera and Equipment.
When it comes to taking stunning Instagram photos, choosing the right camera is essential. There are a wide variety of cameras available for photographers, from professional-grade DSLRs to point-and-shoot cameras. It's important to consider your budget and the type of photography you plan on doing before making a purchase.
For example, if you plan on shooting landscapes or street photography, a high-end DSLR with interchangeable lenses will give you more flexibility and control over your images than a point-and-shoot camera would. However, if you're just starting out or don't want to invest in expensive equipment, then investing in a basic point-and-shoot might be the best option for you.
Picking the Right Lens.
In addition to choosing the right camera for your needs, it's also important to pick the right lens for your project. Different types of lenses have different characteristics that can affect how your images turn out – such as angle of view, depth of field, distortion levels and sharpness levels – so it’s important to choose one that fits your style and subject matter best.
For instance, if you plan on shooting portraits or close ups then using a telephoto lens will give you more control over details like facial features and background blur (also known as bokeh). On the other hand, if you're looking to take wide shots such as landscapes or cityscapes then investing in an ultra wide lens will allow you capture scenes in all their glory without sacrificing too much detail in terms of sharpness or composition.
Make Use of Natural Light.
Natural light is one of the most important elements when it comes to taking stunning Instagram photos. Natural light provides an even and soft source of illumination that can be used to create beautiful images. To understand how natural light works, it's important to know the basics about different kinds of lighting, such as direct sunlight, indirect sunlight, and diffused sunlight.
Direct sunlight is often referred to as “hard” lighting because it casts hard shadows and has a high contrast between highlights and shadows in an image. Direct sunlight also creates harsh highlights on skin tones which can be unflattering or distracting in an image.
Indirect sunlight refers to bright but not direct light, like when there are clouds or trees blocking some of the sun’s rays from hitting your subject directly. This type of lighting usually produces softer shadows than direct sunlight and will give you more even illumination across your scene with less contrast between highlights and shadows than you get with direct light.
Diffused sunlight occurs when there is heavy cloud cover or fog making for a very soft, diffused light that wraps around your subject evenly - perfect for creating beautiful portraits!
Utilizing Different Types of Natural Light.
Once you understand the basics about different kinds of natural lighting conditions, you can start using them creatively in your photography! Here are some tips on making use of each type:
Direct Sunlight – Use this type of lighting for shots where you want strong contrasts between highlights and shadows (like silhouettes) or if you need a lot of directional detail in your image (like texture). Be sure to watch out for harsh highlight areas on faces though!
Indirect Sunlight – Perfect for outdoor portrait shoots due its even illumination across scenes without too much contrast between lights and darks - great for flattering skin tones! Also good for shooting detailed landscapes with subtle textures without harsh contrasty spots popping out at every turn.
Diffused Sunlight – Great choice when shooting outdoors since it wraps around subjects softly giving them a warm glow while eliminating any distracting shadows from being cast by other objects nearby - ideal choice for shooting portraits!
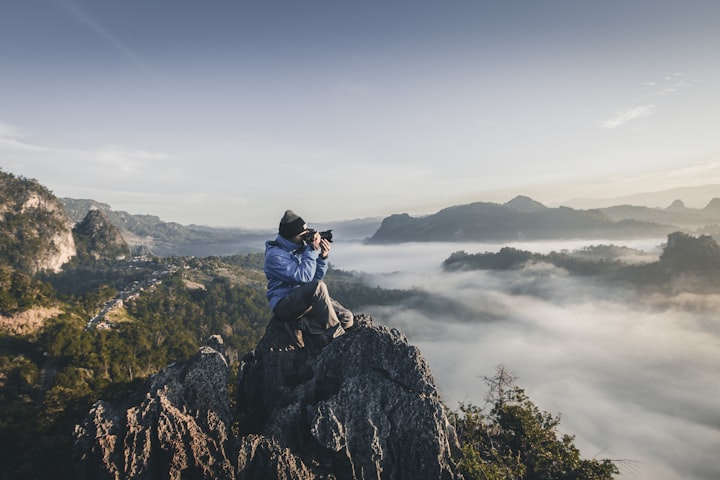
Find Unique Angles.
Creativity is key when it comes to taking stunning Instagram photos - and that means finding new and interesting angles for your shots. When you're out shooting, take the time to explore your surroundings and look for unique perspectives that will make your images stand out from the crowd. Try shooting from different heights or distances, or get creative with reflections, shadows, and other elements in your scene. Experimenting with different angles can help bring a fresh perspective to any shot - so don't be afraid to mix things up!
Capturing the Best Angle for Your Image.
Once you've found an angle that works best for your image, it's important to pay attention to all of the details in order to capture it perfectly. Make sure you have enough room around the subject so there is no distortion or unwanted elements in the frame; adjust your framing accordingly; check for any distractions that may take away from the main focus of the shot; and always be mindful of lighting conditions before snapping a photo. Taking care of these details will ensure that you capture every element exactly as intended - resulting in beautiful Instagram photos every time!
Use Post-Processing Software.
Post-processing software is an invaluable part of a photographer’s toolbox. It allows you to fine-tune the details of your photos, add special effects, or even completely transform the look and feel of your images. With post-processing software, you can adjust exposure and color levels, sharpen details, apply filters, or crop and resize images to achieve exactly the look you want. Post-processing also makes it easier to make quick edits on the go, as many programs are now available in mobile versions that allow users to edit their photos directly from their phones or tablets.
Tips and Techniques for Post-Processing
When it comes to post-processing Instagram photos, there are several tips and tricks that photographers should be aware of:
• Stick with basic adjustments – Unless you’re going for a particular effect or style with your photo, stick with simple fixes like adjusting contrast/brightness levels or cropping/resizing instead of overdoing it with lots of filters or other complex editing techniques.
• Get creative with filters – Filters can be used in subtle ways to enhance certain elements in a photo without making it too “overdone” looking. Experimenting with different filter combinations can create interesting looks that will help your feed stand out from others.
• Pay attention to detail – When editing photos for Instagram posts, pay close attention to small details such as color balance and sharpness so they don’t distract from the overall image quality when viewed at small resolutions on various devices.
• Save multiple versions – Create multiple variations of each edited image so you have options when choosing which one works best for posting online later on. This also helps if you ever need to revert back after making changes that didn’t turn out as expected!
Conclusion
Taking stunning Instagram photos is an art that requires time, practice, and dedication. With the right camera, equipment, natural light, unique angles and post-processing software, you can take your photography to the next level. By following these tips and techniques you will be able to capture beautiful Instagram images that stand out from the crowd. So don't be afraid to get creative and experiment with different techniques - you never know what amazing results you might achieve! Finally, remember that practice makes perfect; so keep at it and enjoy the journey of mastering Instagram photography!
Take action now by putting these tips into practice today to create stunning imagery for your Instagram feed!
About the Creator
Keep reading
More stories from Nawin Vijay and writers in Photography and other communities.
The Ultimate Photography Tips For The Travel Photographer.
You may think that all you need to take quality travel photos is your camera, your smartphone, or even your digital SLR; and while that’s true, there are still many more things to consider before you press the shutter button, no matter what type of camera you’re using. The following photography tips will ensure that you get quality photos every time – regardless of whether you’re traveling across the globe, or just to the next town over.
By Vijay Mistry5 days ago in Photography
Good Picture
This comprehensive guide to photography focuses on capturing moments, emotions, and stories, not just clicking a button. It covers key principles and techniques such as composition, lighting, and camera settings, aiming to elevate photography to the next level.
By Praveen Pkabout 21 hours ago in Photography

Comments
There are no comments for this story
Be the first to respond and start the conversation.