
I Stopped Blaming My Camera for Gray Seascapes
Blue water comes from shallow ground, hard light, and a polarizer. The rest of the frame comes from where you stand, what you put in front of the sea, when you shoot, and how long you leave the shutter open.
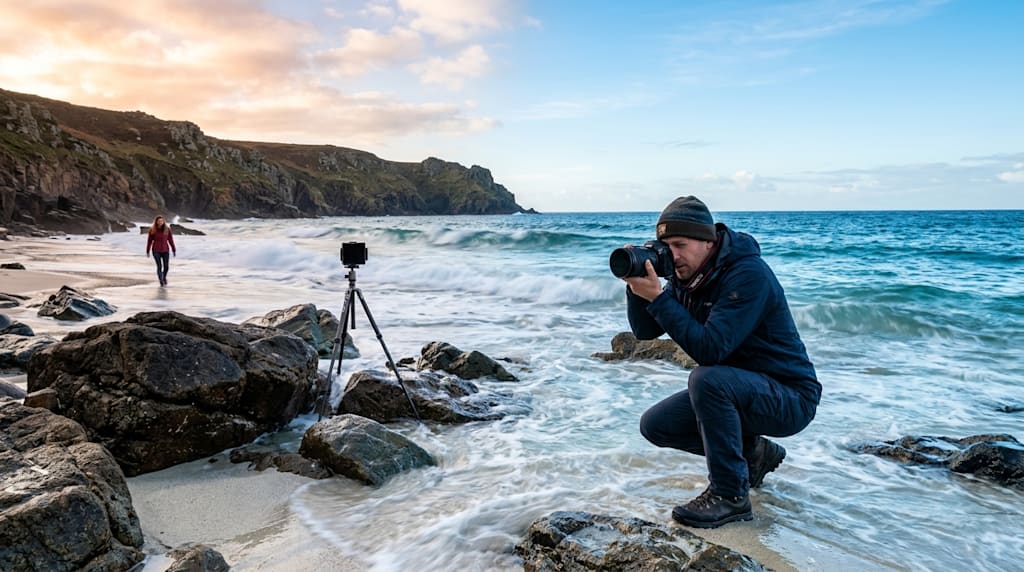
Living in a coastal city means the sea is part of daily life. It also means the sea is easy to photograph badly. Most people arrive at the shore, raise the camera, and make the same picture: horizon in the middle, waves in the foreground, sky on top. Back home, the water looks gray-blue, the sky is flat, and the frame contains everything and nothing.
Good seascape photography depends less on the camera than on three things: the depth of the water, the direction of the light, and whether you use a polarizing filter. If you want a picture people remember, you also need to change your height, find a foreground, wait for the right light, and sometimes slow the shutter down.
Part one: why your water is not blue
1. Shallow water
The pink-blue, turquoise, and crystal-blue water that makes people stop usually sits over a shallow bottom. White sand under a thin layer of water reflects light back through the blue-green water. Deep water absorbs more light and reads darker.
Whitehaven Beach in Australia shows the effect: shallow water, white sand, and a blue that looks almost unreal in overhead sun. Managaha Island in Saipan works the same way. From the foreground to the water around the island, the sea is pale blue. A little farther out, where the water deepens, the color turns darker. Behind the island, a narrow dark band runs along the horizon. That is the deep water beyond the reef.
Santorini is the opposite case. The water around the island is deep, so it reads dark blue rather than pink-blue. That is not a failure. It is a different color. Decide which blue you want before you choose the beach. If you want jelly-water blue, look for shallow sand-bottom water between rocks, off a reef, or at low tide.
2. Frontal or overhead light
Blue water depends on light direction. Frontal light or overhead light works best: the sun behind you or high above the water. Around midday, the sun is high, surface glare is easier to control, and shallow water shows its color. Shoot from a high point with the sun at your back, and the sea can turn into a clean blue field.
Sunrise backlight can be beautiful. It gives golden water, silhouettes, and atmosphere. It rarely gives pure blue water. Backlight turns the sea into a mirror of the sky, not a window into the bottom. Before the trip, decide whether you want blue water or mood. For blue water, plan the main shoot around frontal or overhead light.
3. A circular polarizing filter
A circular polarizer is the filter most seascape shooters forget. It cuts polarized glare from the water surface and the sky. With the filter rotated correctly, the water becomes clearer, the sky deeper blue, the trees greener, the clouds more separated, and boats more transparent.
The difference is easiest to see in a same-spot, same-time, same-angle comparison. Without the polarizer, the water surface throws a white sheet of glare. With the polarizer rotated until that glare drops, the sand patterns under the water and the shape of the boat come back.
Use it with a few practical rules. Rotate the filter while watching the water. Stop where the surface glare drops and the sky color looks natural. With wide-angle lenses, watch for uneven polarization across the sky. One side can go darker than the other. Do not kill every reflection. A little sparkle on the water keeps it alive. Clean salt spray and water drops off the filter. On the coast, they build up fast and soften the image.
Shallow water provides the color. Light direction decides whether you can see it. The polarizer makes the color readable.
Part two: making the seascape different
A clean blue sea is a good start. A memorable seascape needs one more decision about position, foreground, timing, and shutter speed.
1. Change your height
Most seascapes are shot at eye level. That is why they look flat. Move the camera up or down and the sea changes shape.
From a boat or a parasail, the sea becomes a huge blue field and the shoreline turns into a thin line. From a helicopter, looking diagonally down at the Twelve Apostles in Australia, the perspective has far more force than it does from the ground. From a high rock, a cliff edge, a pier, or a drone, the horizon sits in a different part of the frame, and the relationship between land and water changes.
You do not need a helicopter. Stand on a rock instead of the sand. Crouch at the surf line instead of standing upright. Put the camera over the railing of a viewing platform. Each change in height changes how much sea, sky, and shore appear in the frame.
2. Find a foreground
A seascape often works because of what sits beside the sea, not because of the sea alone. The water needs an anchor.
In Fujian, the Qidu Maze exposes a maze of dikes at low tide. The lines give the frame structure. The Xiaohao mudflats at sunset turn into a study of light and reflection. At Kurnell National Park in Australia, large waves hit the cliffs and throw spray into the air. In Tasmania, a blowhole forces seawater through a narrow opening and shoots it upward. Each of these places gives the sea a physical partner: dikes, mud, cliffs, rock holes.
Other anchors are smaller: a person sitting alone on a rock in sea mist, a natural horseshoe-shaped pool in Australia, the Sydney Harbour Bridge and Opera House, the Sea Cliff Bridge curling along the coast like a long dragon. A single figure on a wide beach can do the job too: one person, one empty stretch of sand, one clean horizon.
Walk the shoreline before you shoot. Look for lines, edges, reflections, rocks, buildings, roads, or people. Put one of them in the foreground and the sea stops being a background.
3. Wait for dramatic light
If you want a stronger picture, stay for sunrise, sunset, blue hour, and the night sky. These hours give the sea a different stage.
Arrive at least thirty to sixty minutes before sunrise. Watch where the light will come from and place your foreground before the color appears. After sunset, do not pack up immediately. Blue hour often turns the sea from gray-blue to deep purple, and a slow shutter can make the water look like mist. For night shots, check the moon phase, scout the foreground in daylight, and carry a headlamp. A moonrise over a strange rock formation, a field of stars above the coast, or moonlight on a weathered stone can carry a seascape that flat midday light cannot.
Most good light shots come from being in position early. The picture usually happens after you have waited, not when you first arrive.
4. Use filters to change the shape of the sea
A neutral density filter lets you decide what kind of water you want.
A six-stop ND filter is useful for freezing spray and showing the force of a wave hitting a rock or exploding out of a blowhole. A ten-stop ND filter with a long exposure turns moving water into fog or silk. The sea loses its hard edges and the rocks stay sharp.
For long exposures, keep one sharp element in the frame: a rock, a pier, a building, a person. Without an anchor, a misty sea can look empty. For frozen spray, use a fast shutter and watch the timing of the set. For streaked water, use a medium shutter speed and let the receding wave draw lines across the sand.
Part three: a field sequence
At the beach, do not start by pressing the shutter. Run this sequence:
Check the tide and weather. Low tide may expose mudflats, rocks, and dikes. High tide may bring waves close to the shore. Cloud cover decides whether the sky has layers.
Find shallow water if you want blue. Look for sand visible under the surface.
Judge the light. For blue water, wait for frontal or overhead sun. For mood, wait for sunrise, sunset, or blue hour.
Move away from eye level. Stand higher, crouch lower, or find a new foreground.
Mount the polarizer. Rotate it until surface glare drops and the sky looks natural.
Decide the water’s shape: frozen spray, streaked flow, or misty long exposure.
Check the frame: horizon level, foreground clean, highlights not blown.
Clean the lens and camera body after shooting. Salt spray dries fast.
Closing
If your sea looks gray, check three things before you blame the camera: can you see the bottom, is the sun behind you or overhead, and did you rotate the polarizer? If the picture feels ordinary, change your height, put something in the foreground, stay for the light, or put an ND filter on the lens and let the water move.
At the next beach, before you raise the camera, walk to the water’s edge and look down. If you cannot see sand through the water, move along the shore until you can.
About the Creator
Jin
Writer of reamstories
https://reamstories.com/jin
Enjoyed the story? Support the Creator.
Subscribe for free to receive all their stories in your feed. You could also become a paid subscriber, letting them know you appreciate their work.
Comments
There are no comments for this story
Be the first to respond and start the conversation.