
How to turn a Snapshot into a Portrait on your iPhone
Sometimes there isn't time to get into Portrait mode, or you don't have the program to do a full-on photo edit. This is how I turned a random snapshot into a portrait for the family keeper shelf.

When I first got interested in photography it was all film and dark room training. Yes, I know I’m dating myself with that comment, but here’s the thing... that knowledge easily transitions into the digital arena with the basic adjustment tools. And if you’ve never been interested in editing but love to snap pics of the things and people you love it’s important to know how easy it is to turn your snapshots into something special with those same basic tools.
These days all phones come with a camera, and those cameras are getting better and better. Which means if you’re like me, your digital photo album is full of random shots of the weird and wonderful that make up your life. And sometimes you want to turn random into special.
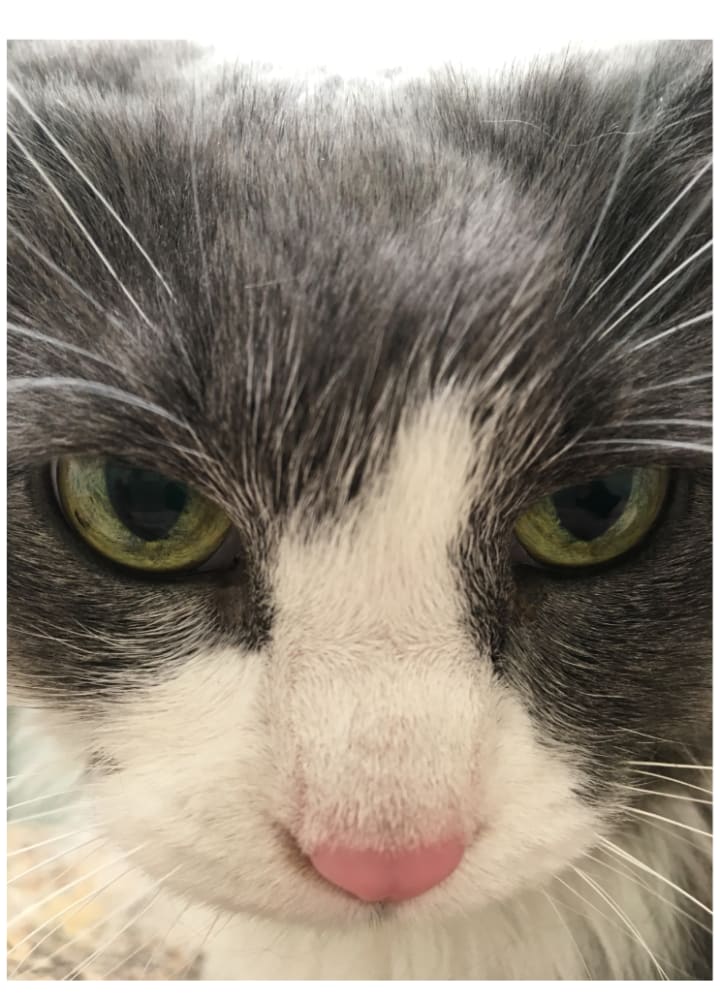
Things like this image I snapped when I took my cat to the vet. She was not happy with me, and when I tried to take a picture of her glare, she came stalking towards me. At first I thought her getting too close had ruined the image. Instead, it gave me something better than I expected. The phones auto focus did its job since she wasn’t moving fast, and when I went into the edit feature it took me less than 60 seconds to turn it into one of my all time cat portraits.
How? By using a preset filter on the phone.
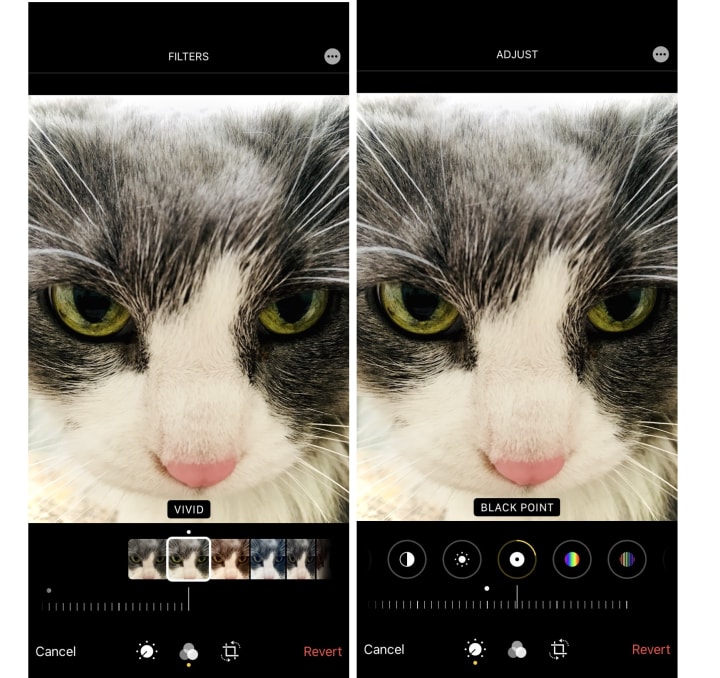
I always explore the presets first, because you never know what they might give you. The very first preset, Vivid, turned the eyes bright and brought home that glare. Then I shifted into the tools and increased the Black Point to make the whites a bit brighter and the darks a little darker Without making them look unnatural. That helps to make those bright eyes really pop.
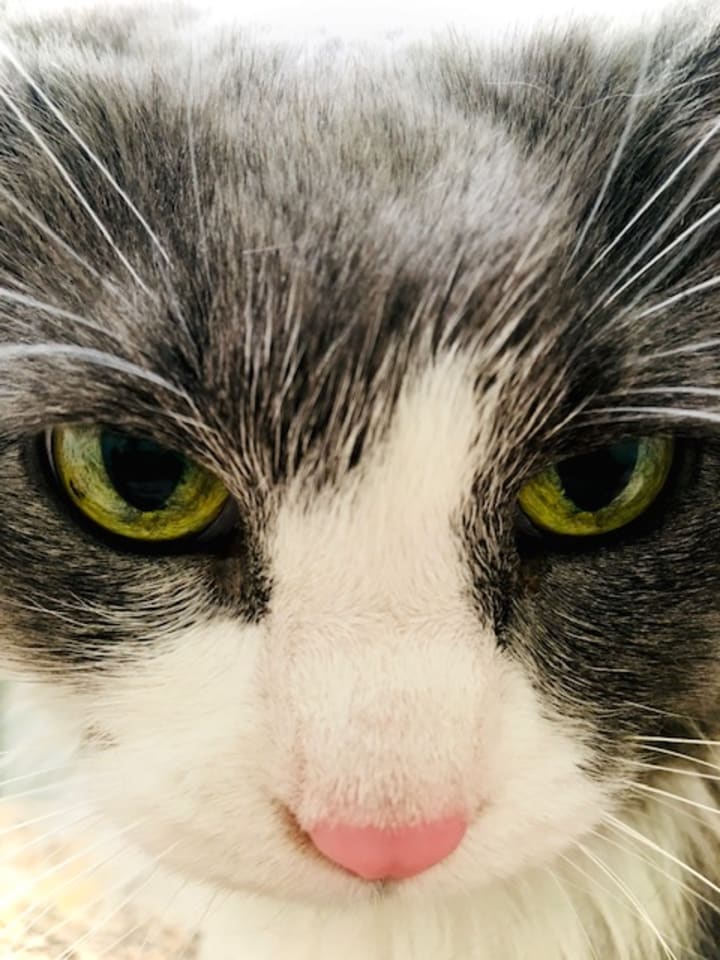
Not all edits will be that simple, but they can be that easy, even on your phone.
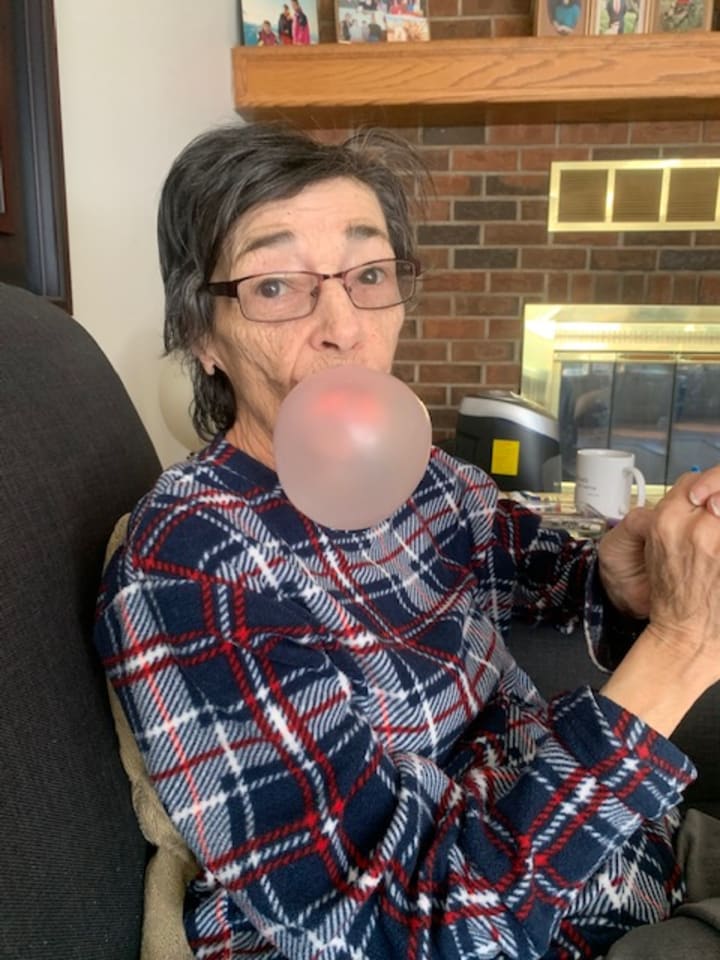
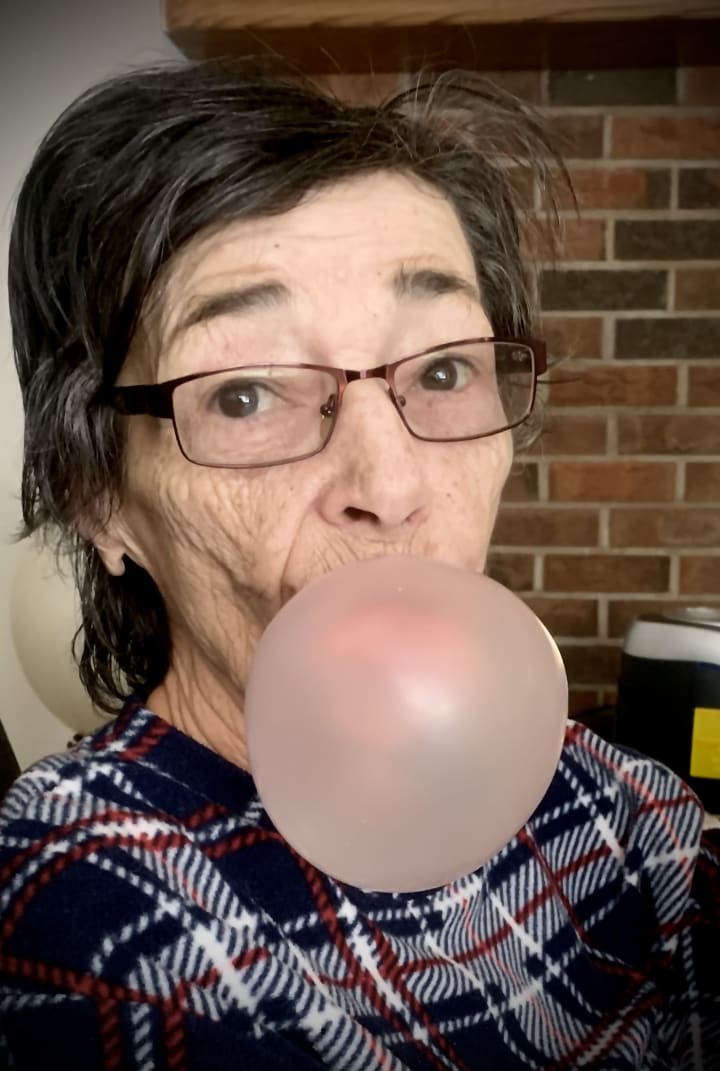
Take this unexpected snapshot of my Mom blowing bubbles as an example. Having bubble blowing contests with Mom is a memory I will always treasure, so I wanted something to help me preserve them. Which meant turning the snapshot into a portrait for the family keeper shelf.
The most important thing my photography and editing experience has taught me over the years is to trust myself. As with so many creative arts, the rules are only guidelines, and beauty is in the eye of the beholder. So the only thing needed is knowledge of what you like and want, and the confidence to follow your instincts.
Here’s a closer, step-by-step look at whatI did.
Snap the image.
Go to Edit (in Photo app on Phone)
I wanted the bubble and Moms expression to be the focus so the first thing I did was crop the image. Keeping the two thirds rule in mind, I left some background space.
Then I whipped through the preset filters, but none of them gave a look I liked so I switched to manual adjustments. This is where my old darkroom knowledge helps out a bit. It’s all about light and dark, balance, and where you want the viewers attention to go.
I played with the Exposure but wasn't getting what I wanted. Same with the Brilliance. So I skipped over to Contrast. For some reason I always like to tweak the contrast. One of these days I’ll go there first.
Black Point is another aspect that is a go-to for me. I simply play with them until the image looks "better" win my eyes. I'm sure there are technical ways to put it, but I just follow my instincts, and go after what *I* like.
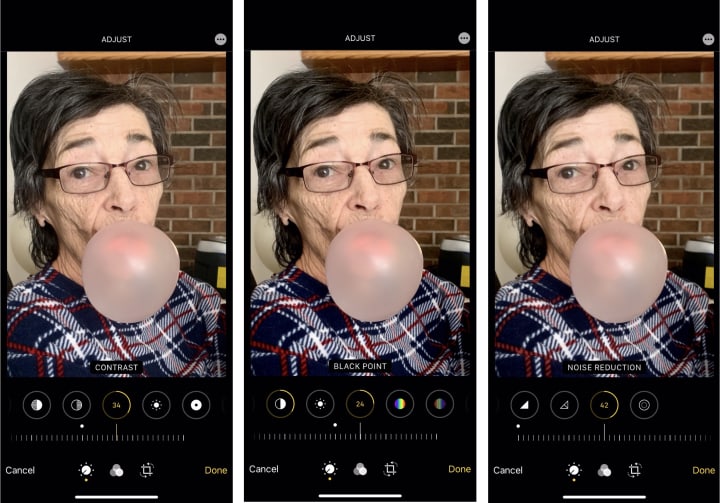
I played with the Vibrance, finally decreasing it a little.
Since I couldn't go in and blur the background and create a Bokeh effect to make it less distracting I increased the Noise Reduction. This also helped smooth out her skin a little.
The final touch was adding a Vignette, the shadow around the edges of the image frame to help keep the focus on my Moms face, and the big pink bubble.
Above you saw a real time video that shows you what I did, and how quickly a snapshot could be turned into something more. It was quick because I play with photos a lot, and I knew going into it what I wanted the end result to be. Do not worry about going fast. Speed will come, along with confidence, the more you play.
FINAL TIP TO REMEMBER
The best thing about digital photos is how easy they are to duplicate. So duplicate the one you’re going to play with, and save the original in a separate album, then you can experiment with confidence knowing you will always have that first image if you somehow screw up.
So duplicate, then go forth with confidence!
About the Creator
Sasha White
Bestselling Author of erotic fiction.
Blogger with ADHD.
World Traveler-when possible. Food Lover and amature Chef.
Visit my website to see my longer works www.SashaWhite.net
Keep reading
More stories from Sasha White and writers in Photography and other communities.
Kitty the mushroom Hunter
Sometimes the world just needs to slow down. I’m no technophobe. I love the immediacy of texting, and Instagram as much as the next person, but there is no denying the way a quiet, disconnected, walk in the forest soothes the soul. Especially if there’s a chance money can be made on that walk.
By Sasha White3 years ago in Petlife
Capturing Magic
In the world of photography, timing is the key to everything. While skilled compositions and technical proficiency are undoubtedly crucial, the perfect lighting can create the perfect photo. Nowadays, we can determine any light ourselves and are no longer dependent on any natural light source, thanks to the developed technology. We can turn every day into a night by using the right filters. And we can illuminate every night to be seen as a day. A typical process, especially in the film industry.
By Krishan Mubashar8 days ago in Photography
Enchanting Views, Full Pink Moon Photos from April 2024
The Full Pink Moon, a celestial spectacle that captivated hearts and minds for centuries, graced the night skies in April 2024. As it adorned the heavens with its mesmerizing hue, photographers and skygazers alike marveled at its beauty.
By SIMORabout 20 hours ago in Photography


Comments
There are no comments for this story
Be the first to respond and start the conversation.