

The exposure triangle is a concept that explains how three factors affect the exposure of an image: aperture, shutter speed, and ISO. These three factors work together to determine how much light reaches the sensor of your camera and how it is recorded. By understanding how they work, you can use manual mode to adjust them according to your creative vision and achieve the best results.
How Does the Exposure Triangle Work?
The exposure triangle works by balancing the three factors of aperture, shutter speed, and ISO to achieve the correct exposure for your image. Exposure is the amount of light that is captured by your camera and it determines how bright or dark your image is.
A correct exposure is when your image has a balanced distribution of tones from dark to light without losing any details in the shadows or the highlights.
The three factors of the exposure triangle are interrelated and affect each other. Changing one factor will affect the exposure and require you to adjust the other two factors to compensate. For example, if you increase the aperture (smaller f-number), you will let more light in and make your image brighter.
To balance the exposure, you will need to decrease the shutter speed (faster) or the ISO (lower) to reduce the amount of light. Conversely, if you decrease the aperture (larger f-number), you will let less light in and make your image darker. To balance the exposure, you will need to increase the shutter speed (slower) or the ISO (higher) to increase the amount of light.
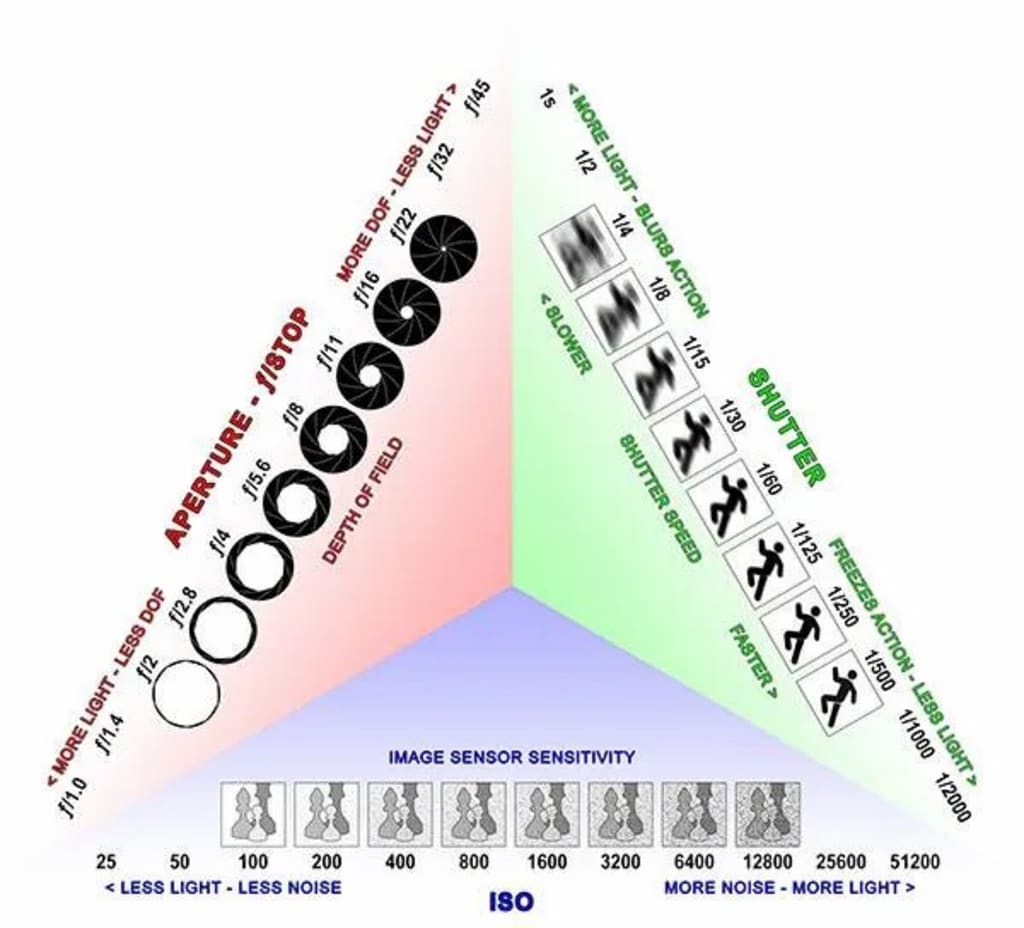
The exposure triangle can be visualized as a triangle with three sides, each representing one factor. The length of each side indicates the value of each factor. The area of the triangle represents the exposure.
A larger area means a brighter exposure, while a smaller area means a darker exposure. The shape of the triangle can vary depending on the combination of the three factors.
For example, a triangle with a long aperture side and a short shutter speed and ISO sides means a large aperture, a fast shutter speed, and a low ISO. A triangle with a short aperture side and a long shutter speed and ISO sides means a small aperture, a slow shutter speed, and a high ISO. A triangle with equal sides means a balanced combination of the three factors.
How to Use the Exposure Triangle
To use the exposure triangle, you need to understand how each factor affects not only the exposure, but also the creative aspects of your image.
Each factor has a different impact on the depth of field, the motion blur, and the noise of your image. By adjusting each factor, you can change the look and feel of your image and express your artistic vision.
What Are the 3 Elements of the Exposure Triangle?
The three elements of the exposure triangle are aperture, shutter speed, and ISO. Here is a brief overview of each element and how it affects the exposure and the creative aspects of your image:
Aperture
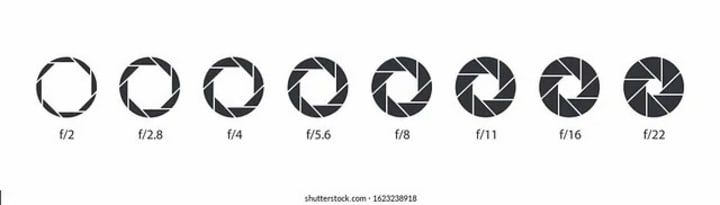
Aperture is the opening in the lens that controls how much light passes through. It is measured in f-stops, such as f/2.8, f/4, f/8, etc. The smaller the f-number, the larger the opening and the more light that enters. The larger the f-number, the smaller the opening and the less light that enters.
Aperture also affects the depth of field, which is the area of the image that is in focus. A large aperture (small f-number) creates a shallow depth of field, meaning that only a small part of the image is in focus and the rest is blurred.
This is useful for isolating your subject from the background and creating a bokeh effect. A small aperture (large f-number) creates a large depth of field, meaning that most of the image is in focus and sharp. This is useful for capturing landscapes and scenes with a lot of details.
Example: The shot on the left was taken at f/2.8, while the one on the right was taken at f/8. Notice how the background is more blurred on the left and more sharp on the right.
Tip: To get the best bokeh effect, use a large aperture (small f-number), a long focal length (zoom in), and a close distance to your subject.
Shutter Speed

Shutter speed is the length of time that the shutter of your camera stays open to expose the sensor to light. It is measured in seconds or fractions of a second, such as 1/60, 1/125, 1/250, etc. The faster the shutter speed, the shorter the exposure time and the less light that enters. The slower the shutter speed, the longer the exposure time and the more light that enters.
Shutter speed also affects the motion blur, which is the amount of movement that is captured in the image. A fast shutter speed freezes the motion and creates a sharp image.
This is useful for capturing fast-moving subjects and action shots. A slow shutter speed blurs the motion and creates a sense of movement. This is useful for creating artistic effects and showing the flow of water, light, or people.
Example: The shot on the left was taken at 1/1000, while the one on the right was taken at 1/15. Notice how the water droplets are frozen on the left and blurred on the right.
Tip: To avoid camera shake when using slow shutter speeds, use a tripod or a stable surface to support your camera. A general rule of thumb is to use a shutter speed that is at least 1 over the focal length of your lens. For example, if you are using a 50mm lens, use a shutter speed of at least 1/50.
ISO
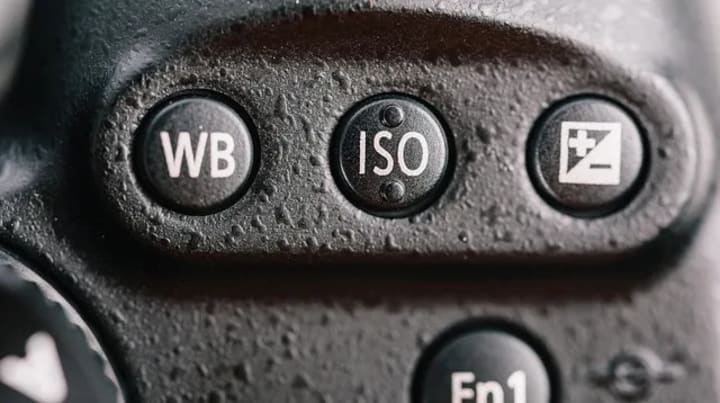
ISO is the sensitivity of the sensor to light. It is measured in numbers, such as 100, 200, 400, 800, etc. The lower the ISO, the less sensitive the sensor and the less noise (grain) that is produced in the image. The higher the ISO, the more sensitive the sensor and the more noise that is produced in the image.
ISO allows you to adjust the exposure in low-light situations without changing the aperture or shutter speed. However, it comes at a cost of image quality. A high ISO can introduce noise, which reduces the sharpness, contrast, and color of the image. Therefore, it is recommended to use the lowest ISO possible for the best results.
Example: The shot on the left was taken at ISO 100, while the one on the right was taken at ISO 3200. Notice how the image on the right has more noise and less detail than the image on the left.
Tip: To reduce noise in your images, use the lowest ISO possible, shoot in RAW format, and use a noise reduction software in post-processing.
Order for Setting the Exposure Triangle
There is no fixed order for setting the exposure triangle, as it depends on your personal preference and the situation. However, a general guideline is to start with the factor that is most important for your creative vision and then adjust the other two factors to balance the exposure.
For example, if you want to control the depth of field, start with the aperture and then change the shutter speed and ISO accordingly.
If you want to control the motion blur, start with the shutter speed and then change the aperture and ISO accordingly. If you want to control the noise, start with the ISO and then change the aperture and shutter speed accordingly.
How to use the exposure triangle?
To use the exposure triangle, you need to follow these steps:
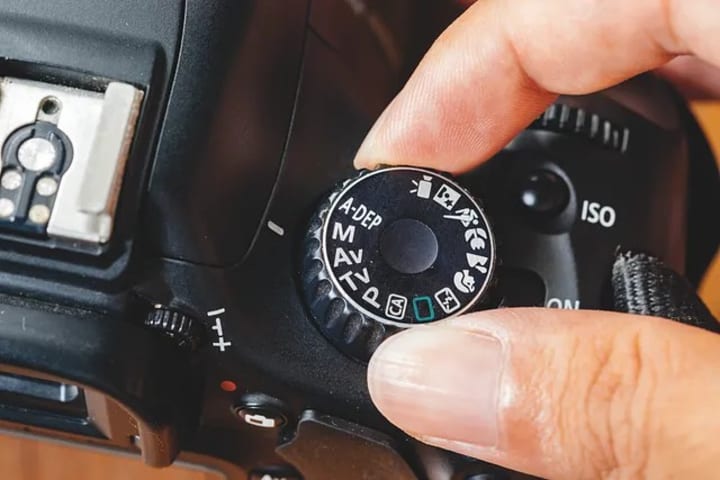
Set your camera to manual mode by turning the mode dial to M.
Set your ISO to the lowest value that allows you to get a good exposure. You can use the exposure meter on your camera to check the exposure level. The exposure meter is a scale that shows you if your image is underexposed (too dark), overexposed (too bright), or correctly exposed. You want to aim for the zero mark or close to it.
Set your aperture to the value that gives you the depth of field that you want. You can use the aperture priority mode (A or Av) to see how changing the aperture affects the exposure and the depth of field. You can also use the depth of field preview button on your camera to see how the image will look before taking the shot.
Set your shutter speed to the value that gives you the motion blur that you want. You can use the shutter priority mode (S or Tv) to see how changing the shutter speed affects the exposure and the motion blur. You can also use a tripod to stabilize your camera and avoid camera shake when using slow shutter speeds.
Take a test shot and review the image on your camera’s LCD screen. Check the histogram, which is a graph that shows you the distribution of tones in your image. The histogram should have a balanced shape that covers the whole range from dark to light without clipping the shadows or the highlights. You can also zoom in and check the focus, sharpness, and noise of your image.
Adjust the aperture, shutter speed, or ISO as needed until you get the exposure and the effect that you want. You can use the exposure compensation button (+/-) to fine-tune the exposure by adding or subtracting light in 1/3 or 1/2 stop increments.
Take the final shot and enjoy your masterpiece!
Manual Mode
Manual mode is a mode on your camera that allows you to set the aperture, shutter speed, and ISO independently. This gives you full control over the exposure and the creative aspects of your image.
To use manual mode, you need to understand how the exposure triangle works and how to balance the three factors to achieve the desired effect.
To use manual mode, you need to follow these steps:
Set your camera to manual mode by turning the mode dial to M.
Set your ISO to the lowest value that allows you to get a good exposure. You can use the exposure meter on your camera to check the exposure level. The exposure meter is a scale that shows you if your image is underexposed (too dark), overexposed (too bright), or correctly exposed. You want to aim for the zero mark or close to it.
Set your aperture to the value that gives you the depth of field that you want. You can use the aperture priority mode (A or Av) to see how changing the aperture affects the exposure and the depth of field. You can also use the depth of field preview button on your camera to see how the image will look before taking the shot.
Set your shutter speed to the value that gives you the motion blur that you want. You can use the shutter priority mode (S or Tv) to see how changing the shutter speed affects the exposure and the motion blur. You can also use a tripod to stabilize your camera and avoid camera shake when using slow shutter speeds.
Take a test shot and review the image on your camera’s LCD screen. Check the histogram, which is a graph that shows you the distribution of tones in your image. The histogram should have a balanced shape that covers the whole range from dark to light without clipping the shadows or the highlights. You can also zoom in and check the focus, sharpness, and noise of your image.
Adjust the aperture, shutter speed, or ISO as needed until you get the exposure and the effect that you want. You can use the exposure compensation button (+/-) to fine-tune the exposure by adding or subtracting light in 1/3 or 1/2 stop increments.
Take the final shot and enjoy your masterpiece!
Conclusion
The exposure triangle is a fundamental concept that every photographer should master. By understanding how aperture, shutter speed, and ISO work together, you can use manual mode to take control of your camera and create stunning images. Manual mode allows you to express your creativity and vision without being limited by the automatic settings of your camera. Experiment with different combinations of the three factors and see how they affect your image. You will be amazed by the results!
About the Creator
Jone Mike
I'm a writer by night and graphic designer and photographer by day.
Keep reading
More stories from Jone Mike and writers in Photography and other communities.
How to Create a Photography Portfolio That Stands Out
1. Choose a niche or specialty Before you start creating your portfolio, you need to decide what kind of photography you want to focus on. This will help you narrow down your target audience and tailor your portfolio to their needs and expectations. For example, if you want to be a wedding photographer, you should choose photos that highlight your ability to capture emotions, details and moments in different settings and lighting conditions. If you want to be a wildlife photographer, you should choose photos that show your knowledge of animal behavior, habitats and conservation issues.
By Jone Mike10 months ago in Photography
Capturing Magic
In the world of photography, timing is the key to everything. While skilled compositions and technical proficiency are undoubtedly crucial, the perfect lighting can create the perfect photo. Nowadays, we can determine any light ourselves and are no longer dependent on any natural light source, thanks to the developed technology. We can turn every day into a night by using the right filters. And we can illuminate every night to be seen as a day. A typical process, especially in the film industry.
By C.B. Visions30 days ago in Photography
The Profound Impact of Top Wedding Photographers in Charlotte on Your Special Day!
What exactly is your wedding day? It's a fountain of emotions, laughter, and feelings that are felt in bouts and moments across the venue! Your wedding photographs and videos are the proven ways to capture these process moments and have them with you even after your wedding!
By Shane Mathew7 days ago in Photography
The Ugliest Building
Mark Twain called the building I work in, “The ugliest building in America.” I agree. The Dwight D. Eisenhower Executive Office Building isn’t the largest in Washington, D.C., but its imposing façade makes it feel like it is. I work for the Office of E-Government and Information Technology. I have a satellite office in the bowels of this monstrosity. Working in this building gives us quick access to both the President and Vice-President because they also have offices here. This access may be why I’m in this situation, or maybe it’s the project I’m assigned to, or both.
By Mark Gagnon5 days ago in Fiction


Comments
There are no comments for this story
Be the first to respond and start the conversation.