
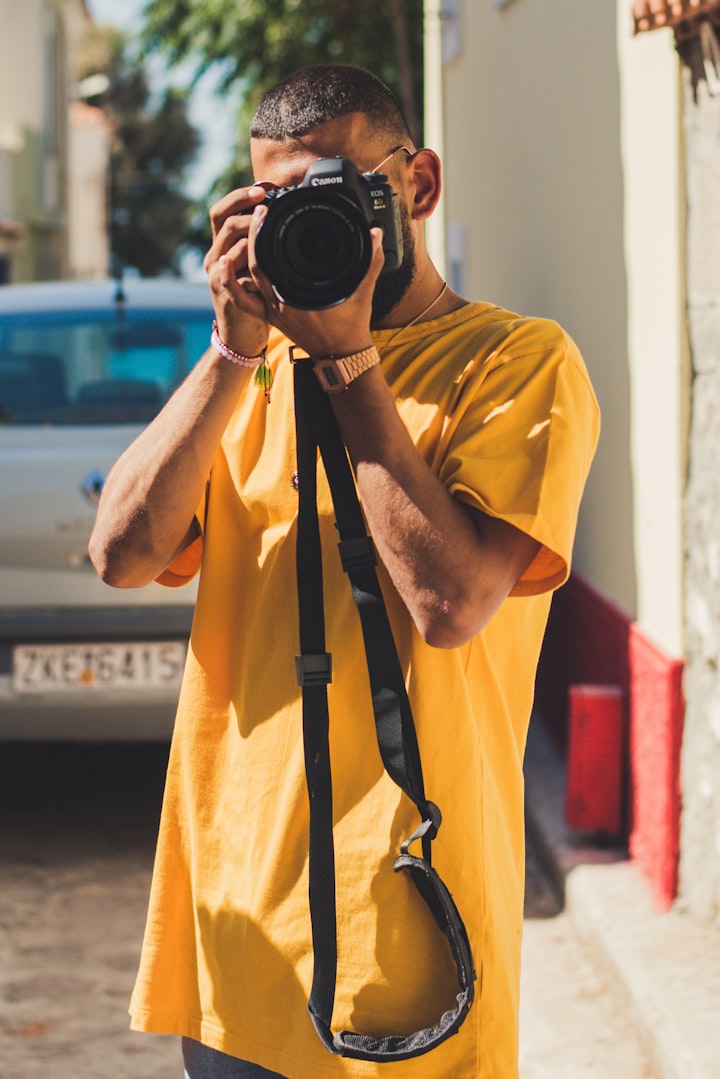
Getting Started With Luminar 4
What You Need to Know to Get You Up and Running Fast
With Luminar 4, your photos are the center of attention. You can conveniently browse, rate, group your photos and much more. Automatically group your photos by year, month, and even day. Easily navigate between images and make sure that the perfect image you’re looking for is always at hand.
Luminar 4 is an all-in-one photo app designed to offer everything a modern photographer needs for photo editing. Give all your photos a look you want in seconds. Make the necessary edits on a single image. And instantly sync all the adjustments with a click. It also works great as a plugin and an external editor for every photographer’s workflow.
New photographers and mobile shooters will appreciate a simple approach using one-click Luminar Looks and universal tools like cropping, noise reduction, and image healing.
Casual photographers may start with those same Luminar Looks, but will soon “graduate” to using Luminar’s purpose-built tools which achieve great results quickly.
For passionate enthusiasts and professionals, the full gamut of editing tools such as brushes, layers, blending modes, texture overlays, an editing history menu and much more enable a new generation of advanced photo editing possibilities.
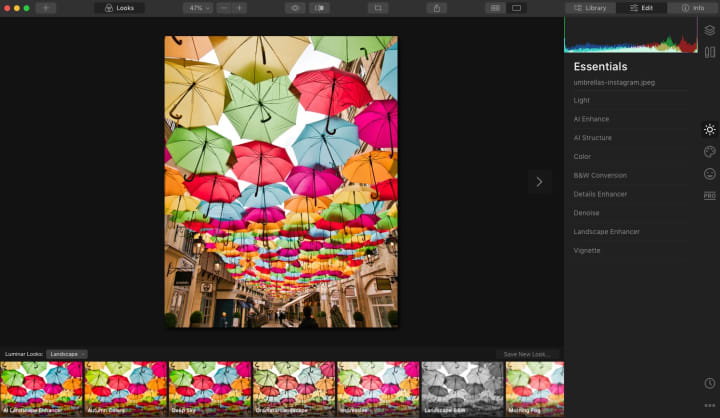
The Interface
The beautiful interface offers a sleek canvas to enjoy and edit all your images without distractions. Automatically group your photos by year, month, and even day. Easily navigate between images and know that the perfect shot you’re looking for is always at hand.
Working with Luminar, you’ll access controls from two primary areas.
- The Library view is for browsing and navigating your photos
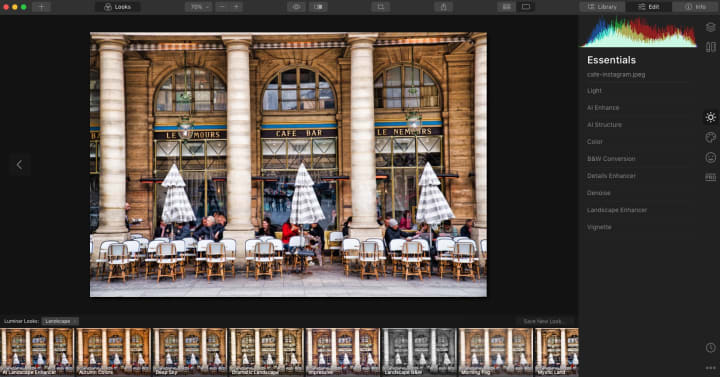
The Library View is where you explore your images. This canvas is designed to be enjoyable for browsing. It also makes it easy to rate and sort your images. Use the Library View to organize your images or to select photos for further editing.
- The Edit view is for enhancing your images.
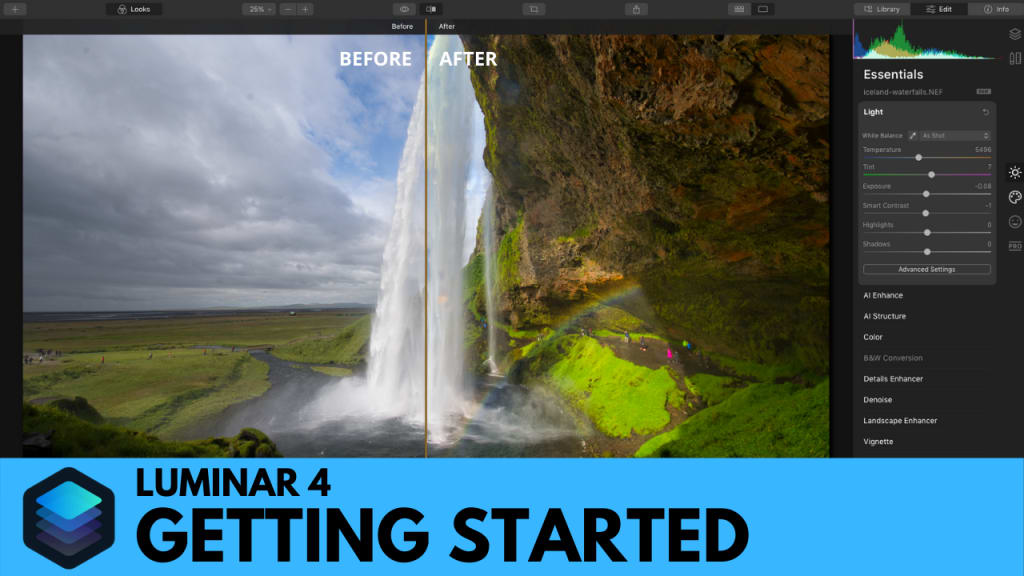
The Edit view is where you enhance your images. You’ll access controls from three primary areas. The Toolbar contains general-purpose and frequently used functions of the software. The Side Panel is located to the right of the main image display; all adjustment tools, layers, and the histogram can be found here. You can also save time with the Luminar Looks Panel at the bottom of the screen, which offers one-click presets.
There is one other view and that is called Info view:
The Info view provides basic information about a photo. It includes details such as: filename, capture date and time, resolution, file size, camera model, white balance, lens, metering mode, ISO, aperture, shutter speed, exposure compensation and focal length.
Opening Images for Editing
There are several ways to open images into Luminar for editing.
- You can add folders, which leave your photos exactly where they are on your hard drives.
- If you want to import images from a memory card or external drive, then Import images that moves or copies your images to a new location.
- You can also open your images from any location with the Edit Single Image command, which allows you to easily edit and export photos that you do not want to keep in your Luminar Catalog.
Editing a Single Image
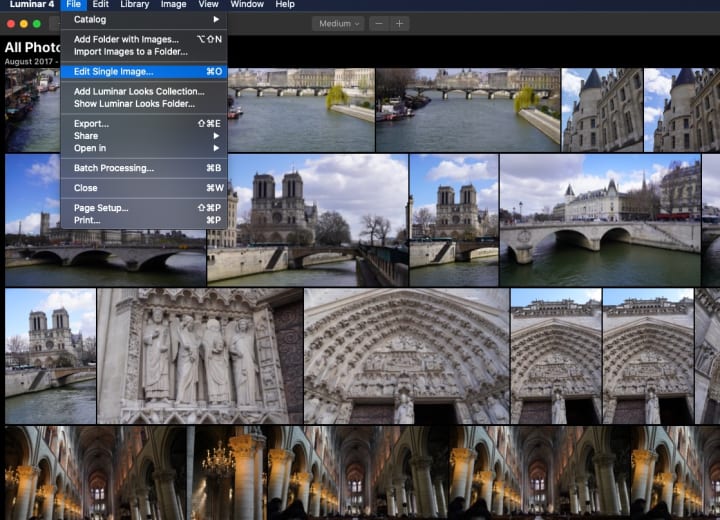
The Edit Single Image command makes it easy to work with individual photos in Luminar. It is also useful for images that don’t exist in your Luminar library. This is similar to using previous versions of the Luminar standalone application.
Adding a Folder with Images
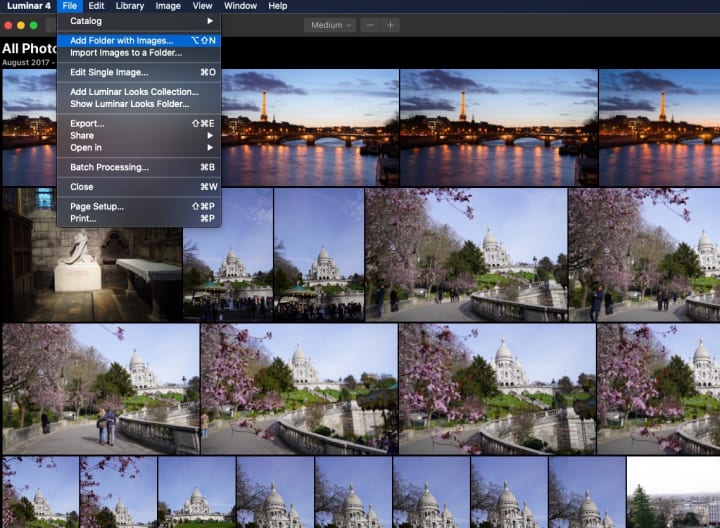
Adding a folder of images to your library allows you to quickly access, organize, and work with photos located on your hard drive, on external hard drives, and even synced cloud storage. When you add a folder, none of your photos are moved. Luminar scans the folder and any subfolders and creates a thumbnail and link to the images inside. If there are folders inside the folder being added, Luminar will keep the folder structure. Folders tie directly to folders on your hard drive. Luminar works with the real-world folder structure of your hard drive(s).
About the Creator
David Sornberger
David Sornberger is a self-taught Canadian photographer whose work is layered by surf, landscape, city and travel subjects | www.davidsornberger.com
Keep reading
More stories from David Sornberger and writers in Photography and other communities.
Twitter Just Made Your Photos Look Better
Twitter has historically reduced the quality of photos to save space. Along with many other creators, I was frustrated with the way it handled media uploads. My photos and videos lose so much resolution and quality when I shared them on the social network so that this content could load faster on web and mobile devices. I continued to post, as many others have, on the world's most popular microblogging site, Twitter, mainly to connect with and to learn from my followers.
By David Sornberger4 years ago in Photography
The Ultimate Photography Tips For The Travel Photographer.
You may think that all you need to take quality travel photos is your camera, your smartphone, or even your digital SLR; and while that’s true, there are still many more things to consider before you press the shutter button, no matter what type of camera you’re using. The following photography tips will ensure that you get quality photos every time – regardless of whether you’re traveling across the globe, or just to the next town over.
By Vijay Mistry6 days ago in Photography
Good Picture
This comprehensive guide to photography focuses on capturing moments, emotions, and stories, not just clicking a button. It covers key principles and techniques such as composition, lighting, and camera settings, aiming to elevate photography to the next level.
By Praveen Pka day ago in Photography

Comments
There are no comments for this story
Be the first to respond and start the conversation.