
Capturing Beauty
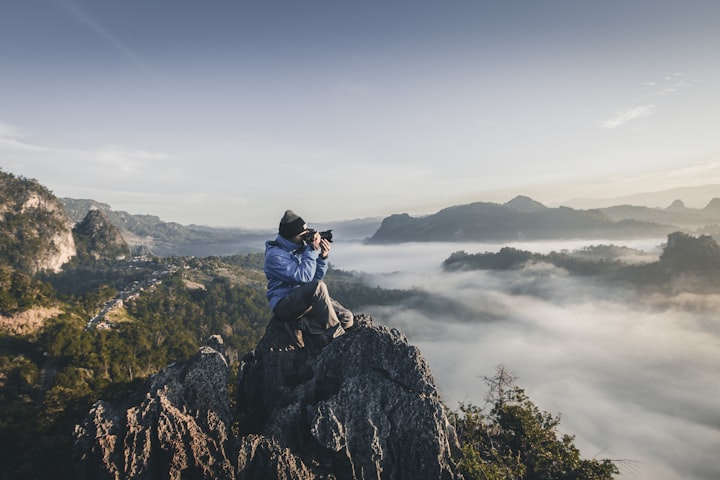
Simple ways to bring your cell phone photos to life and how to take a photo that captures the eye.


My Highschool was lucky enough to have a series of photo tech class' that included access to a dark room. It was an elective that filled quick so I jumped at the opportunity to join as soon as I could. It was in that class that I learned what made an image appealing to the eye.
Most photographers take 50-100 photos of something before scrolling through and picking their favorites to edit and print. This wasn't possible in photo tech because we actually used film and unfortunately it was expensive. So we needed to really focus on many variables before actually snapping the photo. The level of exposure, the contrast, the focal point, the colors and the composition are just a few things to consider before pressing that magical button. A lot of the time you needed a really nice, expensive camera with a tripod and multiple types of lenses too. When it came to developing and printing your own photos there was a whole other process that needed to be followed and executed perfectly, from the measurements of developing chemicals to the filters and print exposure time, There was a lot of work put into capturing that "perfect" photo.
Now anyone with a decent cellphone has the ability to be a photographer. The craft has been changed completely, both in good and bad ways. For some people the appeal of photography was in the process, the dark room and the physical work around bringing a photo to life, It was a lifestyle. It was also very expensive, required access to a dark room and lots of equipment. Today photography is more focused on collecting copious numbers of the same image, picking out the best ones and editing them to your liking. You really only need a camera and a computer to produce a nice image and lots of cell phones now have cameras better than some old film cameras. Just because the process became easier doesn't mean anyone can become a successful photographer though. Due to the simplification of the process, the whole field has become flooded and getting a job requires much more focus on marketing yourself than ever before. This is why so many people, myself included, have a degree in photography but don't use it. We lack the marketing skills!
I travel a lot and love to share my experiences with my friends and family so I still take lots of photos but I traded in all my heavy, fragile gear for a cellphone with an okay camera, eventually I would like to get a better one but the one I have is fine for now (Moto G6). Even though I am not a photographer, I still pay great attention to the composition of my photos and can't help but edit them before uploading them onto my social media. I don't use any fancy software for editing my photos, just the simple built-in "Edit" function on the "photos" app on my computer (windows 10) . These built in programs usually allow you to adjust contrast, lighting, color and crop the image the way you like. This is the program I am going to use for this lesson. I will show you how to adjust your filters (lighting, color, contrast) to make your image stand out the way you want it to. I will also give a small lesson on composition towards the end so you have an idea of what in a photo makes it appealing to the eye.
For more in depth editing there are many free apps available that will give you more options. I suggest Gimp if you want to make any serious changes to your pictures. It is similar to Photoshop and can seem a little confusing to use if you have never used a serious photo editing software before, but it's free! I recommend watching a few YouTube videos on how to use it before giving it a shot though.
Here are some ways to use Windows 10 photos editor to give your photos more impact and personality. I don't take many photos of people, most of my photos are of animals, landscapes or places I have been. The first images are completely edited but later I will show you the extremes in lighting, color and contrast.
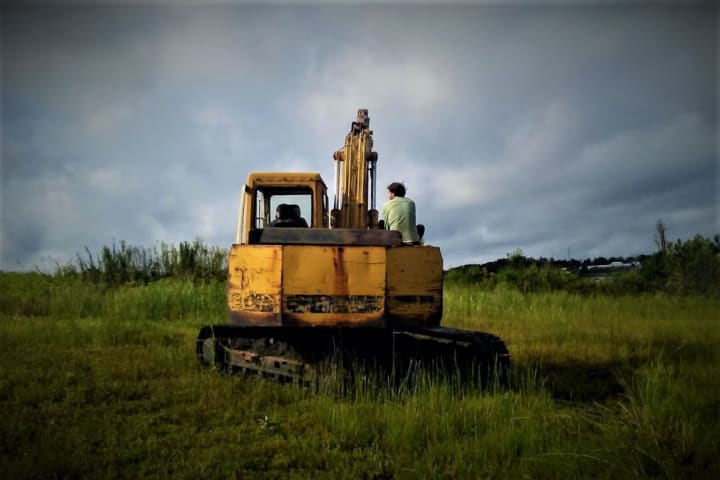
For this image I simply cropped the photo, straightened it, increased the contrast, enhanced the color and added a vignette.

With this photo of a goat I increased the contrast, decreased the lighting and boosted the color saturation.


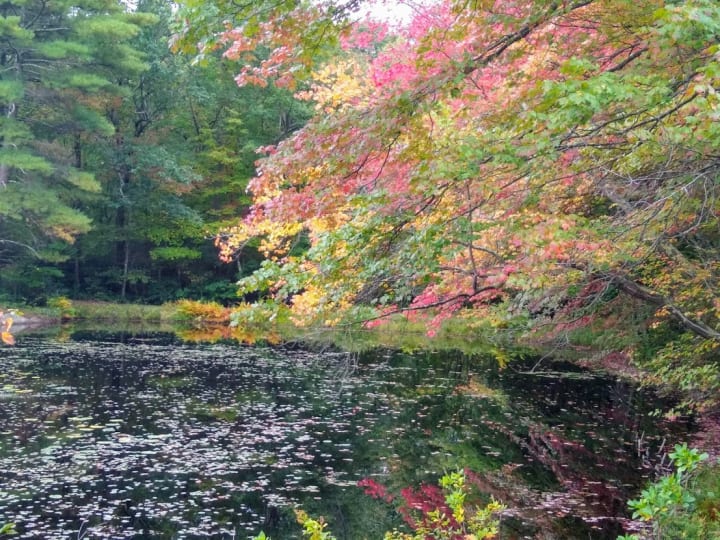
In the following photo I increased the contrast, decreased the light, enhanced the color saturation and cropped the photo to my liking.

Sometimes all I do is adjust the lighting. This angel was a little too dark, I think the lighter photo really helps us see the details of the sculpture.


I like colors and higher contrast for most of my photos but you can add lots of personality and emotion to a photo by drastically changing it. Below I have three versions of a photo. The original, one darker/sharper and the other lighter/softer. They look like they were taken at different times during the day.


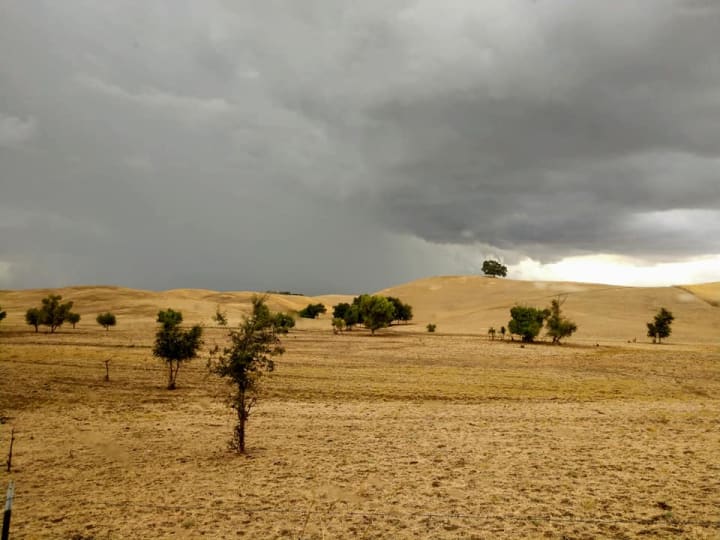
Here is another example. In this one the darker version really emphasizes the storm brewing above and gives the viewer the feeling that the storm is just beginning. The lighter image gives the feeling of passing showers and doesn't look very imposing.


Color can make a huge difference too! Some images are simply more beautiful in black and white and others in full color saturation. Here are some examples. You decide what looks best.


Contrast changes how sharp or soft an image is. I find that softer images portray a more whimsical and relaxing feeling. While sharper images are much more edgy and intense. Here are some examples of the two. Note: These images are extremes of each side of the contrast scale, most images look best somewhere in the middle of the scale.


Probably the most important part of an image is the composition. This is what draws in our attention and moves our eyes around the image. In the editing phase you can adjust your composition by cropping a photo to include and exclude parts of an image but always keep composition in mind when taking the original photos too. There is more than one way to do this and I am going to show you.
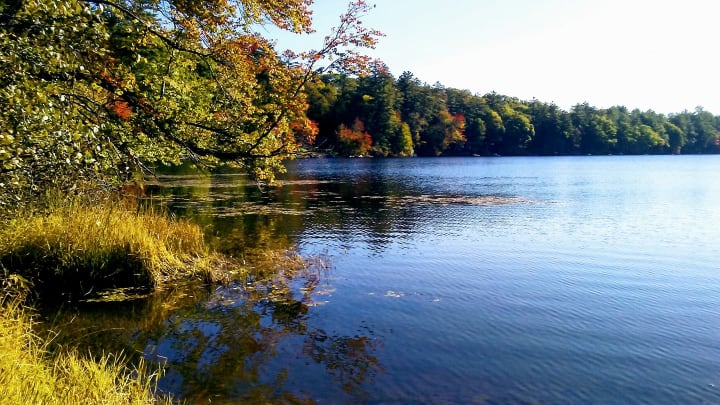
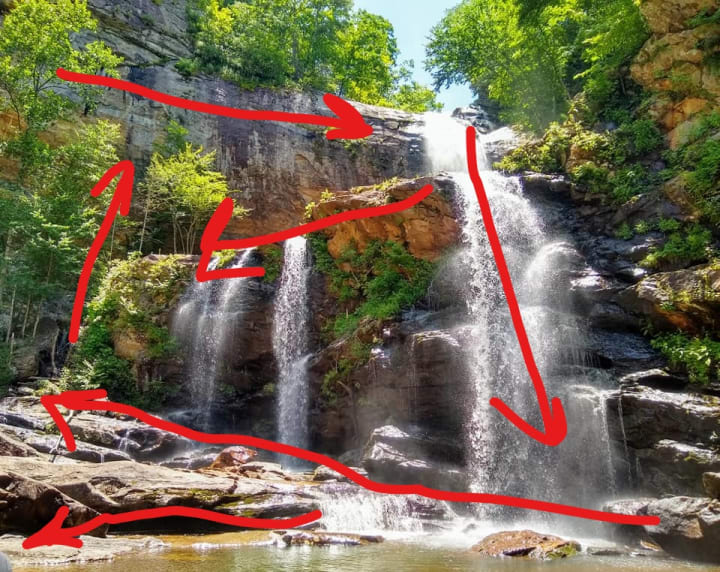
We like to follow lines in an image and if these lines intersect with other lines it will carry our eyes through out the photo. These lines can be made out of anything. This waterfall below shows how the rocks, water and trees create direction in the photo for our eyes to travel.


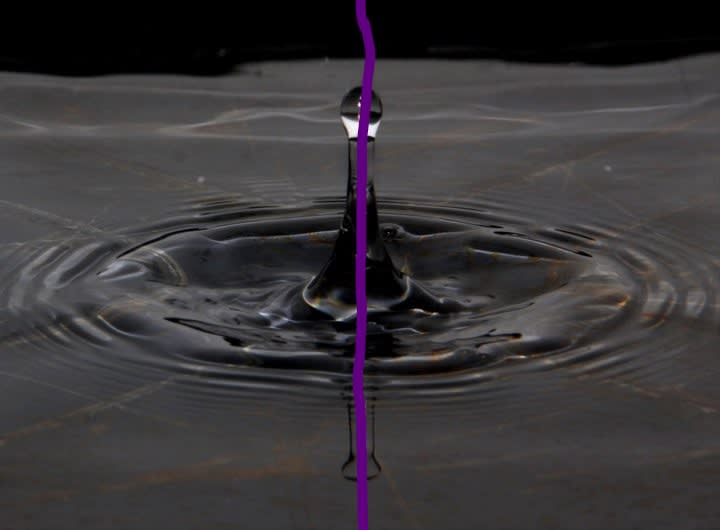
This photo above uses less lines to guide your eye but it also uses balance to hold our attention. Balance is another way to keep interest in a photo. It is pretty self explanatory but the gist is to have two or more things in the photo that are equally important to the image. Balance can also be found in symmetry, where two or more parts of a photo are mirror images to each other.

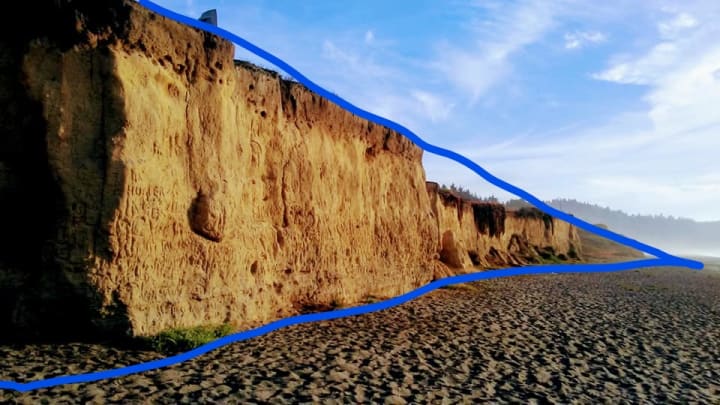
Another interesting way to control the composition of your photos is to follow the rule of thirds. The rule of thirds states that if you can divide an image into three different parts and have each part hold an interesting element for your eye it will make an image more appealing as a whole. You can divide it in anyway but usually you want to divide the image into fairly equal sized pieces. Here are a few examples. I couldn't find an image to divide vertically but that is also an option.


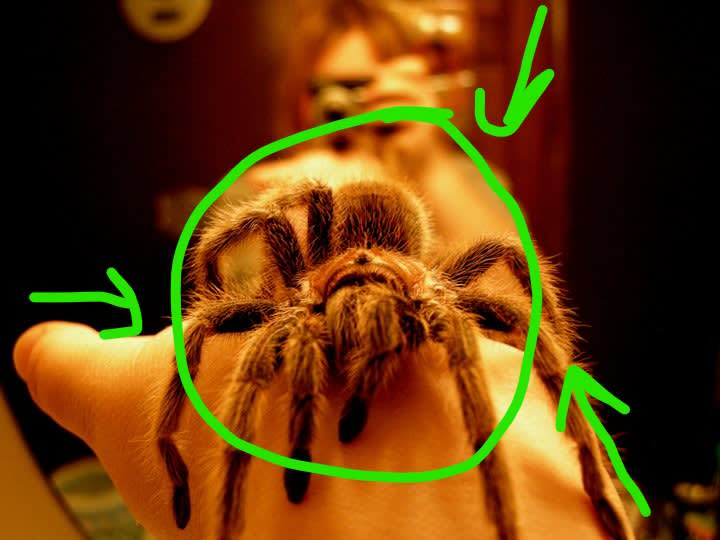
You can direct attention to a certain focal point in an image by having part of the image in focus with the foreground and background blurred. This is another way of using composition to direct attention to a specific part of the image. These images usually tell a story and have more of an emotional impact on the viewer.

If you don't feel confident with your ability to see these keys to good composition while taking photos, I suggest taking many photos from multiple angles and points of view. later you can go through your images and find the ones that look the best. Often you will find that they fit into one of these categories.
Next time, before you upload photos to social media, take a moment to play with your built in editor, crop the photo or adjust some scales. You and your followers will be excited to see your photos taken to the next level. Now go out and take some photos!
About the Creator
Mollie Harrison
Almost thirty and I think I have finally found myself. In the past few years I have gone through a crazy variety of experiences. Between getting married, divorced, The Appalachian trail and hitchhiking the US, I have stories to tell.
Keep reading
More stories from Mollie Harrison and writers in Photography and other communities.
The man under the overpass
I was walking to work along my usual route through the park when I noticed something different. The old man who was usually sitting on the bench by now, giving me a nod as I passed by, was still laying down under the overpass. I had never talked to him, just nodded back every morning. It was our routine for as long as I have walked to my pathetic dead end job, so I guess about 3 years. I couldn't recall one other occasion where this man was absent for our morning acknowledgement in all that time.
By Mollie Harrison3 years ago in Humans
The Ultimate Photography Tips For The Travel Photographer.
You may think that all you need to take quality travel photos is your camera, your smartphone, or even your digital SLR; and while that’s true, there are still many more things to consider before you press the shutter button, no matter what type of camera you’re using. The following photography tips will ensure that you get quality photos every time – regardless of whether you’re traveling across the globe, or just to the next town over.
By Vijay Mistry5 days ago in Photography
Good Picture
This comprehensive guide to photography focuses on capturing moments, emotions, and stories, not just clicking a button. It covers key principles and techniques such as composition, lighting, and camera settings, aiming to elevate photography to the next level.
By Praveen Pkabout 14 hours ago in Photography


Comments
There are no comments for this story
Be the first to respond and start the conversation.