
Budget GH5 Starter Kit (Filmmaker's Guide)
Just dropped a full year's wage from your part-time job on a brand new GH5 body? Here's some low-cost, filmmaking essentials, whether you're a student or just looking to save some cash.

This article is coming from the perspective of a filmmaker, the items listed are geared more towards working on short films as a cinematographer. However, I do use my GH5 for promotional work and will use it for some wedding/events filming. I'll delve into my personal experiences with the GH5 and my processes to choosing which gear to acquire as a starter.
That being said, everyone is different and has different requirements when it comes to shooting. Hopefully, this list will give everyone some ideas that will help decide what to start investing in, once you've got your hands on Panasonic's mirrorless powerhouse.
1. (2, 3) Lenses!
If you bought your GH5 with a kit lens (probably a 12-35mm or 12-60mm f2.8) then a couple of these lenses may not apply to you.
However, I bought my GH5 body-only (a woeful attempt at cutting costs) and chose a few lenses that didn't break the bank *much* further.
Also, due to the GH5's Image Stabilisation, I did not worry about finding lenses with O.I.S.
1. Panasonic 25mm f1.7
The GH5 isn't particularly celebrated for it's lowlight performance, topping out at around ISO 1600/3200 for "useable" footage. So a fast, prime lens was top of the list.
After hours of YouTube videos, talking to GH5 owners and browsing reviews, the 25mm (50mm Full Frame Equivalent) made itself known. I bagged mine for £117 (around $153) from Currys - an absolute steal.
The lens is crisp and performs like a much more expensive prime, which is great for the budding cinematographers amongst us. And what's better, is that it's Micro Four Thirds native (as are all the lenses in this article!). Although the build is primarily plastic, the mount itself is metal, and the lens as a whole feels sturdy; I've put this lens through its paces and have dropped it on several occasions with no lasting damage. Lightweight, compact, this lens is a must for anyone at the price-point.
Find it here.
2. Panasonic 45-150mm f4.0-5.6
This MFT-native tele-zoom lens was my next bid in covering a range of focal lengths on a budget. Although not particularly fast, the 45-150mm (90-300mm FFE) comes as a compact, well-built tele lens with metal mount.
I tried hard to avoid a variable aperture lens, but had no luck in finding something suitable especially at my budget. In practice, though, this is not an issue. I like to use tele-zooms to create a flat image in certain shots, as well as to reach far away subjects. Obviously not a contender for use in a low light scene, but that's why you picked up the 25mm f1.7, right?
For around £240 ($314) this a very good price for a lens that will offer more than acceptable sharpness and help you diversify your gear.
Find it here.
3. Olympus 12-50mm f3.5-6.3
Naturally, a wide angle lens was next on the list. I sought a lot of advice for a budget wide-angle lens but the least expensive recommendations that I was given were still over £500, which, for a student preparing for a foreign film competition, was completely out of the question.
However, I stumbled upon the Olympus 12-50mm (24-100mm FFE) when hopelessly browsing the aisles in Currys. Coming in on sale at around £230 ($301) brand new. I promptly looked up the lens online, there was little information and most of the reviews were either a little dated or related to photography.
But I needed a wide angle lens and had no time left to debate with myself before our next shoot commenced. I risked it all and snapped it up. I was thoroughly impressed.
The widest aperture of f3.5 is not *that* bad, its quick enough to use in 'dull' settings as well as creating a nice-enough depth-of-field when shooting subjects. It isn't the sharpest of lenses out there, and certainly doesn't compare to the more expensive options, but it holds its own.
This lens also has a power-zoom feature, which I enjoy using when I need to quickly set up a shot. There is also an option for shooting macro with a button on the lens, however I don't really use it.
The lens is fully weather sealed and has a convincing weight to it. The build is strong (I dropped it on a river side into rushing water and you wouldn't even be able to tell).
Find it here.
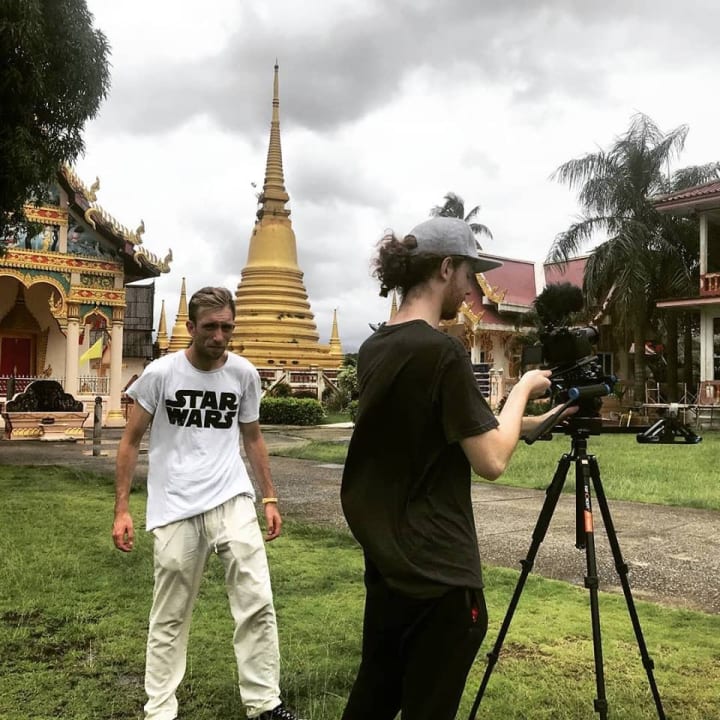
The stills below are taken from the most recent short film I worked on shot in Thailand using each of the lenses mentioned. (Excuse the upload compression).

25mm f1.7

45-150mm f4.0-5.6

12-50mm f3.5-6.3
2. Tripod!
As a somewhat-experienced filmmaker, chances are words such as "fluid head", "counter-balance" and "drag control" jump to mind, and that probably brings you back to "Manfrotto". I also went through this process. Manfrotto is undoubtably the go-to name for securing great quality support items whether you're after a tripod, slider or even cage systems. There are budget options when it comes to Manfrotto; I first began eyeing up the 'BeFree Live w/Fluid Head' which came in at the price range £190-£200 (around $250) which was still pushing my budget a little too much.
Check out the Manfrotto BeFree Live.
I was a apprehensive about slapping my shiny, new GH5 on some cheap, plastic tripod that would likely blow over in a slight breeze with the steady panning capabilities of a four-year-old. So I needed something with a strong build, and a budget fluid head that wouldn't give up on me after the first few whip-pans. I opted to buy the legs and head separately, giving the option to find a reliable fluid head.
Firstly the tripod legs. I came across the K&F Concept Tripod after cycling through a few YouTube videos. The tripod is built from aluminum, giving it a solid build while keeping it lightweight and easy to manage. There is a spring-loaded hook on the underside to add extra weight in keeping your set up held firmly in place. Each leg can be positioned individually and in three ways, to help achieve any height or angle you need and help adapt to your surroundings. The legs collapse using plastic clips which are quick and of decent quality, and the whole system folds in onto itself to pack away neatly and compact. Although I purchased a separate head, the one that comes with the K&F Concept is still worth holding onto; the ball head is smooth and versatile for achieving awkward angles and is useful on sliders.
I bough the K&F Concept tripod for £55 ($72) which I would say is a good deal for this versatile piece of kit.
Find it here.
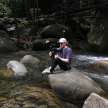
K&F Concept Tripod Chanthaburi, Thailand
Next was to find a reliable fluid head to mount on my new tripod legs. That's when I found the Kingjoy VT-3510 - look familiar?
The Kingjoy, for which I paid £47 ($62), is almost an exact replica of Manfrotto's popular fluid head. Of course you don't get quite the same performance, but for a fraction of the price, the build quality and durability are not far off. The Kingjoy's quick-release plate is even compatible with Manfrotto products which really helps future-proof this item and (if you already have Manfrotto gear) works as a great backup.
The handle can be mounted onto either the right or left hand side and locks securely into place with teeth. The length of the handle also offers good leverage for getting smooth pans or fine tuning an angle.
But what's crucial here is the performance of the fluidity; at this price you really couldn't ask for more. The head is smooth in both panning and tilting, there is no jerkiness or inconsistencies in the feel of the pans. Although you could tell a difference if compared side-by-side with Manfrotto, you'd be hard pressed to complain at the price. The counter-balance also works impressively well. Although there is no drag control, you can tighten the panning lock slightly to add a little more resistance if desired. I have used the head rigorously and am yet to see a decrease in performance. After a day of filming on the extremely windy Gulf Coast, no sand or salt managed to penetrate the head and effect the fluid movement. It fastens securely to the K&F Concept and holds the GH5 well, with rubber on the plate to prevent scratching.
The only downside to this head is that it can be quite cumbersome in regards to traveling with it and it does not fit in the K&F Concept tripod's bag.
Find it here.

Kingjoy + K&F Concept

Kingjoy + K&F Concept
3. Stabilisation
Had your eye on the new Ronin-S? Or the Ronin-M, or the Ronin-MX? Me too. But they're not the most budget friendly are they?
Personally, I don't regard these gimbals as starter essentials, nor do I most gimbals. Zhiyun Tech's Cranes are a great choice for gimbals that retail for around half the price of DJI's Ronin range, but I was still not convinced I *needed* a gimbal when I was starting up, especially with the GH5's impressive IBIS.
If you're heart set on a 'low-cost' gimbal for run-and-gun shooting then, with my experience, I would recommend the Zhiyun Crane/Crane V2 or Crane Plus. The three-axis stabiliser is quick to set up and will comfortably hold the GH5 and lens, it also features joystick controls for further dynamic movement all while offering great stabilisation. When used alongside the GH5's IBIS it can achieve some beautiful results.
Find it here.
For my personal budget, I opted for a trusty shoulder rig in the form of Neewer's "filmmaking system". This kit includes shoulder mount, follow focus and (I'm reluctant to say) 'matte box'; which included metal rods. Forget I mentioned the matte box, I wouldn't regard this assembly of cheap plastic as a matte box.
But the shoulder rig is an easy way to achieve smooth footage without splashing out on a gimbal. The Neewer shoulder rig comes with good quality grips that secure well to the system and a comfortable, lightly weighted shoulder-pad that can be adjusted to suit your arm length. The system fastens tightly to the GH5 and holds well. Providing you're not attaching much more than your lenses and XLR adapter to the GH5, the whole system comes in quite light, removing a lot of strain that you find with large gimbals. The system itself can be attached to tripod legs OR head, sliders and most supports. It can all be disassembled which makes for easy, lightweight traveling. Although the system isn't bad quality, it's not great either, I am seeing clear signs of wear after a couple of moderate scale shoots, but at £44 ($58) I didn't expect much else. The results won't match the dreamlike smoothness you get with gimbals or Steadicam, but it will give clean movement without the jerkiness of going completely handheld.
Find it here.

Neewer Shoulder Rig w/GH5
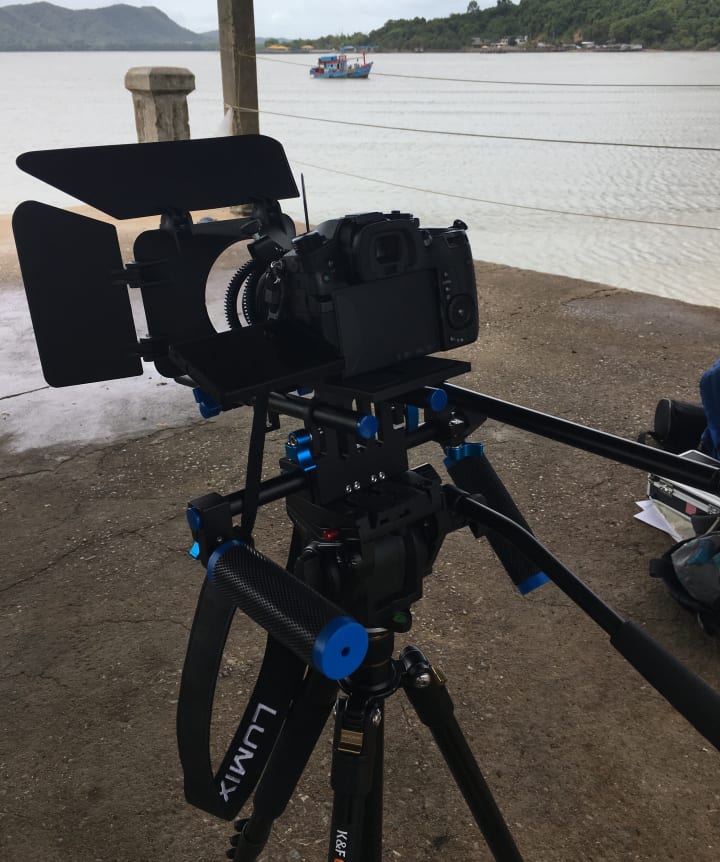
Neewer Filmmaking System on Kingjoy + K&F Concept Setup
4. COLOUR!
The GH5's colour capabilities are undeniably great for a prosumer camera at the price, boasting its impressive 4K 10bit. Why not take advantage of the colour science in the GH5? Even if you're completely new to colour grading and colour correction, the GH5 is the place to start learning.
But what software should you use? This is all down to personal preference, what editing software you're using and how you like to work in post. BUT... in my article, I say DaVinci Resolve by Blackmagic Design is the best place to start, and you can integrate this into almost any workflow you like, regardless of what editing software you use. And, even better, you can start working in Resolve for £0 ($0).
Downloading the free version of DaVinci resolve still gives you access to the editing, colour, audio and export software with a few limitations here and there. If you're a more seasoned colourist then paying for the Studio version may be more for you, retailing at £239 ($314) for the complete package- one time payment, no subscription.
Whether you're going for the free or paid version, you're getting a decent deal here. Resolve's capabilities are vast and in a super user-friendly interface. I am not massively experienced in colour, but I learned with DaVinci Resolve after becoming tired of Premiere Pro's Lumetri Colour and I will continue to use the software for the foreseeable future. One draw back of the free version is that it does not allow you to use 10 bit GH5 files, but if you're a beginner, this shouldn't be much of a concern. Personally, I do my linear edit in Premiere, take the timeline into Resolve for the grade, and finish everything else in Premiere again. There are infinite YouTube tutorials on learning the fundamentals of Resolve, I would encourage anyone to download and start grading.
Find out more about DaVinci Resolve.
I purchased all of the above (and some of the below) equipment over the course of 4/5 months. All the items accompanied me to the Thailand Film Destination Festival where we shot and edited a short film in just under a (gruelling) week. The film was screened on a full size cinema screen, looked great and no items failed us along the way.
Other Accessories to Consider
- Batteries: Without a doubt you should be looking at getting at least one spare battery. Try to avoid third party manufacturers and just buy Panasonic's. Although the Panasonic ones are more expensive at around £68 ($89) you will save yourself a lot of trouble. The GH5 is a workhorse of a camera and you will expect a lot of hours of continuous shooting, but not with a poor battery. I have seen several accounts of people complaining about third party GH5 batteries, so you probably won't even save money when they have to be replaced after every shoot. I have two batteries myself, and made them both last through 10-14 hour days of shooting in a hot climate. Find it here.
- V-Log: If you're unsure as to whether you should drop $100 on Panasonic's Log profile then the answer is probably no. V-Log is great for experienced colourists or confident beginners looking to take their grading to the next level. The colour profile offers (as claimed by Panasonic) two extra stops of dynamic range. This results in a 'flatter' looking image that takes more grading to look "normal", but you will get more details in the highlights and shadows of your image. Find out more or purchase V-Log here.
- GH5 XLR Adapter: For most of the budget filmmakers out there this probably isn't a necessary piece of kit as you likely record audio externally with a Zoom (or something similar). But if you have limited crew or are shooting more guerrilla/documentary work then internal audio recording might be the best, or only, option. This XLR adapter allows for high quality two channel audio recording, that gives plenty of control to achieve your desired results. At the price of £330 ($434), I would suggest going for an external recorder, if your situation allows it, as you will find more budget options, as well as not intruding on your rig or being attached to your sound recordist. Find it here.
- ND Filters: Yes. These are an absolute must, and it took me too long to realise that. If you're shooting outdoors on a sunny day and need that bokeh for a shot, don't compromise because you forgot to get NDs. You can buy ND filters that fit to your lens or buy a matte box and use ND filters that way. Be careful if you want a simple, screw-on option as many of these have been said to cause blue/grey 'hazes' over the image. Tiffen is a trustable brand when it comes to lens-fitted filters but aren't the cheapest of items; a quick search on Amazon will bring up a range of prices from £70-£200, depending on size and ND. If you'd prefer a matte box setup then Camtree's Swing Away Matte Box may be a good starting point. The set up is convenient, holds filters securely and will work with the Neewer system mentioned earlier in this article. At £247 ($324) this is a reasonably priced piece of kit to integrate into your setup (and also lets people watching know that you're shooting a film). Find it here. There are cheaper options when it comes to ND filters, but I wouldn't encourage anyone to cheap-out too much with the items they're putting on their glass.
- Adapter/Speedbooster: I am yet to invest in a lens adapter for my GH5 but I use the Metabones for the Sony FS700 to Canon EF lenses and would say this is an obvious choice in terms of brand. If you already have Canon or Sony lenses, then the Metabones may be a good choice for you, although not cheap you would be saving money on replacing your lenses. Another, more budget friendly option, would be Viltrox. These adapters are relatively reliable and certainly a modest price at £149 ($196) if you're wanting to utilise other lenses that are not MFT-Native. Find it here.
- Panasonic GH5 and GH5 S Facebook Group: This closed Facebook group is home to nearly 30'000 members which is a great place to learn, especially as a starter. Ask other GH5 owners questions, read other people's posts and comments and look at how people are putting this amazing camera to use. It's also a great place to share your work and get some feedback. Find it here.
As mentioned, every cinematographer, filmmaker, videographer etc. is different. This list may not meet everything you demand but this is how I got myself started up with the GH5 without spending too much money. I hope you were able to take something useful from this article and make the most of your GH5!
If you found this useful and it inspired you to get out and start building up your GH5 kit, please feel free to leave a tip to help support me and continue to bring quality content!
About the Creator
Keep reading
More stories from writers in Photography and other communities.
Capturing Magic
In the world of photography, timing is the key to everything. While skilled compositions and technical proficiency are undoubtedly crucial, the perfect lighting can create the perfect photo. Nowadays, we can determine any light ourselves and are no longer dependent on any natural light source, thanks to the developed technology. We can turn every day into a night by using the right filters. And we can illuminate every night to be seen as a day. A typical process, especially in the film industry.
By Krishan Mubashar7 days ago in Photography
Enchanting Views, Full Pink Moon Photos from April 2024
The Full Pink Moon, a celestial spectacle that captivated hearts and minds for centuries, graced the night skies in April 2024. As it adorned the heavens with its mesmerizing hue, photographers and skygazers alike marveled at its beauty.
By SIMORabout 14 hours ago in Photography


Comments
There are no comments for this story
Be the first to respond and start the conversation.