
Behind The Shot: Endless Horizons
A behind-the-scenes look at one of my favorite images.

Post-production is one of the best ways to create a unique look to your imagery and stand out in a world filled with photographers. While the idea of editing and photo manipulation is still not widely 'accepted' by many in the world, I honestly believe that post-production is the future of photography. Every single photographer edits their images to at least some degree. In fact, Peter Lik, one of the world's most famous landscape photographers who has sold over $500 million worth of prints, heavily relies on post-production in order to make his images stand out and attract buyers.
Post-production is key to making unique photos. And the truth is, it's here to stay. Whether you are a realist or a surrealist like myself, you should be editing your photos to at least some degree. RAW files need to be processed in order for them to bear resemblance to reality. And if you want to really get creative and take them a step further, then post-processing is the way you'll be able to accomplish just that.
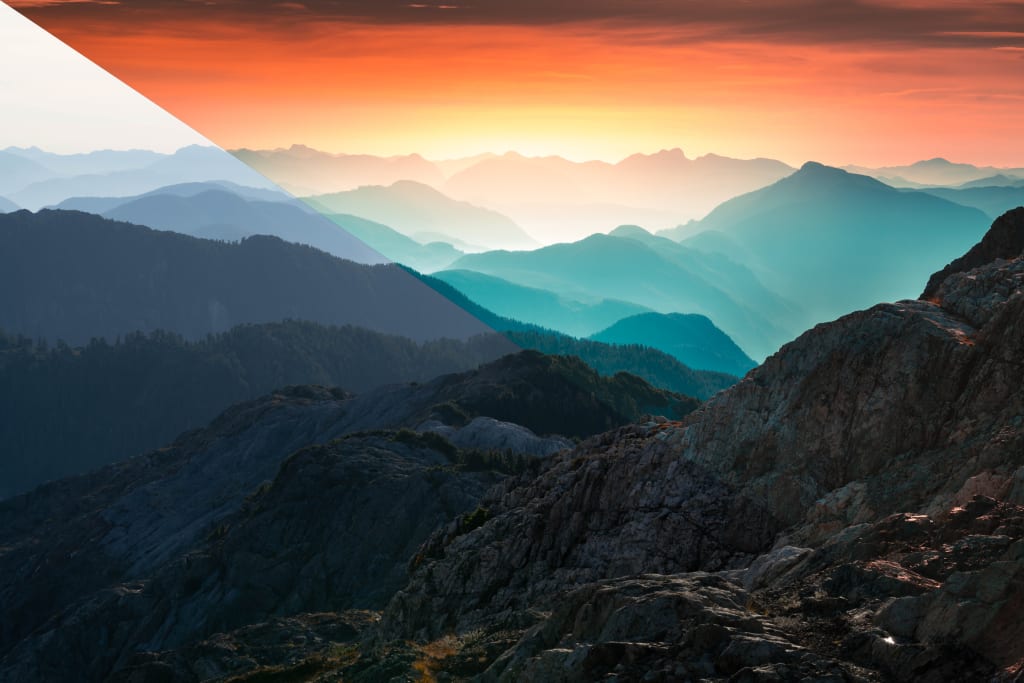
For this article, I want to show you the behind-the-scenes of my in-the-field process and editing techniques used on one of my favorite images. This is a single shot image that I captured up in the mountains not far from where I live. And the edit focuses on bringing out those colors and making the image pop. Let's jump right into it.
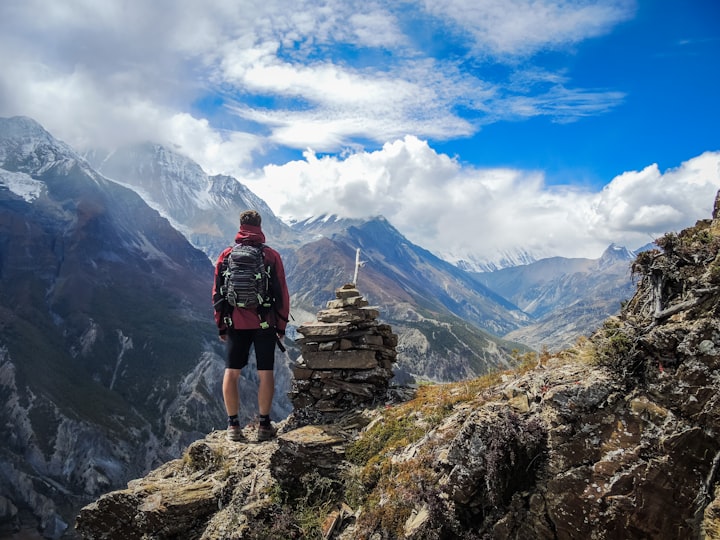
The Scene
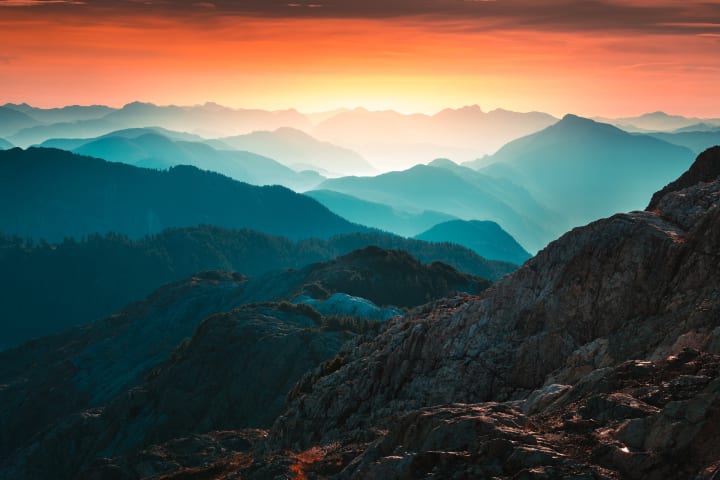
This was captured during a solo overnight hike up in the central mountains of Vancouver Island. After a very restless night of sleep up there all alone, morning finally arrived, and I woke up early to shoot sunrise. It was gorgeous. I watched as the alpenglow lit up the mountains around me in a beautiful pink color. And after breakfast, I went back to the peak once more to enjoy the views around me in that golden morning light. That was when I captured this image. A beautiful scene of what appeared to be a landscape of endless mountain layers. It was stunning. I shot hundreds of images that morning, but this was by far my favorite photo I captured. It was during that moment that I knew, this would not be my last solo hike.
Camera Gear & Settings
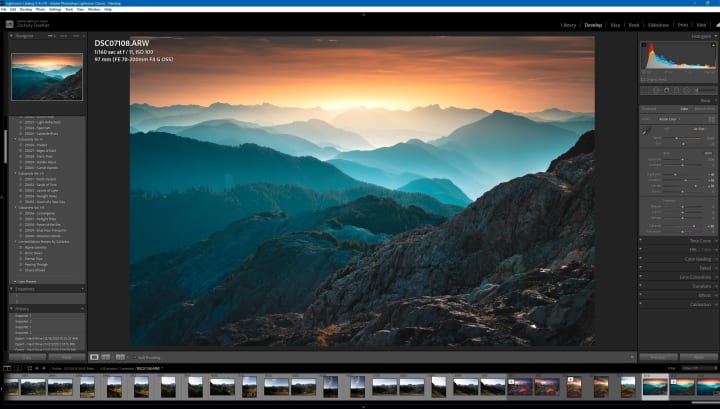
I captured this with my Sony α7R II and the Sony 70-200mm f/4 G. I love the α7R II because it offers an incredible amount of power for the money and gives me plenty of resolution to work with in the field. The 70-200mm was perfect for this scene because I wanted a decent focal length to be able to compress this scene and emphasize those layers even more. I made sure to shoot this image in RAW so that I could harness the full power of the sensor and get the best result possible in post. I also made sure to have stabilization on so that I could get a tack sharp image handheld.
I captured this photo handheld at ISO 100, 97mm, f/11, 1/160-sec. That relatively fast shutter speed combined with optical and in-body stabilization ensured that the end result was tack sharp. As I mentioned earlier, this photo was taken a couple of hours after sunrise. So the sky was quite bright at this point. I underexposed the shot by about 1 stop, this way I could have a little less information in my shadows while preserving the highlights so that they weren’t blown out.
For the composition, I framed up the foreground and the layers to take up about 2/3rds of the photo. The sky wasn’t all that interesting so I wanted to minimize how much room it took up in the photo so that it wouldn’t detract from the landscape.
Post-Production Process
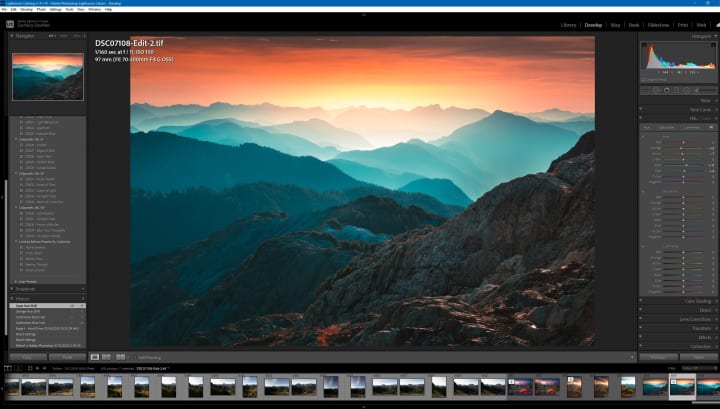
I went over this exact image for one of the lessons in my Colorscapes Masterclass; a course that I made to help people to create colorful photographs. I’ll include a few screenshots and break down exactly how I edited it within that recording session.
The RAW file was fairly cold and bright. There were many different directions I could have taken this edit, but I decided that I wanted to go for a more colorful and warm approach.
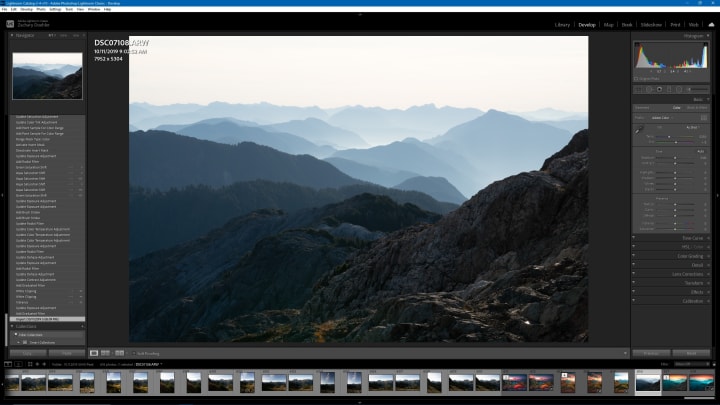
I started off with basic contrast and color adjustments, working through a few different panels in Lightroom and applying different techniques from my usual workflow. Then I did some darkening around the edges with the adjustment brush and darkened the sky using a graduated filter. This allowed me to add more depth and mood to the overall image and bring the viewer’s attention to the center. Finally, I emphasized that center point even more by using a radial filter to add some haze and exposure to my light source.
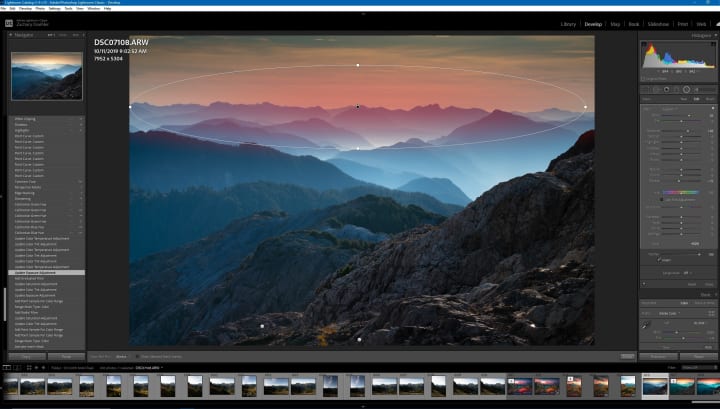
After I did my initial tweaking and local adjustments, I then proceeded to boost the overall colors in the image. I used a combination of different techniques between the HSL, Color Grading, and Calibration panels. I always like to bring over the blue primary slider in the Calibration panel because I just really like the overall color palette this adds to an edit.
Once I was finished with all of my adjustments within Lightroom, I then brought the image over into Photoshop. I did some final color grading over there and added an Orton effect to make the image a little more dreamy and help all of the colors to blend together a bit more. This was the final result.
I hope you enjoyed this behind-the-scenes look at one of my photos and hopefully you learned a few things that you can start implementing into your photography right now. If you have any questions, send me a DM on Instagram and I'll get back to you as soon as I can.
Thanks for reading.
Website: calibreus.co
Instagram: @calibreus
Presets, Training, & Tutorials: store.calibreus.ca
About the Creator
Zach Doehler
Hi! My name is Zach and I am a landscape and nature photographer from British Columbia, Canada. I look forward to sharing with you the behind-the-scenes of some of my adventures!
Website: calibreus.co
Instagram: @calibreus
Keep reading
More stories from Zach Doehler and writers in Photography and other communities.
The Ultimate Photography Tips For The Travel Photographer.
You may think that all you need to take quality travel photos is your camera, your smartphone, or even your digital SLR; and while that’s true, there are still many more things to consider before you press the shutter button, no matter what type of camera you’re using. The following photography tips will ensure that you get quality photos every time – regardless of whether you’re traveling across the globe, or just to the next town over.
By Vijay Mistry5 days ago in Photography
Good Picture
This comprehensive guide to photography focuses on capturing moments, emotions, and stories, not just clicking a button. It covers key principles and techniques such as composition, lighting, and camera settings, aiming to elevate photography to the next level.
By Praveen Pka day ago in Photography

Comments
There are no comments for this story
Be the first to respond and start the conversation.