
A Sea of Dreams: Before & After
I used to be so afraid to show people my "before" images. I thought they would think less of my skill. Flip that thought though... If they could see the transformation process of some of my images...wouldn't they think highly of my skill? Not all images are major transformations & they don't all need to be... but I do enjoy sharing some of the things I battle and how to overcome them.


You want to see the before photo? *GASP* That's like asking to see me in the morning without my mascara & eyeliner! BUT WHYYYYY?! I used to wonder this... why would anyone want to see the before photo? If you're a client, maybe you want to double check you "look ok?" or you aren't making a "weird face"? As a photographer...perhaps you think all photo's come out of camera perfect and ready to go? (Not to say that some styles lean this way...mine does not) Maybe you need more insight into what the possibilities lie ahead?
It was the latter of those questions for me. As I was starting out, I didn't realize the possibility that could come from the average image that was captured.
I'll do my best to narrate this for both photographer & non-photographer. I always get frustrated when I'm reading articles & I can't even follow along. This rings especially true when I am trying to learn something completely new (whether that be in photography or some other element/hobby) or brushing up my skills.
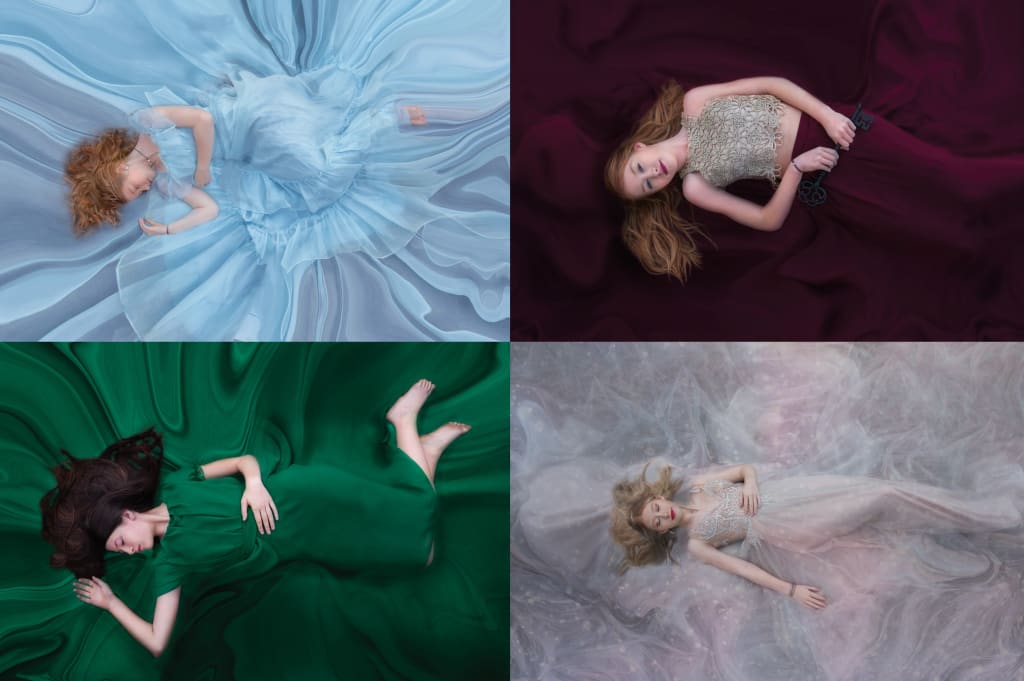
We're going to be looking at 2 of the 4 types of images I have created like this. My first two were "Blue Dress" and "Maroon Dress", simple caption, yes, I know.
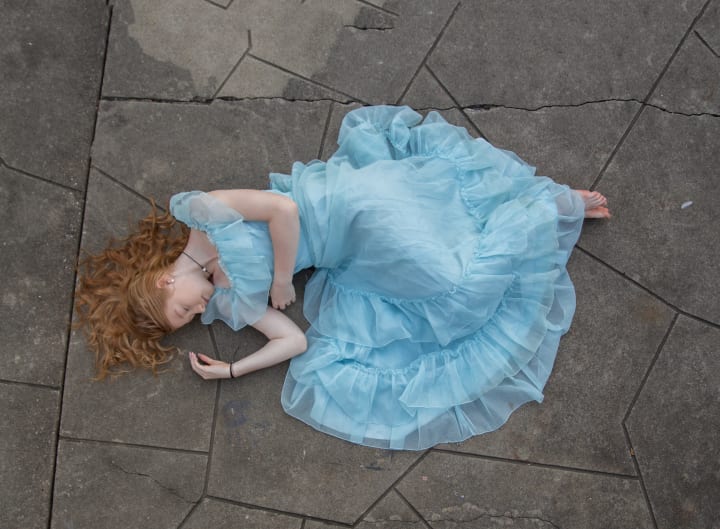
This dress did not fit her... I actually grabbed a bunch of fabric in the back and used a pony tail holder to make it more snug. Normally, I would simply tuck the fabric under her...but it wasn't an option on this one.
At the time that I took this... I didn't have the right type of lens needed to shoot close & above. I really wanted a Sigma Art 35mm but it wasn't in the budget at the time. So I improvised and used my Tamron 24-70mm lens and got creative...
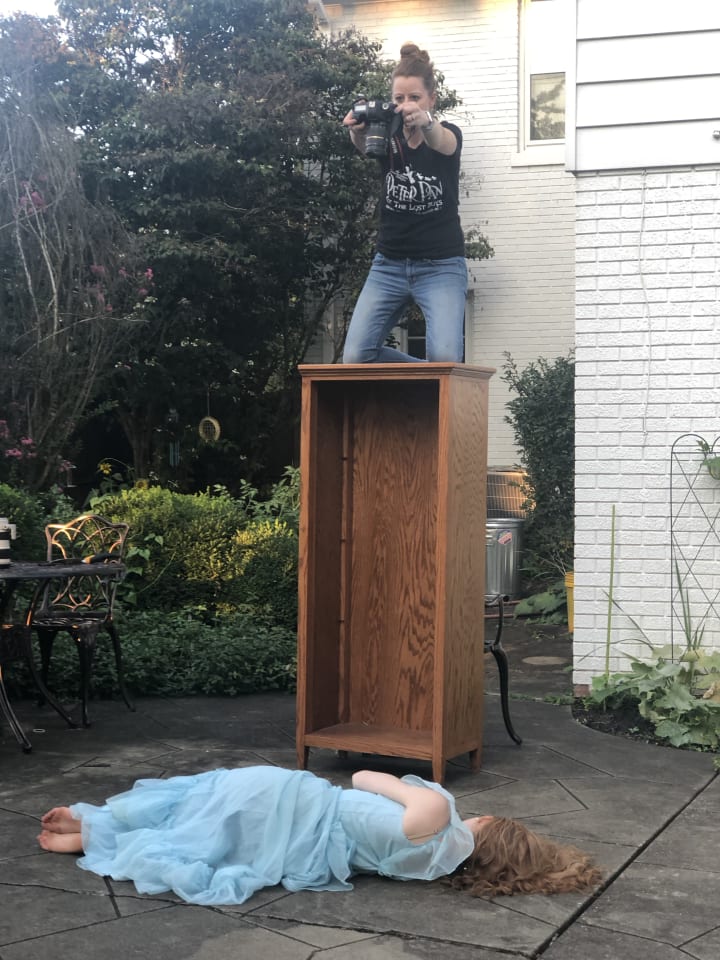
Perhaps you're asking yourself why I didn't use a ladder... great thought! I was less afraid of this then standing on a ladder.
Here's a progression video of where it started and how it ended.
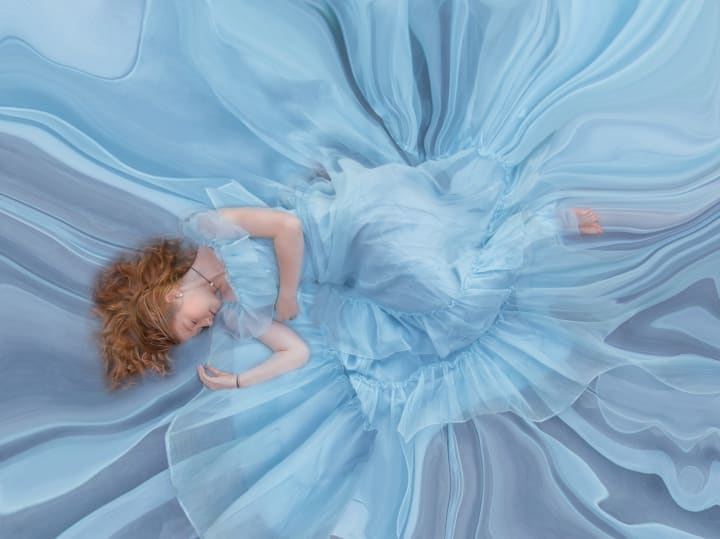
For the photographers interested in the tools I used... There was A LOT of cloning, liquify, dodge & burn and curves layers.
I learned a lot when editing this image. I realize it isn't perfect & I could pick it apart if I wanted to... if you're a photographer reading this... I'm sure you're already looking at the things that bother you. If the tables were reversed...I would be doing the same thing. 😆
Round II - Maroon Dress
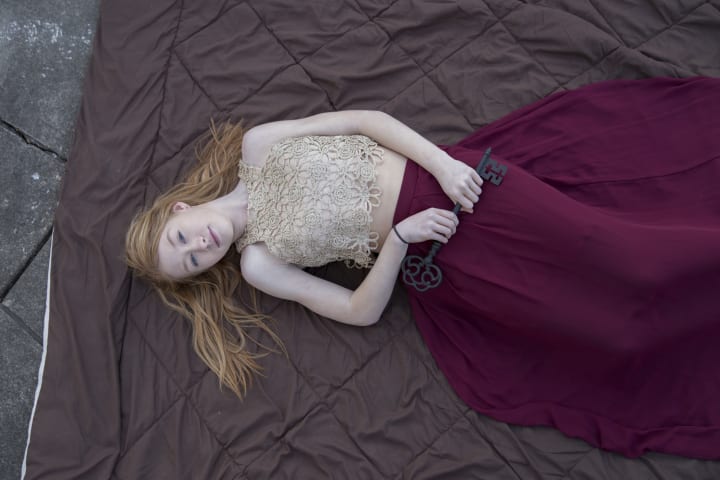
I laid a blanket on the ground, as not to snag the dress + I thought it would be easier to cover/remove during editing. My daughter knows I know how to add "make up" while editing so we didn't bother putting any on. Some other things of note: the key that she is holding is a decor piece I pulled off of my bedroom wall. I thought she needed something to hold so her hands were less awkward. It was a little tricky trying to smooth out her skin tone because she had been using the dreaded self tanner lotion. Back to the dress... this was too big for her. I tucked in the extra fabric the best I could but you can see the top isn't flush against her skin & that's ok!
I used the same lens (Tamron 24-70mm), I honestly don't like this lens. I'm not sure if I am spoiled with my primes or if I messed the lens up...but it's not as sharp as I am used to.
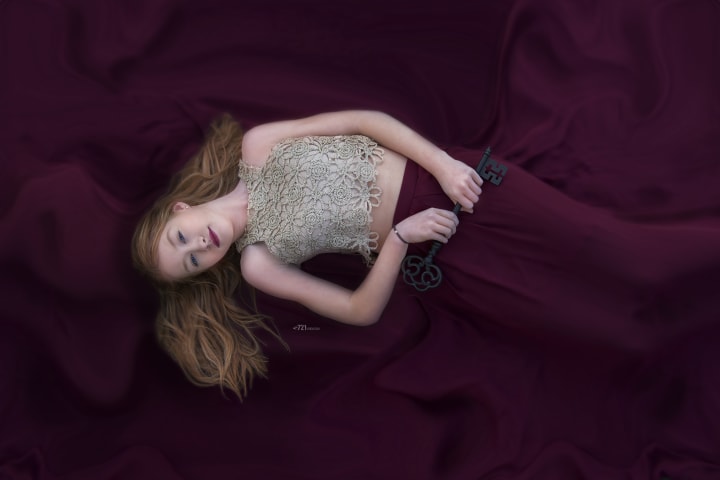
I felt like I blended the dress better this time. Overall I was pretty pleased with the outcome. The only thing I really didn't like was her hair... I couldn't seem to get it the way I wanted.
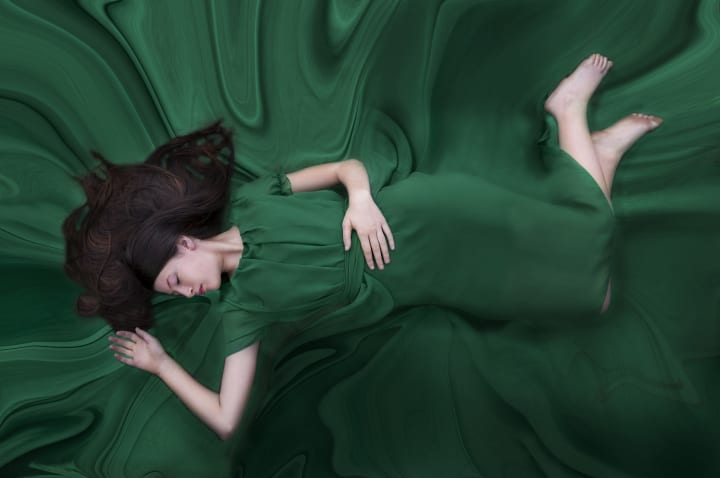
Round III
I branched out this time & recruited one of my daughters friends. Unfortunately, I don't have a before image of this one. But I can assure you, I dragged out that same cabinet along with the same sub-par lens, haha! I used the same techniques as previously mentioned, but I feel like each time I create one of these, I tighten my skills.
Round IIII
This last one is my favorite in the whole series of images like this. I don't have a before image of this one but it was slightly different. I shot this one in a local park just before it got dark. I FINALLY got myself the Sigma Art 35mm lens that I had been eyeing for what seemed like eternity.
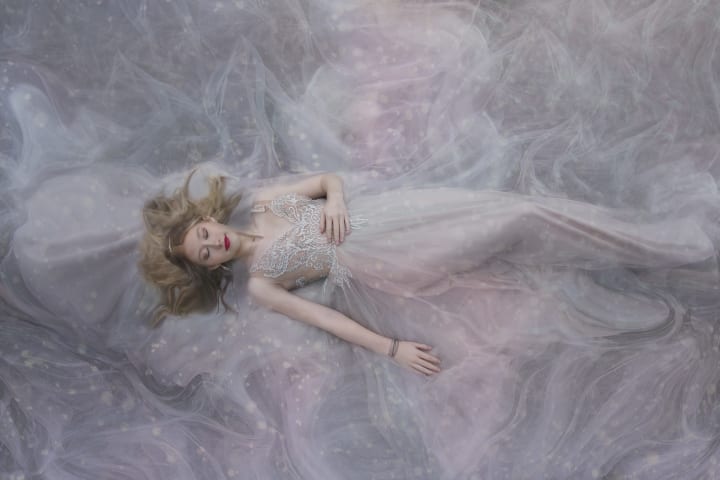
In addition to the previous editing techniques used, I also added a "glittery" overlay on top of the image and masked it off of her hair & skin. This dress was also too big for her...and you'll notice the left strap is loose. This bothers me a little but overall it doesn't kill the image for me.
I do have this behind the scenes video so you can see what type of setting we were in :)
Want to see more of my work?
I can be found on my Website, Facebook, Instagram, Creatively, Medium and Buy Me a Coffee
Did you enjoy this post? Give it a heart, a share, or if you’re feeling extra --> tips are always appreciated too 🥳
About the Creator
Vanessa R. Powell
I am a portrait photographer, graphic designer, creator extraordinaire, oh and I sell Scentsy. I suppose I am dabbling in writing too 😊 | Based in Evansville, IN | I am 721vanessa Photography | www.721vanessa.com
Keep reading
More stories from Vanessa R. Powell and writers in Photography and other communities.
Capturing Magic
In the world of photography, timing is the key to everything. While skilled compositions and technical proficiency are undoubtedly crucial, the perfect lighting can create the perfect photo. Nowadays, we can determine any light ourselves and are no longer dependent on any natural light source, thanks to the developed technology. We can turn every day into a night by using the right filters. And we can illuminate every night to be seen as a day. A typical process, especially in the film industry.
By Krishan Mubashar6 days ago in Photography
Offbeat Places in Malaysia: Travel Secrets
Malaysia is most popular for stunning urban areas like Kuala Lumpur and George Town. In any case, there are such countless odd spots in Malaysia anticipating nature sweethearts and travelers. We've assembled a rundown of 10 mystery objections that make us need to book a pass to Malaysia this exact instant!
By prashant soni2 days ago in Photography
How Sailor Moon Impacted My Life
For 30 years, this cosmic crybaby has warmed the hearts of many people inspired others, and still never fails to give people, courage, strength, and love. You could throw a dart at any movie, TV Show, or author that Sailor Moon has inspired.
By Samantha Parrish8 days ago in Geeks


Comments
There are no comments for this story
Be the first to respond and start the conversation.