
A Photographer's Guide to Editing with Adobe Lightroom
Top Editing Tips & My Personal Process
As a photographer by trade, photo editing is a big part of what I do. Generally, I spend more time editing my photos than I do actually taking them. Thankfully, an evening spent in front of my laptop, editing my photos from the day and listening to a good playlist (top tip: a good editing playlist is key!) is something that I enjoy and so it doesn't feel too much like work.
When it comes to editing, I personally spend more time colour grading than I do retouching and manipulating my photographs. Although some jobs call for use of Photoshop, retouching skin and removing things from photos, I don't always find that element of photo-editing to be a priority. Instead, most of my time is spent in Adobe Lightroom, playing around with the colours and putting my own stamp on my photographs.
But, Isn't Editing Cheating?
It's a debate that I've heard time and time again but, in my opinion, the answer is simple: no.
Editing is a process that contributes to the art of photography. It's a way to communicate your personal vision of the world. The editing process has been around for as long as photography has. Even when it comes to analogue methods and photography approaches, editing has been done in the darkroom, with dodging and burning, and the scanning process, which all came long before the rise of software that we're familiar with today.
Why Would I Edit My Photos?
Although I like to edit my photos and see that as an instrumental part of the process, some photographers opt not to do so and there's nothing wrong with that. However, there are a few reasons that I choose to edit my photos:
- To have more control over the creative vision
- To colour correct an image
- To more accurately represent your view of the world
Editing Tips
Before we get into my personal editing process, let's preface this with a few editing tips.
Shoot in RAW
A RAW image records more information than a JPEG that has already been compressed in-camera once you've taken the shot. Because of this, it allows for better dynamic range and more freedom when it comes to post-processing. Shooting in RAW can allow you to recover incorrect exposures or fix your white balance, for example, with a lot more accuracy, ease and success than if you were attempting to edit a JPEG.
Refer to your original image often
Regularly referring back to your original image is a great way to ensure that you're not pushing the edit too far from reality — if that's your intention. Especially when it comes to editing skin tones or specific colours accurately, it can be important to make reference to the shot that is straight out of camera.
To further increase this accuracy, I will occasionally also shoot a photo on my phone to have another example or reference of what the colours should look like (or, at least, what they looked like in reality).
Software such as Lightroom allows you to easily reference your original image with the before and after tool. To access this quickly, you can also tap the \ key on your keyboard to alternate between your before and after.

Sometimes, less is more
Editing your images and really pushing the boundaries of what editing software is capable of can be fun, I'll give you that, and there are even instances in which that process is recommended or works well (especially if you've developed a signature style in that approach). When it comes to my editing process, however, I'm generally a believer of the idea of "less is more".
Pay attention to the HSL sliders
HSL refers to "Hue, Saturation and Luminance". When we talk of hues, we're talking about what is regularly referred to as a colour. Saturation is how intense this hue is and luminance refers to the lightness or darkness of the hue. These three elements together create what we know as colour.
Balancing your HSL sliders is an important aspect of photo editing. You should use them to correct the colours in your image and to help to enhance the image.
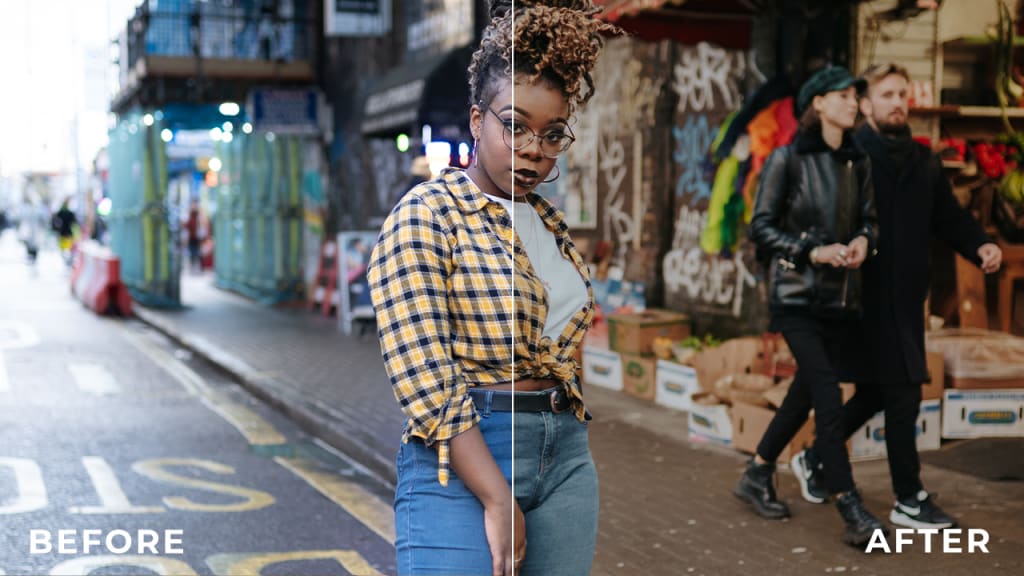
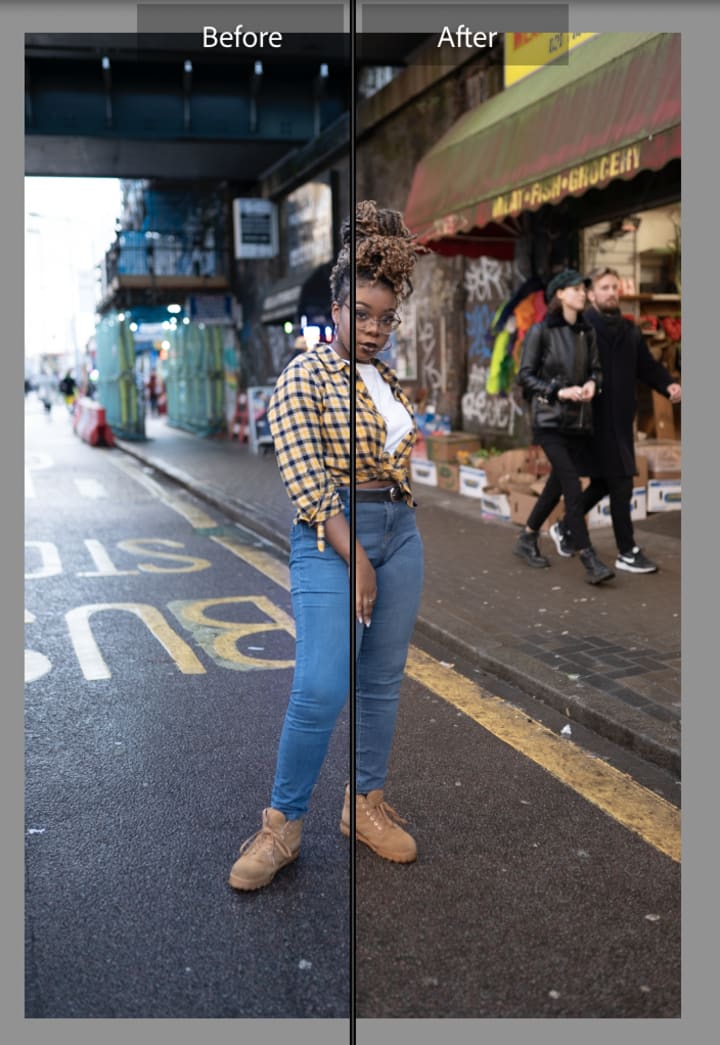
For example, let's explore how altering the luminance of the greens in this image can change it. When the luminance of the green is +100, there greens slightly clash with the blues of the model's jumper due to a lack of contrast.
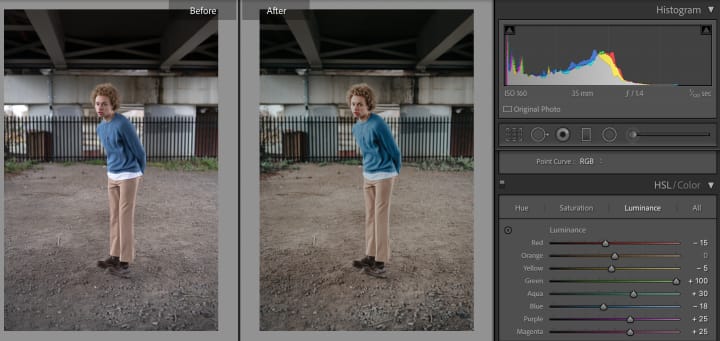
Reducing the luminance to -35 provides more contrast between the blue and green, allowing the green to be less noticeable and for the blue to stand out more distinctively. A good edit is made up of a lot of these more subtle changes. This refers back to the idea of "less is more".

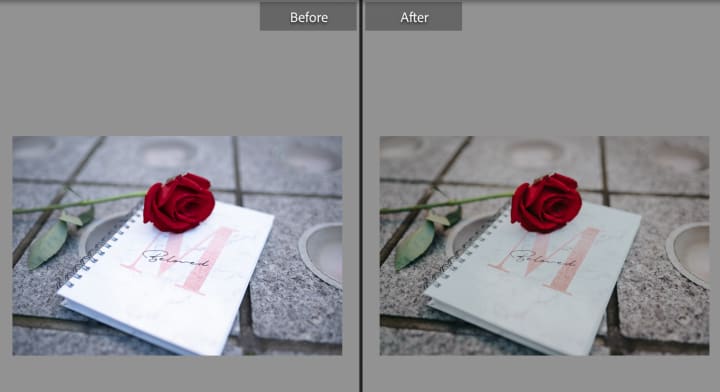
In this image below, we can see how desaturating the blues from the concrete floor has drawn more attention to the focal point of the image: the book and the rose.
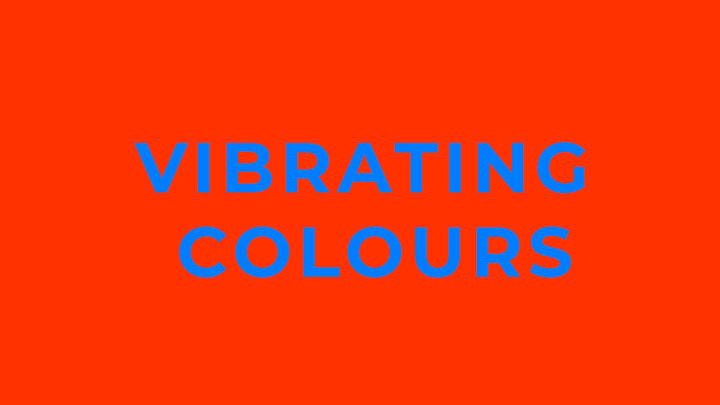
Understanding how colours interact with each other and enhance each other is a key part of photography and photo editing. When you pair colours together badly, there is even such a sensation as "vibrating colours" where colours seem to vibrate due to a lack of contrast.
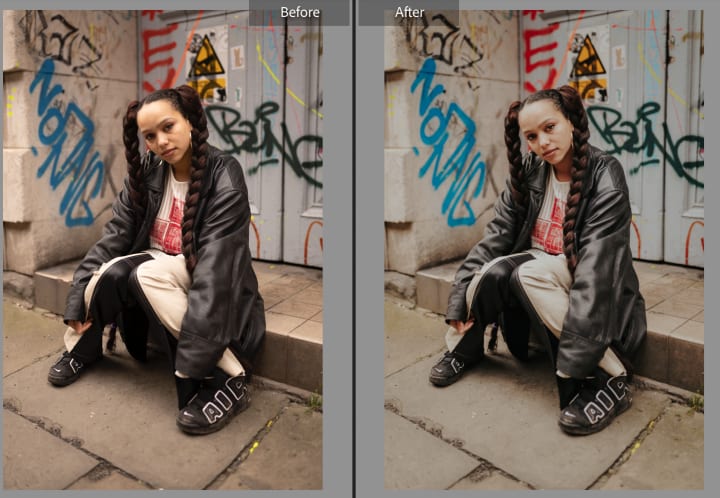
Generally speaking, if you're editing a photograph of a person, you want to make minimal adjustments to the orange, yellow and red HSL as these are the colours that make up skin tones. Altering this too much will likely result in an inaccurate representation of skin tone.
My Personal Process
My editing process begins with the culling and selection of my photos. Once the photos are imported, I'll go through the photos and select the images which I'll choose to edit.
Let's open up an image in Adobe Lightroom and explore how I might edit it.
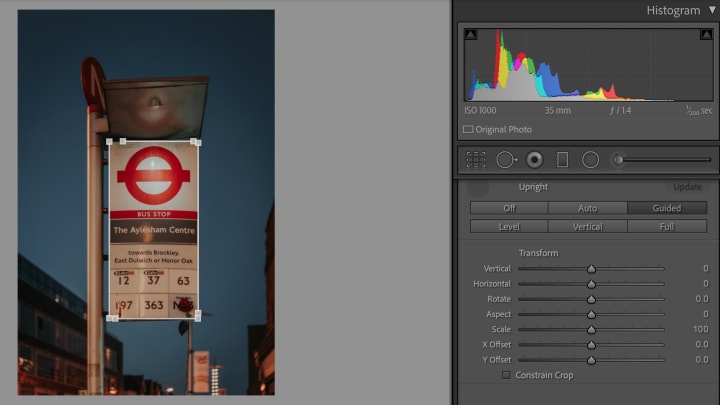
I usually begin by enabling profile correction, which helps to combat any lens distortion or vignetting.
I'll then get to adjusting the composition of my image. This can include cropping my image and removing excess headroom or foot room (the space between your subject and the edges of the frame) as well as straightening the verticals and horizontals in my image.
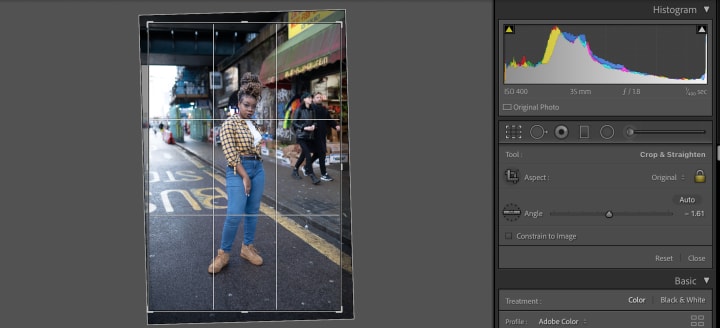
You can even use the transform tool to draw lines along the verticals and horizontals to really perfect the angle of your image. See below for an illustration of the Guided Transform tool.
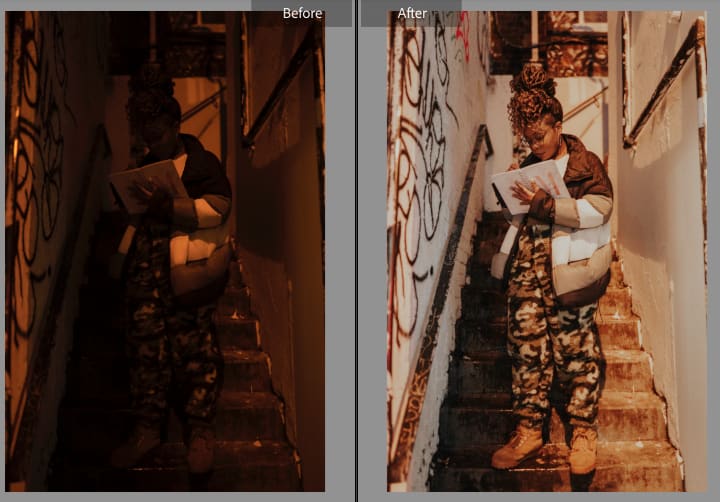
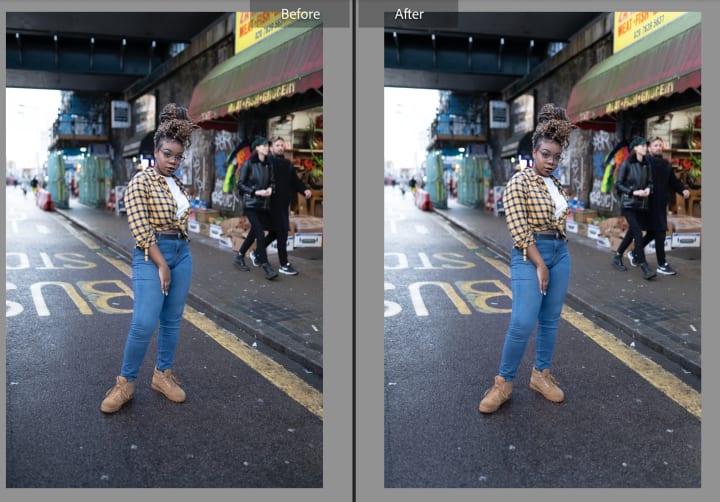
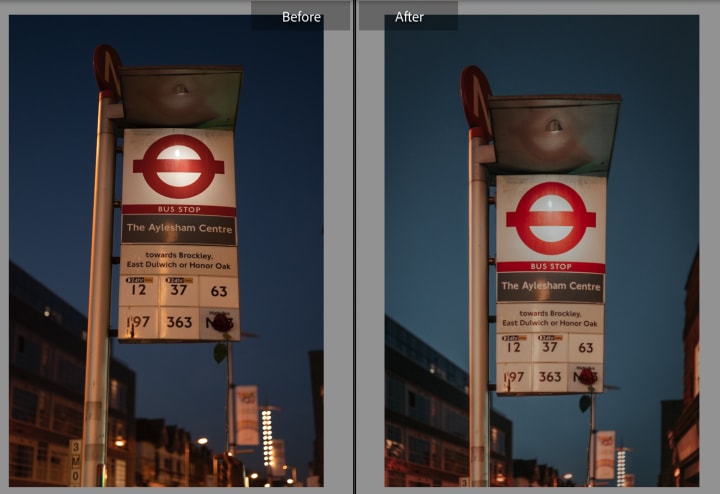
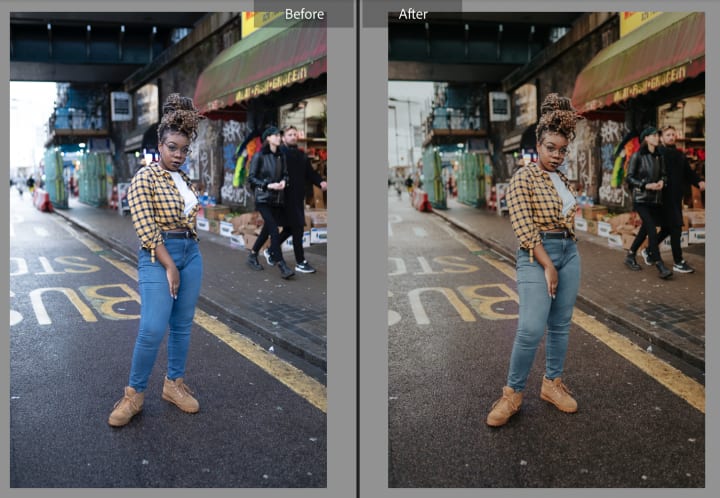
Often, this doesn't get you the most accurate results, but as we can see in the before and after below, it can get you a good deal of the way in correcting your composition.
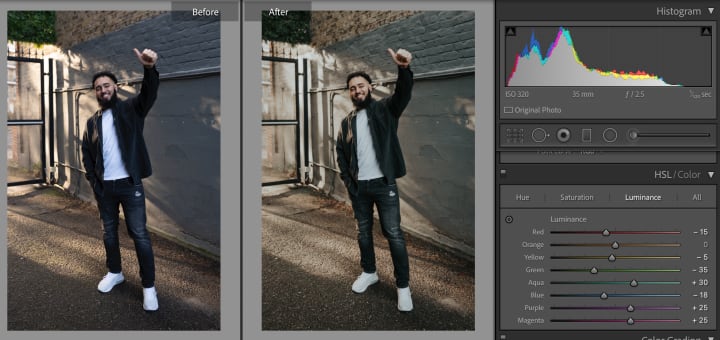
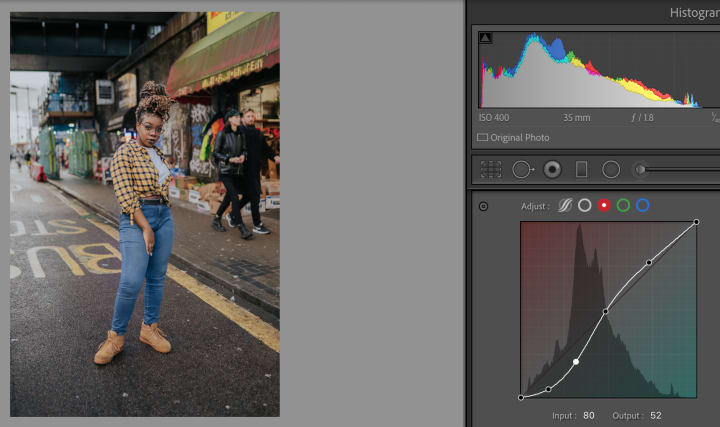
Next up, I'll adjust the contrasts, white balance and exposure to bring my image into a flat profile to work with. I'll also generally flatten the highlights and shadows to reduce the contrast further — for example, bringing the highlights and white sliders down and the shadow and black sliders up. Including less contrast with my image allows greater room to late play around with the tone curves of my image and adjust the visual contrasts using those tools.
The tone curve is where most of my colour grading is done. I generally flatten the highlights further, using the top right point of the tone curve. As well as bringing a cinematic feel to my image, doing this generally helps to smooth out the skin too. I then use a simple S curve within my RGB curves and alter it until the colours are appropriate.
I'll then further correct my colours using the HSL sliders and the "colour grading" section of Lightroom. I like to add subtle colours into my highlights and shadows to help to achieve a soft and cinematic vibe. Generally, I use colours such as blue in the highlights and combat that with warmer colours such as yellow in the shadows.
Once these steps are completed, it's just a process of going back over the image and making any final tweaks, which usually includes tweaking the contrast or the highlight and shadow sliders.
If you'd like to learn more about using Adobe Lightroom to edit your photos, check out my YouTube and Vocal profile for more tips, including my video "12 Lightroom Hacks to Speed Up Your Workflow (Adobe Lightroom Editing Tips)".
Lightroom is a powerful tool and learning how to use it efficiently can transform the way that your images look.
Good luck with your editing journey! If you'd like some advice on your edits, or just want to share them with a second pair of eyes, feel free to get in contact via my website or Instagram (where you can also see more of my work!).
About the Creator
Sophia Carey
Photographer and designer from London, living in Manchester.
sophiacarey.co.uk
Keep reading
More stories from Sophia Carey and writers in Photography and other communities.
How to Shoot Fashion Content for Instagram
Living in a city such as Manchester, I'm no stranger to shooting with fashion influencers. Shooting with fashion bloggers, influencers and content creators can be a great source of income as a photographer, and, generally speaking, it's a brilliant way of creating a regular and consistent source of income as a freelance photographer.
By Sophia Carey3 years ago in Photography
Capturing Magic
In the world of photography, timing is the key to everything. While skilled compositions and technical proficiency are undoubtedly crucial, the perfect lighting can create the perfect photo. Nowadays, we can determine any light ourselves and are no longer dependent on any natural light source, thanks to the developed technology. We can turn every day into a night by using the right filters. And we can illuminate every night to be seen as a day. A typical process, especially in the film industry.
By Krishan Mubashar6 days ago in Photography
The Secret of Lighting
“Light is not just an element, but the essence that breathes life into images.” Whether it is capturing the delicate contours of a portrait, the vibrant hues of a landscape or the intricate details of still life, lighting plays a tremendous role in shaping the mood and visual impact of a photo. Understanding the nuances of lighting is crucial for us to elevate our craft from snapshots to interesting works of art. It is not just about having the right equipment, it is about harnessing the light creatively to transport emotions, tell stories and evoke reactions from our viewers.
By Krishan Mubashar3 days ago in Photography
The Dangling Bead
My life is splashing before my eyes, as I precariously suspend and prepare for the end, the consumption of my Self and identity. I know that gravity will be the victor in this struggle. Like a pendant, slipping from the chain, the tension has caught me in this moment, bestowing one last gift of reflection. I cling desperately, questioning my purpose. Searching for comfort. And I remember…
By Leslie Staven3 days ago in Fiction


Comments
There are no comments for this story
Be the first to respond and start the conversation.