
Two ways to make recycled button scarf rings
I recently got this beautiful new button print scarf from my sister. Still, I am not a scarf person, so I was searching online to see if I could use it in another way and came across this awesome tutorial on making recycled button scarf rings.


I recently got this beautiful new button print scarf from my sister. Still, I am not a scarf person, so I was searching online to see if I could use it in another way and came across this awesome tutorial on making recycled button scarf rings.
In addition to being beautiful, they're also versatile and easy to make. So today, I'm going to show you two ways to make these cool-looking button scarf rings.
The supplies you need
Six buttons with a loop on the back,2 square pieces of fabric (same size), sewing needle and thread, sewing machine, and scissors. Optional: fabric adhesive or spray adhesive
Fold one square piece of fabric in half, then fold it in half again lengthwise and cut off the edges, so you have four long rectangular strips. Repeat this process with the other piece of fabric.
Place one set of folded strips horizontally and one set vertically so that the two ends match up (one set will be longer than the other). Use a basting stitch along the left edge to form a rectangle tube.
Put it onto your work surface face down-open side up, and you should see two folded rectangular pieces come together.
Step 1: Cut off the fabric.
Cut off the long strip of fabric from one end of the scarf and place it on a flat surface. Begin rolling up the fabric from the non-cut end and tuck in each piece as you go so that no loose ends are showing. It may take some practice at first, but with time it becomes easier.
As you roll up, hold your index finger on top of one side of the roll - this will keep it together and tight. Continue rolling until all of the fabric is used up or until you reach your desired length (approximately four inches).
Once you have finished rolling, cut away any excess pieces of fabric with scissors or a rotary cutter before securing them with clear adhesive tape.
Step 2 - Getting your buttons ready
Collect your buttons. You'll need the button parts that come with a typical men's dress shirt (collar studs, front placket buttons, cuff buttons, and sleeve buttons). The number of buttons you need depends on how many holes are in your fabric.
Place the open loops at one end of a ribbon or string and start threading the other end through the loops so that they are evenly spaced.
Continue until all but one loop is threaded shut around a button. Tie off the string at this point by threading it around the last open loop, then tying it in a knot. Cut any excess thread and glue down the loose ends with fabric glue or hot glue if needed.
Step 3: The sewing machine is your friend.
Ideally, they will create a loop you can slip over your thumb. But, sometimes, one side gets tied more tightly than the other, and it won't work. Sometimes the shape is awkward, and you have to work for a while with two hands to get the buttons in just the right spot before closing it up.
But still, there is something very fulfilling about making that initial loop, turning it into a tight knot, and getting your loops even. Once I've made my loops and stuffed them into the shape of a circle, it's time for the final step: threading a wire through my loops, so they look like this!
Step 4: How do they look?
When your ring is completed, it should look like this. Looking at the photo, you can tell if you've made a mistake. It has one long stitch through both pieces of fabric.
When you cut this long piece off, the fabric will snap back into place and reveal a flat knot that needs to be flattened with your fingers or something pointy (scissors work well).
About Author
My Name is Mohammad Aaqib the founder of Pandorabracelet.co.uk
I am a Lawyer by profession but Blogger by passion.
Pandorabracelet.co.uk will be an operating system for Blogging.
In the Blogging journey, you may fail at one point but I am here to hang you around me until you are willing to tie with me.
About the Creator
BLOGGER AAQIB
Hi,
My Name is Mohammad Aaqib the founder of Pandorabracelet.co.uk
I am a Lawyer by profession but Blogger by passion.
Pandorabracelet.co.uk will be an operating system for Blogging.
Keep reading
More stories from BLOGGER AAQIB and writers in Marriage and other communities.
Which Diamond Cut is Right for You? Emerald vs Radiant
The Gemological Institute of America (GIA) recognizes three primary diamond cuts: the brilliant round cut, the princess cut, and the emerald cut. Emerald diamonds have 57 facets that radiate from the centre toward the edge of the stone in a step-like pattern, creating a hall of mirrors effect.
By BLOGGER AAQIB2 years ago in Marriage
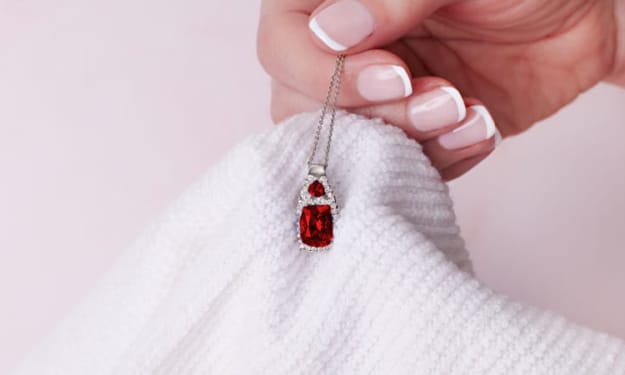
Expert Tips for Caring for Your Precious Natural Ruby Pendant
Who doesn’t love adorning precious red-hued rubies on their ring finger, wrist, neckline or earlobes? These priceless motifs spread the uncontrollable virus of love and romance wherever they go. Nobody can get enough of ruby’s infectious beauty and magnetic brilliance. If you already have a natural ruby pendant or rather any ruby creation in your jewelry collection, you would agree with what we said, wouldn’t you?
By Henryy Willsons2 days ago in Marriage
The gradual developing institution of marriage
Throughout human history, marriage has been one of the fundamental institutions of society. It is the union between two people who love each other and whom commitment, and frequently, tradition, bind. Marriage has changed considerably over the years due to cultural, religious, and legal factors. Marriage is currently changing dramatically due to the people’s recent romantic experience and the increasing number of divorces.
By chimdi divine about 7 hours ago in Marriage
Snacktime Sonata Challenge Winners
Well, your Snacktime Sonatas made us hungry, and that’s about the highest compliment we have. Food — taste, smell, sensation — is a powerful conduit to the past, to memories pleasurable and painful and sometimes bittersweet, a mixture of comfort and challenge. Congratulations to Penny Fuller for Sativa — it’s a first win for Penny — a hymn to the “secret, unbounded/freedoms” of fresh peas in the pod. The narrative voice of the poem doesn’t really want to be outside, but finds joy in the green things of the earth; this is a lovely work of resilience.
By Vocal Team7 days ago in Resources


Comments
There are no comments for this story
Be the first to respond and start the conversation.