
There is nothing more satisfying that creating something, especially indulging in a new project and making something unique and personal. I particularly enjoy crafting homeware (such as display pieces or rugs or cushions), as these creations bring such joy, and reflect your own personality into a house, transforming it into your home.
Cushion covers began as a lockdown craft, when my 18-year-old sister Scarlett approached me and wanted to learn to sew together. I was absolutely over the moon - as you can imagine she is usually out with her mates and far too busy to hang out with her 26-year-old sister. I must confess I had not sewn since I was 10, but had been desperate to learn properly as I wanted to make my own clothes. This seemed the perfect chance to practice my skills, and spend some time bonding with my sister.
Like everyone in lockdown, we had gone through all our old clothes and had many bags awaiting the re-opening of the charity shops. It was Scarlett’s idea to use these as materials, as all the markets were closed. Clothing in general but particularly T-shirts are great for cushion covers as the material is washable, durable, and comes in a great many designs.
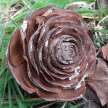
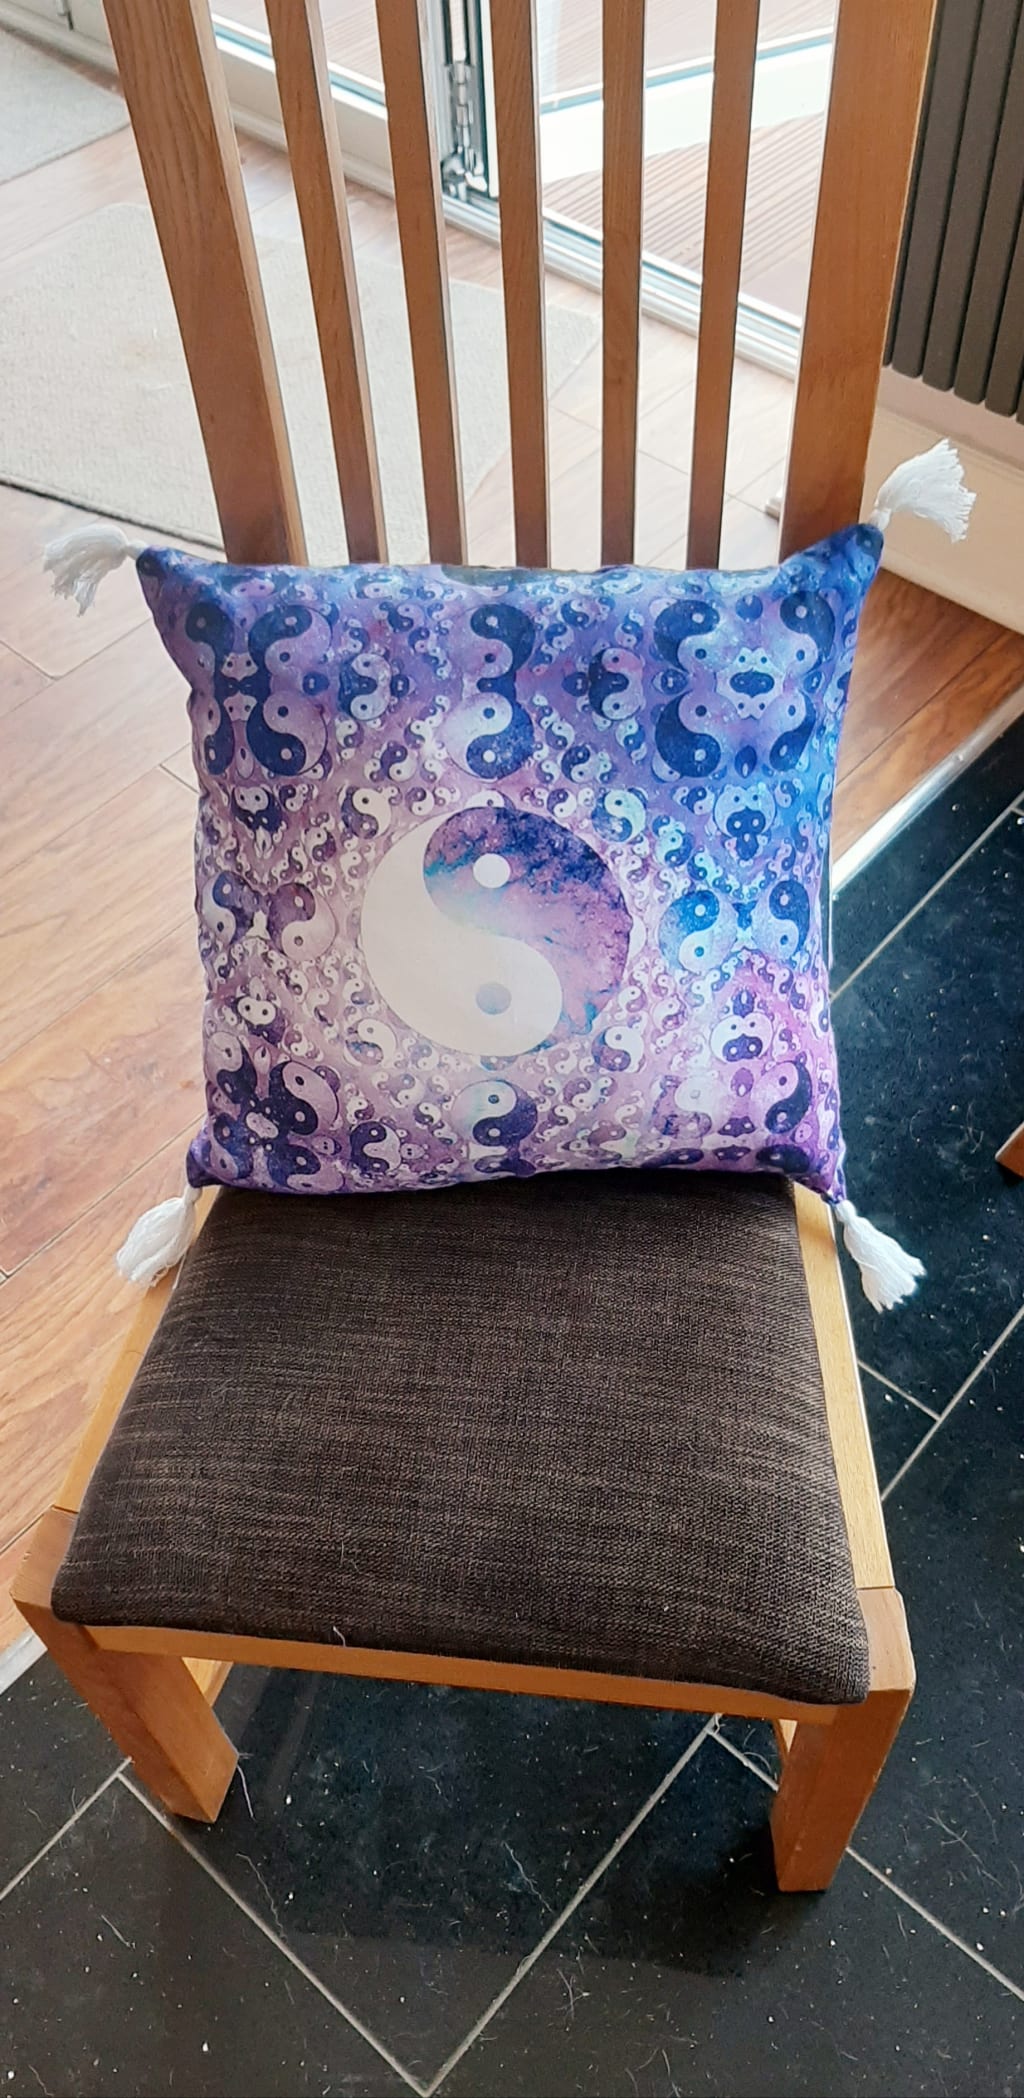
I don’t know about you, but I can be a bit of a hoarder – I hang onto things with memories even if they no longer serve their purpose. I had a bag of clothes as a “maybe” pile, that I no longer wore, but didn’t have the heart to throw out. Amongst these items was a t-shirt (see photo below) from the first festival I had ever gone to, with a wonderful man who later became my fiancé. I couldn’t let this t-shirt go, but it was something I was never going to wear again. I realised that this would be perfect to turn into a cushion cover, as I could give life to something that had lost its use, whilst holding on to a keepsake of a special memory.

T-shirts into Cushions
You will need:
- Scissors
- Pencil
- Ruler
- Preloved t-shirt
- A cushion (with or without removable cover)
- Sewing needle and thread (or sewing machine)
Optional Accessories:
- pop poms, tassels, fluffy trim etc (the only limit is your imagination and sewing skills!)
- Zip
How to:
- Place your t-shirt flat, front facing you.
- If the cushion has a removable cover (see 3 if not): Turn the cover inside out and place on your t-shirt making sure that the design is in the centre, and that the neckline of the t-shirt isn’t covered. Using a pencil, trace around the cover to get an outline – don’t trace too closely, better to be slightly wider.
- If it doesn’t have a removable cover: use a ruler to measure the height and width of your cushion and add an extra centimetre to these measurements. Draw your square outline in pencil with these dimensions onto the cushion. Make sure your design is at the centre of the square, and that the neckline doesn’t encroach on your outline either.
- Making sure the t-shirt is perfectly flat, use the scissors to cut over the outline so that you are cutting both the back and front of the t-shirt at the same time. You will now have two equal sized squares.
- Place the squares together so that the design is on the inside for both back and the front.
- Sew three of the edges together by hand or sewing machine (YouTube has a great selection of video’s for first timers). If using tassels like I did: As you reach each corner place the tassel so that it is in between the two squares, with the single strand of string poking out at the corner by a few inches. Sew around the corner and tie a big knot in the tassel’s string so that it cannot fall out through gaps in the stitches.
- For the last edge you have two options, either adding a zip (step 8) to make the cover removable so that it can be washed, or stitching the edge closed (step 9) for something more permanent.
- Adding a zip to make the cover removable: keeping the cushion cover inside out, sew in a zip so that it faces into the two squares. Open the zip and turn the cushion cover inside out through the hole in the zip. Put your plain cushion into the hole, and close the zip.
- Not adding a zip (my way): Turn the design inside out so that the design is now visible. Put the cushion into the cover and sew the last edge closed.
- (Optional step): If not using tassels, sew pompoms in the corners to add a finishing touch. Or stitch a fluffy trip around the outer edge (carefully avoiding the zip). Go as crazy as you like!
You now have your own home made, personalised, upcycled cushion. Find a spot to put it (bed, sofa, chair), and Instagram the hell outta it!

Post crafting euphoria
Clothing is so personal to us, and it brought me such joy to upcycle mine into something special for my home. It’s a great activity to do as a couple, or with friends, no matter your crafting abilities. Scarlett and I had a wonderful day together, chatting, crafting, and bonding. I was so proud of our first attempts, and since then we’ve been crafting even more, improving with each cushion and getting more and more ambitious.
As well as capturing memories of events like festivals, the amazing thing about this hobby is that it can be a wonderful way to remember those in your life who are no longer with us. Turning Grandpa’s old clothes into a cushion to still find comfort from his presence - there is something quite special about that, which is another reason this hobby is so close to my heart.
I would love to turn this hobby into a business, with Scarlett and I selling our own custom range of cushions, and making bespoke designs for customers who can send us their t-shirts. We’d also offer a service for creating cushions to help others remember loved ones too. Crafting all day would be my absolute dream job, even more so if it meant working with my sister. I hope one day we'll have saved enough for a start up fund to make our dream comes true. Until then I hope those reading this go on to make their own memories into cushions and find both comfort and happiness in their crafting.
About the Creator
Oby
Writing from the heart, for fun. Thank you to anyone reading my work.
Revealing Why More People Want Diabetic Test Strips
It's interesting to see why a larger number of people are desiring Diabetic test marks. Nowadays, the marketplace is witnessing an increase in the desire for these strips that assist in monitoring blood sugar levels. Individuals diabetes require these marks to sustain well-being. They aid in managing food, exercise, and medications. Each mark reacts to the sugar in one's blood, and an equipment shows the response.
By Joseph Hicklingabout 8 hours ago in Lifehack
The Best Fashion Tips for Your Zodiac Sign: Dress Your Cosmic Best
Fashion isn't just about following trends; it's about expressing your unique essence. And what better way to tap into your true self than by aligning with the stars? Astrology offers a fascinating lens through which to view your personal style, unveiling the cosmic blueprint that guides your fashion choices.
By David Thomas3 days ago in Lifehack


Comments
There are no comments for this story
Be the first to respond and start the conversation.